
Find Northbird on social media:
This post contains affiliate links. As an Amazon associate, I earn from qualifying purchases. This means that I make a small commission at no extra cost to you. You can read my full disclosure HERE.
Jump to Printable Activity Card
Return to “Homeschooling Activities & Resources”
Return to “Winter Activities & Crafts”

Our family recently had the opportunity to go to an off-grid cabin for Family Day Weekend. It was about a 45 minute snowmobile ride into the bush from our house. Hard, challenging (I was seven months pregnant), but totally worth the adventure.
Our first day was quite cold! Temperatures reached -41 degrees celcius with the wind chill, but averaging around -30 degrees.


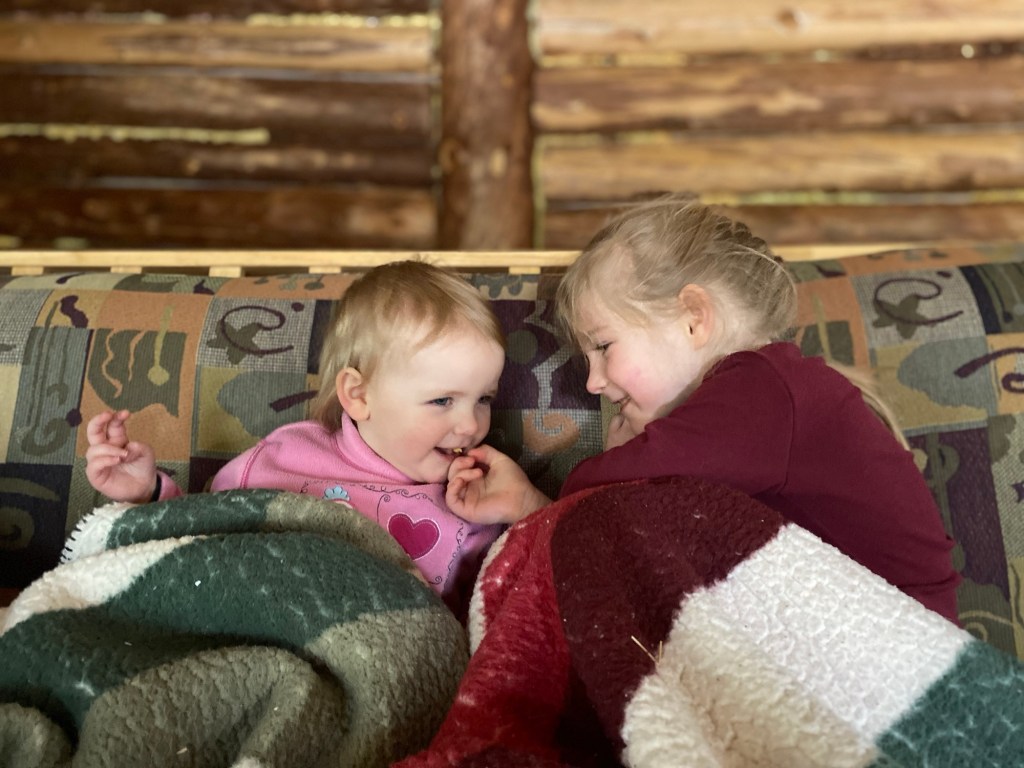
When we arrived at the cabin, it was around -30 degrees INSIDE. Brrrr. The kids honestly had a few tears while we got a fire going, dug out the cookies, and started the kettle to make some hot chocolate. After they warmed up, they got excited and started exploring our snug little home for the weekend.
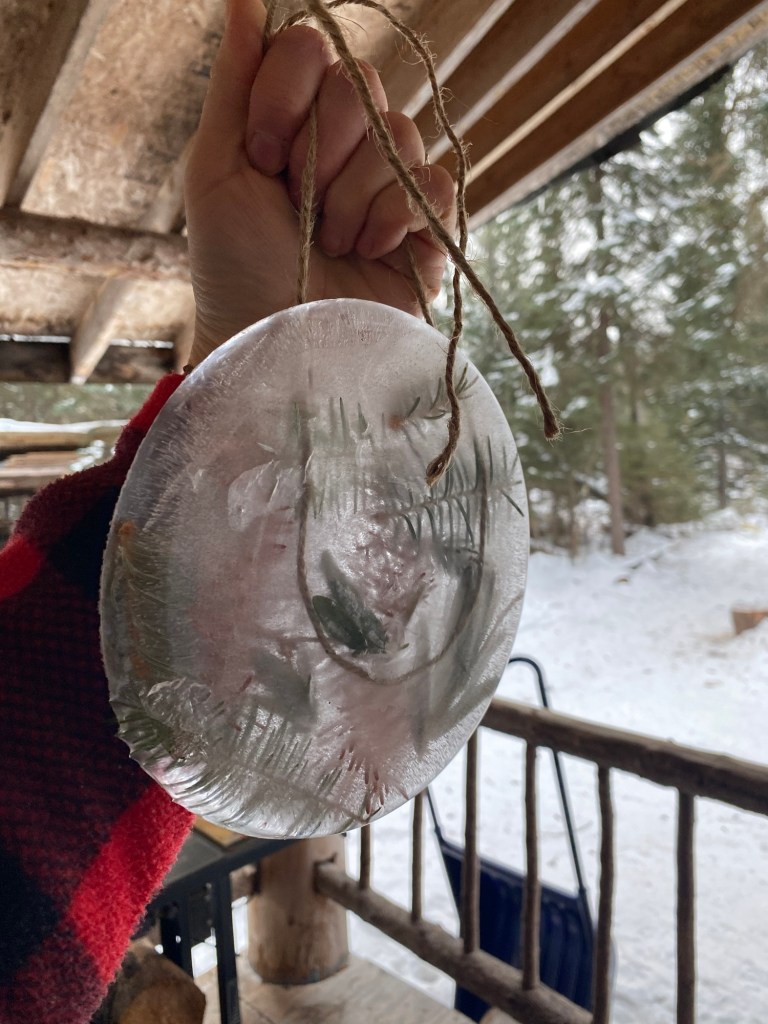
One of the previous families to visit the cabin had hung up some coloured ice sun-catchers (see pictures below), using food colouring or paints, and hung up outside the windows. We loved to look at these while cooking in the kitchen or eating our meals!


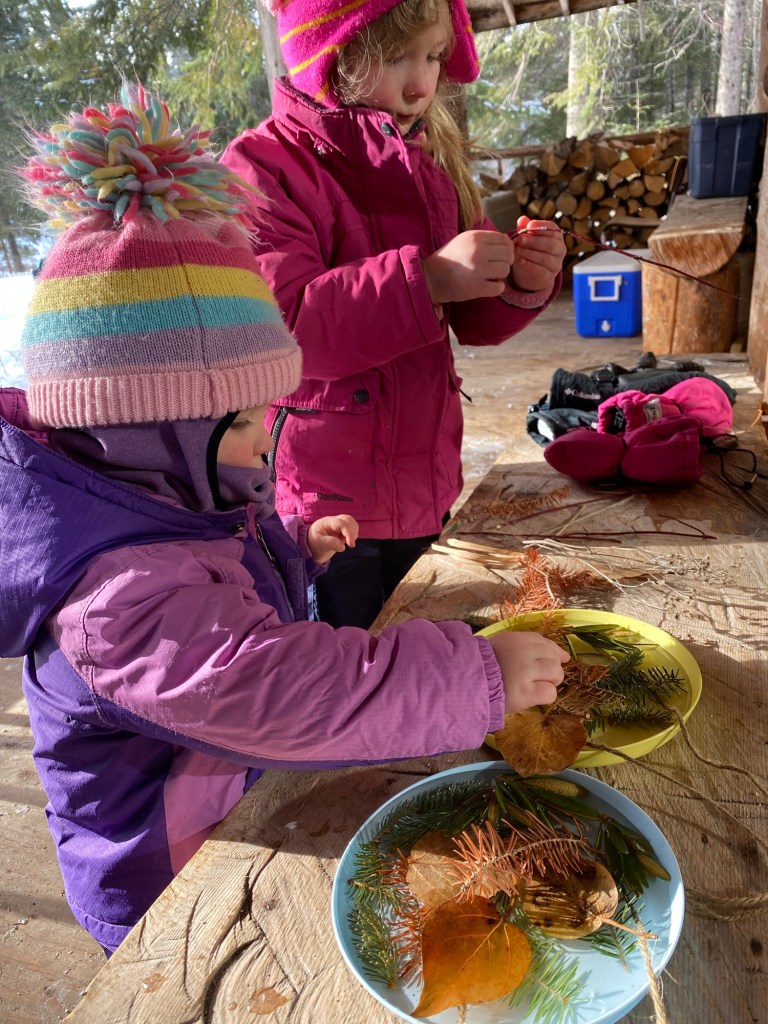
We were inspired to also make something similar, but we didn’t have anything to colour the water/ice with. We decided to do some exploring around the cabin and find natural items to use instead.
This was a wonderful activity and natural inquiry for our oldest, as she scavenged for different sticks, leaves, dried flowers, pine and spruce needles.
“What’s this Mommy?” pointing to a stick covered in a black fungus, “It looks like something pooped on it!”
Or “discovering” what a raspberry bush looks like/feels like in winter without the leaves on it (thorns!).

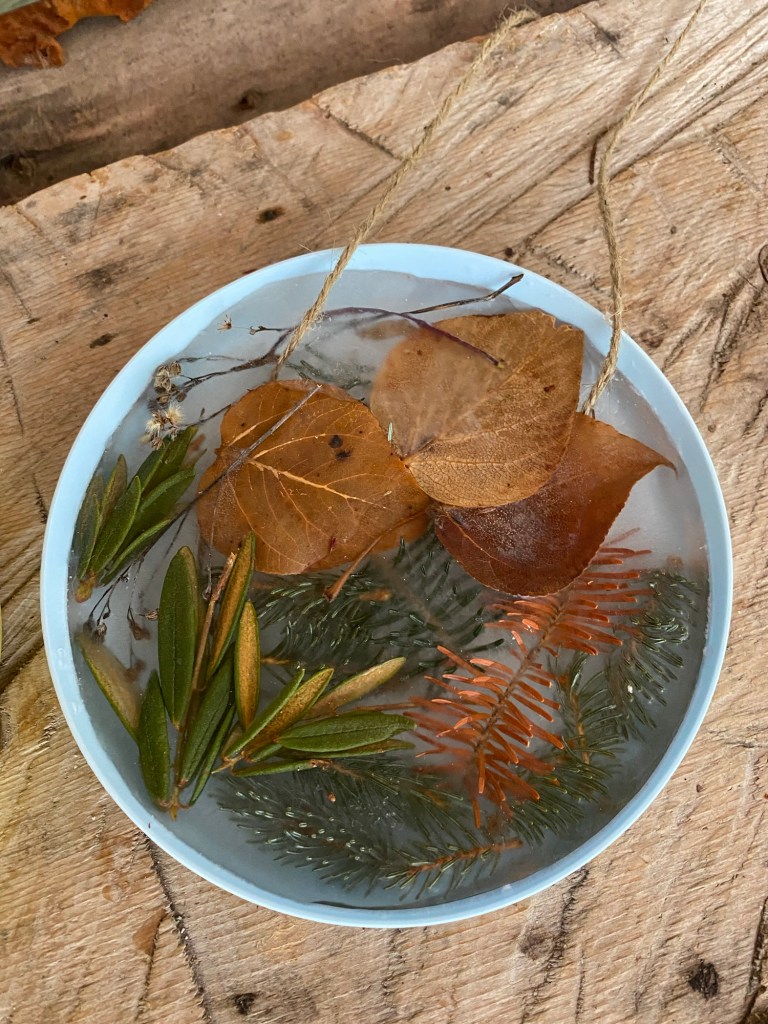
I love that we used natural items to do this activity, so that as it melts in the spring, the decorations frozen in the ice will decompose over time on the ground. We also used natural twine to hang it up that we found hanging around from previous visitors.
Enjoy! Send Northbird pictures of your Ice Sun-catcher creations, we’d love to see them!
A brief video of when our girls made Ice Sun-catchers.
How to Make Ice Sun-Catchers
Supplies Needed:
- Warm water (the warmth helps so the kid’s fingers don’t get too cold during the activity if you are assembling the plate outside)
- String
- Scissors
- Plastic plate or paper plate with a rim
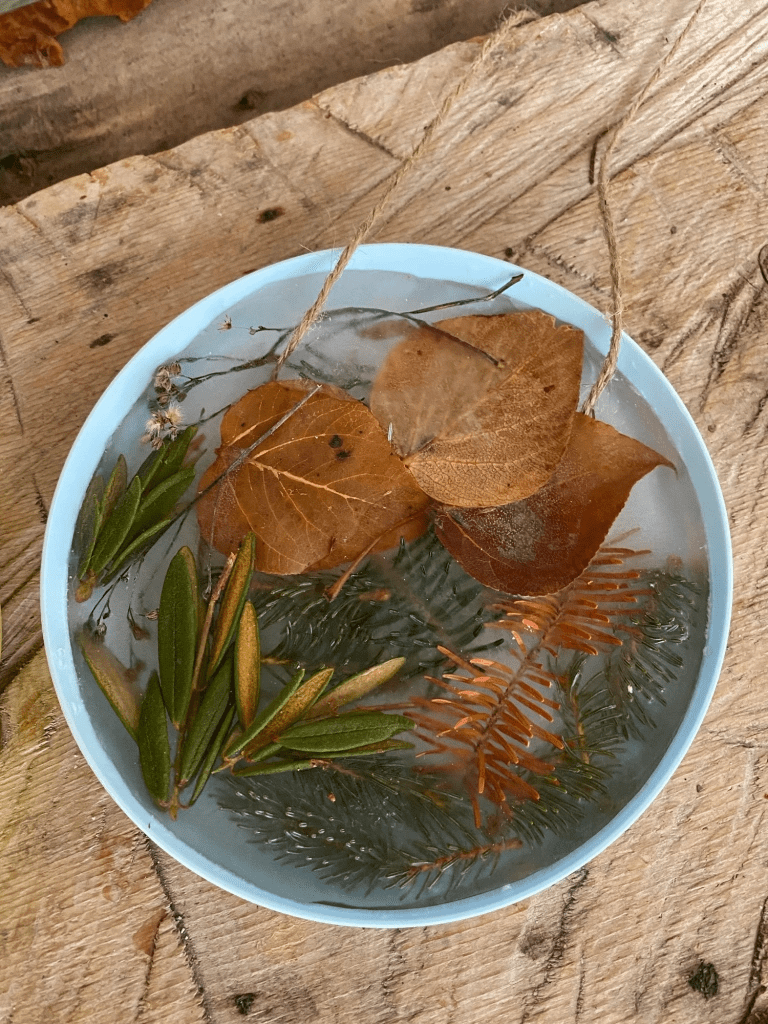
- Outdoor nature decorations (leaves, sticks, dried flowers, bark, etc)
Directions:
1. Explore your backyard for various items to decorate your Ice Sun-catcher with. (See ideas above)
2. Lay the plate down on a flat surface. If you are assembling the plate inside, you might want to first put the plate on a cookie sheet. Fill the plate with water.
3. Cut string to desired length for hanging up. (I recommend a minimum of 3 feet). Place the string in a “U” shape, with the untied ends hanging out, pushing the string into the water.
4. Lay your selected nature decorations on the plate, pushing them gently into the water.


5. Leave plate outside overnight or until completely frozen.
6. Carefully transfer out of plate. If it is a paper plate, the plate can be easily cut off.
7. Hang up outside where it can be viewed and enjoyed!
More Homeschooling Crafts & Activities to Check Out:


Hi, I’m Jessie!
I’m a Wife and Homeschooling Mom living in a remote town in Northern Ontario, Canada. I love making wholesome meals for my family from scratch, homeschooling our girls and learning more about natural living.
Read more about my story HERE.

Subscribe to Northbird’s email list to get weekly posts on: tasty recipes, activity ideas for kids, natural living tips, and some genuine mom thoughts and encouragement!
Recent posts from Northbird:


How to Make an Ice Sun-Catcher
This is a fun winter activity to do with your kids! Combine it with exploring your backyard or local park for natural decorations to freeze in it!
Supplies Needed:
Directions:
- Explore your backyard for various items to decorate your Ice Sun-catcher with. (See ideas above)
- Lay the plate down on a flat surface. If you are assembling the plate inside, you might want to first put the plate on a cookie sheet. Fill the plate with water.
- Cut string to desired length for hanging up. (I recommend a minimum of 3 feet). Place the string in a “U” shape, with the untied ends hanging out, pushing the string into the water.
- Lay your selected nature decorations on the plate, pushing them gently into the water.
- Leave plate outside overnight or until completely frozen.
- Carefully transfer out of plate. If it is paper, the plate can be easily cut off.
- Hang up outside where it can be viewed and enjoyed!

Discover more from Northbird
Subscribe to get the latest posts sent to your email.

I love those ice sun-catchers!
xo
LikeLike