
Find Northbird on social media:
This post contains affiliate links. As an Amazon associate, I earn from qualifying purchases. This means that I make a small commission at no extra cost to you. You can read my full disclosure HERE.

We love this time of year! Lots of beautiful fall colours, it’s sweater weather, and it’s time to harvest what is left in the garden.
(Now, this year is a bit of an exception as there wasn’t much of a garden to speak about!) But other years at my parent’s house there has been much fun in discovering all the pumpkins and squash that have been hiding all summer, and bringing them inside to store for the next several months.
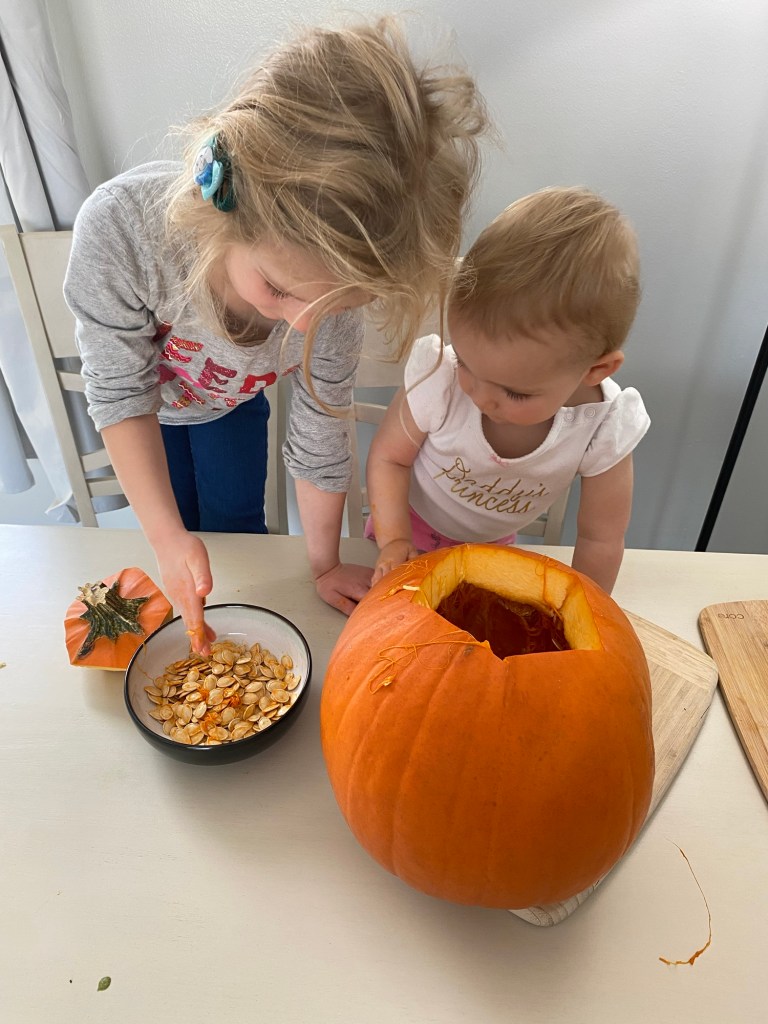
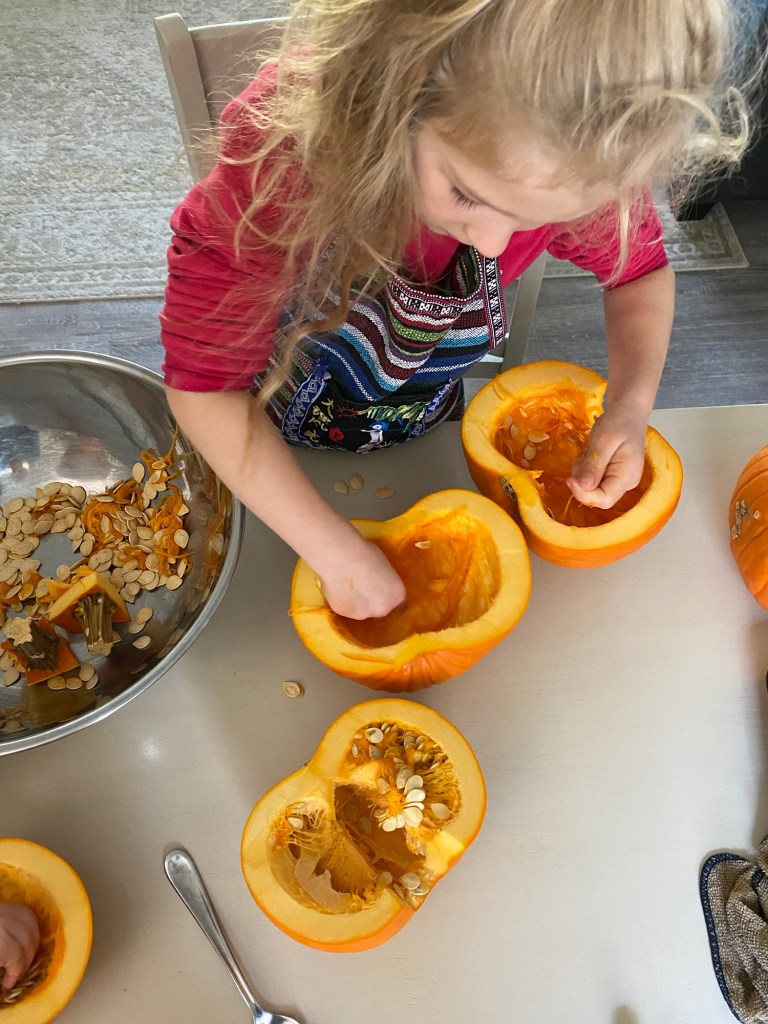
We particularly love cutting up and cooking pumpkins to turn into homemade pumpkin puree. It’s a great activity for the kids to help with, working on their fine motor skills and scooping out all the gooey seeds!

Ways to use Pumpkins and Pumpkin Puree:
There are so SO many ways of using this tasty fall vegetable besides carving it up and putting it on your doorstep for decoration!
Here are a few of my favourites plus a few more fun ideas:
| Sweet | Savoury |
| Pumpkin Pie | Pumpkin Seed Wheat Bread |
| Pumpkin Muffins | Pumpkin Crackers |
| Pumpkin Energy Balls | Pumpkin Egg Noodles & Other Pastas |
| Pumpkin Chocolate Squares | Pumpkin Hummus & Veggie Dips |
| Pumpkin Sweet Bread | Pumpkin Soup Variations |
| Pumpkin Cookies | Pumpkin Casserole |
| Pumpkin Spiced Latte & Other drinks | Stuffed Pumpkin Dishes |
| Pumpkin Pancakes & Waffles | Fried Pumpkin Fritters |
Does the Size of Pumpkin Matter?
Honestly, the size only matters for what you plan on using the puree for. The smaller pumpkins will typically be sweeter, and the larger ones will just be a bit more watery.
Smaller pumpkins, such as “pie pumpkins” are usually used for (obviously!) pies! They are sweeter, and have a more distinct taste, making them ideal for baked goodies and treats.
The larger pumpkins are not usually used for pies and baking due to their slightly more dulled taste because they have a higher water content. This of course doesn’t mean that they can’t be used in baking and cooking, it’s purely a matter of preference.

What can you do with the Pumpkin Seeds?
Here are 3 ways that we use leftover pumpkin seeds:
- Seed Saving for planting the following year (s).
- Dry the seeds to use in crafts or educational activities.
- Roast and eat them in so many different ways!
Saving Pumpkin Seeds for Planting:
- Clean seeds in a bowl of water and separate out any pulp or broken seeds. Select the biggest and best seeds to save.
- Drain off as much water as possible and pat the seeds as fry as you can.
- Put seeds on parchment paper to continue drying for several days.
- Put in a paper envelope and label.
- If you are using the seeds the following planting season, you can store it in a cool, dry pantry. If you want the germination of the seeds to last for many years, put in the freezer.
- Note: If it’s an heirloom pumpkin then it is definitely nice to save some seeds for future planting. If it’s a hybrid-grown pumpkin then you may not get much produce from planting the seeds, and anything grown would likely be less hardy and more vulnerable to diseases.

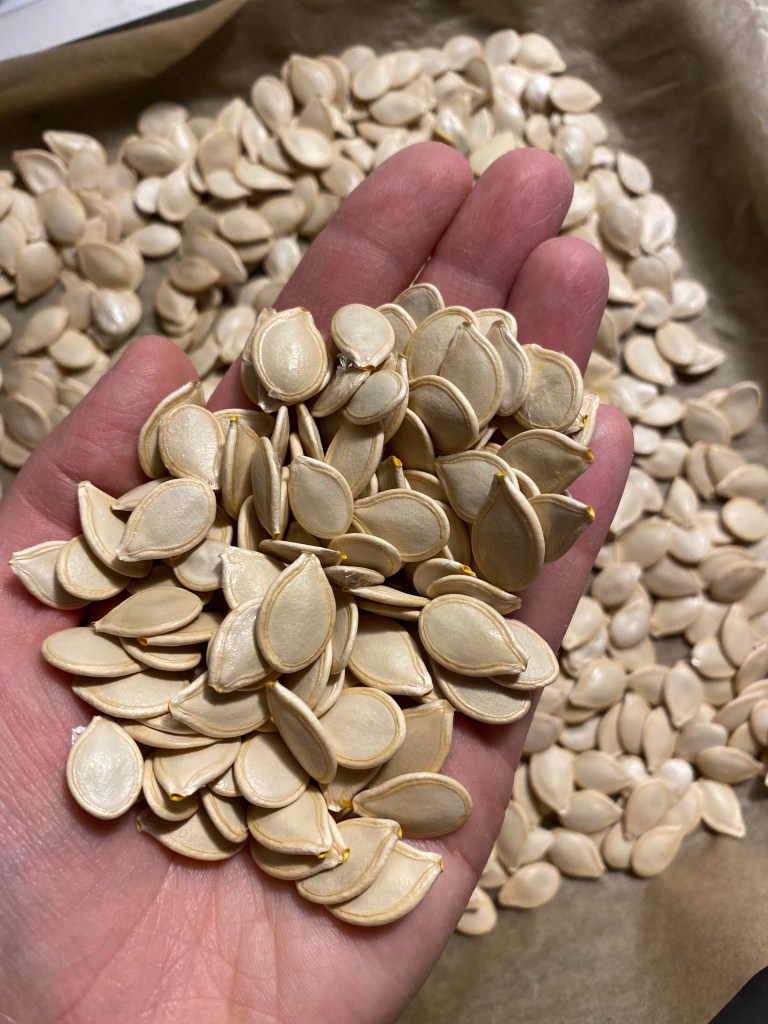
Dry the Seeds for Crafts & Activities:
1. Clean seeds in a bowl of water and separate out any pulp from them.
2. Drain off as much water as possible and pat the seeds as dry as you can.
3. Put seeds on parchment paper to continue drying for several days.
4. Store the seeds in a paper envelope.

Eating Pumpkin Seeds:
The seeds are delicious to use in so many ways!
- Enjoy as a salty snack
- Add to a trail mix with other seeds, nuts and dried fruits
- As a salad topping
- As a pumpkin or squash soup garnish
- Make your own pumpkin seed crackers
- Baked into bread
- Put in a smoothie
- Mix into a nutritious breakfast bowl

How to Roast Pumpkin Seeds:
1. Wash the seeds and separate from the pulp.
2. Mix in a small bowl with olive oil or (my favourite) Avocado oil. Add sprinklings of salt, pepper and also a dash of paprika.
3. Spread in single layer on parchment paper.
4. Broil on low for about 5 minutes, or until crispy (every oven is different!)
5. Store in an airtight container at room temperature for up to one week.
Here’s a simple video of one of the times we recently cut up some pie pumpkins.
How to Make Your Own Pumpkin Puree
Supplies Needed:
Ingredients:
- Pumpkins
Directions:
1. Preheat oven to 350 degrees fahrenheit.
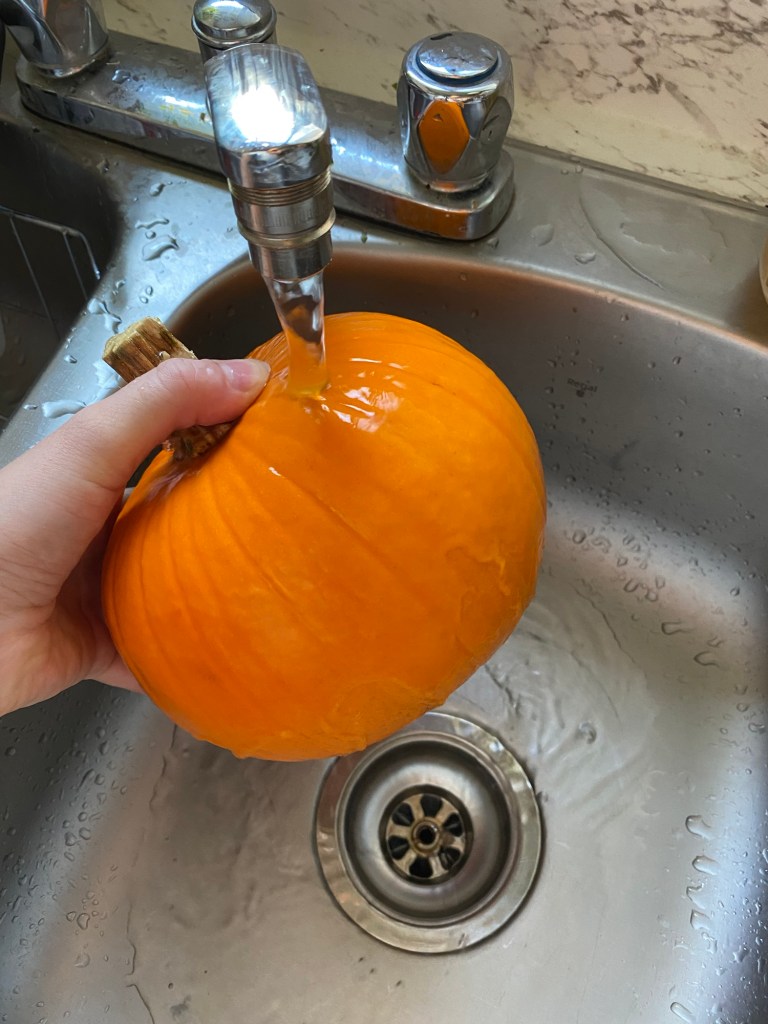
2. Wash the outside of the pumpkins to remove any dirt.
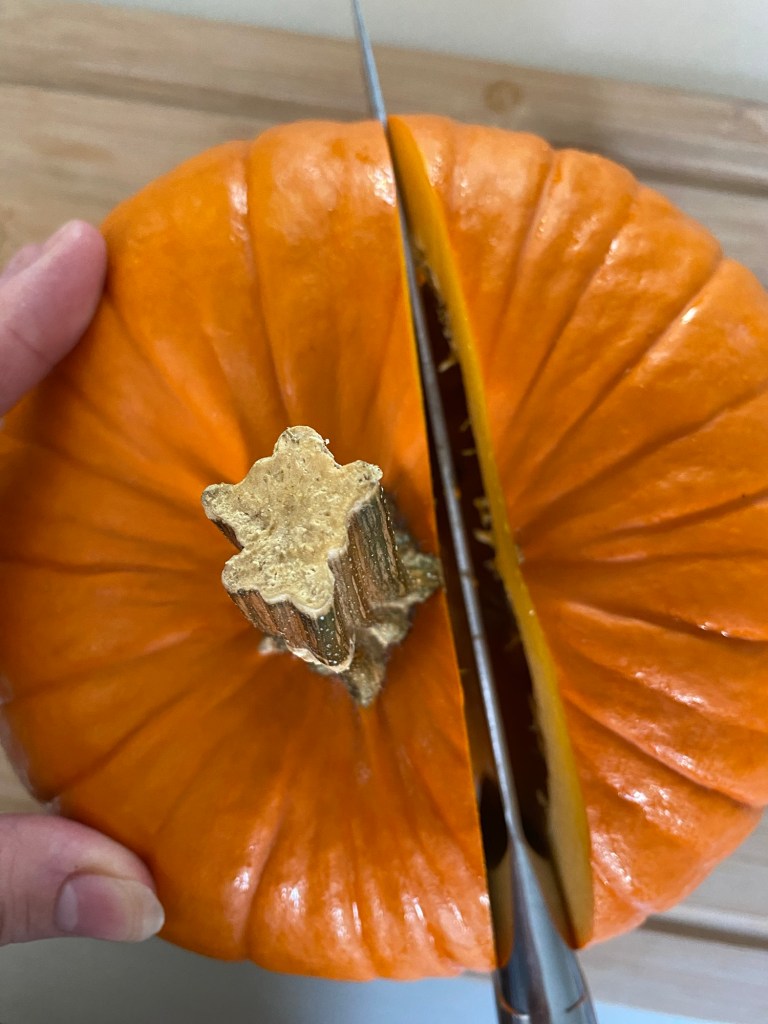
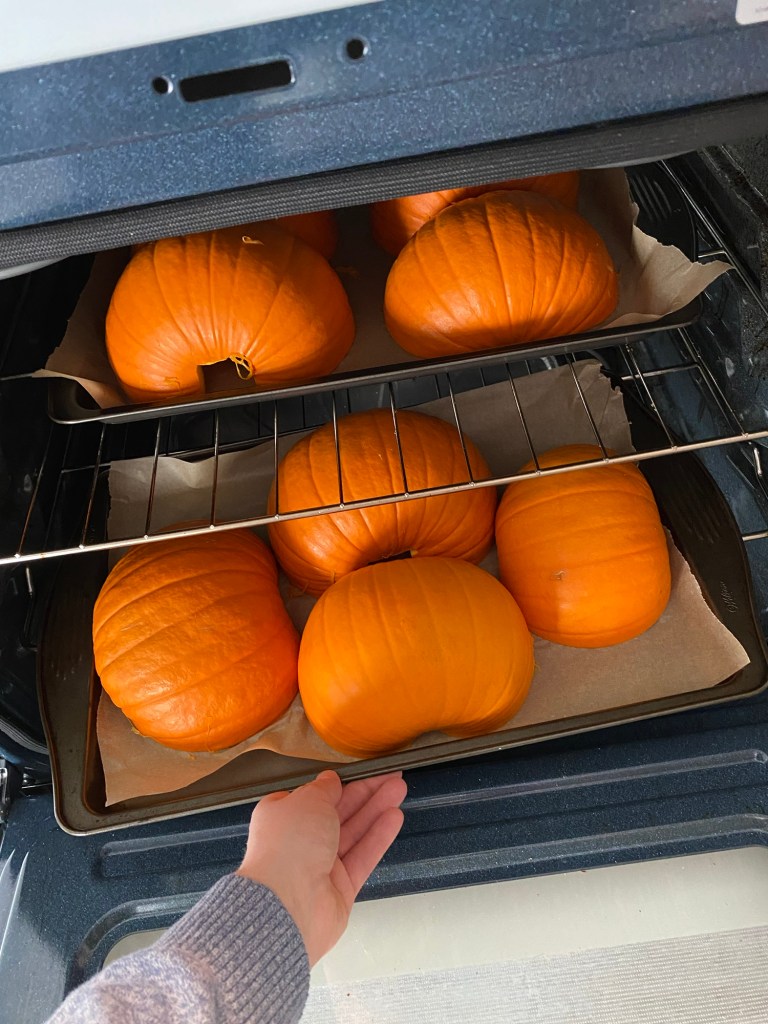
3. If it is a small pumpkin, simply cut in half next to the stem and cut through into two halves. Cut off the stem and blossom end. If it is a larger pumpkin, cut around the stem part of the pumpkin in a circle and lift it out. Cut off the blossom ends as well.
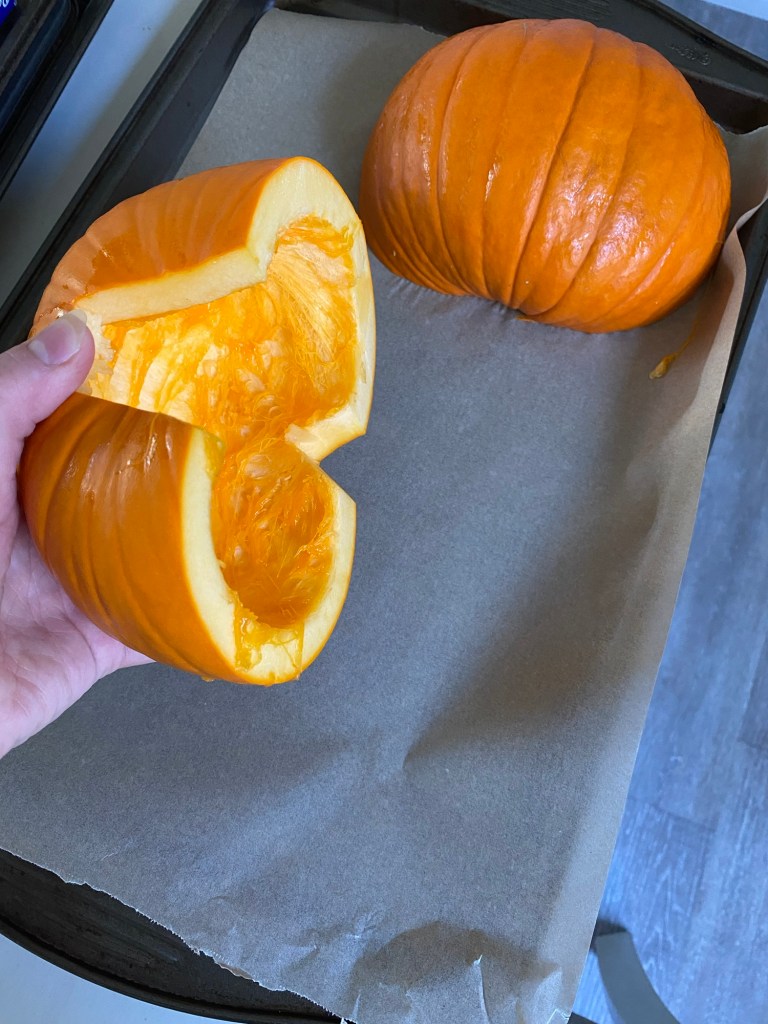
4. Scoop the seeds out into a bowl **Save these for a tasty snack later!
5. Place pumpkin halves upside down on parchment-lined baking sheets.
6. Bake fat 350 for 45-60 minutes until the pumpkin skin on the outside is soft, lightly browned, and can be easily pierced with a fork. (You will want it soft enough to easily scoop the pumpkin flesh)


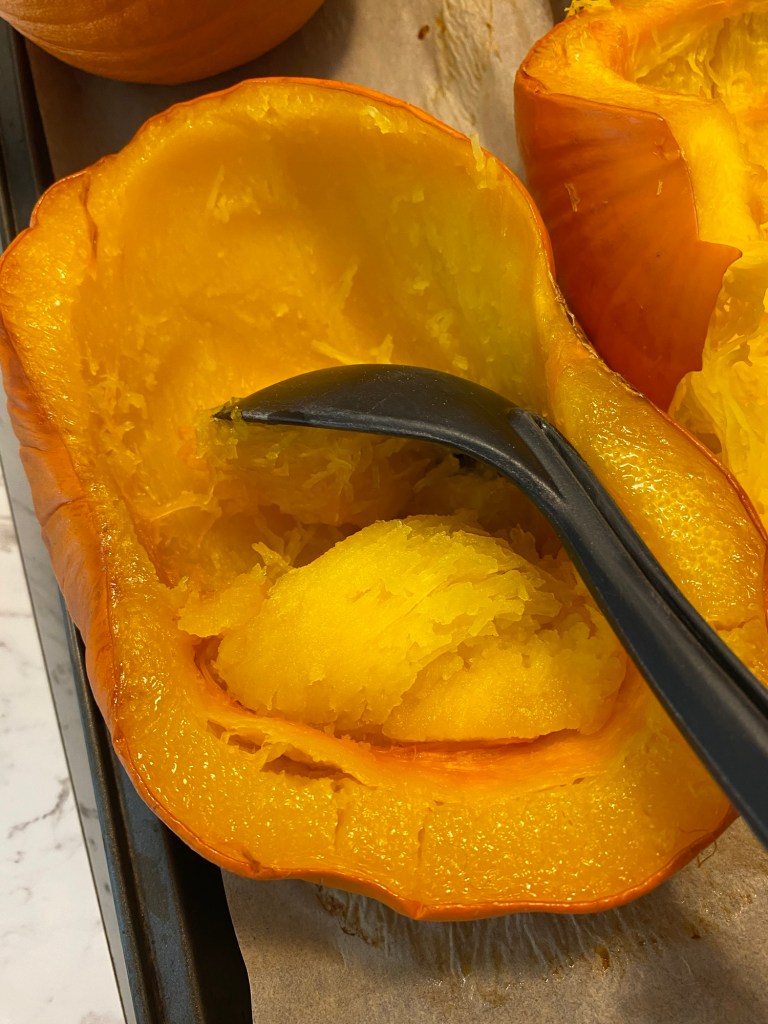
7. Let cool completely, turning right side up to cool down faster.
8. Scrape the insides out into a high powered blender and puree until smooth.

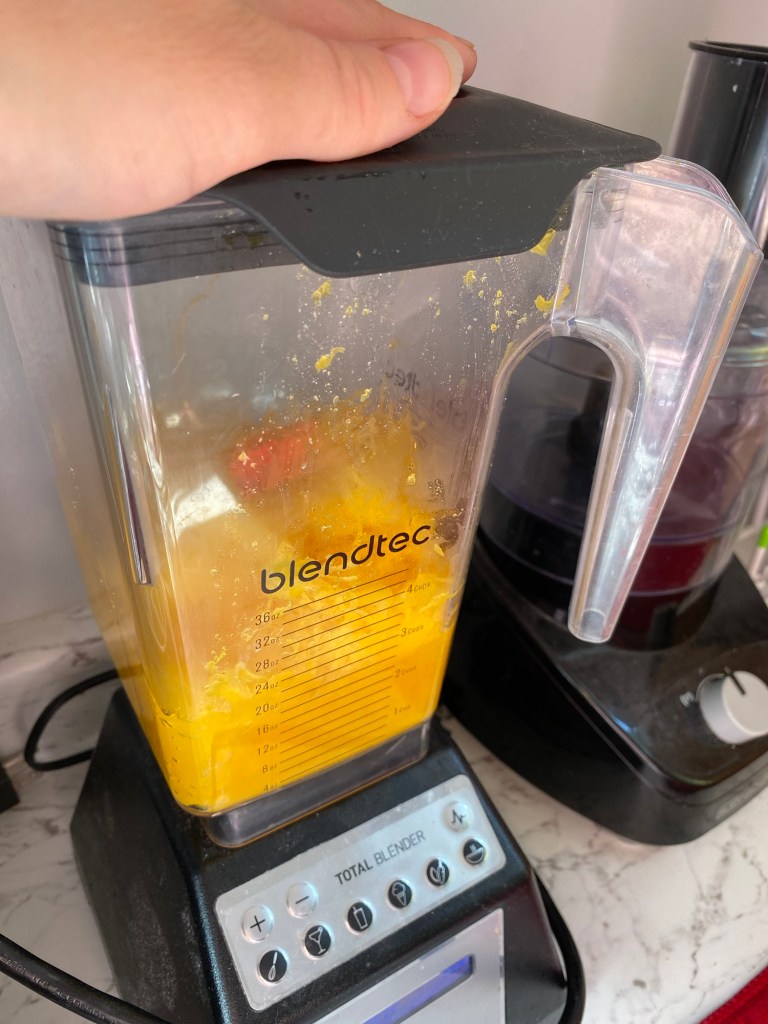
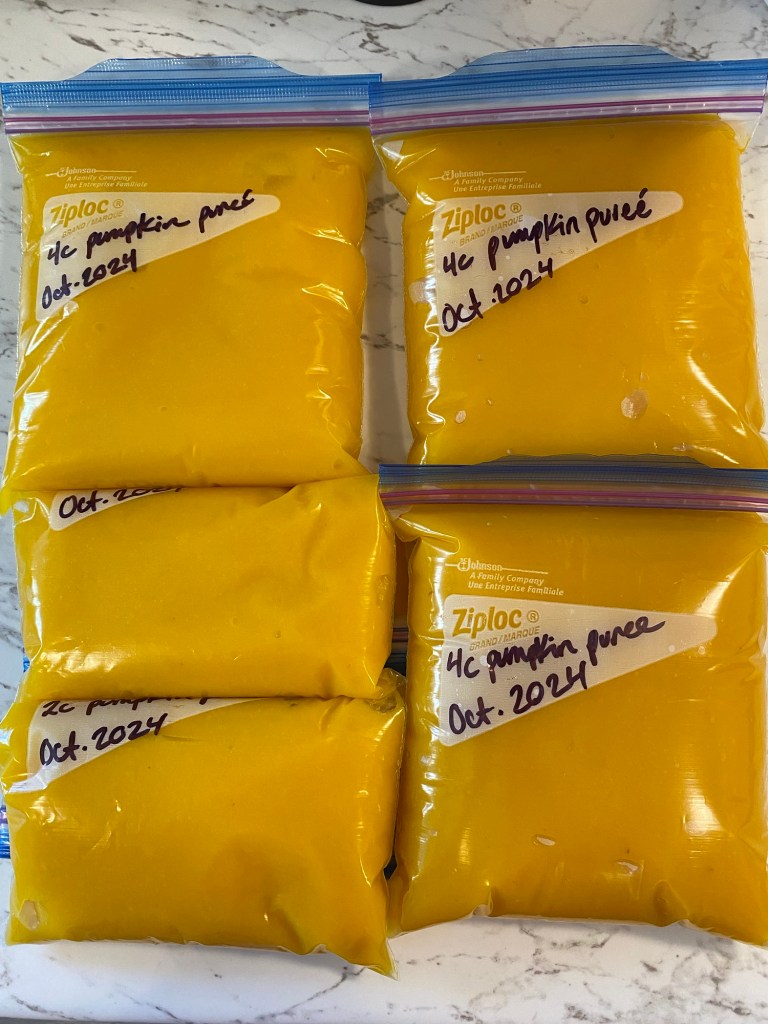
9. Use immediately in desired recipe, or put in a sealed container and store in the fridge for up to one week. You can also put the pumpkin puree in a ziplock bag in the freezer. Best to use within 6 months. (Although I have used some puree that was frozen for much longer than that and still thawed and tasted great!)
10. One small pie pumpkin makes approximately 4 cups of puree.


Hi, I’m Jessie!
I’m a Wife and Homeschooling Mom living in a remote town in Northern Ontario, Canada. I love making wholesome meals for my family from scratch, homeschooling our girls and learning more about natural living.
Read more about my story HERE.

Subscribe to Northbird’s email list to get weekly posts on: tasty recipes, activity ideas for kids, natural living tips, and some genuine mom thoughts and encouragement!
Recent posts from Northbird:


Homemade Pumpkin Puree

Make your own pumpkin puree with this easy recipe and then freeze the puree to later make many sweet or savoury pumpkin recipes!
You can use either large or small pumpkins for this recipe. The smaller pumpkins will typically be sweeter, and the larger ones will just be more watery. See ideas above for how to use pumpkins best based on their size.
Ingredients
- Pumpkins
Directions:
- Preheat oven to 350 degrees fahrenheit.
- Wash the outside of the pumpkins to remove any dirt.
- If it is a small pumpkin, simply cut in half next to the stem and cut through into two halves.
- Scoop the seeds out into a bowl **Save these for a tasty snack later!
- Place pumpkin halves upside down on parchment-lined baking sheets.
- Bake fat 350 for 40-50 minutes until the pumpkin skin on the outside is soft, lightly browned, and can be easily pierced with a fork.
- Let cool completely, turning right side up to cool down faster.
- Scrape the insides out into a high powered blender and puree until smooth.
- Use immediately in desired recipe, or put in a sealed container and store in the fridge for up to one week. You can also put the pumpkin puree in a ziplock bag in the freezer. Best to use within 6 months.
- One small pie pumpkin makes approximately 3-4 cups of puree.
Nutrition
Per 1 cup serving: 34 calories; 0.3 g fat; 8.1 g carbohydrates;
1.1 g protein.

Discover more from Northbird
Subscribe to get the latest posts sent to your email.
