This post contains affiliate links. As an Amazon associate, I earn from qualifying purchases. This means that I make a small commission at no extra cost to you. You can read my full disclosure HERE.
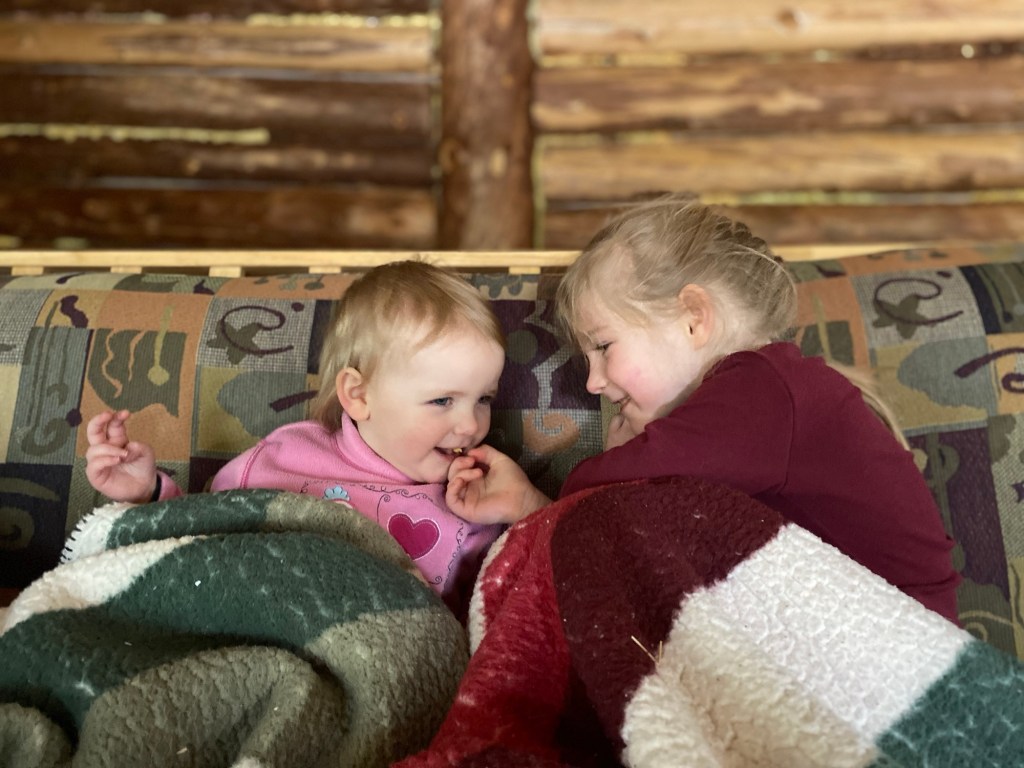
Our family recently had the opportunity to go to an off-grid cabin for Family Day Weekend. It was about a 45 minute snowmobile ride into the bush from our house. Hard, challenging (I was seven months pregnant), but totally worth the adventure.
Our first day was quite cold! Temperatures reached -41 degrees celcius with the wind chill, but averaging around -30 degrees.
When we arrived at the cabin, it was around -30 degrees INSIDE. Brrrr. The kids honestly had a few tears while we got a fire going, dug out the cookies, and started the kettle to make some hot chocolate. After they warmed up, they got excited and started exploring our snug little home for the weekend.
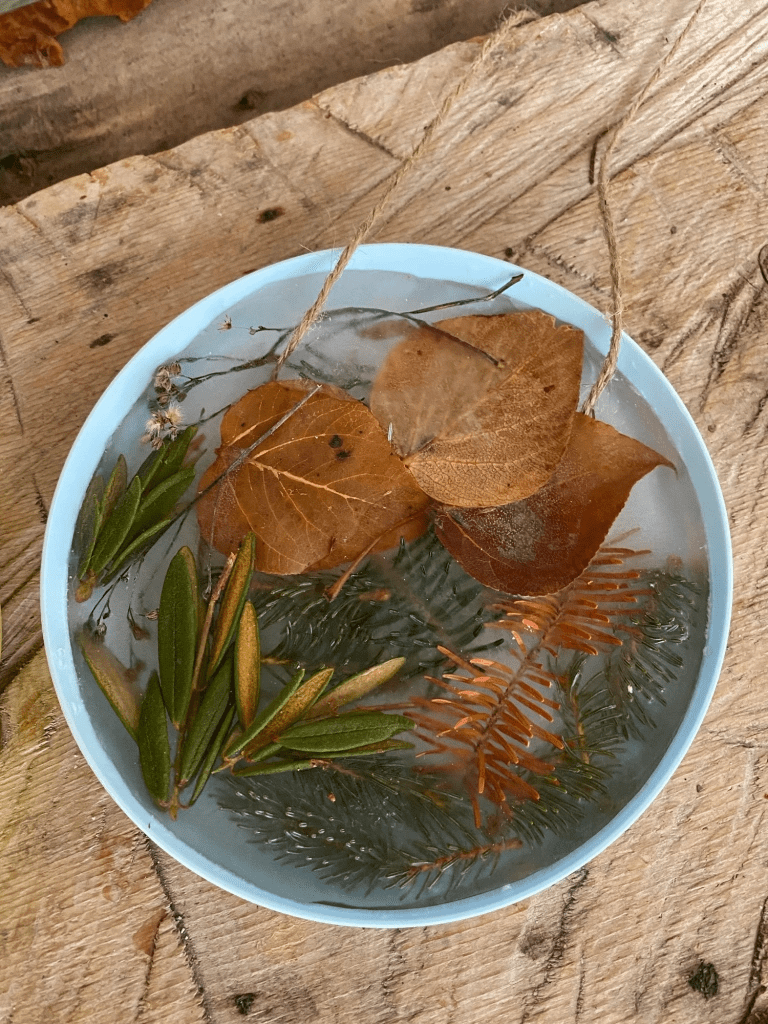
One of the previous families to visit the cabin had hung up some coloured ice sun-catchers (see pictures below), using food colouring or paints, and hung up outside the windows. We loved to look at these while cooking in the kitchen or eating our meals!
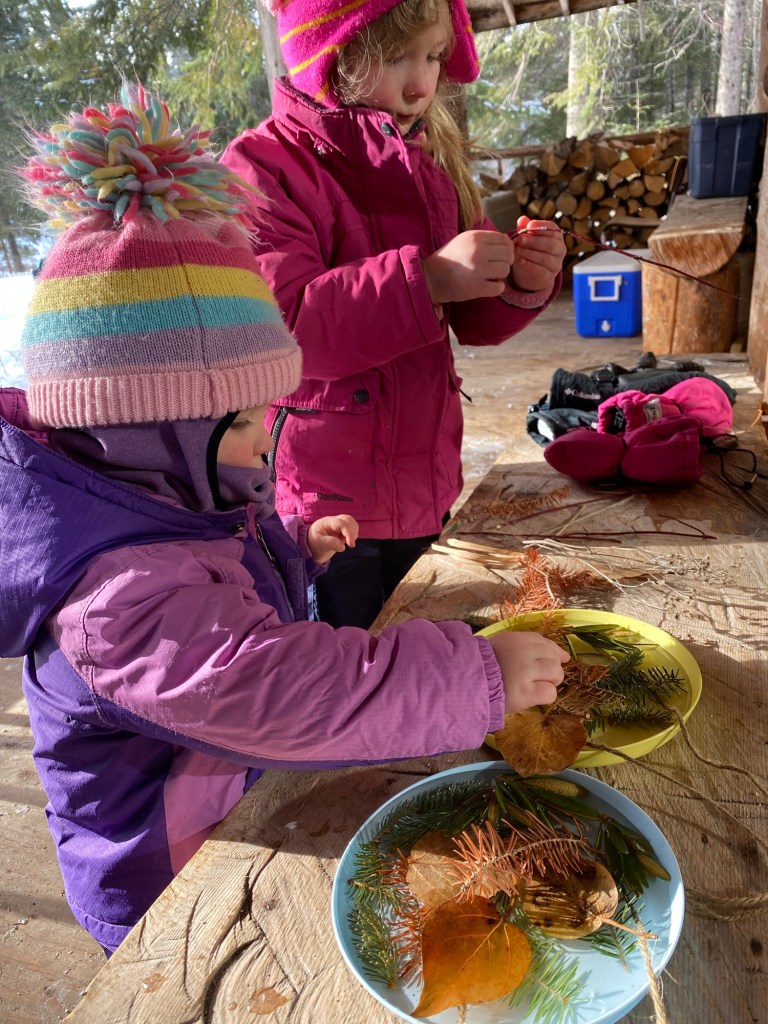
We were inspired to also make something similar, but we didn’t have anything to colour the water/ice with. We decided to do some exploring around the cabin and find natural items to use instead.
This was a wonderful activity and natural inquiry for our oldest, as she scavenged for different sticks, leaves, dried flowers, pine and spruce needles.
“What’s this Mommy?” pointing to a stick covered in a black fungus, “It looks like something pooped on it!”
Or “discovering” what a raspberry bush looks like/feels like in winter without the leaves on it (thorns!).
I love that we used natural items to do this activity, so that as it melts in the spring, the decorations frozen in the ice will decompose over time on the ground. We also used natural twine to hang it up that we found hanging around from previous visitors.
Enjoy! Send Northbird pictures of your Ice Sun-catcher creations, we’d love to see them!
A brief video of when our girls made Ice Sun-catchers.
How to Make Ice Sun-Catchers
Supplies Needed:
Warm water (the warmth helps so the kid’s fingers don’t get too cold during the activity if you are assembling the plate outside)
1. Explore your backyard for various items to decorate your Ice Sun-catcher with. (See ideas above)
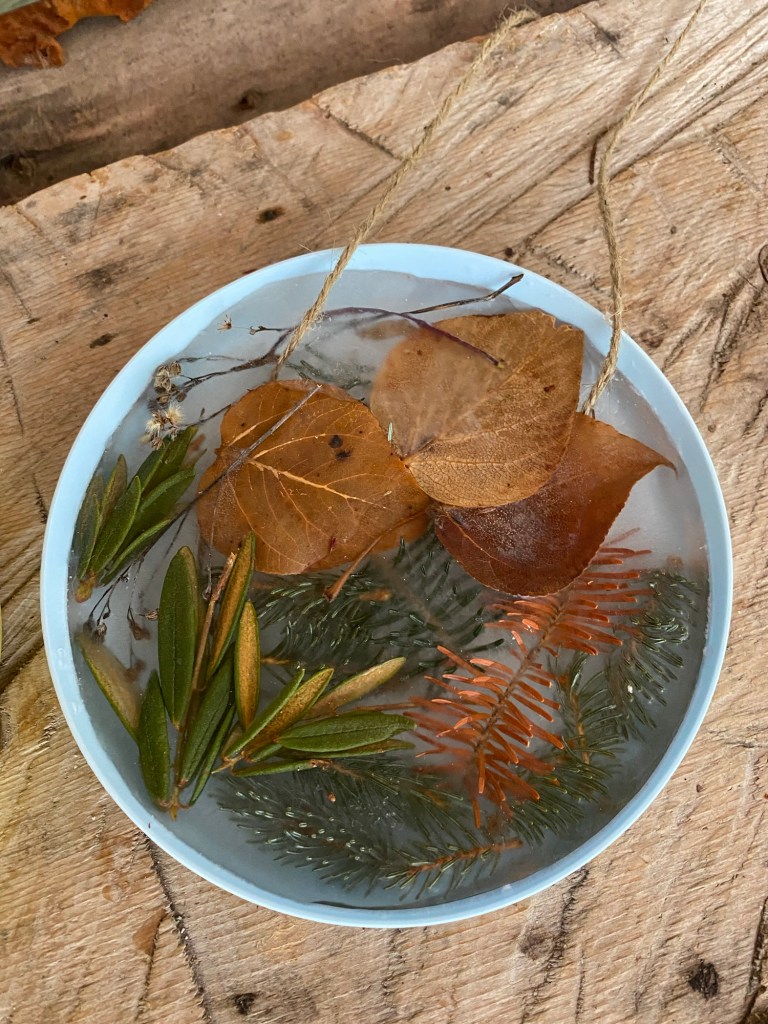
2. Lay the plate down on a flat surface. If you are assembling the plate inside, you might want to first put the plate on a cookie sheet. Fill the plate with water.
3. Cut string to desired length for hanging up. (I recommend a minimum of 3 feet). Place the string in a “U” shape, with the untied ends hanging out, pushing the string into the water.
4. Lay your selected nature decorations on the plate, pushing them gently into the water.
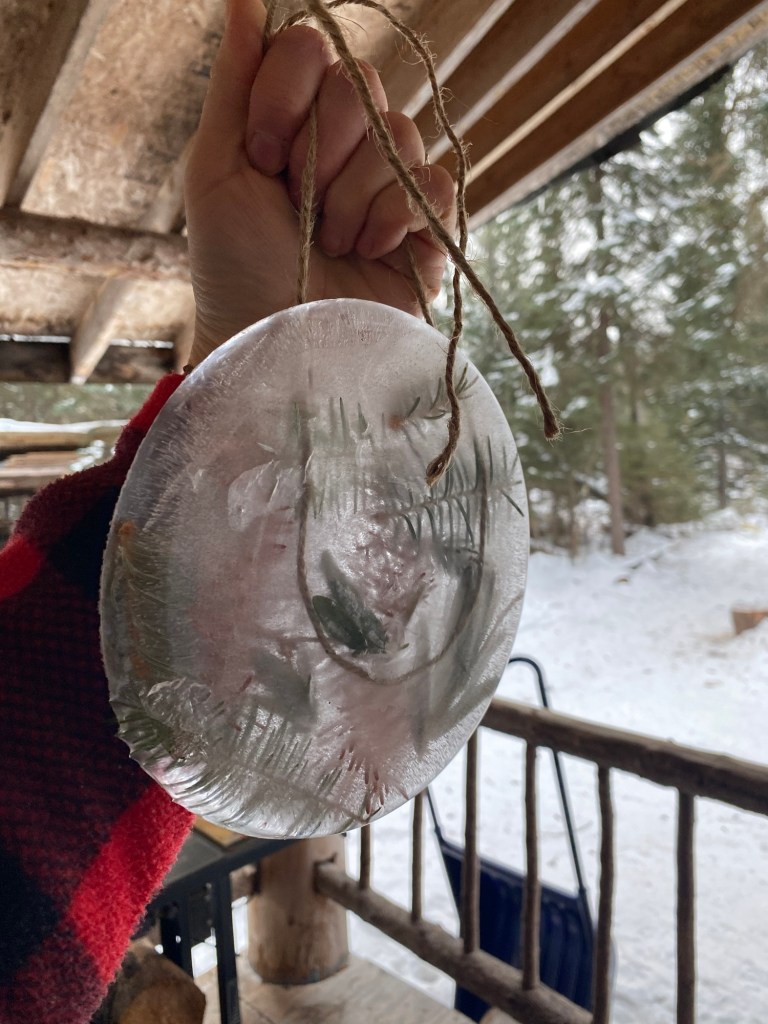
5. Leave plate outside overnight or until completely frozen.
6. Carefully transfer out of plate. If it is a paper plate, the plate can be easily cut off.
7. Hang up outside where it can be viewed and enjoyed!
More Homeschooling Crafts & Activities to Check Out:
I’m a Wife and Homeschooling Mom living in a remote town in Northern Ontario, Canada.I love making wholesome meals for my family from scratch, homeschooling our girls and learning more about natural living.
Subscribe to Northbird’s email list to get weekly posts on: tasty recipes, activity ideas for kids, natural living tips, and some genuine mom thoughts and encouragement!
Explore your backyard for various items to decorate your Ice Sun-catcher with. (See ideas above)
Lay the plate down on a flat surface. If you are assembling the plate inside, you might want to first put the plate on a cookie sheet. Fill the plate with water.
Cut string to desired length for hanging up. (I recommend a minimum of 3 feet). Place the string in a “U” shape, with the untied ends hanging out, pushing the string into the water.
Lay your selected nature decorations on the plate, pushing them gently into the water.
Leave plate outside overnight or until completely frozen.
Carefully transfer out of plate. If it is paper, the plate can be easily cut off.
Hang up outside where it can be viewed and enjoyed!
This post contains affiliate links. As an Amazon associate, I earn from qualifying purchases. This means that I make a small commission at no extra cost to you. You can read my full disclosure HERE.
Need an easy crockpot chicken meal idea? This is it.
My mother used to make this delicious chicken meal a lot when I was growing up. I am not sure where the recipe actually came from, so I cannot truly give origin credit where it is due. However, it’s just one of those simple, easy, go-to meals that truly makes busy days easier.
I remember my mother making huge meals of this whenever she was hosting a large amount of people. She would double/triple this recipe and preferred to cook it in the oven in a large covered roasting pan.
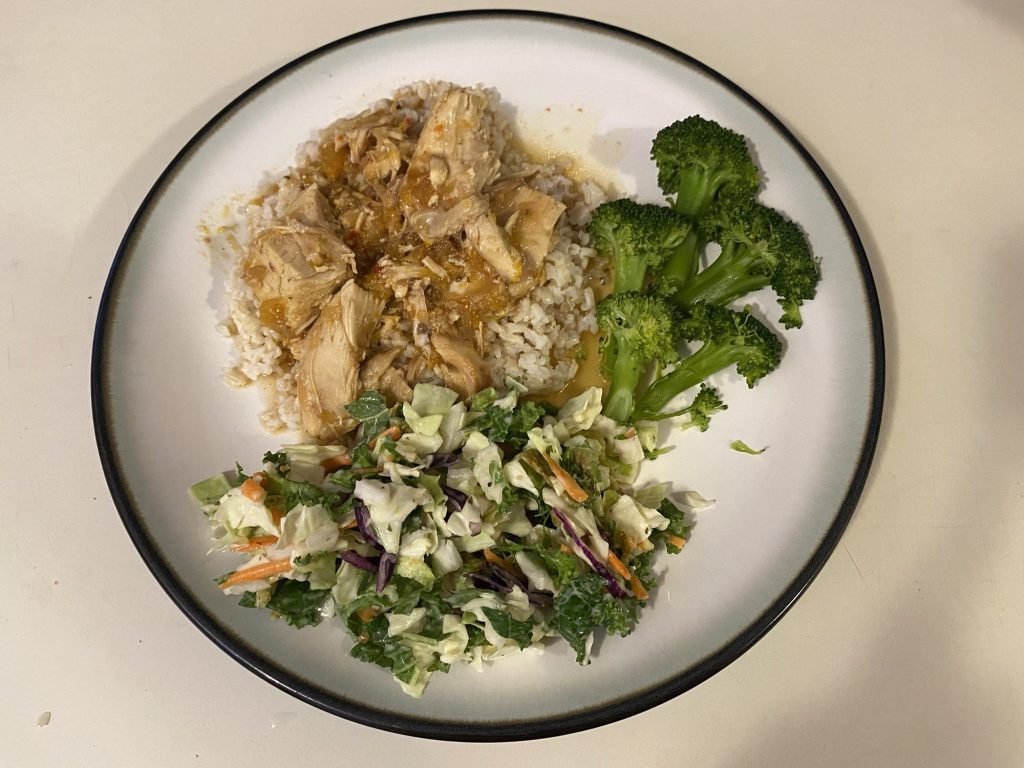
We always served it with brown rice and a cooked vegetable and salad on the side. I have to say, I almost prefer eating just the sauce poured over the rice, it is SERIOUSLY that good.
This is a short visual of how to make this delicious crockpot chicken dinner!
How to Make Heavenly Crockpot Chicken
Supplies Needed:
Crockpot (or see note below for cooking in the oven)
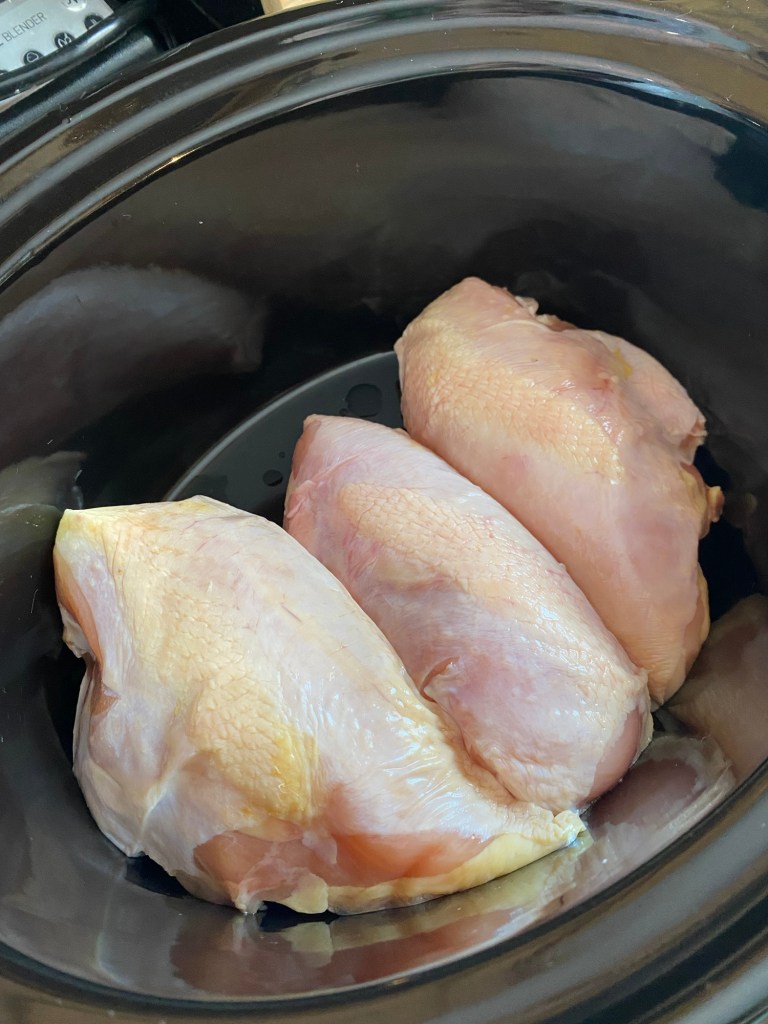
Thaw chicken if frozen and wash with cold water. Place evenly in crockpot.
In a small bowl, mix together: onion soup mix, apricot, and 1 cup of Italian salad dressing.
Pour over chicken.
4. Cover and turn crockpot to high for 3-4 hours, or low for 6-8 hours. Baste chicken tops with sauce 1-2 times through cooking time.
In the oven: Preheat to 350 degrees fahrenheit and bake 2 hours covered, turning chicken once. Cook chicken to an internal temperature of at least 165 degrees fahrenheit.
5. Serve over rice (pairs well with brown rice), and generously drizzle the sauce! We like to add a salad and cooked vegetable on the side.
Additional Note: We have used boneless/skinless chicken breasts, chicken thighs, drumsticks, etc. If chicken used has bones, it’s nicest to take off meat once it is fully cooked and return to crockpot until ready to serve.
Edit: When we made this meal recently, I found out last minute that we didn’t have any canned apricots or apricot jam! So we subbed in fresh peaches and peach jam instead. It tasted quite similar and was just as good!
I’m a Wife and Homeschooling Mom living in a remote town in Northern Ontario, Canada.I love making wholesome meals for my family from scratch, homeschooling our girls and learning more about natural living.
Subscribe to Northbird’s email list to get weekly posts on: tasty recipes, activity ideas for kids, natural living tips, and some genuine mom thoughts and encouragement!
With only 4 ingredients, this delicious recipe proves the simplicity of crockpot meals for those busy weekdays!
Additional Note: We have used boneless/skinless chicken breasts, chicken thighs, drumsticks, etc. If chicken used has bones, it’s nicest to take off meat once it is fully cooked and return to crockpot until ready to serve.
Peaches and peach jam is also a nice alternative to apricots.
Supplies Needed:
Crockpot (or see note below for cooking in the oven)
Thaw chicken if frozen and wash with cold water. Place evenly in crockpot.
In a small bowl, mix together: onion soup mix, apricot, and 1 cup of Italian salad dressing.
Pour over chicken.
With lid on, turn crockpot to high for 3-4 hours, or low for 6-8 hours. Baste chicken tops with sauce 1-2 times through cooking time. In the oven: Preheat to 350 degrees fahrenheit and bake 2 hours covered, turning chicken once. Cook chicken to an internal temperature of at least 165 degrees fahrenheit.
Serve over rice (pairs well with brown rice), and generously drizzle the sauce! We like to add a salad and cooked vegetable on the side.
Nutrition
Per 1 serving: 332 calories; 22 g fat; 14.9 g carbohydrates;
17.8 g protein.
Every once in a while we do a purge and inventory of our freezers, and guess what we find?! Lots and lots of frozen bananas. Sometimes when our food order arrives off the train, the bananas look less than appealing. Especially if they’ve not been packaged properly (slightly squashed) or left in a cold area (slightly frozen). I really dislike wasting food, so as long as the bananas aren’t outright rotten, I’ll usually throw them into one of the freezers to be used later in baking.
This recipe was created from one such time, when we realized we were desperately running out of space in the fridge freezer, and also had an abundance of sourdough discard that I didn’t want to just toss out.
The amount of sourdough discard in this recipe is flexible, based on what you have available. That’s the beauty of muffin recipes: the batter consistency is usually not too different from a sourdough discard consistency, so anywhere up to 1 cup of sourdough discard would blend into this muffin batter quite well in my opinion. I have made it several times with varying amounts of discard and they all turn out great and tasty!
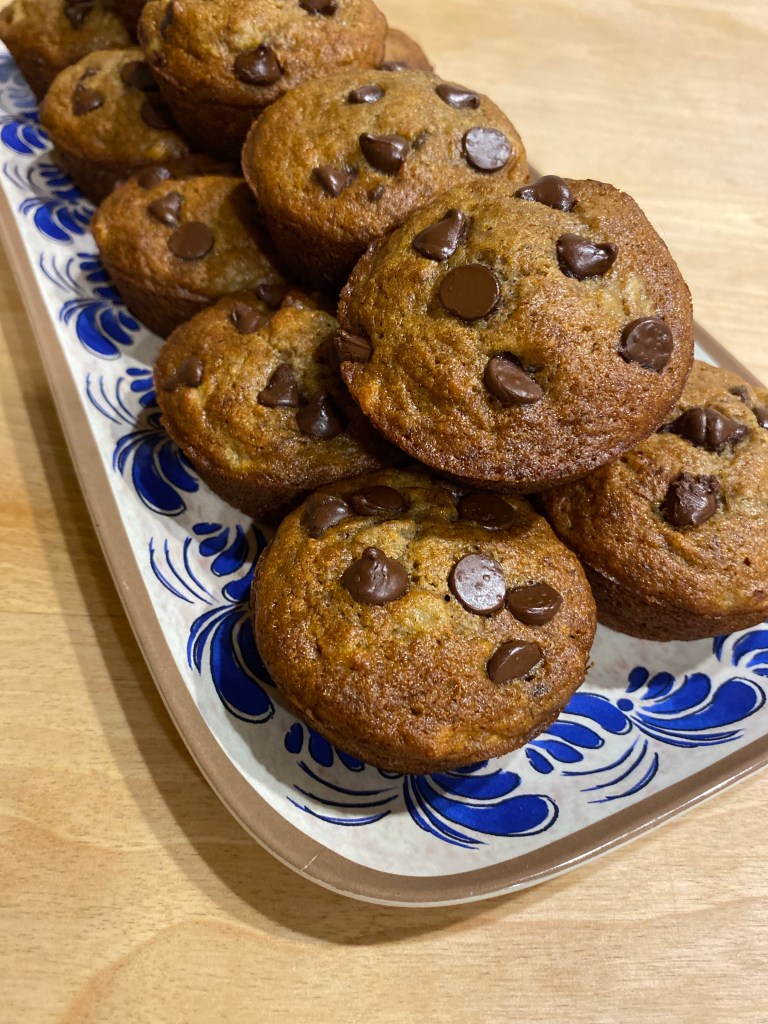
How to Make Banana Chocolate Chip Muffins (Sourdough Discard)
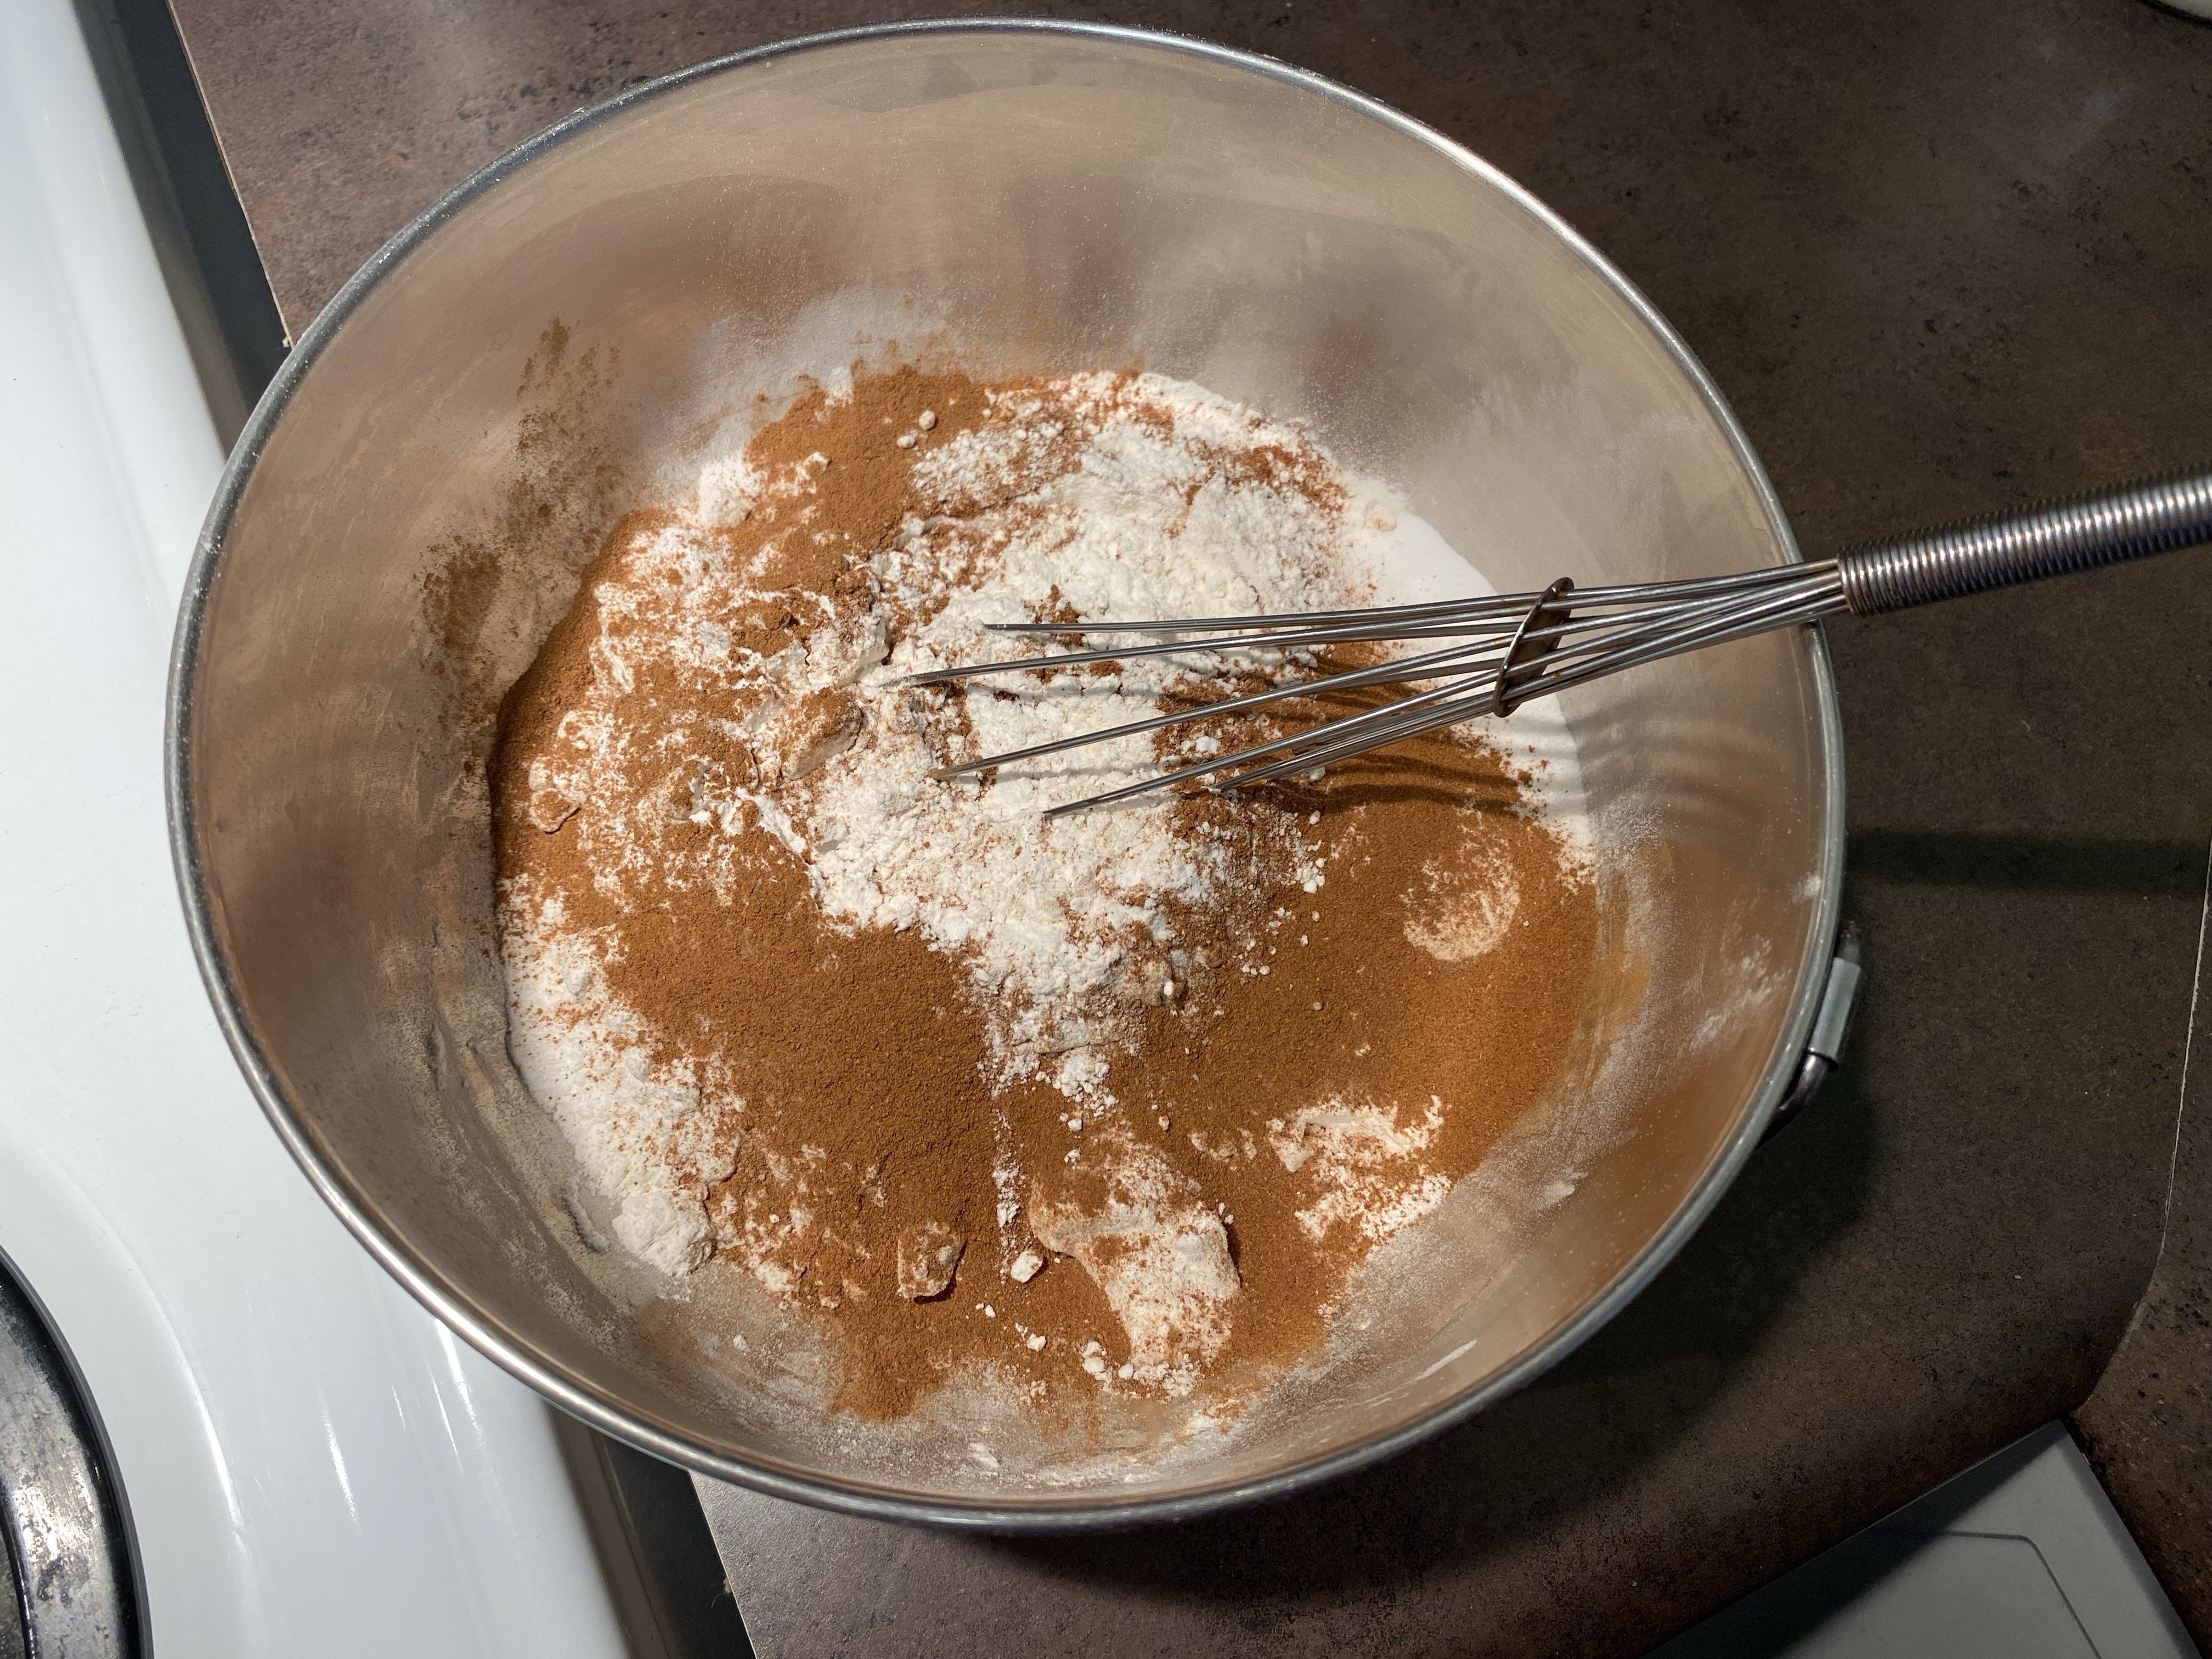
In a large bowl, mix the flour, baking soda, baking powder, salt, cinnamon, and nutmeg together
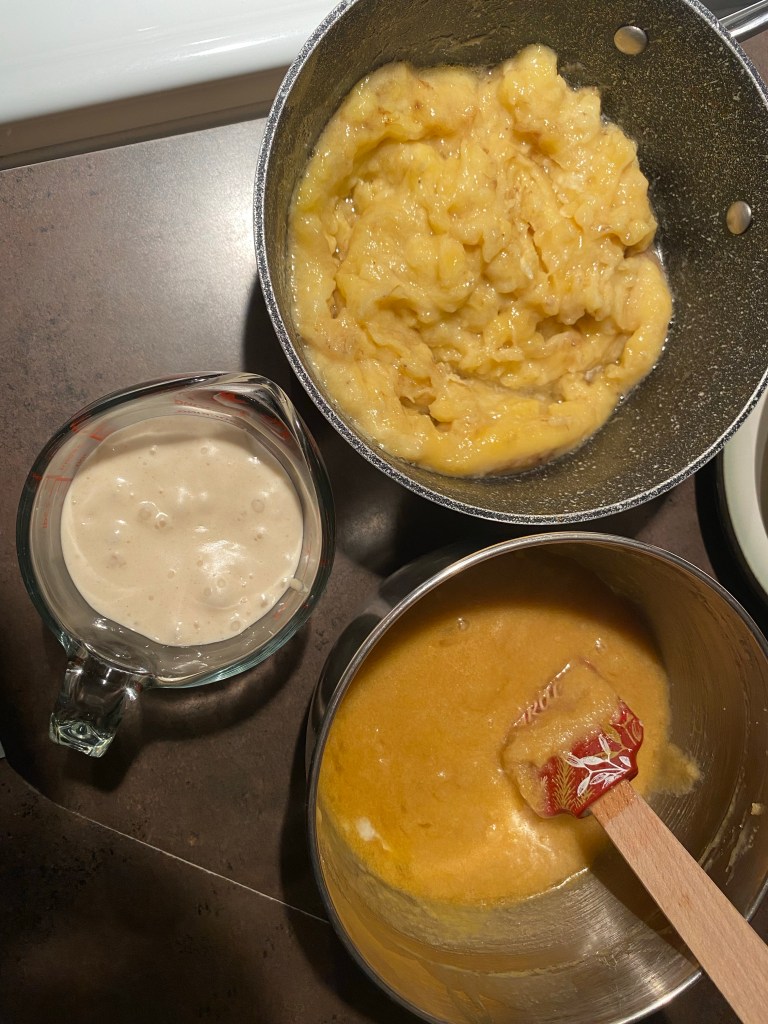
3. In another bowl, cream the butter and brown sugar together. Whisk in the eggs and add vanilla.
4. Add the mashed bananas, sourdough discard, and applesauce to the wet mixture and mix well together.
5. Make a “well” in the flour mix, and add the wet mixture to it. Mix until fully blended together, but do not “overmix” so that the muffins stay fluffy. Fold in the chocolate chips.
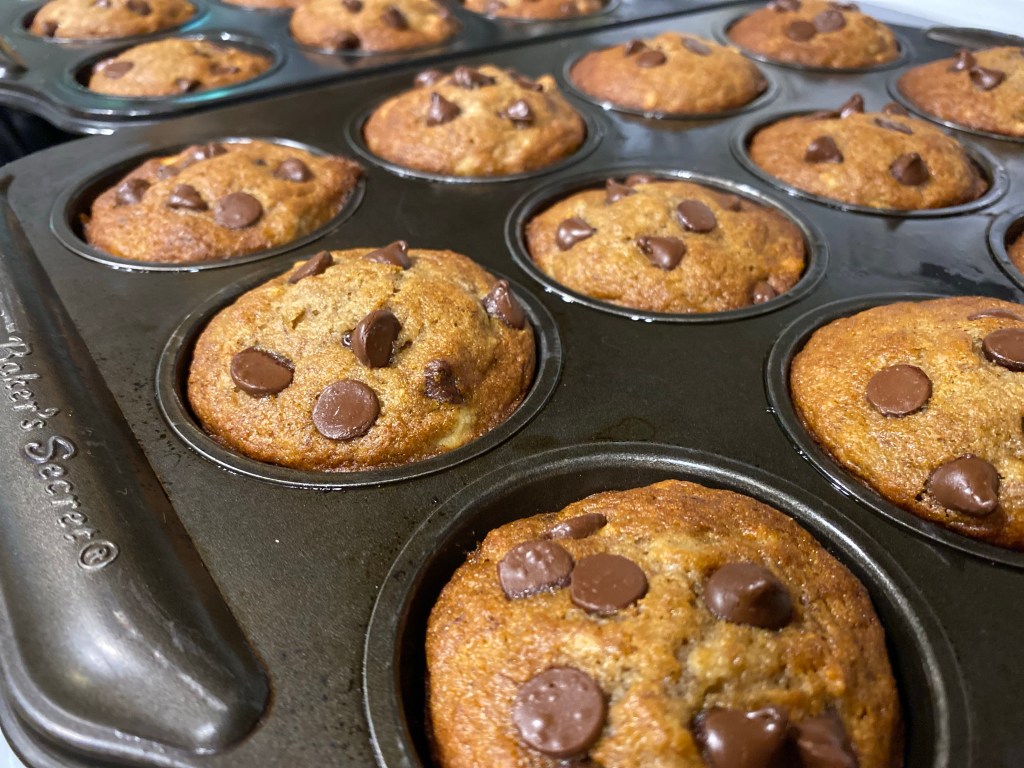
6. Grease muffin pans or use muffin cups. (I like greasing our muffin pans with coconut oil, works beautifully every time!)
7. Fill muffin cups 3/4 full and sprinkle more chocolate chips on the tops.
8. Bake at 425 F for 5 minutes, then turn the oven down to 350 until muffins are golden on top and a toothpick comes out clean when inserted. For large muffins this takes me about 12-15 minutes.
9. Let muffins cool in the pan for 5 minutes before moving to a cooling rack or inverting in the pan.
10. Store in a sealed container at room temperature for up to 5 days, refrigerate for 1 week, or freeze in a sealed freezer bag for up to 6 months.
Additional note: This recipe usually makes about 30 muffins, half of which we like to freeze and use within a few months. Freeze in a freezer-ziploc bag, remove air. Thaw overnight and pop in the oven or microwave to freshen up!
I’m a Wife and Homeschooling Mom living in a remote town in Northern Ontario, Canada.I love making wholesome meals for my family from scratch, homeschooling our girls and learning more about natural living.
Subscribe to Northbird’s email list to get weekly posts on: tasty recipes, activity ideas for kids, natural living tips, and some genuine mom thoughts and encouragement!
In a large bowl, mix the flour, baking soda, baking powder, salt, cinnamon, and nutmeg together.
In another bowl, cream the butter and brown sugar together. Whisk in the eggs and add vanilla.
Add the mashed bananas, sourdough discard, and applesauce to the wet mixture and mix well together.
Make a “well” in the flour mix, and add the wet mixture to it. Mix until fully blended together, but do not “overmix” so that the muffins stay fluffy. Fold in the chocolate chips.
Grease muffin pans or use muffin cups. (I like greasing our muffin pans with coconut oil, works beautifully every time!)
Fill muffin cups 3/4 full and sprinkle more chocolate chips on the tops.
Bake at 425 F for 5 minutes, then turn the oven down to 350 until muffins are golden on top and a toothpick comes out clean when inserted. For large muffins this takes me about 12-15 minutes.
Let muffins cool in the pan for 5 minutes before moving to a cooling rack or inverting in the pan.
Store in a sealed container at room temperature for up to 5 days, refrigerate for 1 week, or freeze in a sealed freezer bag for up to 6 months.
Additional Notes:
This recipe usually makes about 30 muffins, half of which we like to freeze and use within a few months. Freeze in a freezer-ziploc bag, remove air. Thaw overnight and pop in the oven or microwave to freshen up!
Nutrition
Per 1 muffin: 179 calories; 5.8 g fat; 31 g carbohydrates;
2.6 g protein.
This post contains affiliate links. As an Amazon associate, I earn from qualifying purchases. This means that I make a small commission at no extra cost to you. You can read my full disclosure HERE.
This post contains affiliate links. As an Amazon associate, I earn from qualifying purchases. This means that I make a small commission at no extra cost to you. You can read my full disclosure HERE.
We LOVE curry night! Once a week we have either a stir fry or curry served with rice. My favourite is curry of course because it’s a little less work and can be easily made ahead and kept warm.
Before Jesse and I got married (or even met), I spent several months in a bible school that had an outreach focus in Asia. After training, my team and I lived in a missionary’s house in Tokyo, Japan, for a month, followed by another month in Southern Thailand. It was during this time that I grew to love eating different curries and of course rice.
There are hundreds of different curry recipes, originating from many different countries and cultures. I love trying different ones out and letting my somewhat enthusiastic family try them (they are not as excited to try anything remotely spicy!).
This Chickpea Coconut Curry has become my go-to recipe for last minute curry cooking. It may change week-to-week based on what vegetables I have available, but I love this particular mix of ingredients. It is generally easier on the more sensitive palate, making it a great choice on the menu for little ones.
Nutritional Benefits of Chickpeas:
Chickpeas are also known as garbanzo beans, and are widely used in many different cuisines. From falafel to curries to hummus, there are countless types of dishes that feature chickpeas.
They are high in protein, which makes them a favourite alternative for replacing meat protein. They are also high in healthy fats, carbs and fibre. Some other nutritional components include: Manganese, Folate (Vitamin B9), Copper, Iron, Zinc, Phosphorus, Magnesium, Thiamine, Vitamin B6, Selenium and Potassium.
Health Benefits May Include:
Help you to feel full longer
Weight management
Boosts bone & muscle health
Helps to regulate blood sugar levels
Assists with digestion
May reduce risk of chronic illnesses
Supports brain function
May help relieve anxiety and depression
Boosts red blood cell production (Iron deficiency)
You can read more HERE about why Chickpeas are an amazing addition to your diet.
Is Coconut Milk good for you?
Coconut milk is an amazing source of healthy saturated fats and high in calories. It is typically made from grinding the white flesh part of a matured brown coconut and then mixed with water. It is important to not confuse coconut milk with coconut water, which usually comes from an immature green coconut and is estimated 94% water.
The coconut milk has varying thickness of fat in it, and used for different dishes. In most cuisines, the thicker the milk is, the more likely it is used for deserts and creams. The thinner milk is usually used for making soups, curries and sauces.
My mother usually has at least one can of coconut milk buried at the back of her fridge. She chills the can so that the milk layers will separate and the thicker cream can be used as desert toppings.
I heard a story a while ago of how some babies that were born in the south pacific islands were given coconut milk when there was no baby formula or substitute nursing mothers available. And these babies thrived with no developmental concerns.
Perhaps one thing to note about drinking coconut milk, is that not all store bought brands are actually good for you. Many of them contain preservatives and added sugars, so it’s always a good idea to read the labels!
Here’s a short video of how to make Chickpea Coconut Curry…!
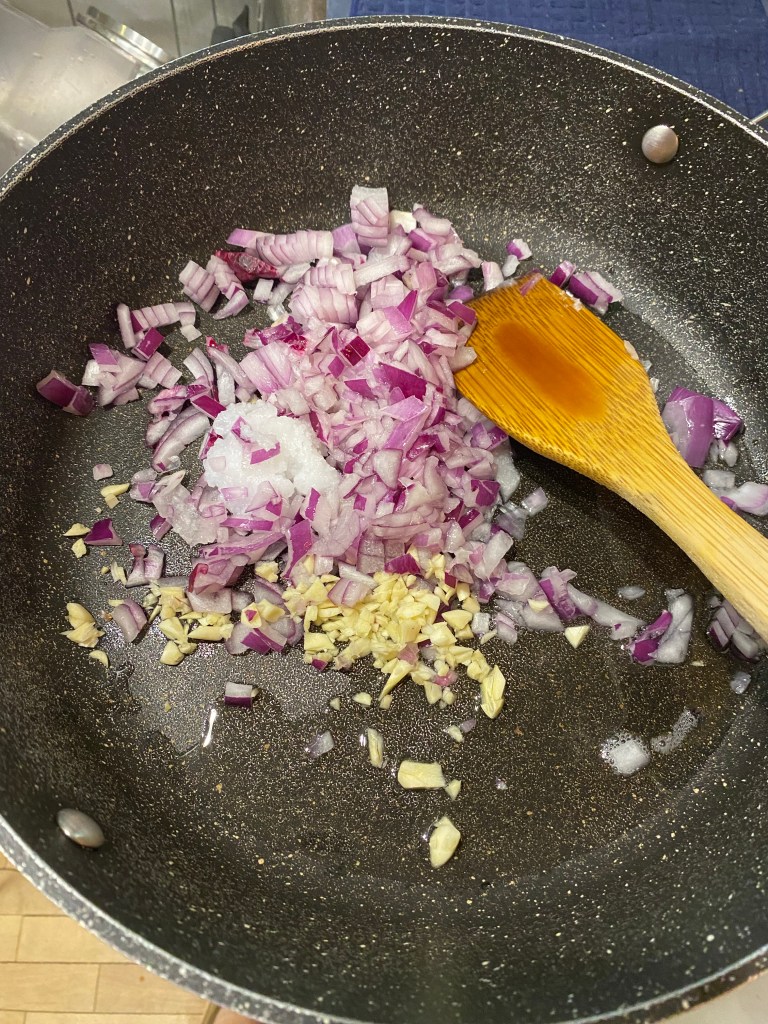
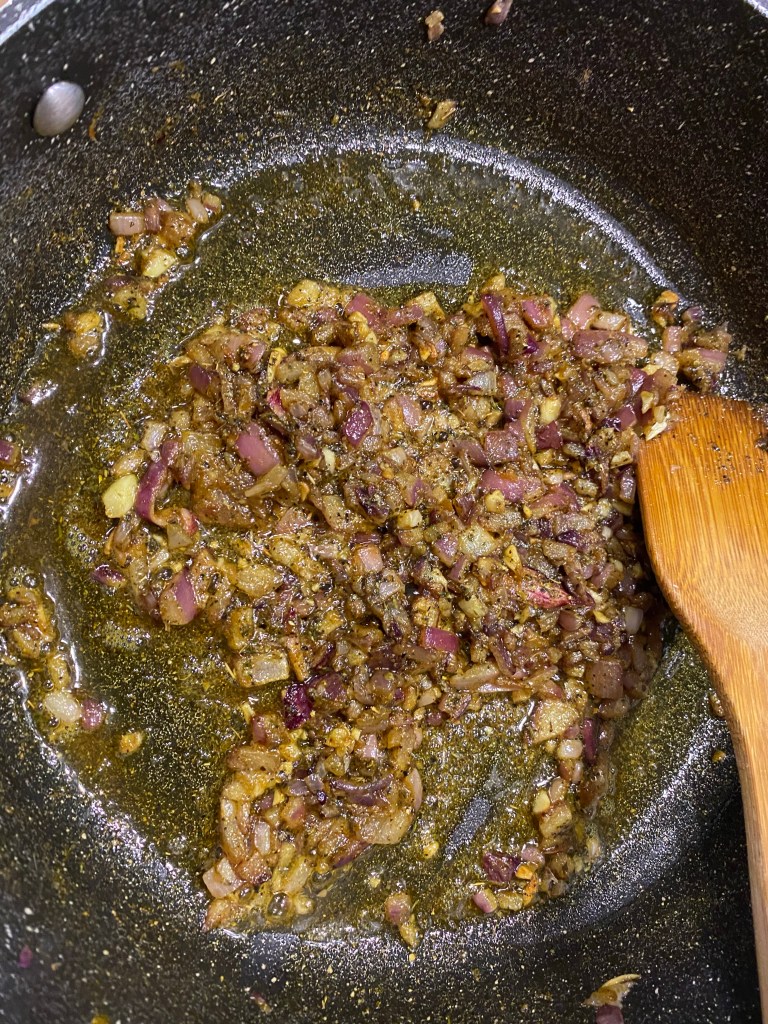
Melt the coconut oil in wok or large skillet over medium heat.
Add the onion, garlic and ginger. Cook for 2 minutes or until the onions have softened.
Add the spices/herbs: coriander, curry, salt, pepper, and Italian seasoning. Stir for 1 minute.
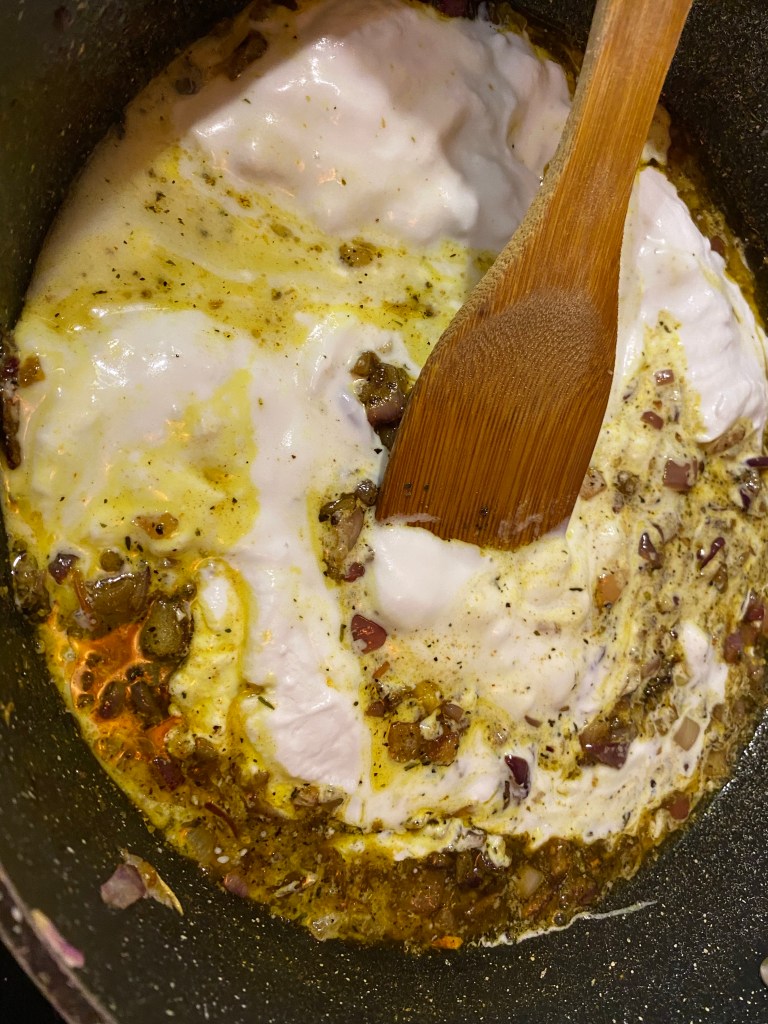
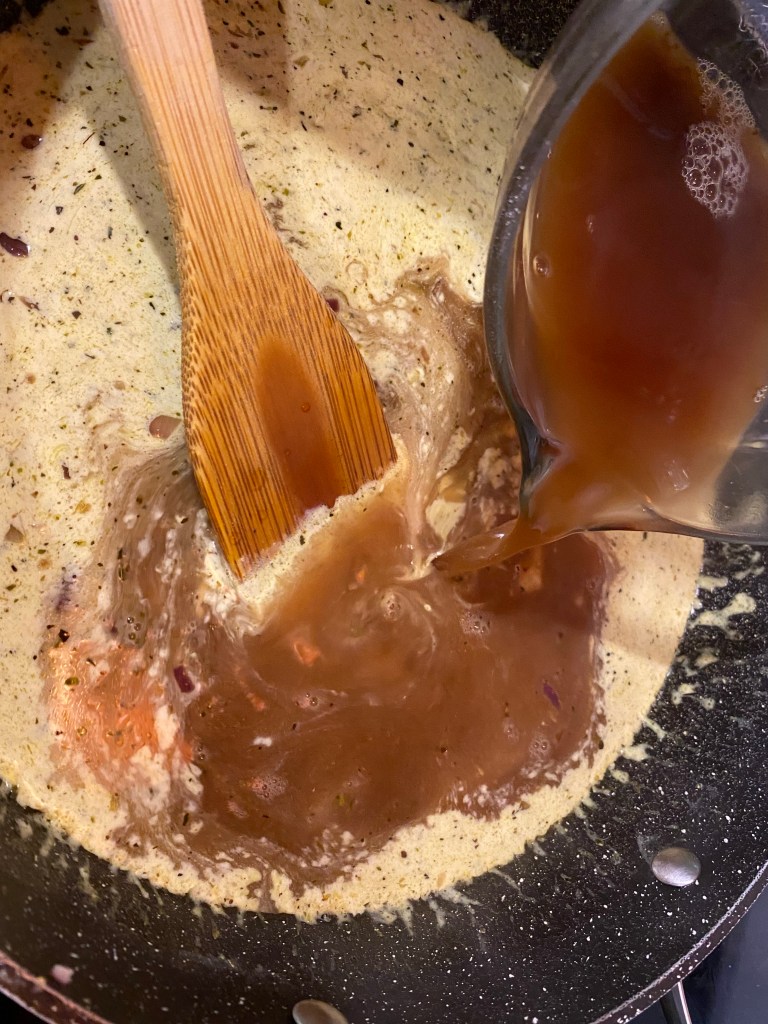
4. Add the coconut milk and stir in, followed by the beef stock. Cook for 5 minutes and stir well.
5. Add the remaining ingredients (sweet potatoes, chickpeas, mushrooms, bay leaves, and any other vegetables you would like to add!).
6. Continue cooking and stirring occasionally for another 15-20 minutes, until curry thickens and vegetables are tender.
7. Serve over rice and garnish with fresh basil or parsley.
Additional Note: This recipe is lovely with some fresh Naan bread for dipping. I am developing a recipe to share on here soon!
Other Soups and Entrees to Check Out:
Hi, I’m Jessie!
I’m a Wife and Homeschooling Mom living in a remote town in Northern Ontario, Canada.I love making wholesome meals for my family from scratch, homeschooling our girls and learning more about natural living.
Subscribe to Northbird’s email list to get weekly posts on: tasty recipes, activity ideas for kids, natural living tips, and some genuine mom thoughts and encouragement!
This post contains affiliate links. As an Amazon associate, I earn from qualifying purchases. This means that I make a small commission at no extra cost to you. You can read my full disclosure HERE.
I love celebrating Valentines Day, and using this opportunity to speak words of encouragement and love into my little girls and husband.
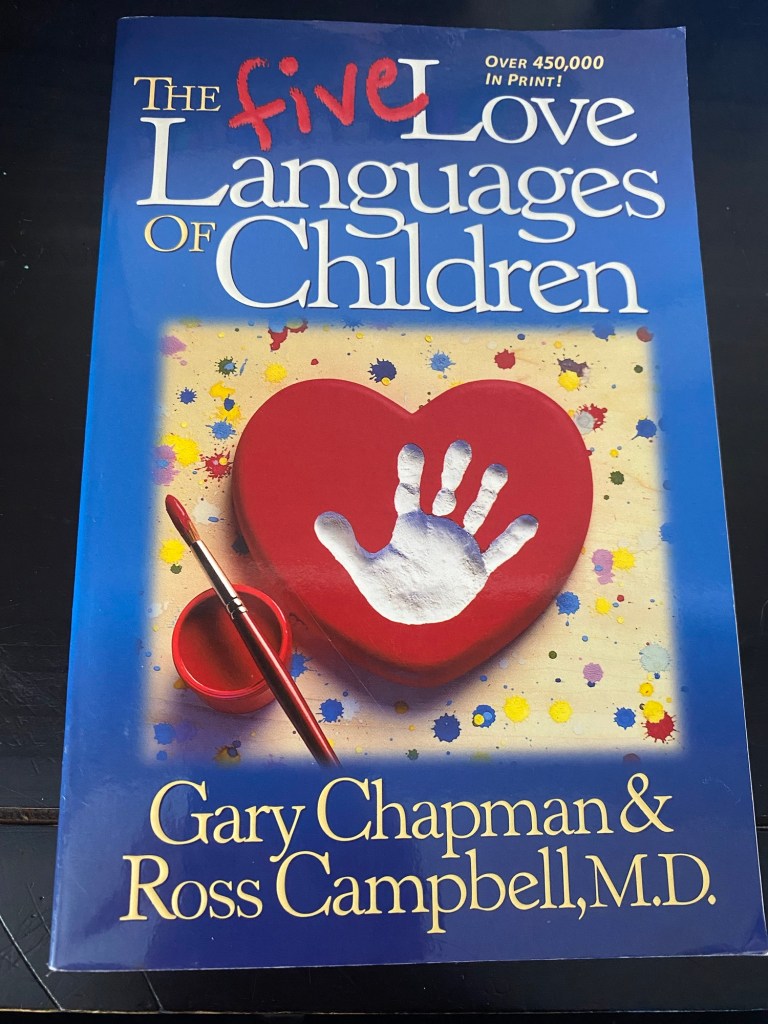
I recently started reading “The Five Love Languages of Children” by Gary Chapman & Ross Campbell, M.D., and it is just as good as the Love Languages book that was written for adults.
Every child needs to know that they are loved and valued, and this book focuses on learning how to express that love in a way that your child can understand it in their own unique way. I highly recommend this book as a parenting resource to check out!
To summarize the Five Love Languages, these are the common ways that each person receives and gives love:
Quality Time
Words of Affirmation
Gifts
Acts of Service
Physical Touch
“We believe a child’s need for love is basic to all other needs. Receiving love and learning to give love is the soil out of which all positive human endeavors grow.” -Gary Chapman & Ross Campbell
Other Love Language books that I love from Gary Chapman:
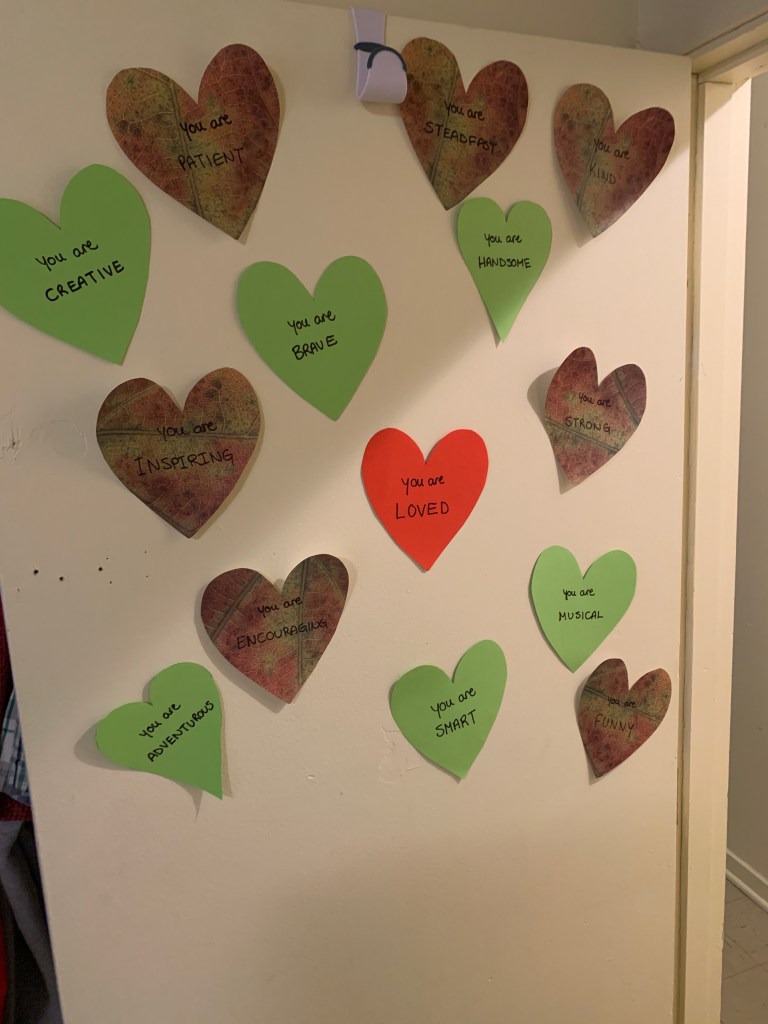
Since my oldest was about 18 months, I have kept up this tradition for her and my husband as a way of speaking and affirming words of encouragement for them:
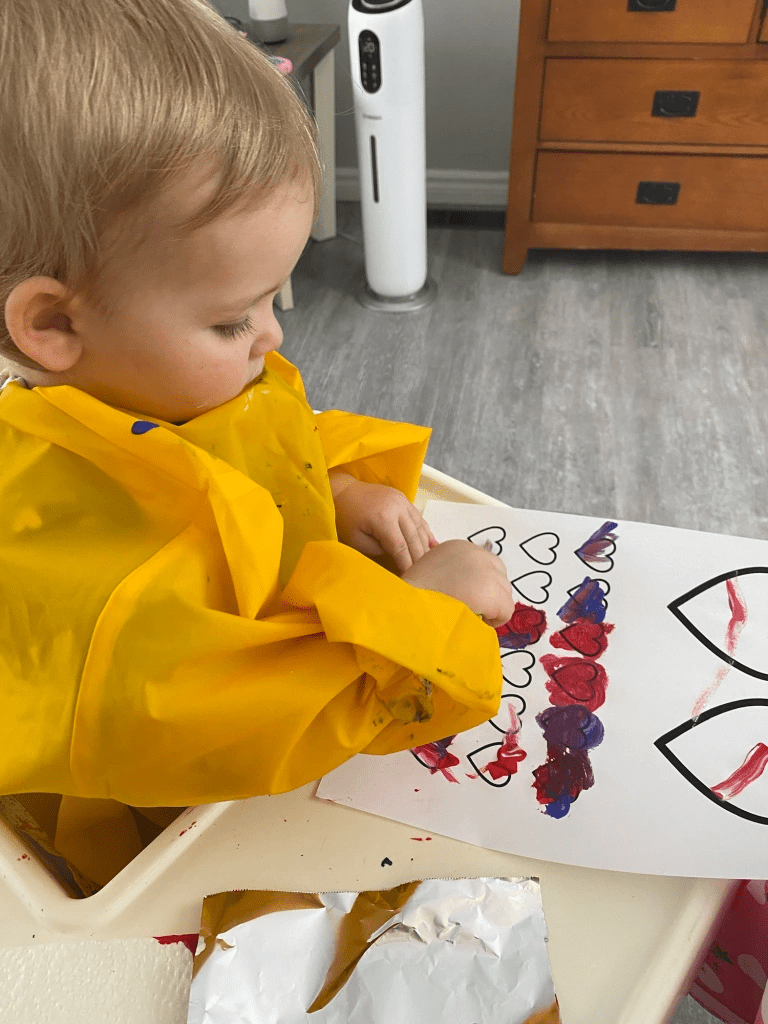
Every day, for the 14 days leading up to Valentines day, I put a heart on their doors with a word that I feel describes part of who they are. I always end on the 14th day with a red heart saying: “You Are Loved”.
This particular year, we joined an online Homeschooling Valentine exchange group on facebook to make and sends cards to other homeschooling students all over Canada. The idea was to incorporate a little geography learning of our country for my 5-year-old, and also understanding more about the postal system.
The result: my particular online group had 30+ students that we needed to make cards for! (Honestly, a little mind boggling in addition to the other valentine cards for family and friends that we were ALREADY going to make!)
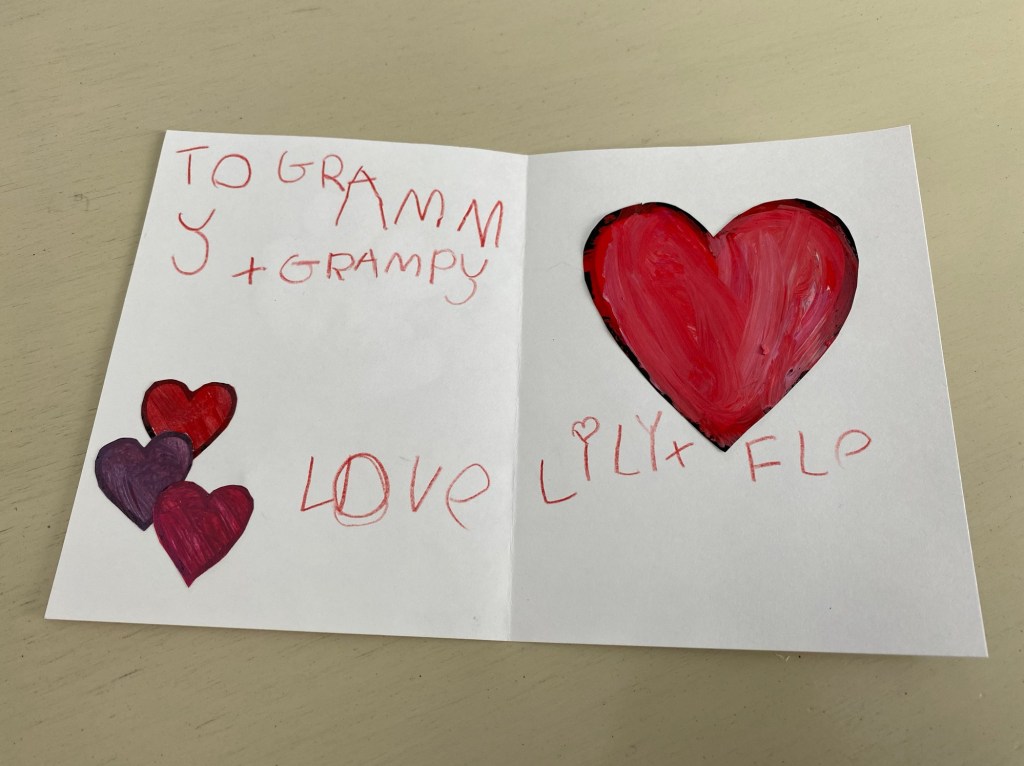
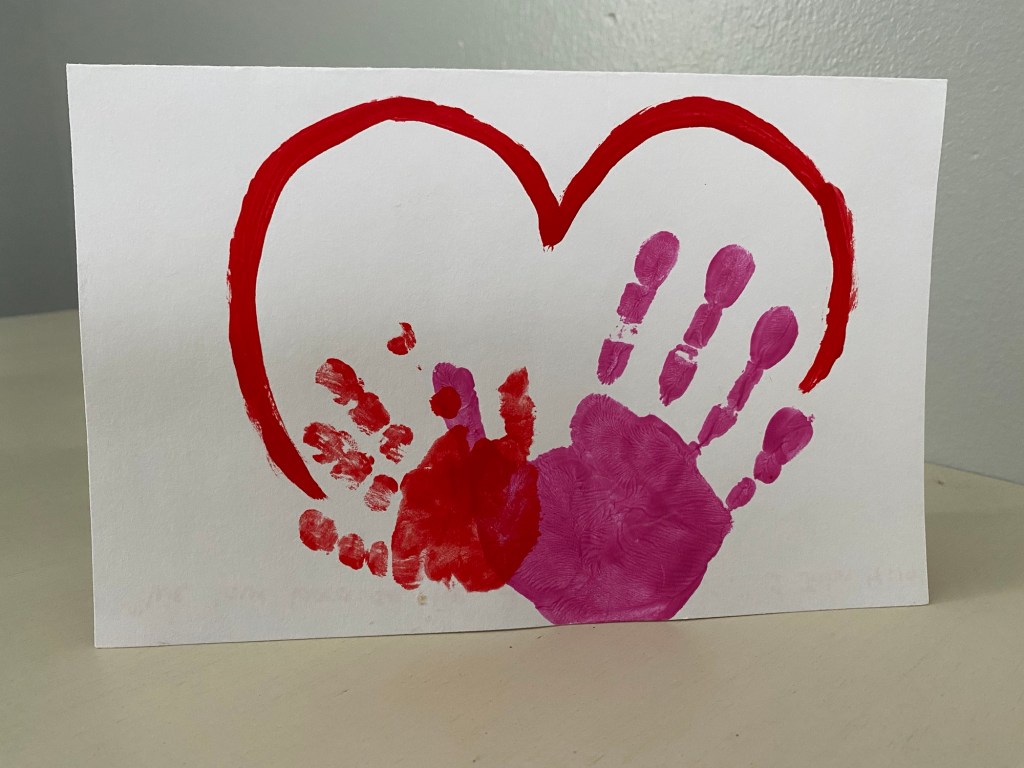
So the girls and I decided to create something that would be relatively simple, yet creative, customizable, and could easily be in a flat envelope (not a bulky card, and less expensive to post).
I also wanted to make something that my youngest (not yet 2) could participate in (and for it to look somewhat still pleasing to the eye!).
I have included here the free template that the girls and I used to paint and cut out for the cards, as you’ll see more in the directions below on how to use this template.
I hope your kids have fun with this creative activity as much as mine did!
3. Cut 1 page of card stock paper in half for two cards, and pre-cut string for balloon hearts and bow.
4. Tie string at one end with ends amounting to number of “balloons” you wish to use on the front of card. Glue all and write on front of card if desired.
5. Glue remaining hearts on the inside of card and write/decorate as desired.
6. Enclose with one of these simple white envelopesthat fit perfectly!
Additional Notes: This activity could be easily done with inserting coloured paper into your printer and then print the template form to eliminate the painting step.
Here are other homemade Valentine Cards we have done in the past:
More Homeschooling Crafts & Activities to Check Out:
Hi, I’m Jessie!
I’m a Wife and Homeschooling Mom living in a remote town in Northern Ontario, Canada.I love making wholesome meals for my family from scratch, homeschooling our girls and learning more about natural living.
Subscribe to Northbird’s email list to get weekly posts on: tasty recipes, activity ideas for kids, natural living tips, and some genuine mom thoughts and encouragement!
Cut 1 page of card stock paper in half for two cards, and pre-cut string for balloon hearts and bow.
Tie string at one end with ends amounting to number of “balloons” you wish to use on the front of card. Glue all and write on front of card if desired.
Glue remaining hearts on the inside of card and write/decorate as desired.
This post contains affiliate links. As an Amazon associate, I earn from qualifying purchases. This means that I make a small commission at no extra cost to you. You can read my full disclosure HERE.
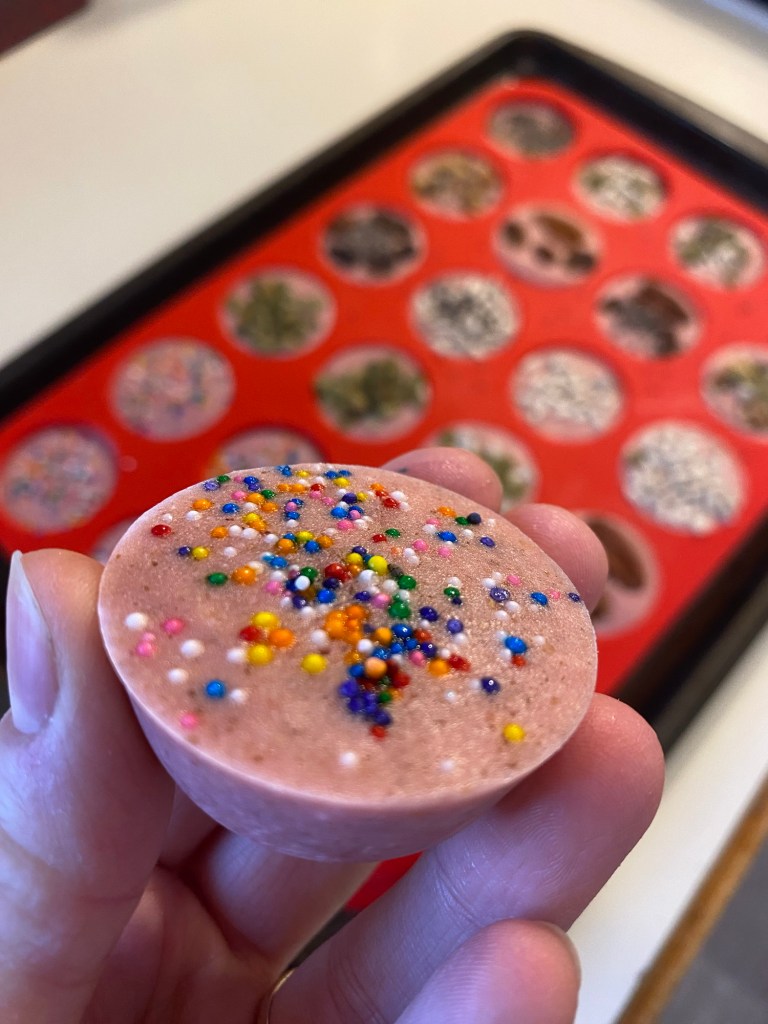
We made a big batch of homemade yogurt the other day, and after setting aside what we needed for the week, we realized that there was still quite a bit left over. So we thought this would be a fun time to experiment with our taste buds! The girls and I had a lot of fun creating this healthy and oh so delicious treat.
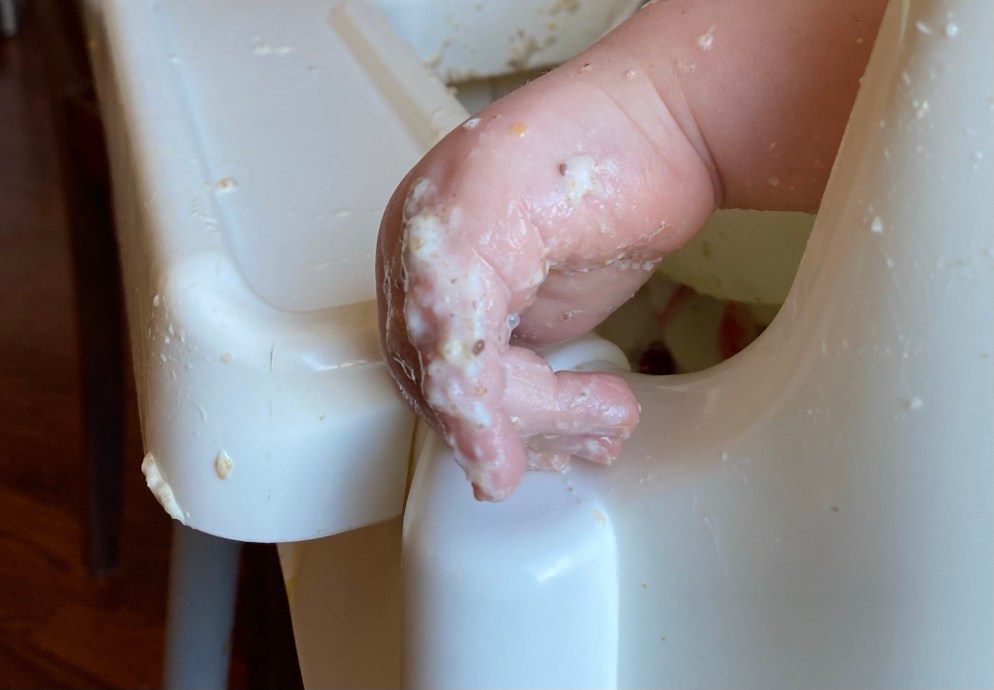
My oldest has enjoyed having these cold homemade yogurt treats as little rewards for completing her schoolwork, chores, and as a healthy desert option over the past week. Being a very high-energy child, she tends to overheat and loves having something cold to help her “cool down” from all her activity. (And this is normal even with eliminating sugar!) Her little sister (not yet 2) is not as excited to eat “cold” sweets and instead prefers to watch the yogurt bombs melt in her hands and then play with the gooeyness…!
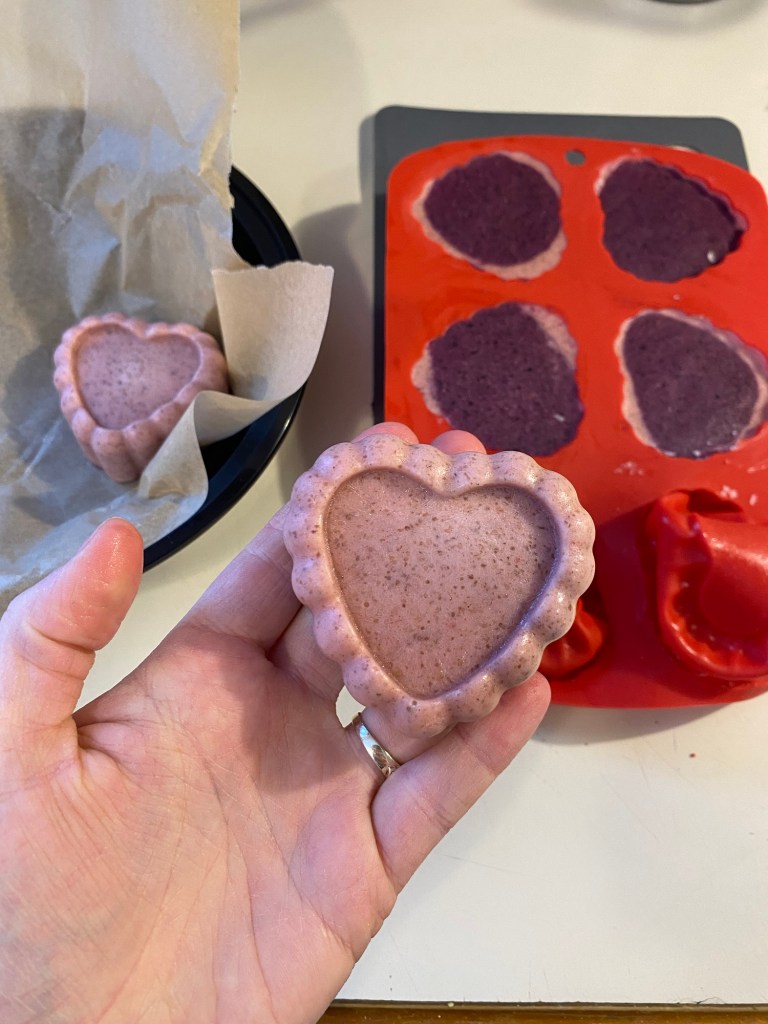
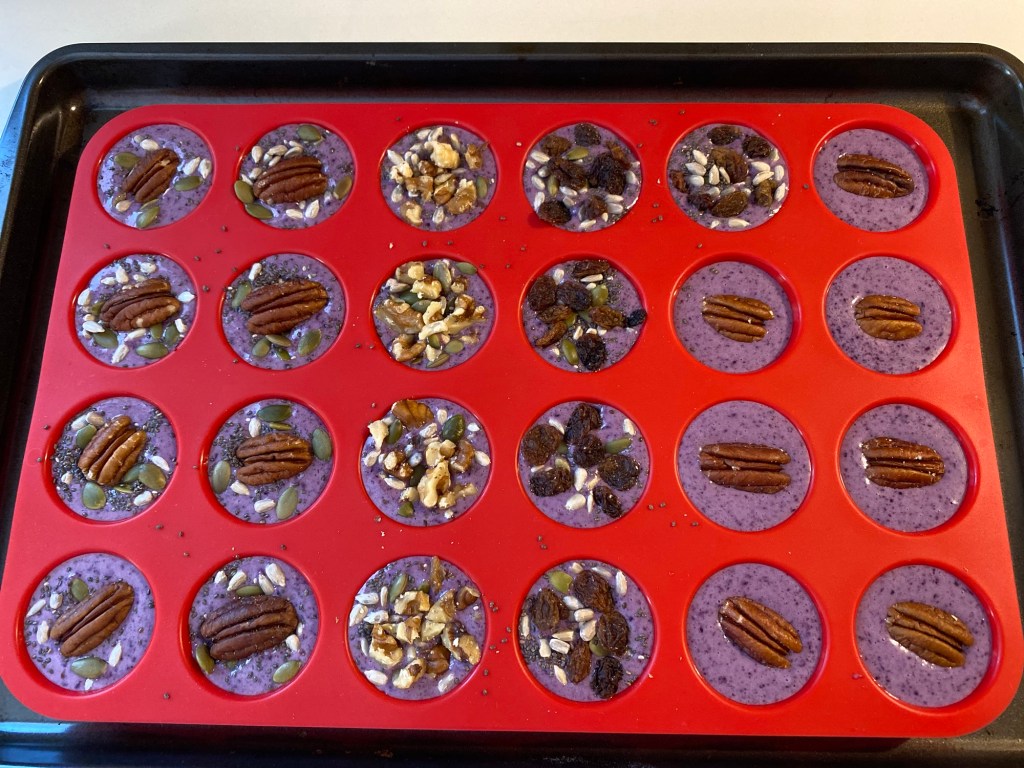
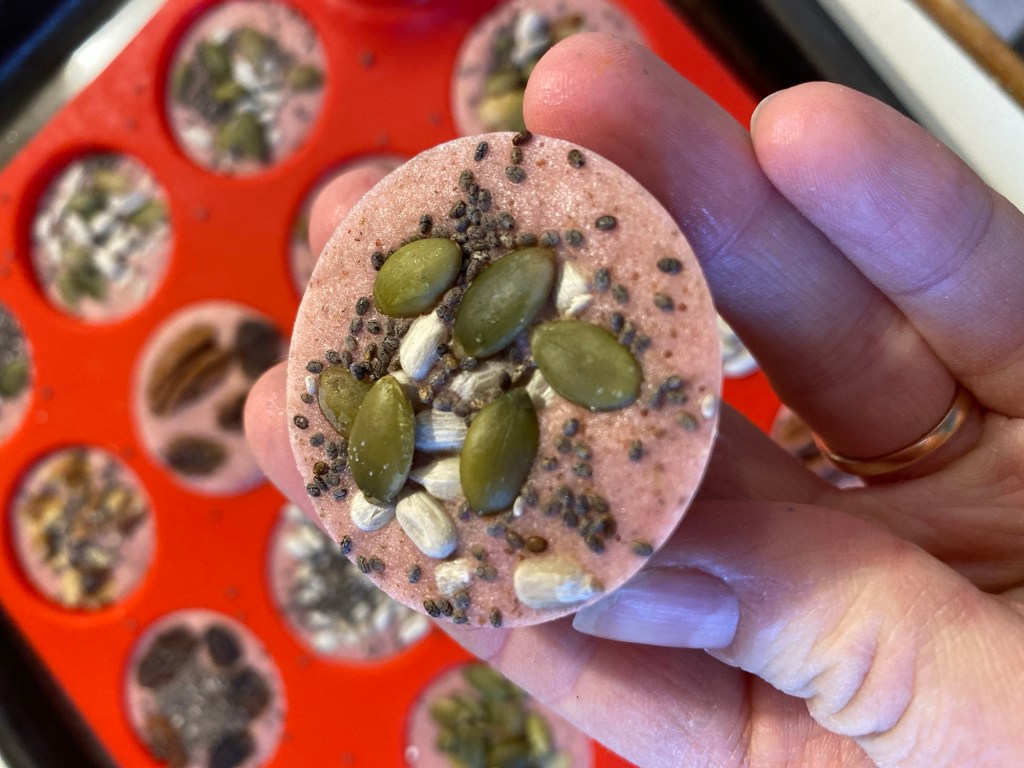
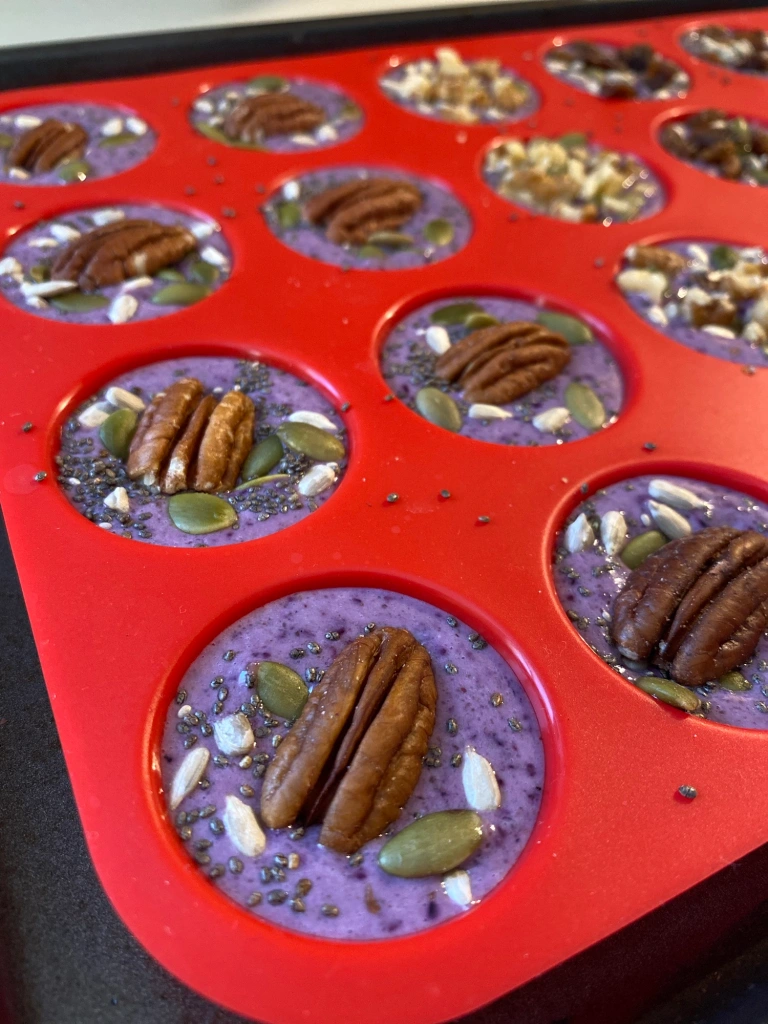
We doubled this recipe and did one batch using frozen strawberries to make the bombs pink, and the other batch using frozen blueberries to make those bombs purple. Perfect colours for these girls! Another time we will experiment with using different frozen fruit, for example: peaches, pineapple and kiwi. (I’m curious to find out if we will get orange, yellow and green!)
I will update this post with my findings when that happens. (Or you can and let me know how it turns out!)
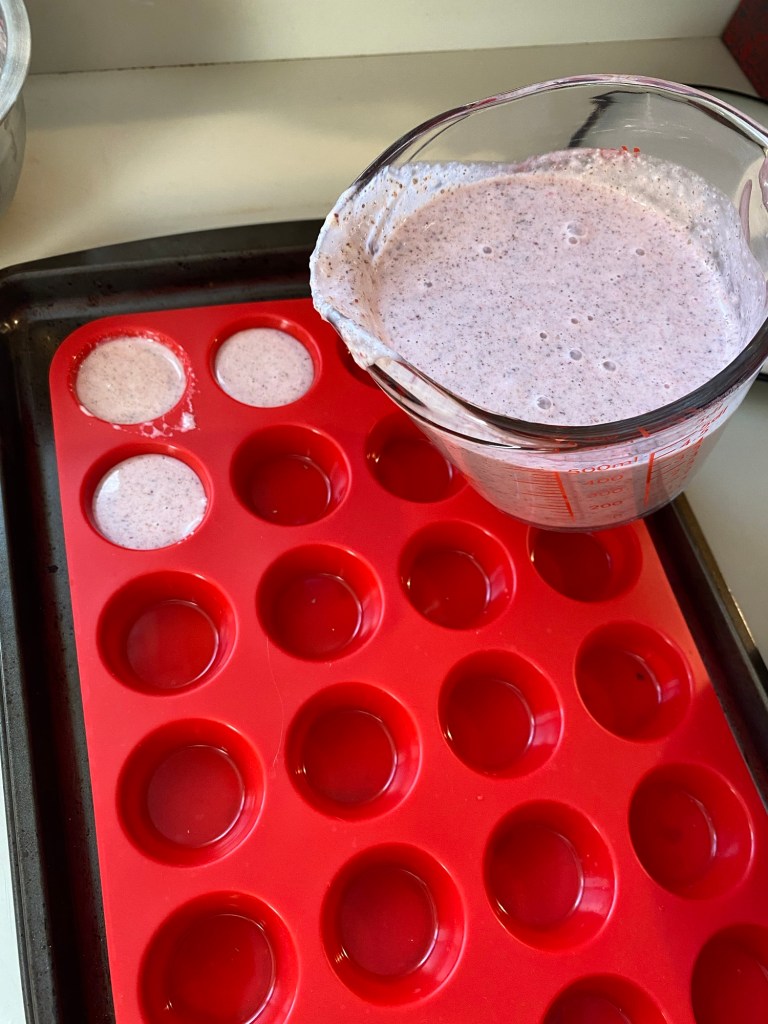
We enjoyed the creativity and hands-on part of this kitchen activity. Once I poured the prepared yogurt/berries/seeds/maple syrup into the silicone molds, it was easy for my daughter to decorate the tops and have fun with it! I also had some heart-shaped silicone molds which were perfect for Valentines Day coming up.
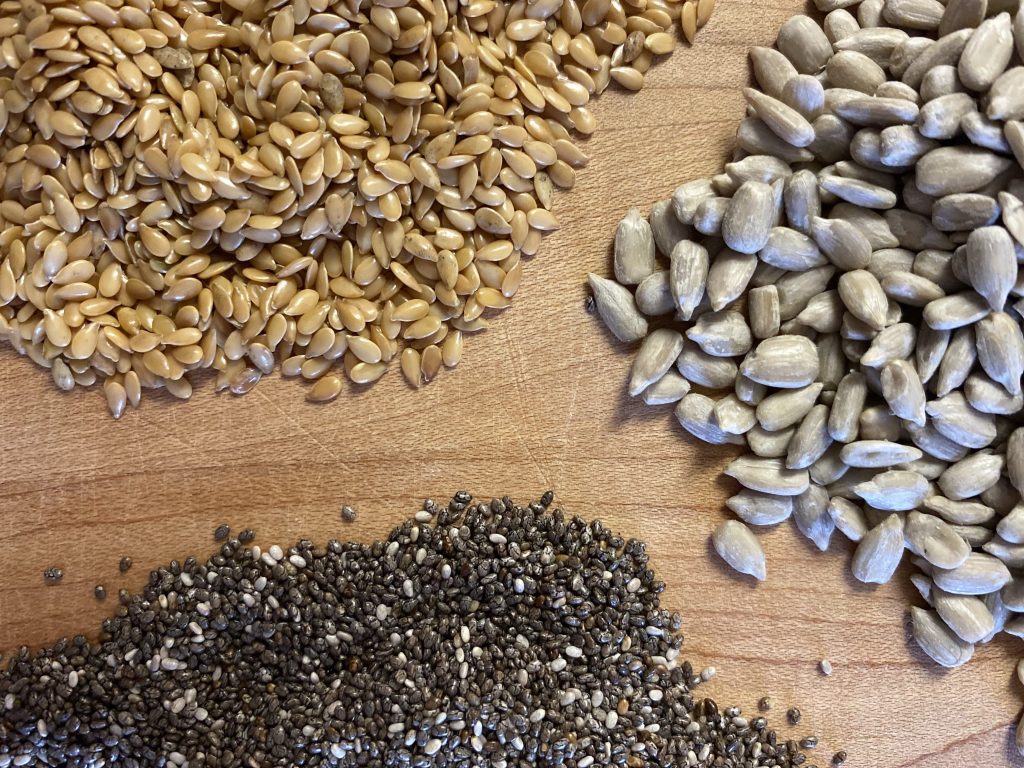
What is our 3 Seed Blend?
My second post ever I did on here featured the 3 Seed Blend Mix that we use quite often in breakfast bowls and other dishes. It is made up of equal parts of blended Flaxseed, Sunflower Seed and Chia Seeds.
When blended up finely, it is easy for your body to digest and absorb all the goodness! It also acts as a natural thickener, and works very well adding it to this frozen yogurt treat without taking over the flavours of the yogurt and berries.
A little more about the Seeds…
Organic Golden Flaxseed:
These are high in fibre and omega-3 fatty acids! They have also been shown to help lower blood pressure and blood sugar, contain protein, improve digestion (hence the fibre) and reduces bloating. Some doctors also claim it to help with weight loss.
Important to note: Nutrition experts recommend the importance of grinding up flaxseed instead of eating it whole. Ground flaxseed is easier to digest and for your body to absorb the nutrients. Avoid buying it pre-ground, as it is best ground fresh and stored in the fridge. At room temperature it will lose some of its nutritional properties, which is why our Naturopath discouraged us from buying the pre ground sold at bulk barn!
We buy organic flax seeds in bulk from a health food store in the south and then put in freezer bags and freeze until we need them. Big $ saver this way and ensures we always have some on hand for various recipes.
Raw, Hulled Organic Sunflower Seeds:
These are notably high in vitamin E and selenium, which act as a powerful antioxidant and supports your immune system and thyroid function. They also contain protein, magnesium, and linoleic fatty acids.
We have also been able to buy these in bulk, and store them the same way as the flaxseeds. It is important to buy them raw and unsalted!
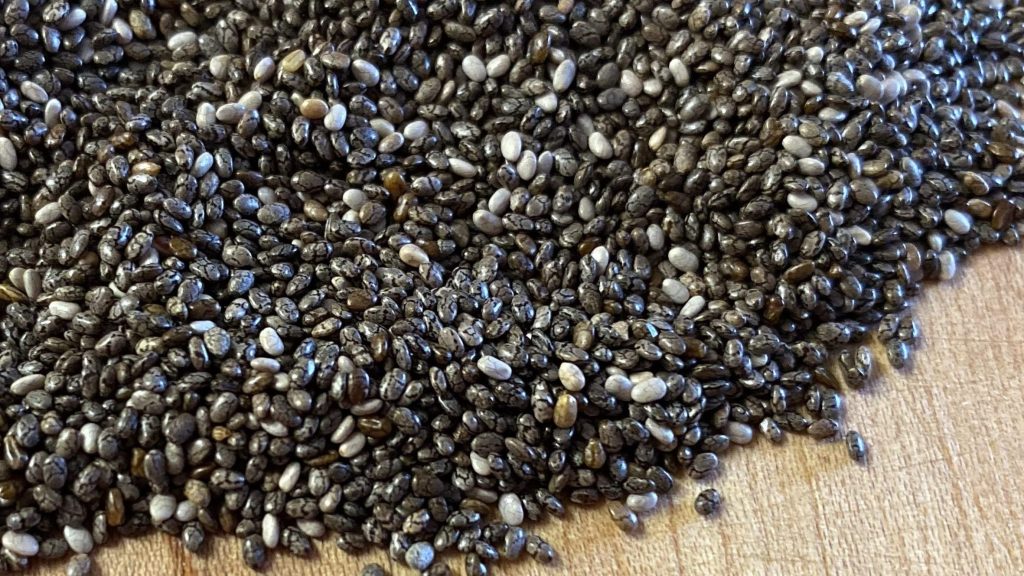
Organic Chia Seeds:
Chia seeds have had their waves of popularity over the past few years, but the science and nutritional values still speak for themselves. Chia seeds are amazing for lowering blood pressure, blood sugar and cholesterol, and improving overall heart health. They are high in fibre, which aids in digestion and reduces bloating.
It is important to soak whole chia seeds for at least twenty minutes before eating them so that they become more digestible. This is true of most edible seeds! If we are eating them whole, we like to soak them in almond milk (see our recipe for homemade almond milk), but some people soak them in water as well.
When they are soaked, the hard seed shell releases a gelatinous-like film around the seed, making it look like frog eggs!
How to Make the 3 Seed Blend:
Click HERE to get specific directions to make your own 3 Seed Blend.
Here’s a short video of how we made these easy Yogurt Berry Bombs!
Mix yogurt, berries, 3 seed blend and maple syrup in a small bowl with an immersion blender (regular blender works great too).
2. Pour into silicone molds or muffin baking sheets (**with paper muffin liners).
3. Top with your choice of sprinkled goodies. Get creative!
4. Place in freezer for a minimum of 2 hours until berry bombs have finished setting.
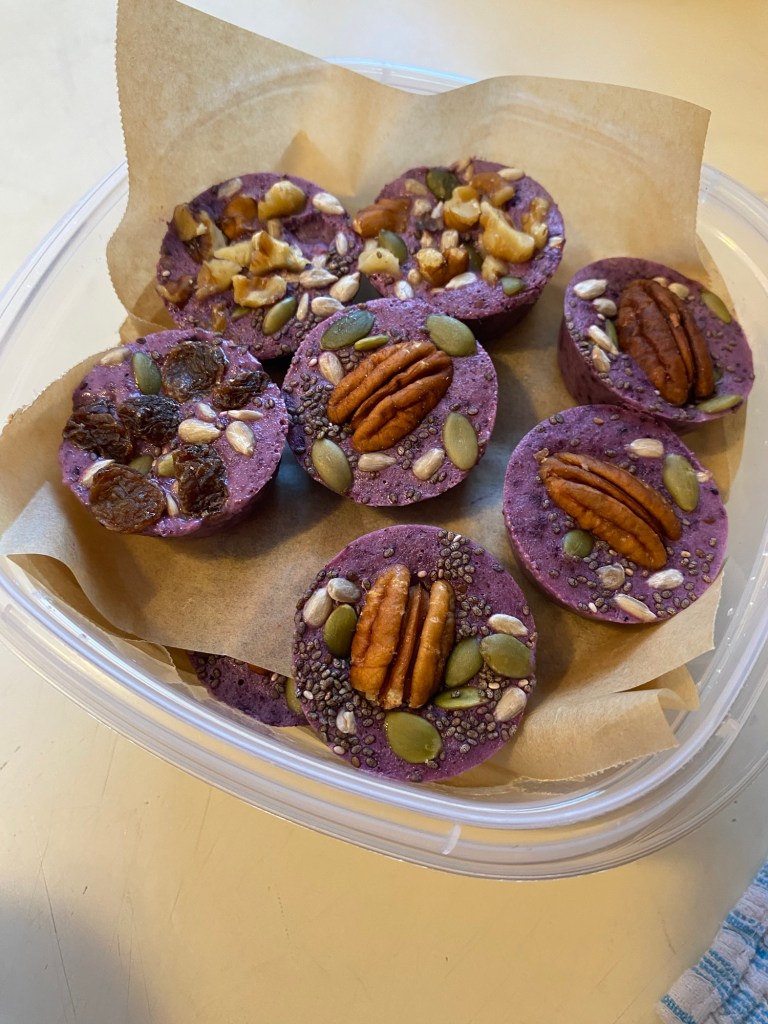
5. Transfer to parchment lined food storage containers and return to freezer until ready to eat.
6. Best to use within 3 months.
More Desert & Snack Recipes:
Hi, I’m Jessie!
I’m a Wife and Homeschooling Mom living in a remote town in Northern Ontario, Canada.I love making wholesome meals for my family from scratch, homeschooling our girls and learning more about natural living.
Subscribe to Northbird’s email list to get weekly posts on: tasty recipes, activity ideas for kids, natural living tips, and some genuine mom thoughts and encouragement!
This post contains affiliate links. As an Amazon associate, I earn from qualifying purchases. This means that I make a small commission at no extra cost to you. You can read my full disclosure HERE.
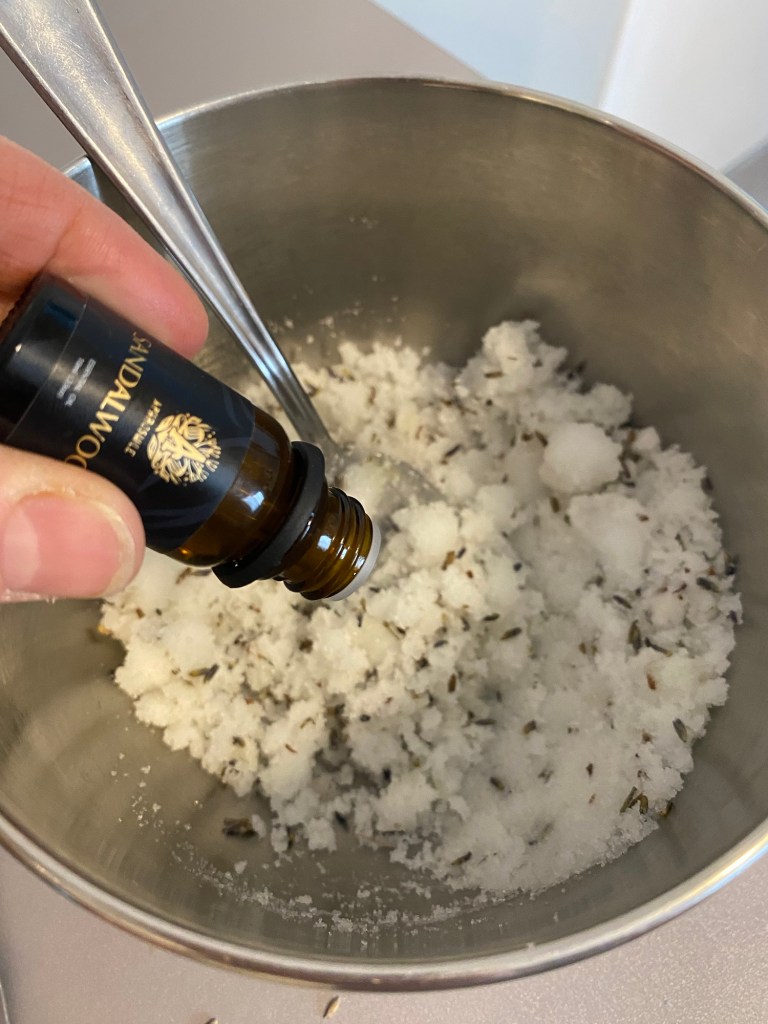
I love this scent combination! Lavender and Sandalwood have got to be some of my new favourites. Sandalwood is a wonderful scent that is often used in shampoos and body wash. At least for me, that’s what I always think of with this scent: Clean and fresh!
Lavender flowers and pure lavender essential oils in particular are always beneficial to have on hand for SO many reasons.
Here’s a short personal story of how lavender has helped me.
A few weeks ago (RIGHT before we left for the holidays), I fell backward to the floor and hit my head pretty hard. I was pretty sure it was a mild concussion due to the immense pain, dizziness and goose egg that followed shortly after. (Thankfully because the fall was backward, I was not as worried that our 20 week baby was harmed in the womb).
The next two days were very difficult and busy with trying to finish packing for going away for two weeks. Balancing ordinary life with two little kids, was also a challenge, and trying to take care of my concussion. Thankfully the hubby was able to take one of those days off to take care of the kids, which made it much easier.
In general, I have a hard time “relaxing” or laying around when there’s lots to do! So that’s also why these few days were particularly difficult.
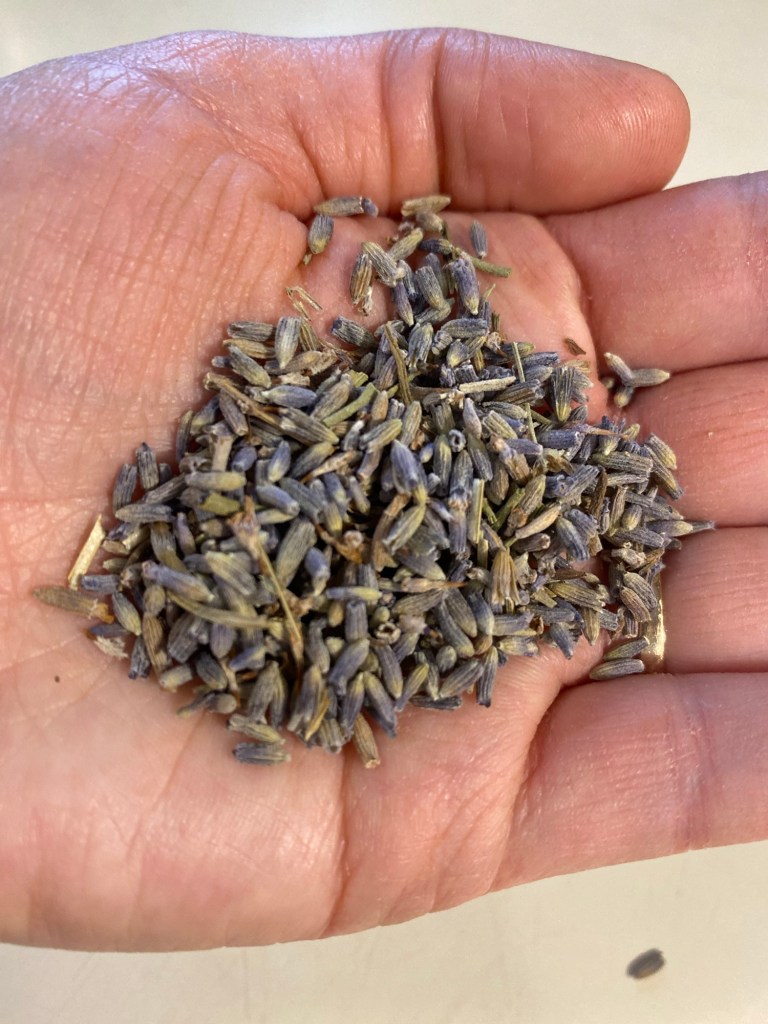
When Jesse and I got married, my aunt had given me a sachet of home-dried lavender flowers that I usually keep in my clothes dresser so that the contents of the drawer smell nice. When the concussion happened, I knew that the relaxing scent of lavender would help in so many ways.
So whenever I lay down to try rest, I put the sachet of dried lavender on the pillow next to me and breathed in the scent. Within a few breaths, I could feel my muscles relax, airways open up more, and headache pain began to decrease.
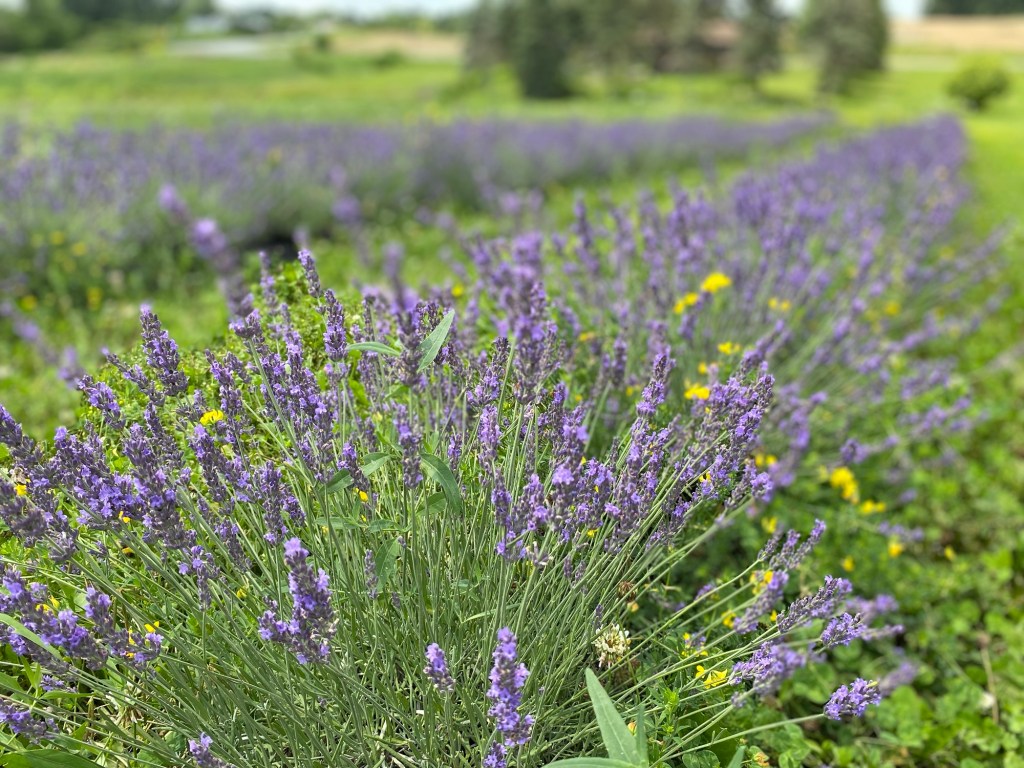
I wish we could grow lavender this far in the north! Perhaps if I get a greenhouse built one of these years then I can experiment with this idea. But until then, I am very thankful for being able to purchase dried lavender online.
On a side note: this past summer, my other aunt and uncle took my mother and I to a lavender farm in the Niagara (Ontario) region, named “Mingle Hill Farms“. It was SO beautiful and calming to walk among the rows of lavender bushes, and breath in the wonderful aroma. If you are in the area, it is definitely worth checking out!
Benefits of using a sugar scrub on your skin:
Improves circulation
Cleanses the skin pores
Removes any dead skin
Moisturizes the skin
Muscle relaxant
Helps to remove toxins
Smooths the skin
What are sugar scrubs made of?
Most scrubs are simply made using products found right in your kitchen! The basis of most scrub recipes consist of: an oil and an exfoliant, with herbs and essential oils used to cleanse and exfoliate the skin, and they do wonders to relax muscles and nerves in the process!
Sugar and salt are most commonly used as an exfoliant, and while there are many types of sugars and salts, my opinion is that the bigger the granules are, the better it will rub on your skin. For example, I would recommend a coarsely ground sea salt over an iodized-finely ground table salt. However, I have also enjoyed learning of many more creative ingredients that can be used as the rough element in a scrub: oatmeal, coarsely ground coffee beans, rice, some seeds, veggies and fruits. Mud and sand are also great!
Dried Herbs/Flowers:
Lavender -Most health food stores carry this, with comparable prices on Amazon due to their popularity.
Rosemary -Check your kitchen spices! Or you can buy at any grocery store.
Peppermint -Easy to grow, or you can forage for wild mint! You can also cut open a peppermint tea bag or purchase larger dried pieces at the grocery store or online.
Rose Petals -You can pick your own wild roses and dry them or look for them at your local health food store, or buy online.
Rosehips -These grow in abundance in the north, so we pick our own wild rosehips and dry them, but you can also purchase them online or check out your local health food store.
Calendula -Easy to grow your own! Also available at health food stores or online.
Camomile -Look for these growing wild! Just be careful to select flowers that are not near roads or have been sprayed. You can also cut open a Chamomile tea bag, or buy the whole flowers at a health food store or online.
Commonly Used Essential Oils for Body Scrubs and Their Medicinal Uses:
Lavender: Lowers stress, anxiety, and headaches. Improves sleep quality, relaxes muscles, lowers pain. Also used to treat head lice and stimulate hair growth.
Peppermint: A great resource for opening up the sinuses and relieving headaches.
Lemon: A bright and refreshing scent that helps to even out the skin tone.
Tea Tree: Aside from being used to treat lice and insect bites, Tea Tree oil is also known as an anti-fungal, and anti-septic and an anti-inflammatory.
Eucalyptus: An antiseptic, anti-fungal, anti-viral, and anti-bacterial essential oil. Fights infection and promotes healing.
Rosehip: Primarily used for treating eczema, acne and rashes. It has linoleic acid in it which shrinks pimples and reduces inflammation.
Sweet Orange Oil: An anti-bacterial, anti-inflammatory, aides in digestion, but most known to act as a mood enhancer and relaxant.
Geranium: Used to treat depression, balance hormones, improve circulation, and sleep aid to name a few.
Carrot Seed Oil: An antioxidant, anti-fungal and anti-bacterial. Primarily used to treat skin infections and inflammations.
Jasmine: Used to treat depression and anxiety, aides in balancing hormones and improving energy and sleep.
Grapefruit: Treats acne and other skin infections. Mood enhancer and may also help with weight loss.
Other Commonly Used Skin Care Oils:
Vitamin E Oil is one that I always add a few drops of into whatever skin care products I am making at the time. It is highly beneficial to the skin because of its moisturizing properties and it is also an antioxidant.
Jojoba Oilis another all-around essential skin oil that is a great moisturizer and cleanser. It is also known to help with treating acne, psoriasis and eczema.
If the coconut is hard, you can soften it a little in microwave or small pot on the stove.
Mix in all the other ingredients.
Let cool if the oil is still warm.
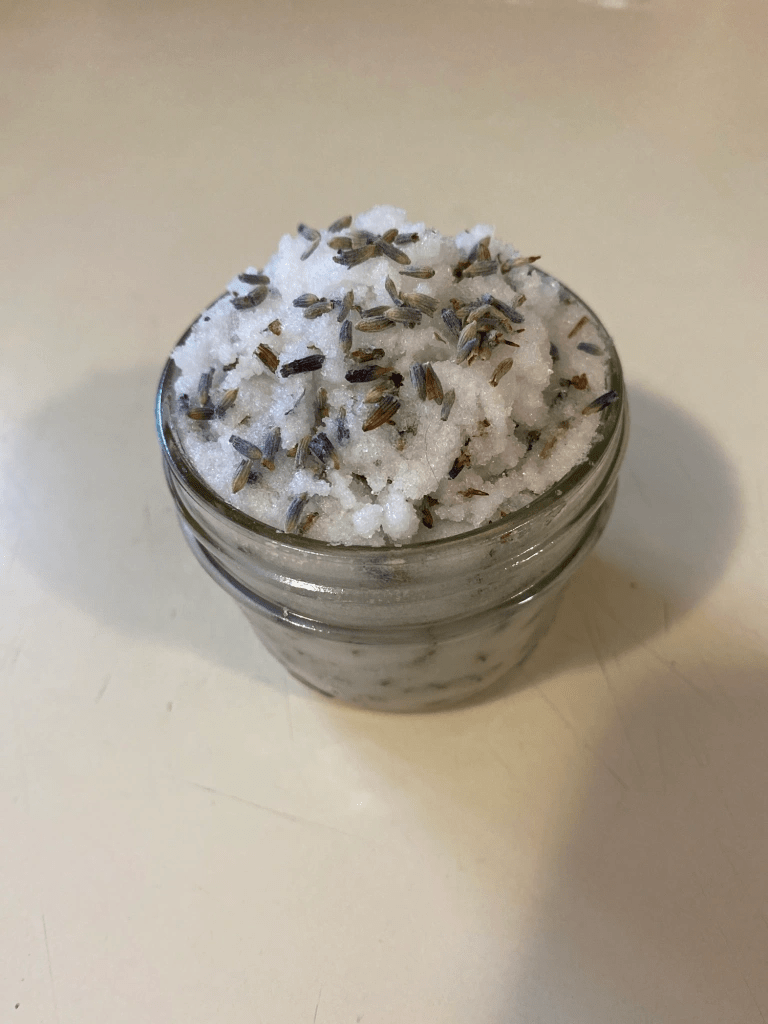
Spoon into the small glass jar, pressing down to fit it all in.
Add a few more dried lavender flowers to the top and a few more drops of lavender and sandalwood oils before closing.
Enjoy!
Optional: Label and tie ribbon or twine around it for a cute DIY gift!
Here are More Sugar and Salt Scrubs to Try!
More Ideas for Natural Living:
Hi, I’m Jessie!
I’m a Wife and Homeschooling Mom living in a remote town in Northern Ontario, Canada.I love making wholesome meals for my family from scratch, homeschooling our girls and learning more about natural living.
Subscribe to Northbird’s email list to get weekly posts on: tasty recipes, activity ideas for kids, natural living tips, and some genuine mom thoughts and encouragement!
An on-going picture collection of various herbs, vegetables, fruits, oils, etc and highlighting some of the amazing health benefits that they have to offer us!
This post contains affiliate links. As an Amazon associate, I earn from qualifying purchases. This means that I make a small commission at no extra cost to you. You can read my full disclosure HERE.
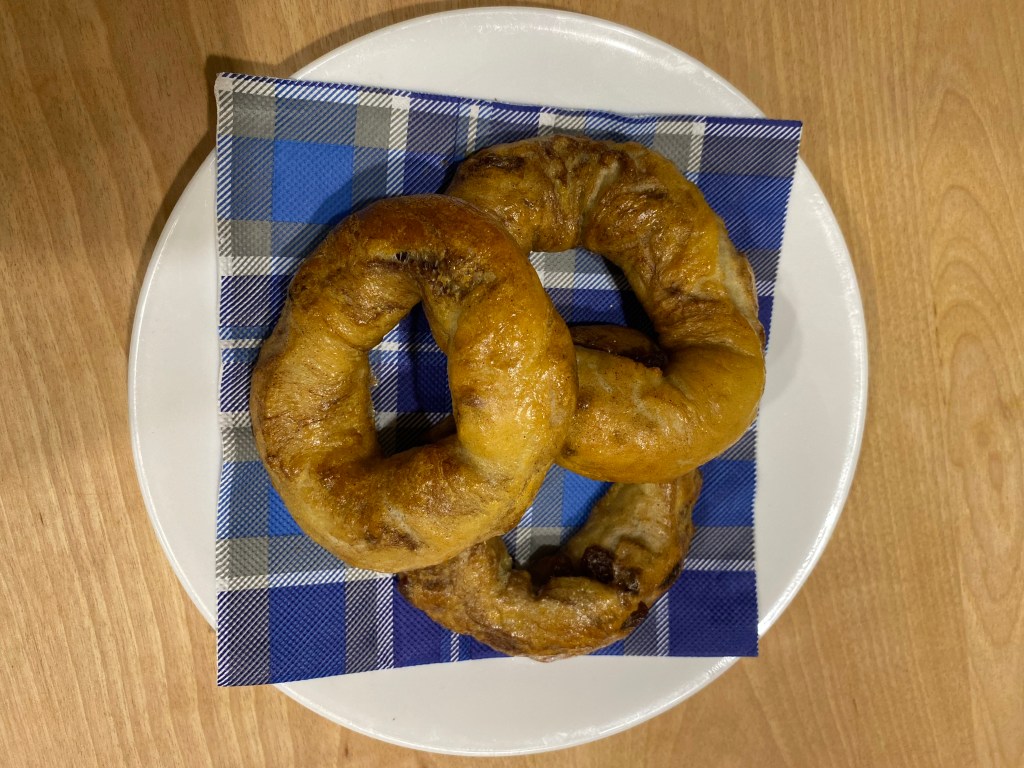
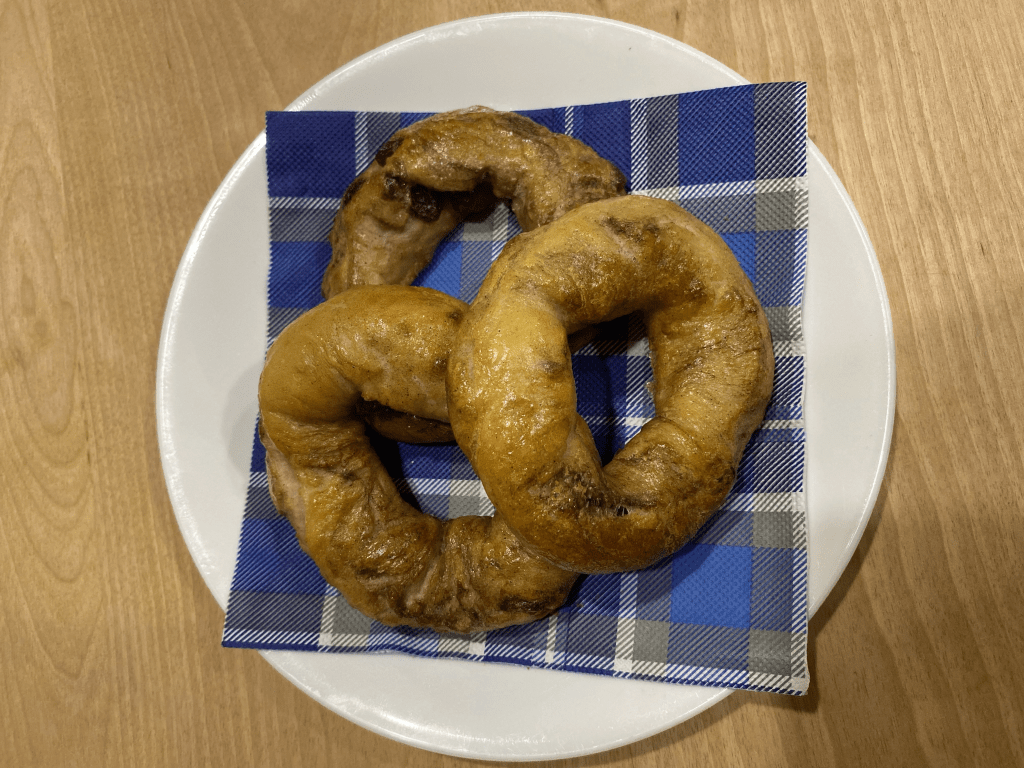
The common bagel is thought to have originated in Poland and other Eastern European countries around the 1600s. Later in the mid 1800s, Jewish immigrants brought the “bagel” with them to the United States and Canada. After this, the classic bagel became increasingly popular and a part of our western cuisine. The varying types of bagels we see today originate from the different communities that the Jewish and European immigrants came from.
The root dough recipe is very similar to that of soft pretzels, and you can easily mix one batch of dough to produce both bagels and soft pretzels. I have done this a few times, since each family member has their particular favourites!
My daughter L had a lot of fun making these bagels with her two cousins A & M. It was a great homeschooling activity and they loved shaping the bagels and picking what flavours they wanted to make (and eat later!)
We will continue to share recipes for the other types of bagels that the girls and I have come up with since that fun day, using the same easy dough recipe!
What is Sourdough?
Sourdough is made using a fermented mixture of flour and water, called the “starter”, and mixed with more water, flour, and usually salt. The dough naturally rises as it ferments during resting stages. There is a lower amount of gluten in sourdough baking, which is why the dough needs to be “stretched” multiple times to help it expand and become fluffy.
Are you new to Sourdough? Click HERE for a little more “starter” information found on my post “How to Make Sourdough Bread”.
Is Sourdough Good For You?
Sourdough is easier to digest than other traditional yeasted baking. The fermenting that takes place while making sourdough baked products produces amino acids, which in turn produces enzymes that help to break down proteins and lower the overall gluten levels in the sourdough products (making it easier to digest).
Whole grain sourdough products have a lower glycemic index than other types of bread, (specifically white flour baking) that have been processed and are packed full of preservatives. This means that sourdough baking has less of a glycemic spike, and more of a gradual release on the glycemic scale, making it a healthier option for those struggling with balancing blood sugar levels.
Sourdough breads and baked goods contain higher levels of protein, fibre and nutrientsthan most traditional yeasted baking.
Sourdough baking still contains many of the natural nutrients that are processed out of the majority of other kinds of breads and baked goods.
Sourdough contains lower levels of phytate, which helps your body to absorb the nutrients easier than other breads.
Whole grain sourdough is considered a high-fiber food, which feeds the good bacteria in your gut and digestive system.
Common vitamins and minerals found in sourdough baking: Calcium, Iron, Manganese, B1-B6, B12, Potassium, Magnesium, Folate, Niacin, Zinc, Thiamin, Riboflavin, Selenium, Phosphorus, and Vitamin E.
Other Sourdough Bagel Recipe Variations:
Use this one recipe to make many more kinds of bagels! Just add the extra ingredients right before the dough is ready to be shaped into bagels. I’ll post more bagel recipes when I can, but until then have fun experimenting and trying some of these out!
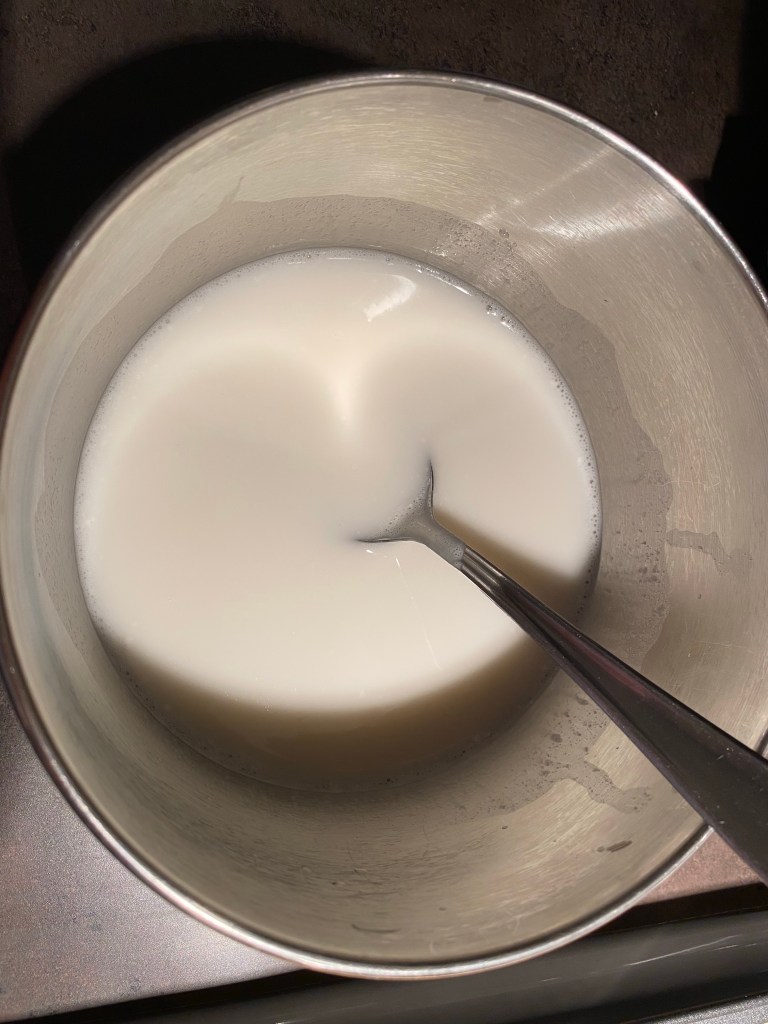
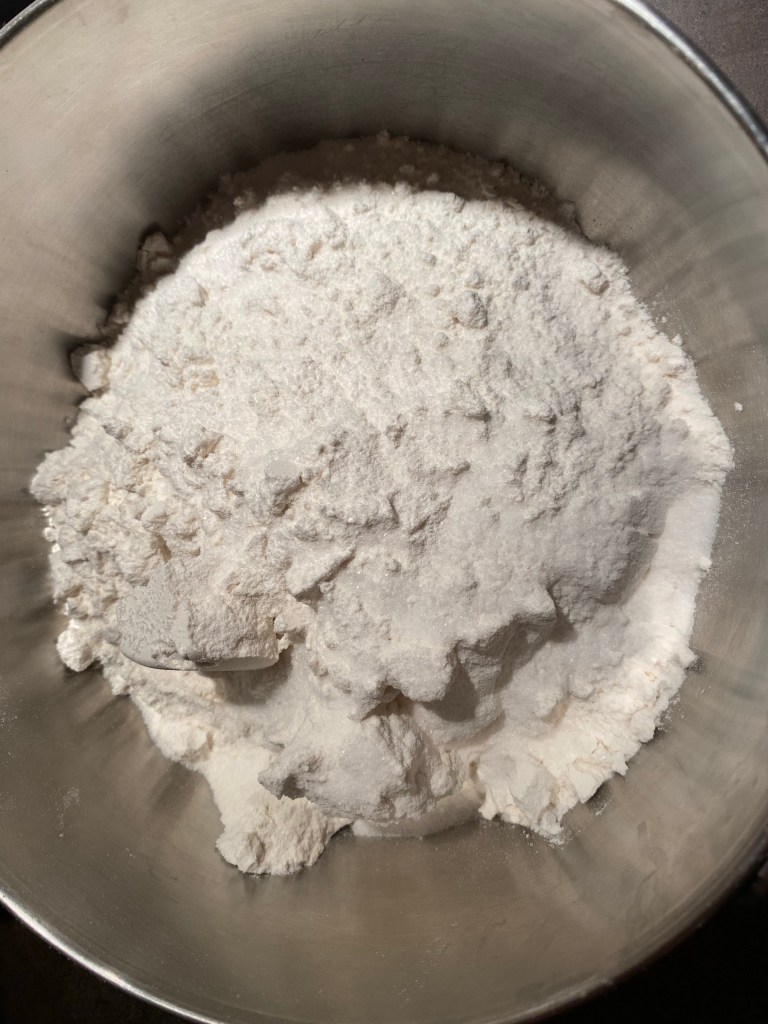
1. Mix your active sourdough starter with the water and honey. Mix the sea salt and flour together and add to the wet mixture. Mix all together well.
2. Cover with a beeswax food cover, plastic wrap or a tea towel and let rest overnight or for 8-10 hours to bulk ferment. Dough will be moist and spongy and will have doubled in size.
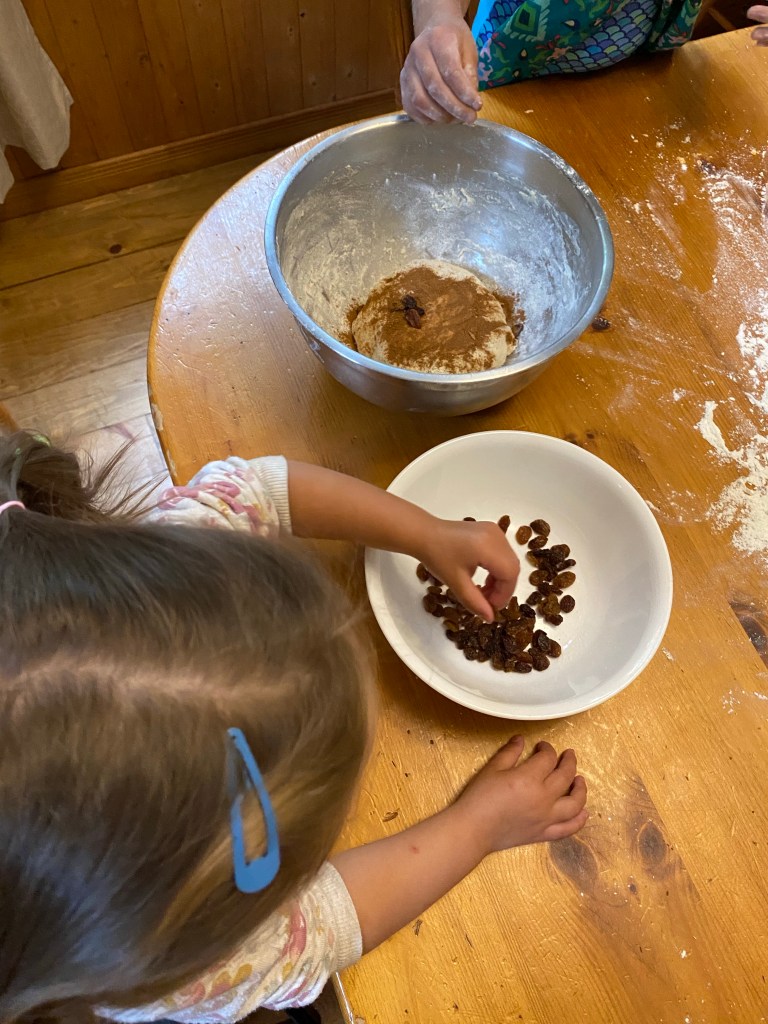
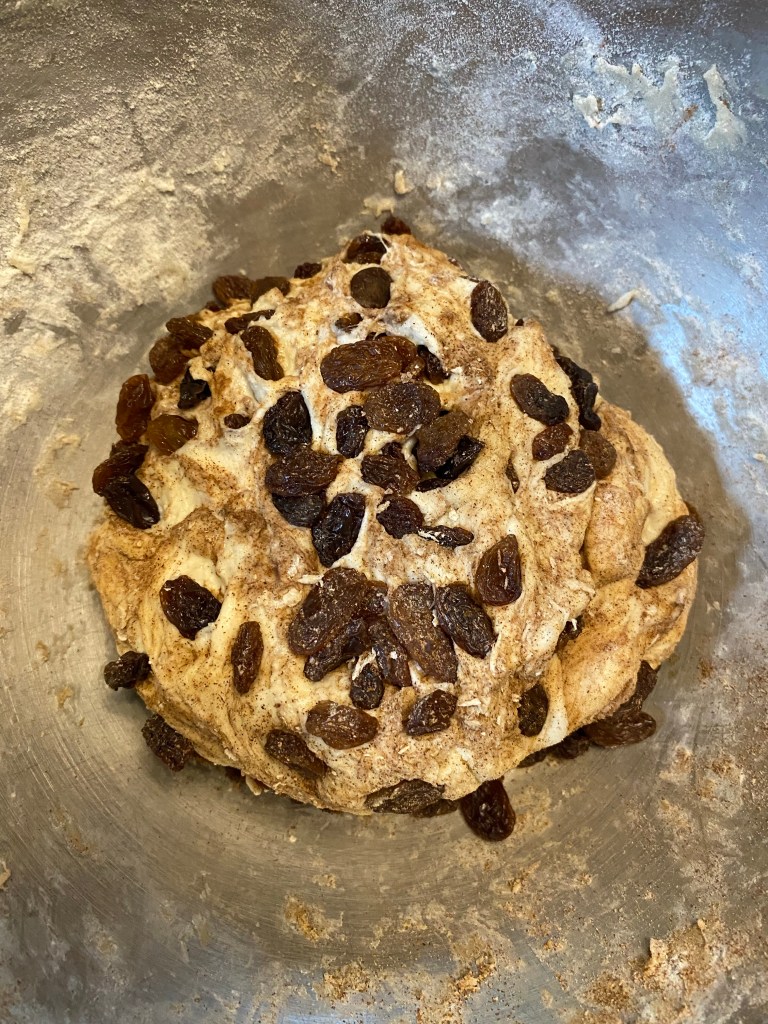
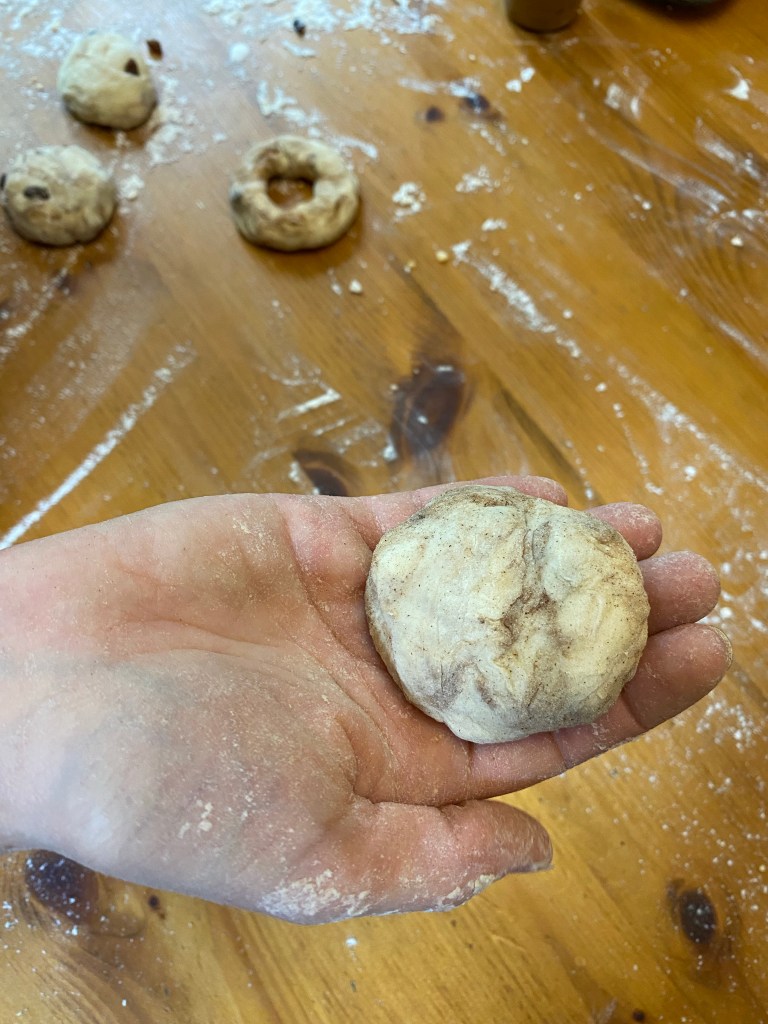
3. Add 1 cup of raisins and 1 tablespoon of ground cinnamon to the bowl and work it into the dough. Knead dough on floured surface for 2 minutes until it is a soft dough ball. Divide into 12 equal pieces.
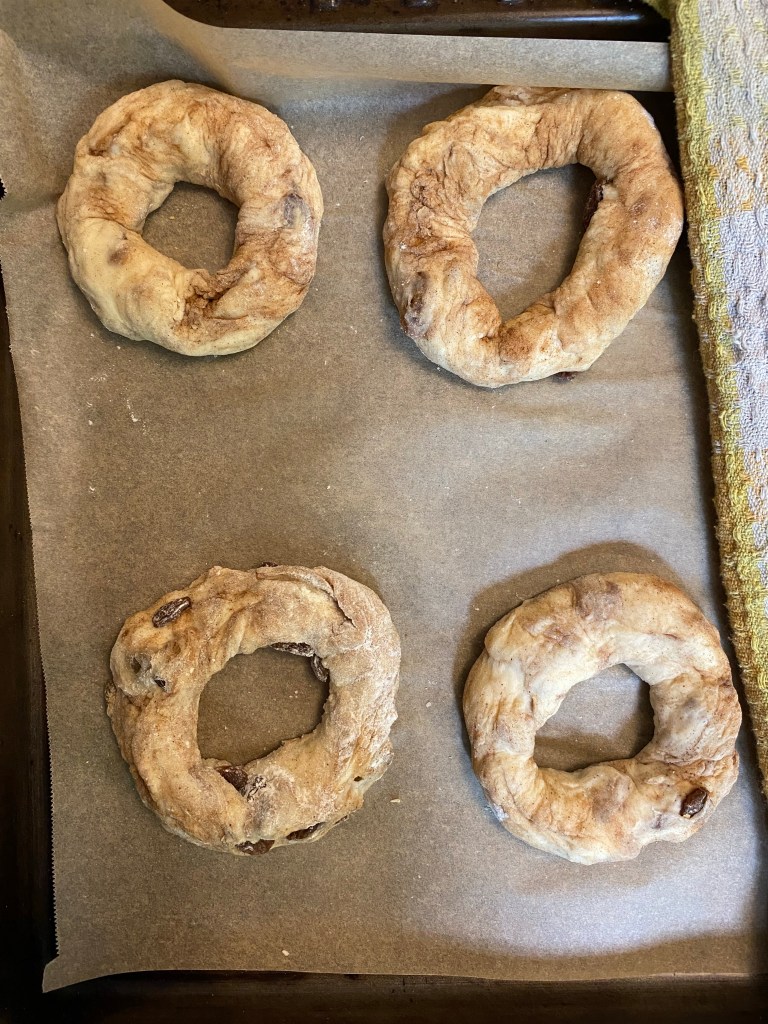
4. Form each piece into a flattened “ball” then poke fingers through the middle to create a hole.
5. Place on parchment-covered baking sheet and cover with a tea towel. Let rest for 1 hour. (Note that at this stage the bagels will expand and puff up, so thinner is good prior to resting. You can always gently stretch them again before putting in the water bath too.)
6. Preheat oven to 425 degrees Fahrenheit.
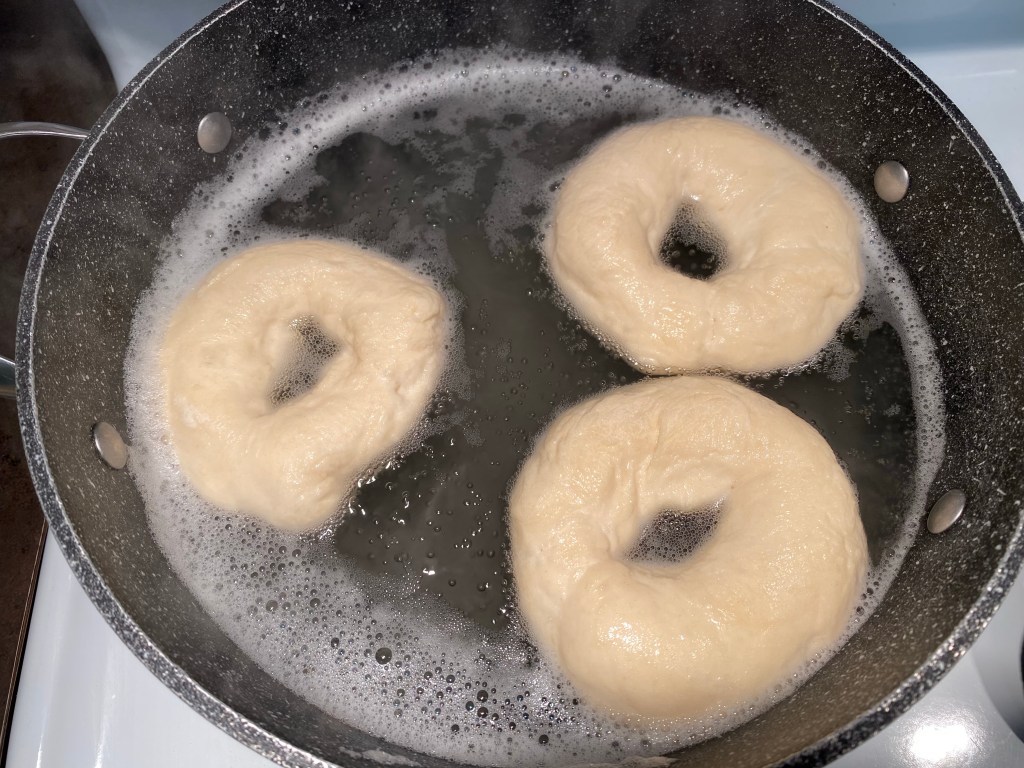
7. Boil 6 cups of water in a large pot and add baking soda and sugar. When it is a rolling boil, add 3-4 bagels gently with a large slotted spoon.
8. Set the timer for 30 seconds, then turn them over for another 30 seconds on the other side. Transfer them back to the baking sheet.
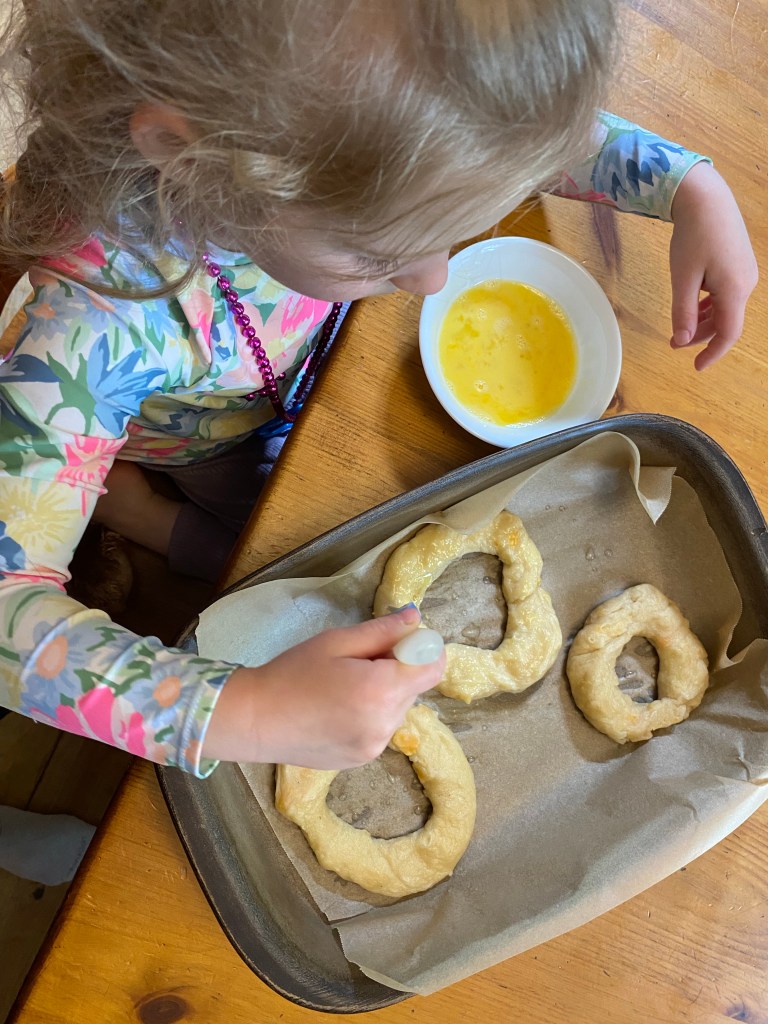
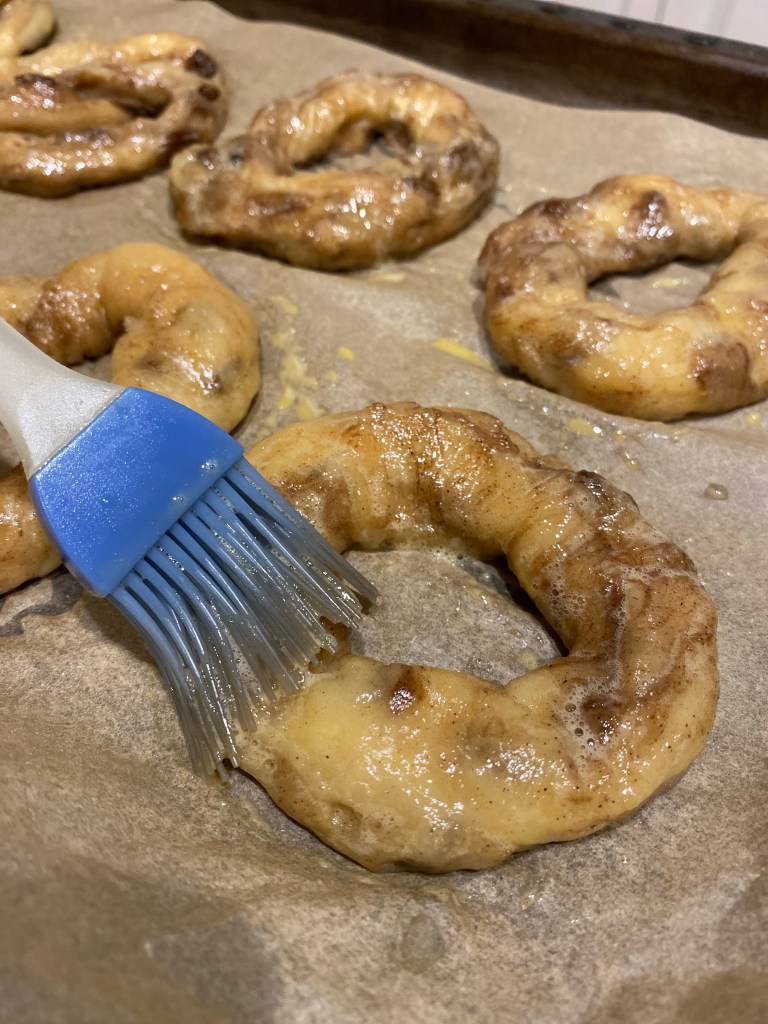
9. When all the bagels are back on the baking sheets, whisk up an egg in a small bowl and paint the bagels with a cooking brush. (This will give them that lovely golden colour on the crust after being baked!)
10. Bake the bagels on the middle rack in oven for 14-16 minutes or until golden brown on top and bottom and cheese starts to bubble. Let cool on baking sheets or rest at least 10 minutes before biting into. Enjoy!
Additional Notes: Store at room temperature for 5 days in an airtight container, or freeze for up to three months in a freezer bag. Thaw in fridge then warm in the oven or microwave to freshen them up!
Enjoyed this recipe?
You can turn this Cinnamon Raisin Sourdough Bagel Recipe into a Sourdough Soft Pretzel Recipe! Click HERE to learn how to shape the pretzels and how to add additional ingredients to make many more types of delicious pretzels!
Other Tasty Sourdough Recipes to Check Out!
Hi, I’m Jessie!
I’m a Wife and Homeschooling Mom living in a remote town in Northern Ontario, Canada.I love making wholesome meals for my family from scratch, homeschooling our girls and learning more about natural living.
Subscribe to Northbird’s email list to get weekly posts on: tasty recipes, activity ideas for kids, natural living tips, and some genuine mom thoughts and encouragement!
Mix your active sourdough starter with the water and honey. Mix the sea salt and flour together and add to the wet mixture. Mix all together well.
Cover with a beeswax food cover, plastic wrap or a tea towel and let rest overnight or for 8-10 hours to bulk ferment. Dough will be moist and spongy and will have doubled in size.
Add 1 cup of raisins and 1 tablespoon of ground cinnamon to the bowl and work it into the dough. Knead dough on floured surface for 2 minutes until it is a soft ball. Divide it into 12 equal pieces.
Form each piece into a flattened “ball” then poke fingers through the middle to create a hole.
Place on parchment-covered baking sheet and cover with a tea towel. Let rest for 1 hour. (Note that at this stage the bagels will expand and puff up, so thinner is good prior to resting. You can always gently stretch them before putting in the water bath too.)
Preheat oven to 425 degrees fahrenheit.
Boil 6 cups of water in a large pot and add baking soda and sugar. When it is a rolling boil, add 3-4 bagels gently with a large slotted spoon.
Set the timer for 30 seconds, then turn them over for another 30 seconds on the other side. Transfer them back to the baking sheet.
When all the bagels are back on the baking sheets, whisk up an egg and paint the bagels with a cooking brush. (This will give them that lovely golden colour on the crust after being baked!)
Bake the bagels on middle rack in oven for 14-16 minutes or until golden brown on top and bottom and cheese has started to bubble. Let cool on baking sheets or rest at least 10 minutes before biting into!
Store at room temperature for 5 days in an airtight container, or freeze for up to three months in a freezer bag. Thaw in fridge then warm in the oven to freshen them up.
Nutrition
Per 1 Cinnamon Raisin Bagel: 274 calories; 5.8 g fat; 47.6 g carbohydrates;
8.7 g protein.
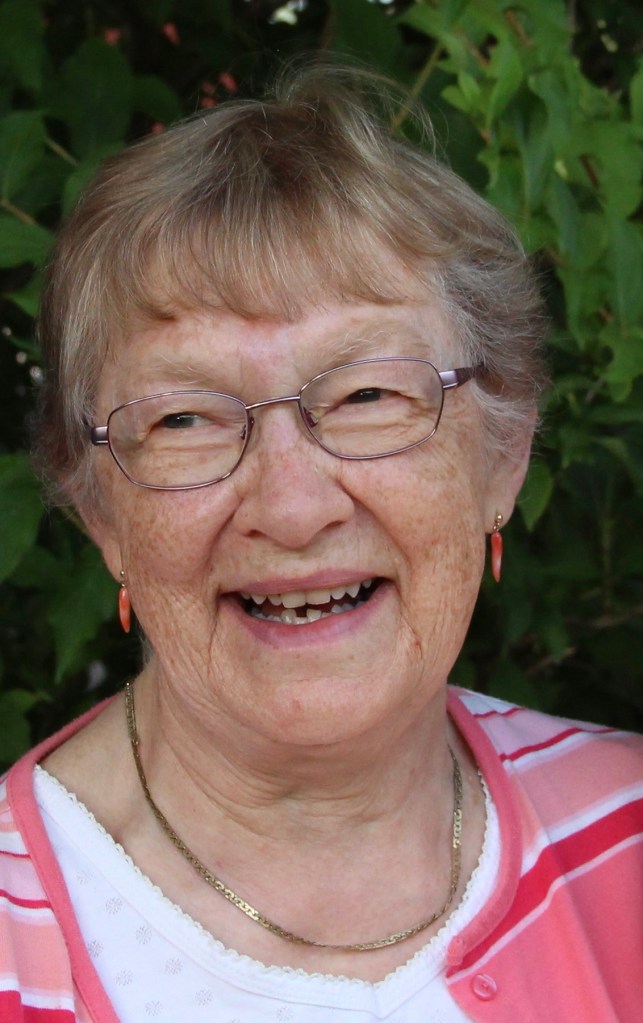
This past year we said goodbye to my grandmother “Juanita”. I’m not intending to make this a sad post by any means, but I wanted to give her a little tribute on here and share with you a part of her very interesting and inspiring life story.
Please note: story credits also go to my Aunt A and parents S & S for their help in getting some historical facts strait.
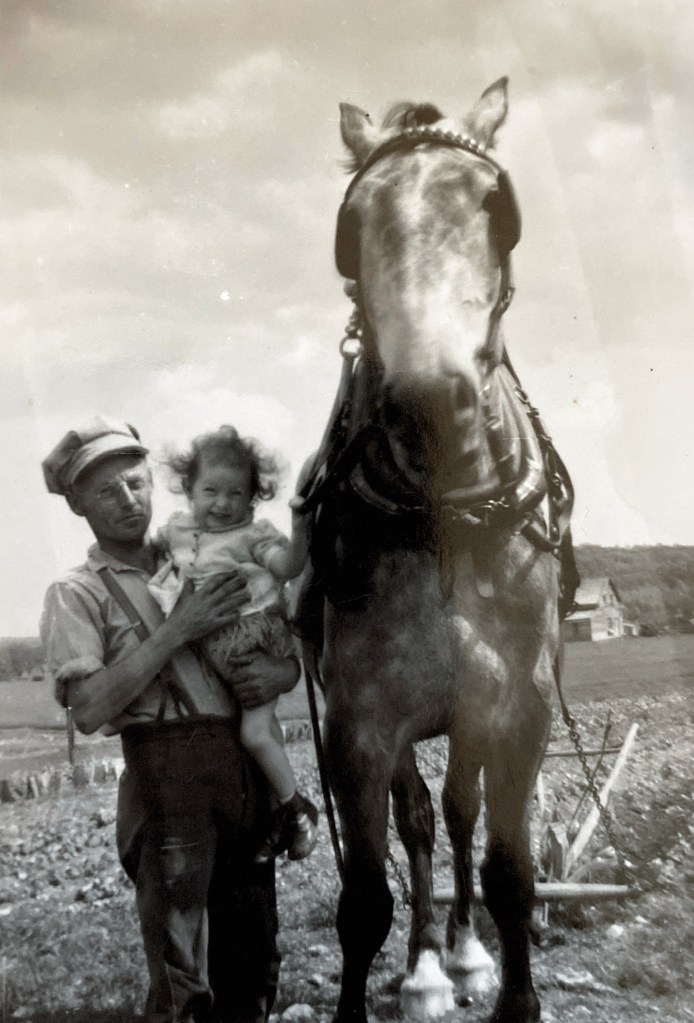
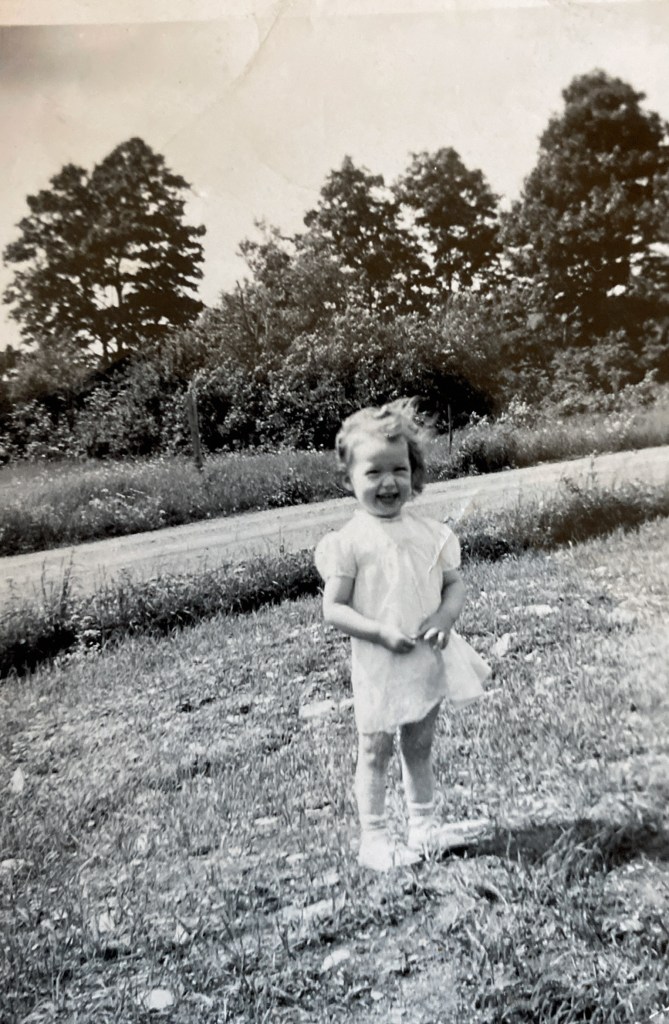
Juanita was born in a small farming town in Eastern Canada. When she was a child, she was diagnosed with severe epilepsy, a diagnosis that she would struggle with her whole life.
When she was 16, a nice young man named Stanley moved in to the boarding house across the street. His landlady was a notable matchmaker and thought it would be fun to set the two of them up on a date.
She told Stanley “Juanita is hoping to go to the cinema tomorrow night with you.”
She told Juanita “Stanley would like to take you to the cinema tomorrow night.”
The movie they watched? “An Affair to Remember.” I don’t think there was an affair that evening, but it was certainly an evening to remember because after that they started going out.
It wasn’t long after Juanita’s graduation from high school that they knew they wanted to get married.
Then a curveball hit Juanita’s small town world. Stanley, who worked at the local bank, was offered a management job at the Bank of Nova Scotia in the Dominican Republic. But the bank would only hire him on the condition that he go there as a single man.
So off he went… and two months after his arrival, Stanley announced to his co-workers that he was engaged to a girl named “Juanita”. His co-workers, assuming that “Juanita” was a Dominican, were amazed that he had wasted no time getting to know a local girl, not realizing that this “Juanita” was from back home!
Juanita had never traveled or left her home county before, so after packing her wedding trousseau she was escorted to the airport and set off to get married in a new country, without any of her friends or family present. She was 18 years old.
Stanley’s co-workers and their wives at the bank put on a wedding reception for them and helped Juanita get settled in her new home. The next year my father was born, and a little later, my aunt.
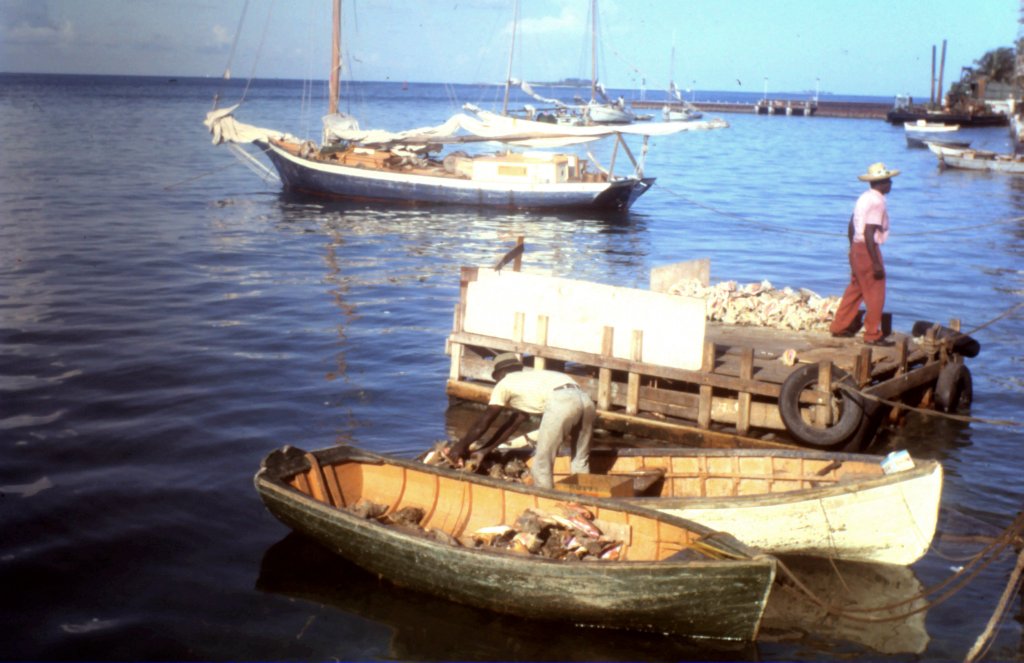
1961 was a turbulent year in the DR, with dictator Rafael Trujillo being assassinated and replaced by a democratically elected president. In 1963, a coup overthrew the government and turbulence continued for the next two years, developing into the Dominican Civil War. In April 1965 the United States dispatched 22,000 soldiers to the DR, occupying Santo Domingo.
At this time, ex-patriots and foreign civilians were advised to evacuate out of the country. Almost overnight, my grandparents had to pack a small suitcase of belongings and flee the city, not an easy thing with two small children!
They were air-lifted by helicopter to the USS Boxer, an aircraft carrier stationed nearby. They lived on the ship for a week before being taken ashore in Puerto Rico, flying to New York, and from there they travelled back to their family in the Maritimes.
Before they left, Stanley and one of his good friends and co-workers at the bank were tasked with making sure all the bank’s gold coins got safely smuggled out of the city in the middle of the city being in complete chaos! I’m not sure I heard the full story, but it was definitely not an easy responsibility!
Six months later the fighting had settled down, so Stanley and Juanita decided returned to the DR to attempt to resume their lives there, but after a few post-war altercations, (including a friend of theirs losing his life to a grenade very near them), they decided to return to Canada for good.
Stanley and Juanita later moved closer to Toronto where he continued working with the bank and she raised their kids. Sadly, while on vacation in the United States a few years later, Stanley had a sudden heart attack and died.
Juanita was now a widow and although her two children were now young adults, they were moving on with their lives and shortly after moved to homes of their own. She had to learn to live on her own while continuing to struggle with epilepsy.
She became involved in her local church and made some close friends during this time. Serving others seemed to help with her grief and keep her busy.
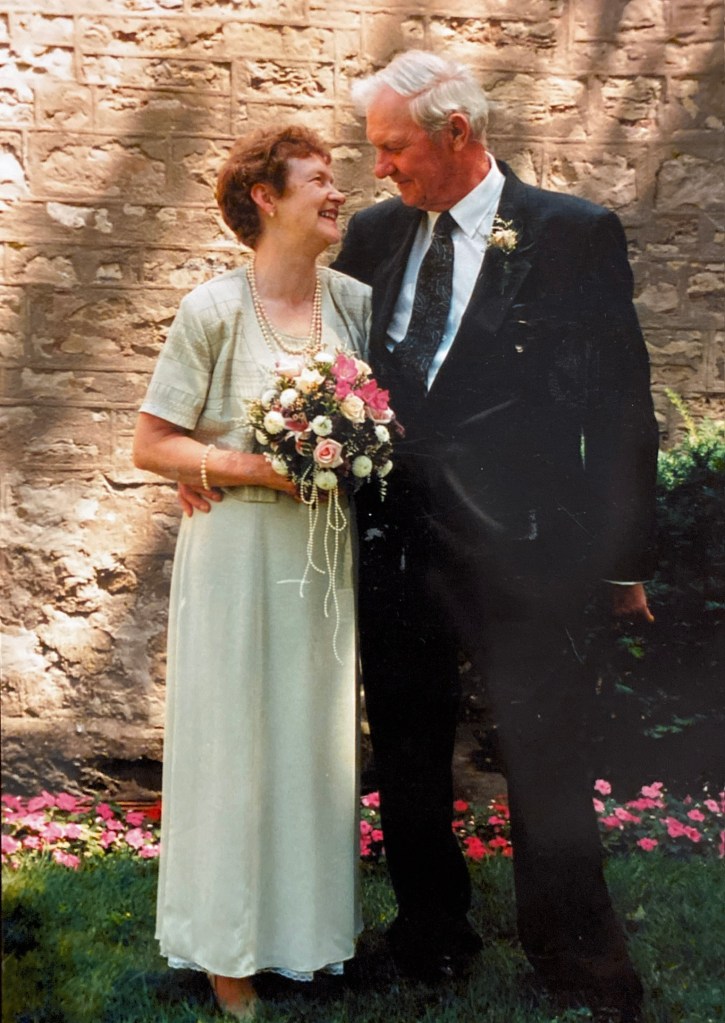
13 years later, she was on a cruise with one of her friends and met a handsome farmer named “Dan”, who was recently retired, travelling alone, and was a widower.
They struck up a friendship during this cruise, and continued to meet back in Ontario after the cruise was over.
After a time, he asked her if she would move in with him to his farmhouse. She said no, but that she’d marry him instead!
The next few years were happy ones for Dan and Juanita. They travelled on many cruises all over the world, seeing many different cultures and places.
I have many postcards from their adventures and being homeschooled at the time, it was a natural inquiry to geography and history from some of their travels.
As their health and energy started to drop, they became more settled into their new condo and took smaller local trips around southern Ontario.
Whenever my family and I would come south to visit, there was always a pre-scouted adventure or local outing lined up to do with them. It was important to them that we learn as much as we could about our Canadian heritage and appreciate what we have.
Every trip always included watching the ships go through the Welland Canal, and dinner at the Mandarin or Swiss Challet.
When Dan passed away from cancer a few years later, Juanita’s epilepsy became more severe, leading to falls and she was unable to take care of herself. My aunt and family brought her to live with them for the next few years until she moved into a senior home.
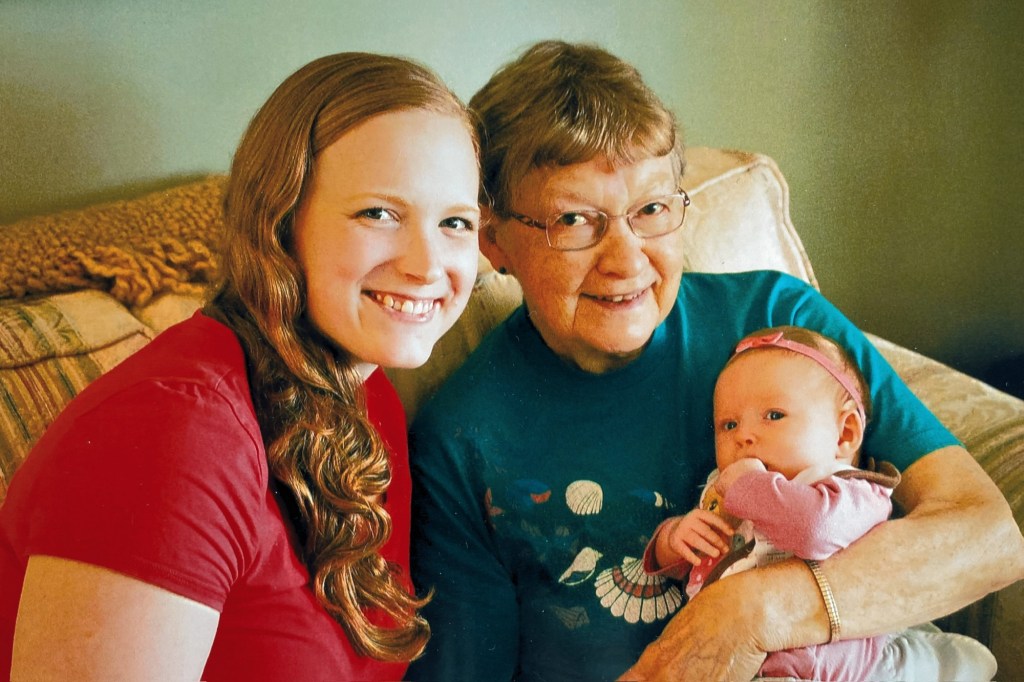
Although this season was difficult for her health, she enjoyed spending time with her grandkids and especially the great-grandkids that began to arrive! Within five years there were 9 little ones that she loved to cuddle and give rides to on her walker.
Gigi meeting our first daughter
Gigi meeting our second daughter
Although my grandmother no longer had energy for socializing much or writing letters, she did her best to stay in touch by phone and always remembered when we had a birthday.
She loved the Lord, and loved her family. She had a strong, stubborn, and sometimes difficult personality to understand, but she knew she wasn’t perfect.
In her bible, there were a few things that we found written and underlined that provided insight into her faith and walk with the Lord.
I hope it provides some encouragement to those that are reading this.
“There is a time for everything, and a season for every activity under the heavens:A time to be born and a time to die, a time to plant and a time to uproot, a time to kill and a time to heal, a time to tear down and a time to build, a time to weep and a time to laugh, a time to mourn and a time to dance, a time to scatter stones and a time to gather them, a time to embrace and a time to refrain from embracing, a time to search and a time to give up, a time to keep and a time to throw away, a time to tear and a time to mend, a time to be silent and a time to speak, a time to love and a time to hate, a time for war and a time for peace. What do workers gain from their toil? I have seen the burden God has laid on the human race. He has made everything beautiful in its time. He has also set eternity in the human heart; yet no one can fathom what God has done from beginning to end.” Ecclesiastes 3:1-11
3 “You discern my going out and my lying down; you are familiar with all my ways. 4 Before a word is on my tongue you, Lord, know it completely. 5 You hem me in behind and before, and you lay your hand upon me. 6 Such knowledge is too wonderful for me, too lofty for me to attain.
7 Where can I go from your Spirit? Where can I flee from your presence? 8 If I go up to the heavens, you are there; if I make my bed in the depths, you are there. 9 If I rise on the wings of the dawn, if I settle on the far side of the sea, 10 even there your hand will guide me, your right hand will hold me fast. 11 If I say, “Surely the darkness will hide me and the light become night around me,” 12 even the darkness will not be dark to you; the night will shine like the day, for darkness is as light to you.
13 For you created my inmost being; you knit me together in my mother’s womb. 14 I praise you because I am fearfully and wonderfully made; your works are wonderful, I know that full well. 15 My frame was not hidden from you when I was made in the secret place, when I was woven together in the depths of the earth. 16 Your eyes saw my unformed body all the days ordained for me were written in your book before one of them came to be.” Psalm 139:3-16
“The Lord is my shepherd; I shall not want. 2 He makes me to lie down in green pastures; He leads me beside the still waters. 3 He restores my soul; He leads me in the paths of righteousness For His name’s sake.”Psalm 23:1-3 (NKJV)
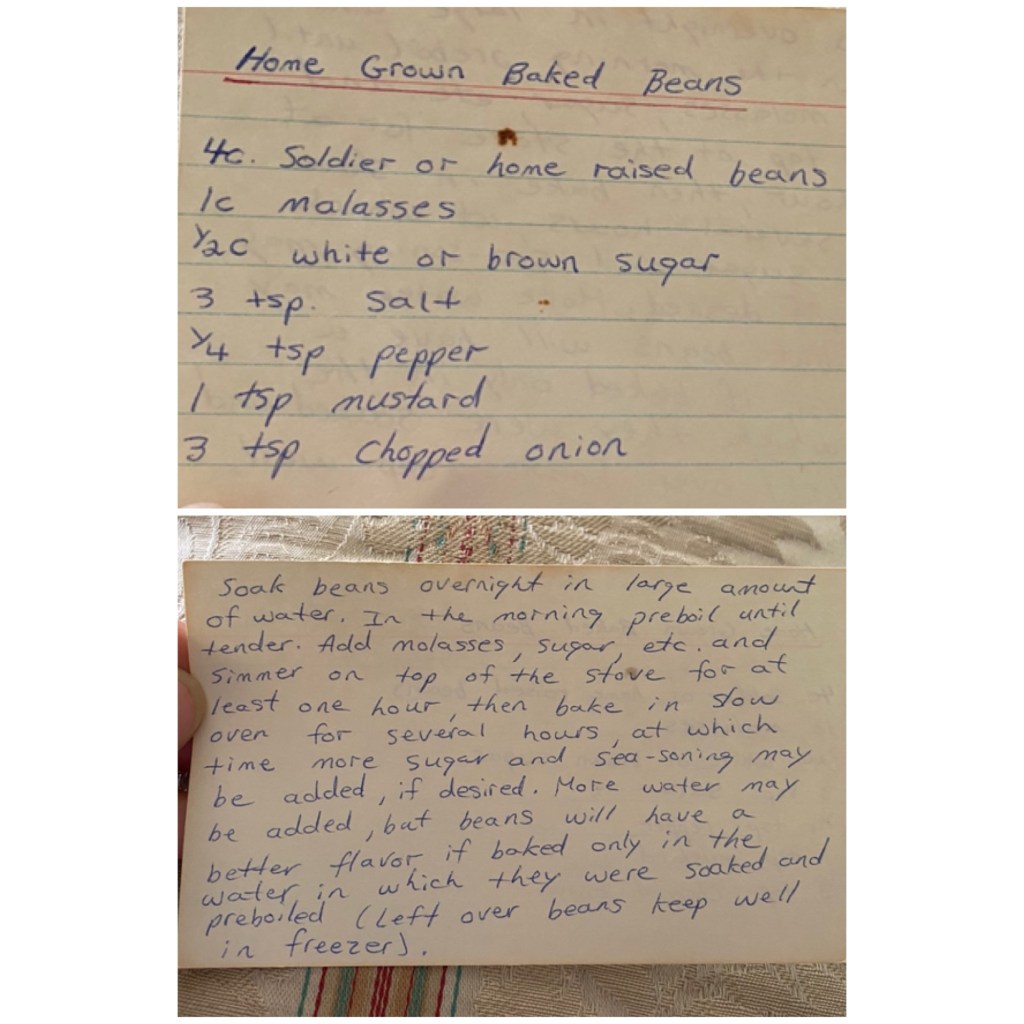
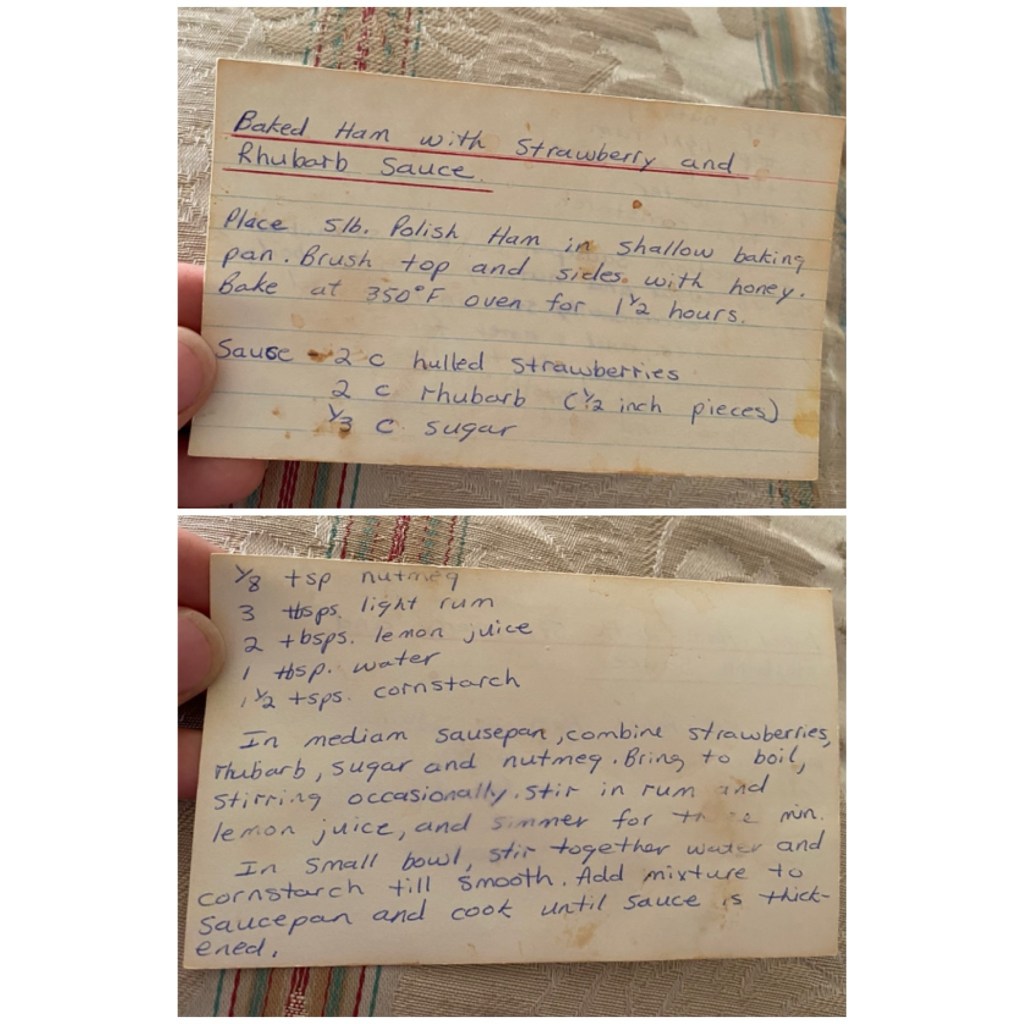
I’d also like to share with you some of her most memorable recipes—she was an amazing cook! When I have the time, I’ll do individual posts to feature the recipes properly, but until then enjoy this snapshot version!!
Ps. Don’t you love these food-stained recipe cards?! Made many times with love!
More Stories from The Mom Page:
Hi, I’m Jessie!
I’m a Wife and Homeschooling Mom living in a remote town in Northern Ontario, Canada.I love making wholesome meals for my family from scratch, homeschooling our girls and learning more about natural living.
Subscribe to Northbird’s email list to get weekly posts on: tasty recipes, activity ideas for kids, natural living tips, and some genuine mom thoughts and encouragement!
Recent posts from Northbird:
This post contains affiliate links. As an Amazon associate, I earn from qualifying purchases. This means that I make a small commission at no extra cost to you. You can read my full disclosure HERE.
This post contains affiliate links. As an Amazon associate, I earn from qualifying purchases. This means that I make a small commission at no extra cost to you. You can read my full disclosure HERE.
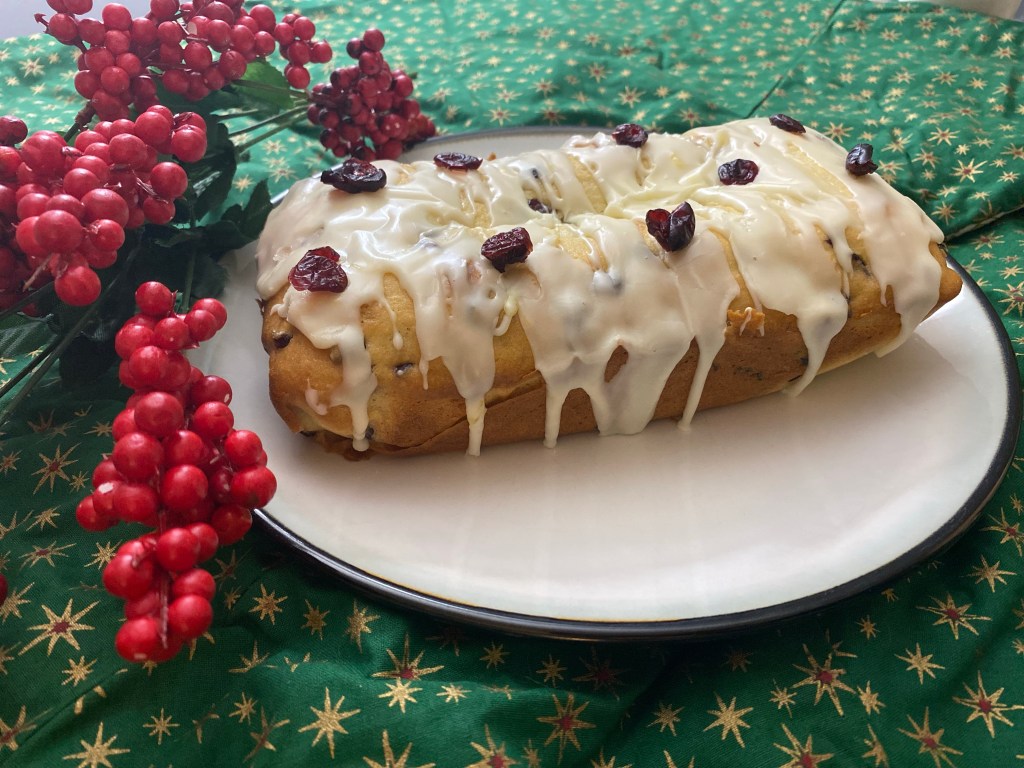
Looking for a festive and oh so delicious desert this Christmas season? Then this is a must on the menu!
Every Christmas, my mother-in-law makes this tasty Cranberry Loaf for the family to enjoy. In recent years, the little grandkids have become her helpers in the kitchen when making this loaf.
When we decided that this would be a great recipe to feature on Northbird this Christmas season, my daughter “L” insisted that she could make it for the pictures. She did a fantastic job, making it just like when she makes it with Grammy, and even let her little sister help stir the bowl (well sometimes!).
Did You Know these Amazing Health Benefits of Eating Cranberries?!
Cranberries are most known for reducing the risk of urinary tract infections. This is due to the proanthocyanidins in the berries that help to prevent bacteria from sticking to the urinary tract. A build up of bacteria in the urinary tract is what causes infections and other illnesses if left untreated.
The proanthocyanidins in Cranberries also help to support your teeth, and some research suggests gum disease as well.
Cranberries contain Vitamin E, which supports hair and skin health.
Cranberries have high levels of anioxidants, which support the immune system and help prevent illness and diseases.
Cranberries have high levels of phytonutrients, which is great for reducing inflammation in the body.
Cranberry juice contains phytochemicals that help to maintain healthy digestion in your body.
Cranberries are also very high in Vitamin C (ascorbic acid), boosting your immune system and helping to maintain health.
Cranberry juice helps to lower cholesterol levels, which lowers the risk of heart disease.
Please Note: When buying cranberry juice at the store for medicinal purposes, it is always important to read the label carefully and to select a brand that is 100% pure cranberry juice, no added sugar, and not a juice cocktail mix.
Watch the girls make this easy and delicious cranberry loaf!
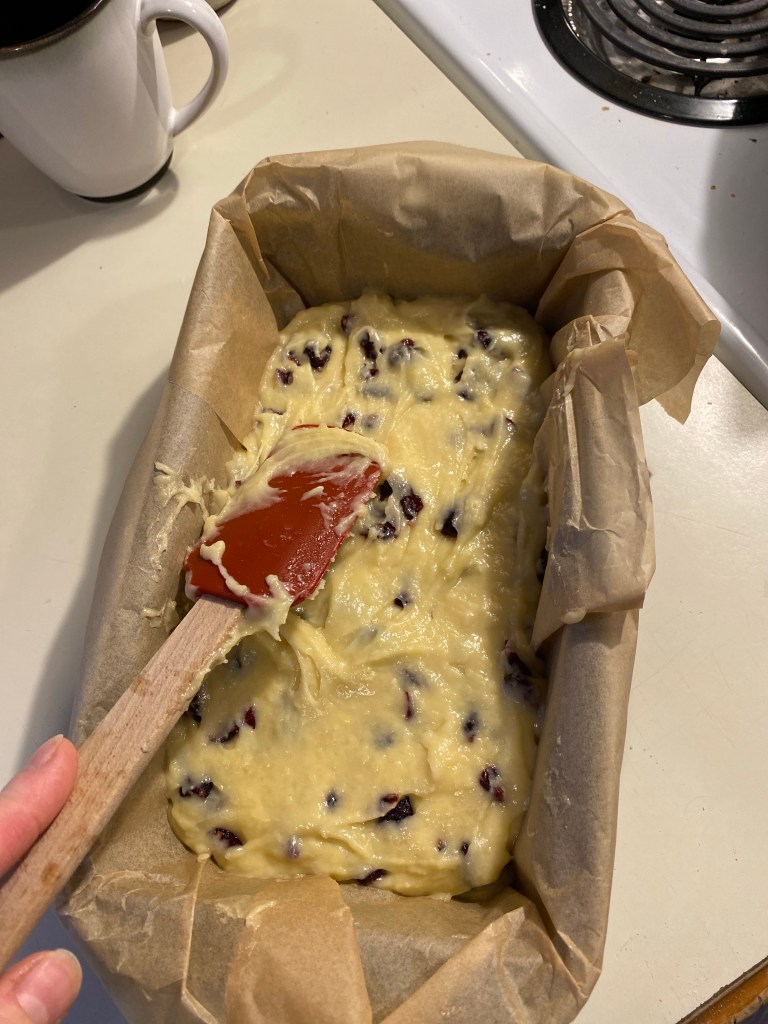
Preheat oven to 350 degrees fahrenheit. Butter loaf pan and dust with flour. (Our pan was not in the best of shape so we lined it with parchment paper instead)
In a medium sized bowl, mix together: flour, baking powder and salt. Set aside.
In a small bowl, combine milk and orange juice. Set aside.
In a large mixing bowl, cream together butter and sugar. Add whisked eggs and mix until smooth.
Add the flour/baking powder/salt mixture and the milk/orange juice mixture to the large bowl (butter/sugar/eggs), and mix until fully blended together.
6. In a small bowl, toss the frozen cranberries in flour. Gently fold into the batter.
7. Put in prepared loaf pan, and bake on middle rack for 45-50 minutes until golden and firm on top.
8. Let cool in pan for several minutes, then remove and cool more on wire rack.
9. To prepare glaze: Mix together powdered sugar and orange juice until smooth. Drizzle or spread with spoon to cover the top of the cranberry loaf. Enjoy!
One note to mention from the original recipe: We didn’t have any frozen cranberries when making this for the pictures, so we substituted in dried cranberries instead frozen. The amount of berries also came to a little less than it called for, due to much snacking from the girls in the middle of mixing up the batter!
Please also note: You will want to make sure you plan ahead a little for this recipe, and let the following ingredients come to room temperature prior to mixing: Milk, Butter, and Eggs.
More Desert & Snack Recipes:
Hi, I’m Jessie!
I’m a Wife and Homeschooling Mom living in a remote town in Northern Ontario, Canada.I love making wholesome meals for my family from scratch, homeschooling our girls and learning more about natural living.
Subscribe to Northbird’s email list to get weekly posts on: tasty recipes, activity ideas for kids, natural living tips, and some genuine mom thoughts and encouragement!
Looking for a festive holiday desert this season? Carol’s Cranberry Loaf is a great addition to your Christmas menu!
One note to mention from the original recipe: We didn’t have any frozen cranberries when making this for the pictures, so we substituted in dried cranberries instead frozen. The amount of berries also came to a little less than it called for, due to much snacking from the girls in the middle of mixing up the batter!
Please also note: You will want to make sure you plan ahead a little for this recipe, and let the following ingredients come to room temperature prior to mixing: Milk, Butter, and Eggs.
Preheat oven to 350 degrees fahrenheit. Butter loaf pan and dust with flour. (Our pan was not in the best of shape so we lined it with parchment paper instead)
In a medium sized bowl, mix together: flour, baking powder and salt. Set aside.
In a small bowl, combine milk and orange juice. Set aside.
In a large mixing bowl, cream together butter and sugar. Add whisked eggs and mix until smooth.
Add the flour/baking powder/salt mixture and the milk/orange juice mixture to the large bowl (butter/sugar/eggs), and mix until fully blended together.
In a small bowl, toss the frozen cranberries in flour. Gently fold into the batter.
Put in prepared loaf pan, and bake on middle rack for 45-50 minutes until golden and firm on top.
Let cool in pan for several minutes, then remove and cool more on wire rack.
To prepare glaze: Mix together powdered sugar and orange juice until smooth. Drizzle or spread with spoon to cover the top of the cranberry loaf. Enjoy!
Nutrition
For 1 loaf divided into 8 slices, 1 slice: 343 calories; 9.8 g fat; 62 g carbohydrates;
4 g protein; 191 mg sodium.