This post contains affiliate links. As an Amazon associate, I earn from qualifying purchases. This means that I make a small commission at no extra cost to you. You can read my full disclosure HERE.
It’s that time of year. Wonderful summer heat! And for me, a decreased desire to eat or cook/bake anything hot for dinner!
That’s why every summer I love finding new salads and developing ideas to serve for dinner without heating up the kitchen. And besides, at this time of year, I would much rather be in the garden!
Nutritional Benefits of Chickpeas:
Chickpeas are also known as garbanzo beans, and are widely used in many different cuisines. From falafel to curries to hummus, there are countless types of dishes that feature chickpeas.
They are high in protein, which makes them a favourite alternative for replacing meat protein. They are also high in healthy fats, carbs and fibre. Some other nutritional components include: Manganese, Folate (Vitamin B9), Copper, Iron, Zinc, Phosphorus, Magnesium, Thiamine, Vitamin B6, Selenium and Potassium.
Health Benefits May Include:
Helps you to feel full longer
Weight management
Boosts bone & muscle health
Helps to regulate blood sugar levels
Assists with digestion
May reduce risk of chronic illnesses
Supports brain function
May help relieve anxiety and depression
Boosts red blood cell production (Iron deficiency)
You can read more HERE about why Chickpeas are an amazing addition to your diet.
A Little About Perennial Edible Flowers:
I love finding edible flowers and putting them in salads, or as garnishes for other festive dishes. My sister H is a very accomplished cake baker and often decorates her cakes with fresh edible flowers. (I’m hoping she’ll start her own blog soon to share and feature her awesome creativity —wink wink @H!)
On my parent’s farm, they have a large area of their garden dedicated to various organic edible flowers that they sell to restaurants and resorts for fine dining.
Please note that when picking or foraging flowers and herbs in residential or public areas, make sure to only pick ones that have no risk of a pesticide spray or dog pee on them! If possible, source from an open field or an area with “clean” flowers.
There are many edible flowers with numerous health benefits, and too many to list now, so perhaps that will be a separate post in the future! Below are two common edible flowers that I have found grow well as a perennial in zones 2-3.
Pansies:
Pansies are one of my favourite edible flowers. They have a sight sweet taste, and aside from their charming looks and extremely hardy character for growing in the north, they have several medicinal uses as well.
Traditionally, they have been used in teas and poultices to treat skin problems, respiratory infections, fevers, headaches and pain relief. They have antioxidant, antimicrobial and anti-inflammatory properties.
The pansy family has many names: Jolly Jump Up, Heartsease, Wild Pansy, and Viola Tricolour are some of them.
Dandelion:
Dandelions are usually known as an invasive weed, and one of the first foods that bees look for in the spring. But they are also a highly nutritious plant and packed full of medicinal properties. From the root to the flower head, all of the plant is edible and has different uses.
A “Dandelion House” that my oldest built for her toy tiger.
Dandelion root is traditionally used to treat digestive problems and help the liver and gallbladder. Feeling constipated? Dandelion root tea can help with that. (I’ve tried it!) It is also used to make “root coffee”, a coffee bean alternative.
Dandelion greens are considered a superfood! Jo Robinson, author of “Eating on the Wild Side”, says that when compared to spinach, dandelion leaves have “eight times more antioxidants, two times more calcium, three times more Vitamin A, and five times more vitamin K and vitamin E.”
The leaves taste a little bitter, so when making a dandelion leaf salad it is nice to add some sweetness to balance it out. I enjoy it with a raspberry vinaigrette.
Dandelion flowers are a powerful antioxidant. In addition to supporting the immune system, they help to lower cholesterol, fight infections and reduce inflammation. They taste sweeter than the leaves, and can be used not only in salads, but can also be cooked in sauces and made into preserves.
I enjoy making an annual batch of “Dandelion Jelly”, which tastes like wild honey.
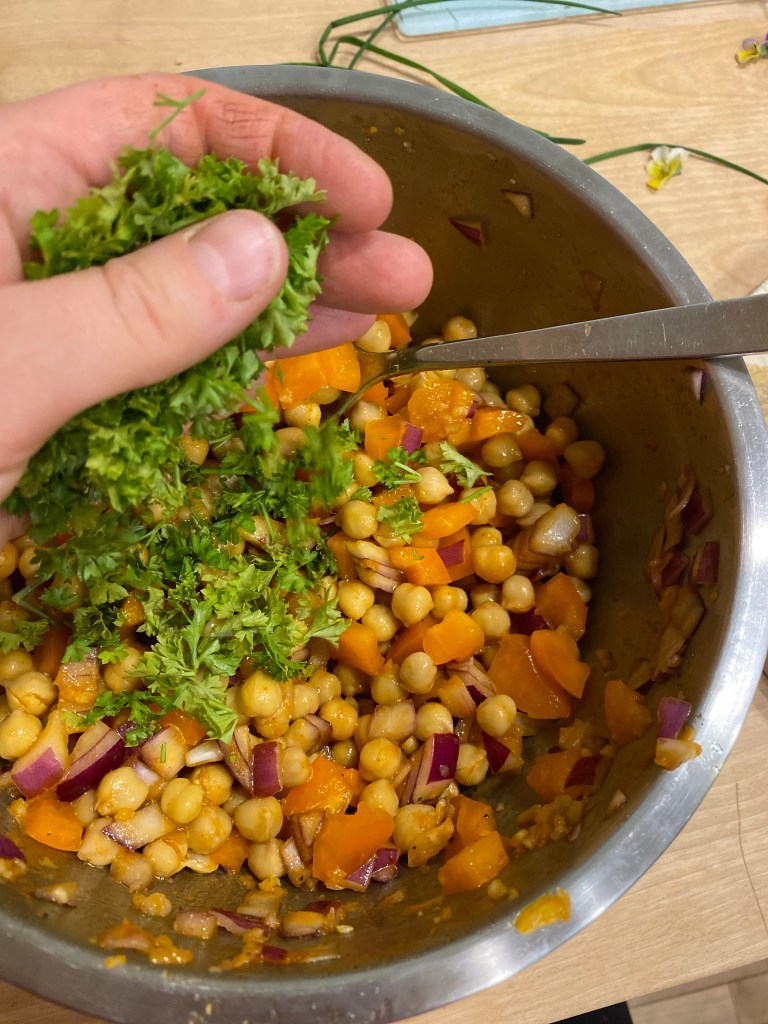
1. Drain and rinse the chickpeas and add to large bowl. Add the garlic cloves, bell pepper, red onion, olive oil, lemon juice, paprika, salt and pepper. Stir well.
2. Pick some fresh herbs, chop finely and add to bowl. Refrigerate until serving time.
3. Decorate the top with fresh edible flowers closer to serving time so that the flowers do not wilt.
We made a colourful and fresh meal that night by cooking some corn cobs, making a green salad, fresh homegrown sprouts, avocados, veggie sticks and hummus!
I’m a Wife and Homeschooling Mom living in a remote town in Northern Ontario, Canada.I love making wholesome meals for my family from scratch, homeschooling our girls and learning more about natural living.
Subscribe to Northbird’s email list to get weekly posts on: tasty recipes, activity ideas for kids, natural living tips, and some genuine mom thoughts and encouragement!
Drain and rinse the chickpeas and add to large bowl. Add the garlic cloves, bell pepper, red onion, olive oil, lemon juice, paprika, salt and pepper. Stir well.
Pick some fresh herbs, chop finely and add to bowl. Refrigerate until serving time.
Decorate the top with fresh edible flowers closer to serving time so that the flowers do not wilt.
Nutrition
Per 1 Serving: 250 calories; 6.9 g fat; 37.2 g carbohydrates;
11.9 g protein; 746 mg sodium.
This post contains affiliate links. As an Amazon associate, I earn from qualifying purchases. This means that I make a small commission at no extra cost to you. You can read my full disclosure HERE.
Every Friday night we have homemade sourdough pizza (unless we are not home or it is simply way to hot in the summer to use the oven!). We pair this with watching a family movie and setting up the screen projector to have a fun, relaxing family time while munching on delicious pizza.
I love the simplicity of this meal, and how easy it is to make and roll out the dough ahead of time, then decorate and bake off closer to when my husband is home from work and we get ready to start the movie.
We love pairing homemade pizza with fresh home-grown sprouts and an assortment of veggie sticks!
Prior to getting addicted to sourdough recipes, I would make variations with different flours using traditional yeast dough. I can honestly say that I prefer the sourdough process for making pizza dough, and because the dough ferments prior to being loaded and baked, my sensitive tummy appreciates it too.
New to Sourdough?
Sourdough is made using a fermented mixture of flour and water, called the “starter”, and mixed with more water, flour, and usually salt. The dough naturally rises as it ferments during resting stages. There is a lower amount of gluten in sourdough baking, which is why the dough needs to be “stretched” multiple times to help it expand and become fluffy.
You can read more in the Sourdough Bread Post HERE about sourdough tips, feeding the sourdough starter, and keeping it happy.
Pizza Topping Ideas: (what we use to cut down grocery costs)
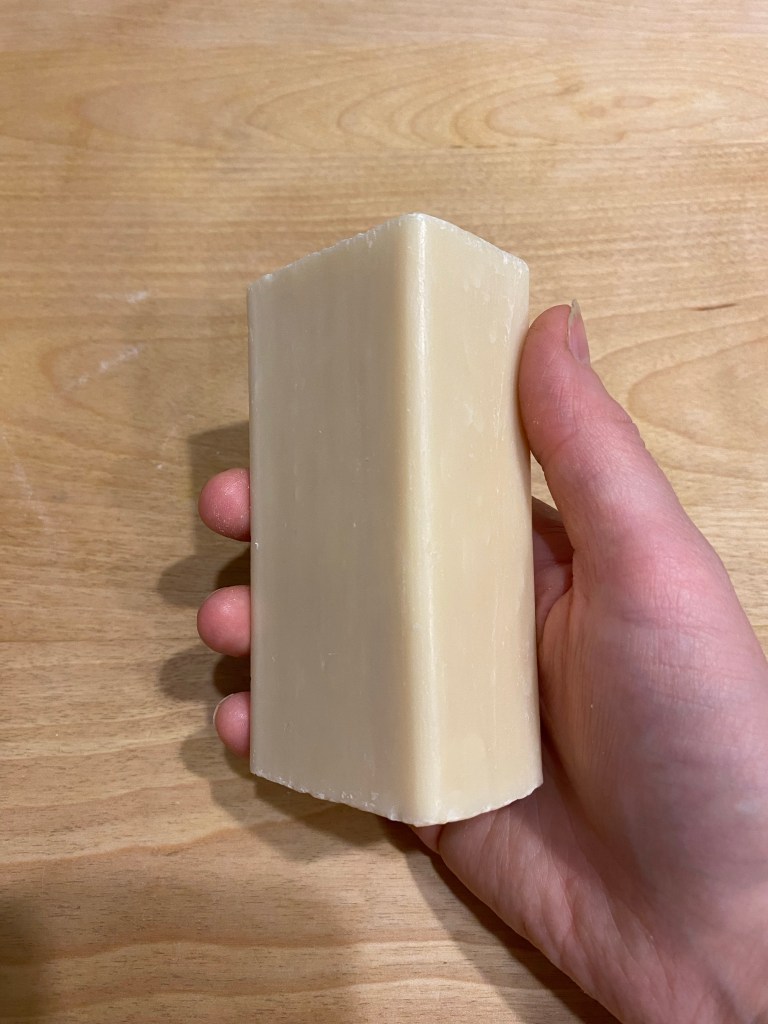
Cheese: Mozzarella and white cheddar are my favourites to use on pizza, but they are undoubtedly the most expensive part of the pizza. Where we live in the north, one 400g block costs around $10! We buy several blocks at a time when we are in the south and they go on sale, and if the expiry date is close, then the cheese intended for pizza goes directly into the freezer. Frozen cheese can tend to crumble a little when thawed, but that works just fine for pizza, right?!
Pizza sauce: You can use regular canned pizza sauce or also pasta sauce, it just won’t be as thick. (In a later post I’ll share my mother’s Garlic Cream Sauce for pizza!)
Meat: If we have a ham, chicken, beef roast, etc then I’ll cut off small portions and put in freezer bags and label for pizza. I also use cooked bacon, kohlbassa and occasionally pepperoni and do the same thing.
Peppers: I love dehydrating peppers from the summer garden and using them year long on pizzas! They re-hydrate easily in a bowl of water for a few minutes prior to putting on the pizza.
Mushrooms: You can also dehydrate these, and rehydrate in water like the peppers. (it’s on my bucket list and I’ll share with you how it turns out!)
Olives: these are easy to buy canned and sliced.
Pineapple: We are one of those families that enjoys fruit on pizza! Easy to buy small cans of diced pineapple, or buy a whole one on sale, cut up and freeze in portioned baggies. Thaw prior to use.
Herbs: It’s always nice to sprinkle some herbs on top at the end. Fresh herbs in the summer, and dried herbs in the winter (unless we are organized to grow some windowsill herbs year long!) Oregano, thyme, chives and rosemary are delicious sprinkled on pizza.
Other veggies: We have also used zucchini, vidalia onion, red onion and arugula.
Directions: Day One
1. Feed your starterin the morning
If your starter takes less time to activate, then feed your starter in the early afternoon.
2. Mix your Dough in the Evening
Mix your active starter with the water and set aside. At this point if the measured starter floats on top of the measured water, you know it’s going to be a great rising pizza dough! Sometimes my timing has been a little off due to life getting crazy, and my starter doesn’t float (even though it looked bubbly and risen in the starter jar). If this happens to you, just add another 1-2 tablespoons of starter and it should still rise good.
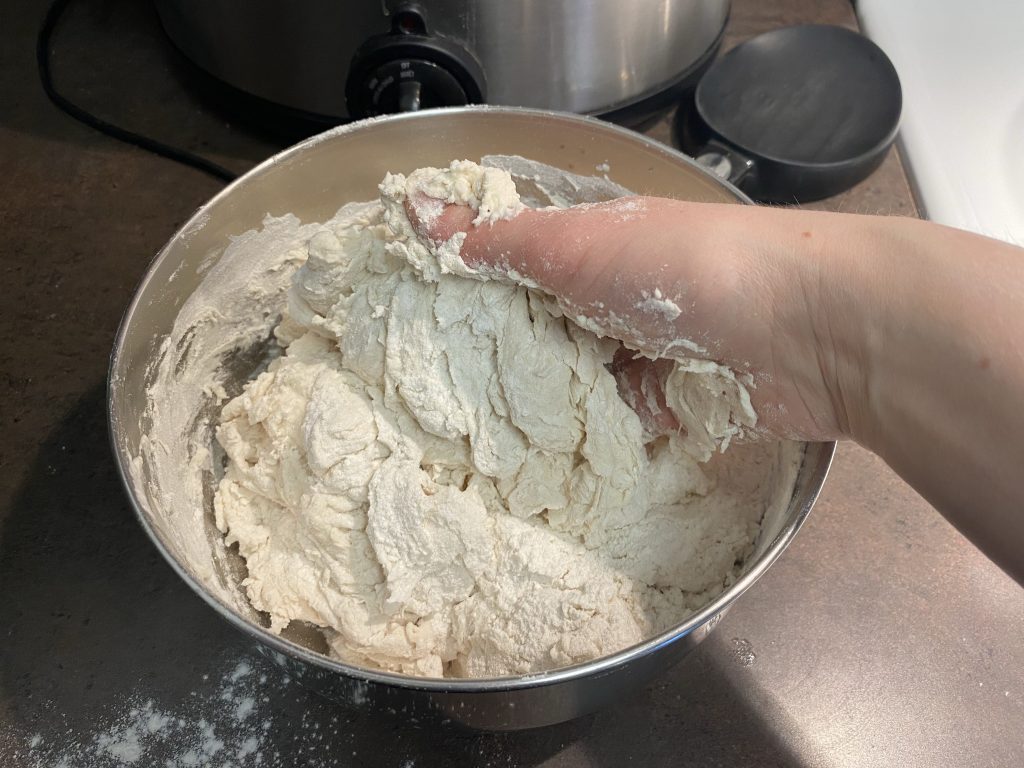
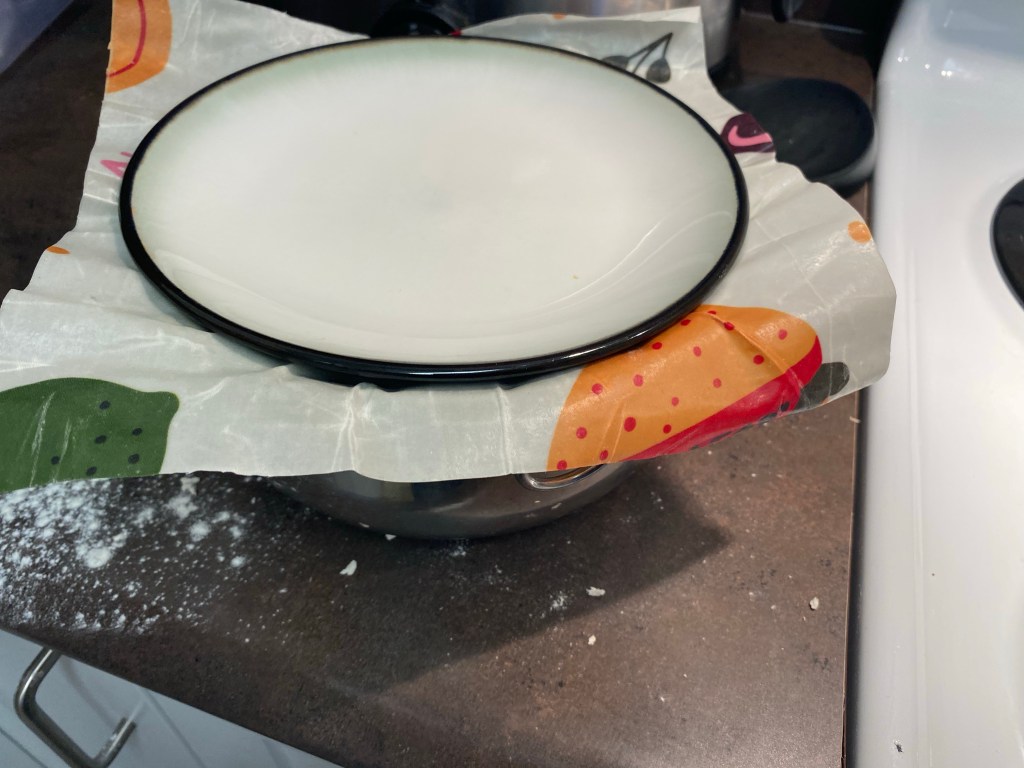
Mix the flour and salt together in a larger bowl, then add the wet ingredients and stir together until it forms a sticky ball. I find it easier to finish mixing it with my hands. If it is dry, resist the urge to add any water! Cover with beeswax cover or tea towel and plate and rest for 30 minutes.
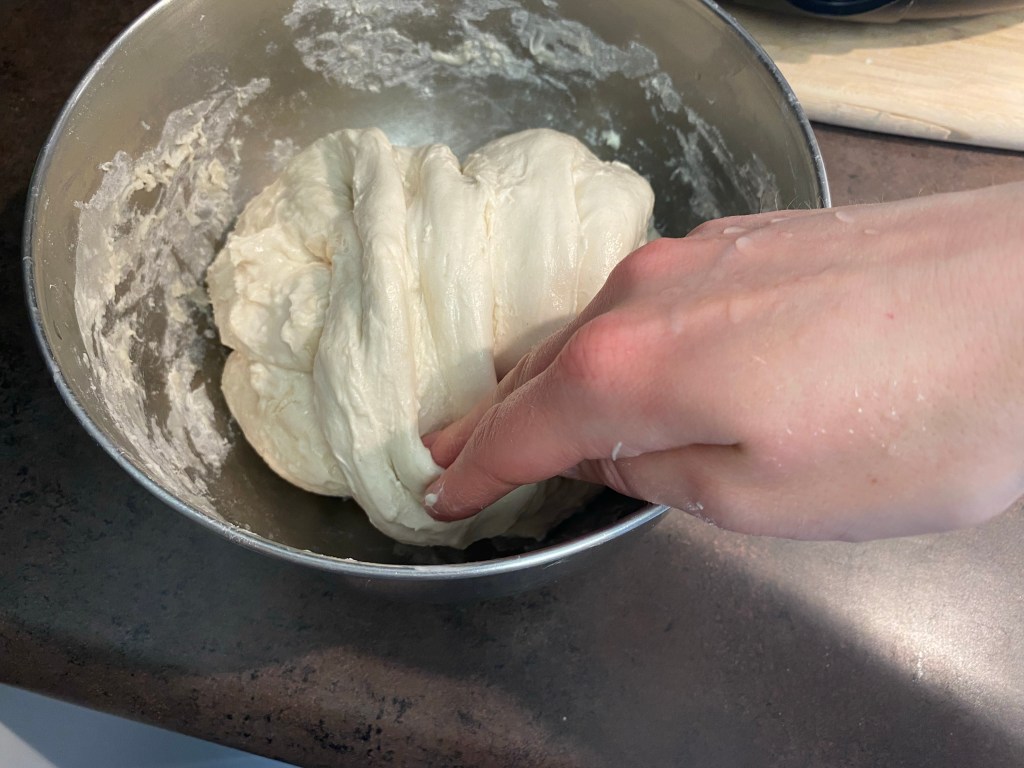
3. Stretch & Fold: 1st Way
Wet one hand and gently loosen dough from edges of bowl. Take a handful of dough from the top of the bowl and pull towards you *See picture. Turn bowl 1/4 turn and repeat for a total of 4 stretch & folds to complete circle.
Cover and rest 20 minutes
Repeat stretch & fold full circle
Cover and rest 20 minutes
Repeat stretch & fold full circle
Cover and rest overnight 10-12 hours.
Directions: Day Two
1. The next morning, lift & fold: 2nd way
Wet both hands and loosen dough from edges of bowl. Using both hands, pick up dough from middle and let it droop over the sides of your hands. *See picture. Gently lower into bowl and let it fold on top of itself. Turn bowl 1/4 turn and repeat for total of 4 to complete full circle.
Note: If it is stiff at first, you can pick it up and gently stretch a little with your wet hands to encourage the gluten. *See picture.
Cover and rest 20 minutes
Repeat lift & fold full circle
Cover and rest 20 minutes
2. Prepare dough & put in fridge
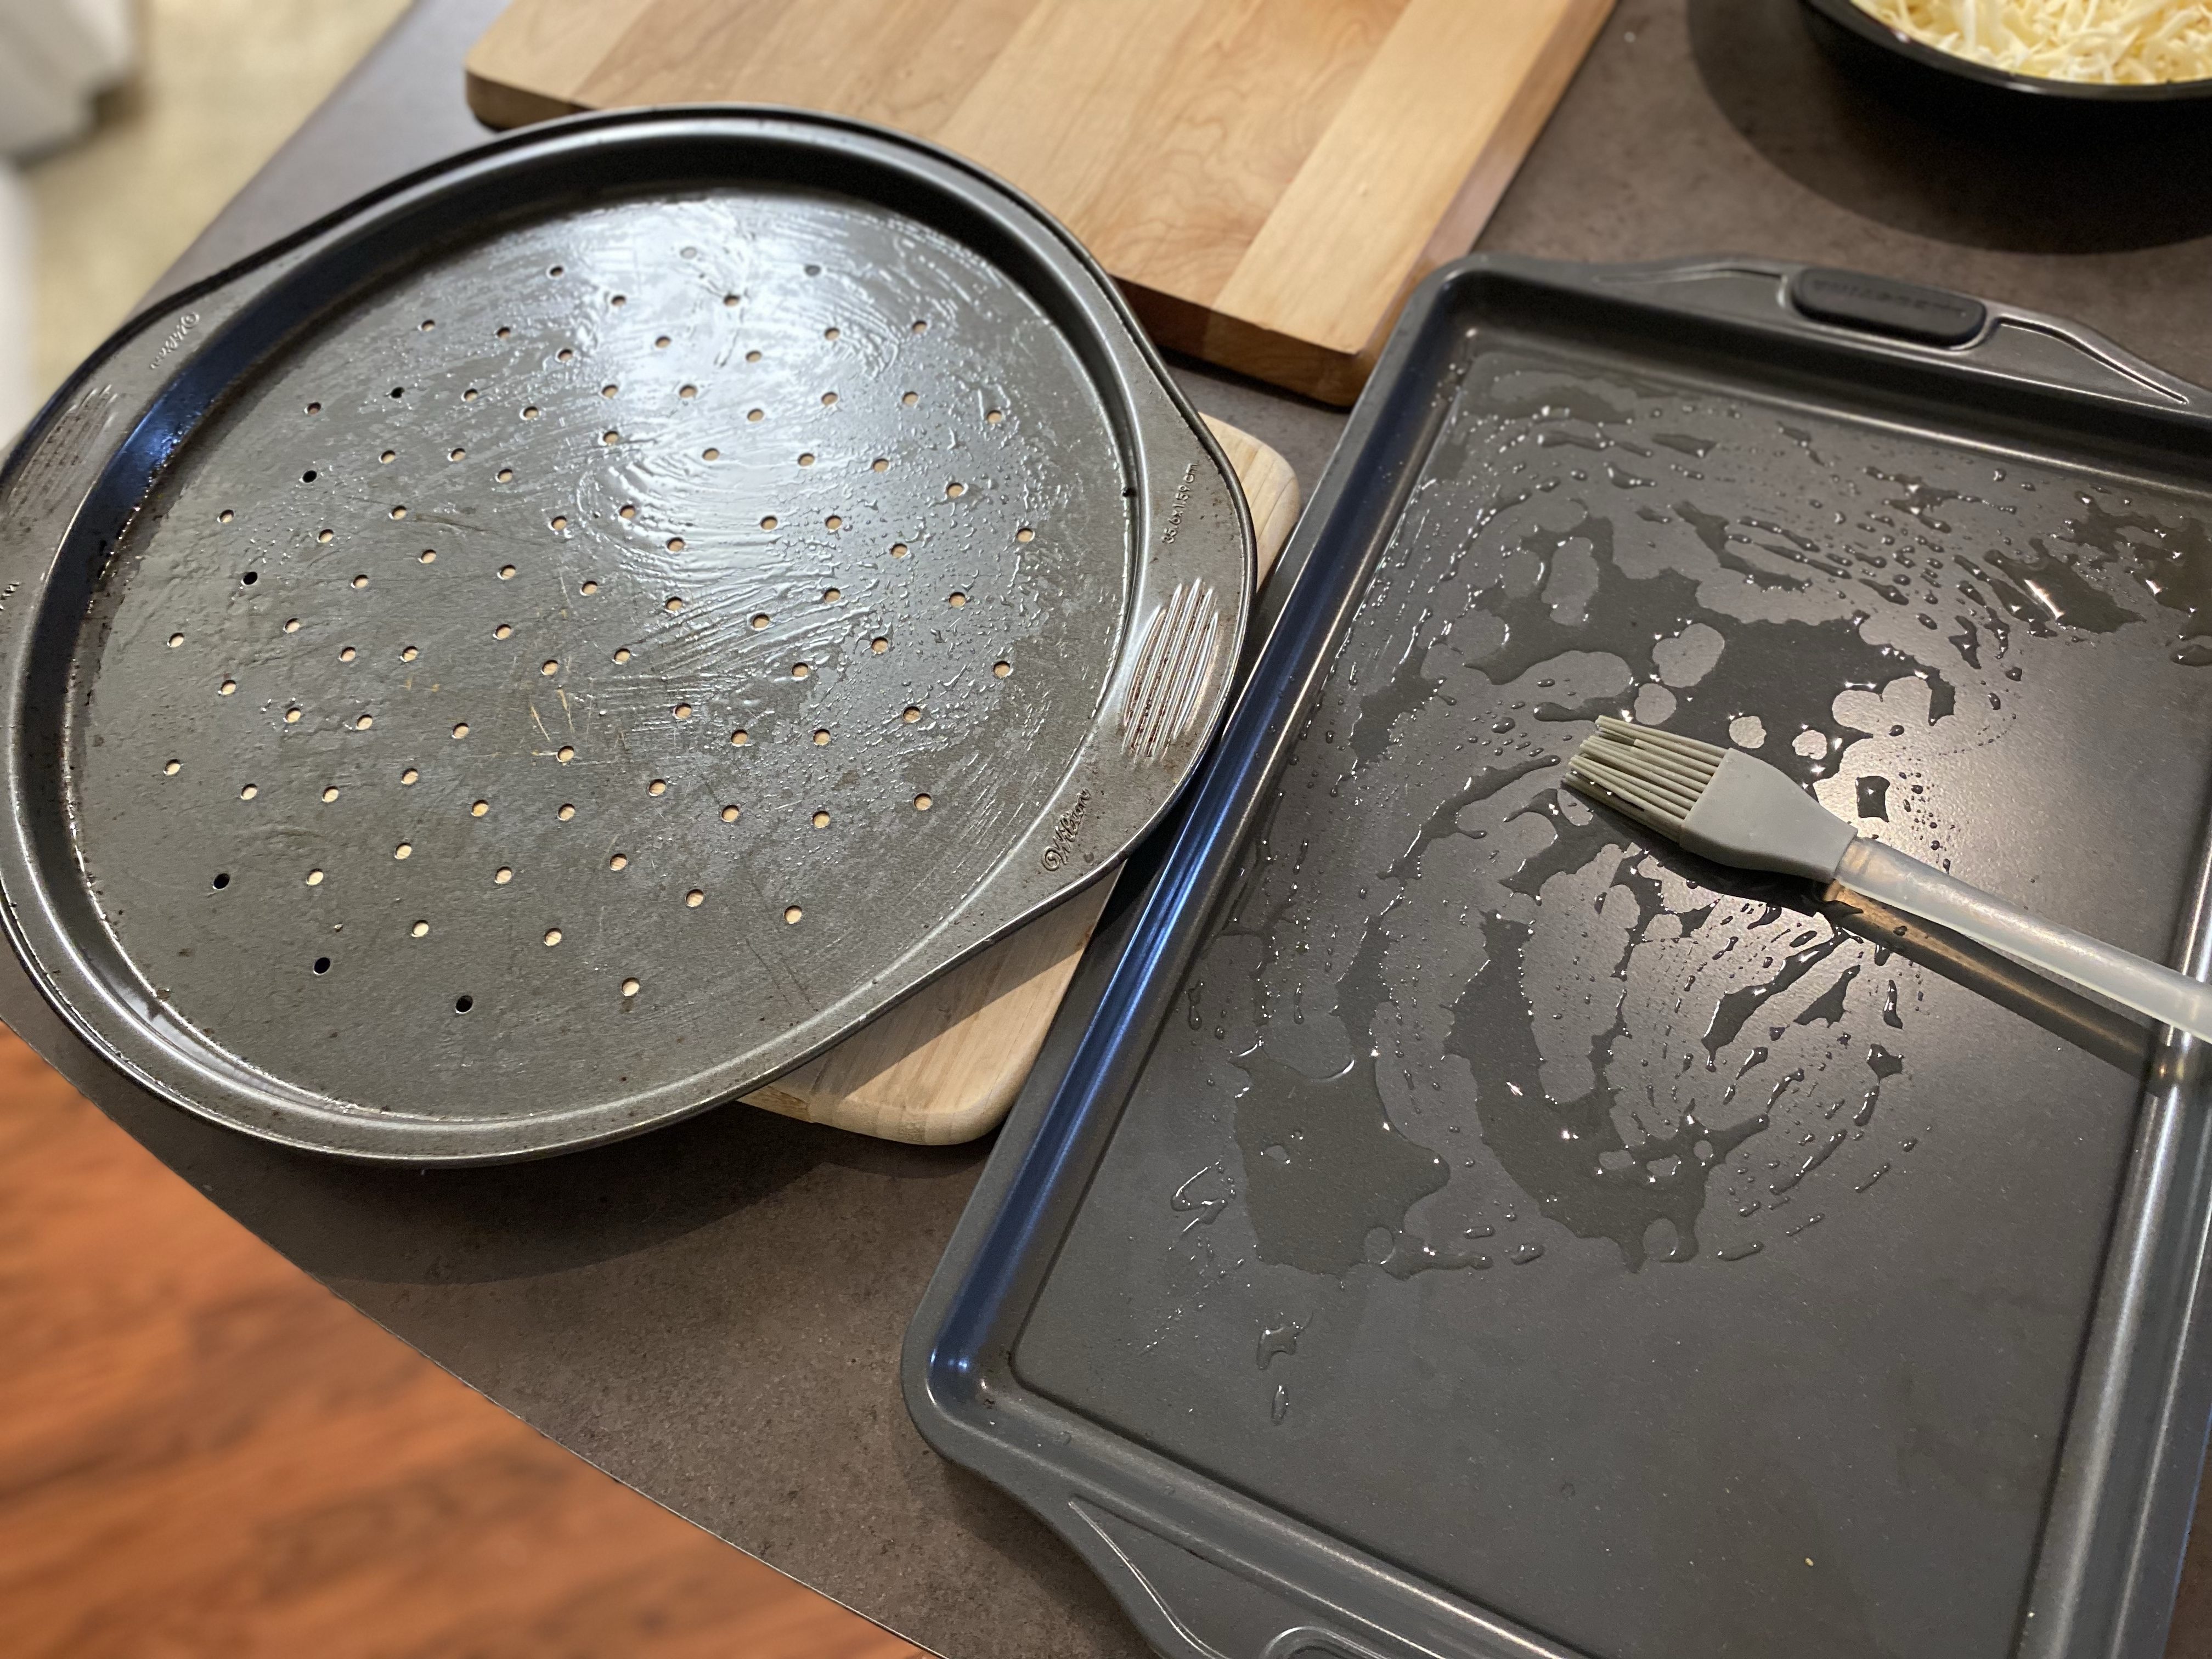
Grease pizza pans with olive oil, and sprinkle cornmeal onto it to help the bottom not to stick later.
Separate the dough into two balls. Roll out on lightly floured counter and press into prepared pizza pans.
Put pizza pans in the fridge for minimum 1 hour, or for several hours until closer to when you want to bake the pizzas off. I like to get it all prepped up to this point in the morning, then it’s just a quick decorate and bake before dinner.
3. Decorate dough
Preheat the oven to 425 degrees fahrenheit.
Rehydrate any dehydrated veggies in water prior to putting on the pizza: (mushrooms, peppers, onions, dried meats, etc)
Brush pizza sauce on top of dough.
Decorate pizza with desired toppings and cover with shredded cheese. Herbs are nice sprinkled on top (see above list of suggestions).
Optional: You can stuff the pizza crust with cheese if you want by pulling the dough edges outward, putting a wad of cheese into it and rolling and pinching it back.
Optional: A final touch that I like to do is brushing the crust with olive oil.
4. Bake the Pizza
Bake the pizzas for 15-20 minutes (depending on your oven!) until crust is hard and golden and cheese has browned on top. I usually take a peek of the underside to see if it looks doughy or cooked. You can also broil for a minute to crisp the top more if desired (but keep a close eye on it!)
I’m a Wife and Homeschooling Mom living in a remote town in Northern Ontario, Canada.I love making wholesome meals for my family from scratch, homeschooling our girls and learning more about natural living.
Subscribe to Northbird’s email list to get weekly posts on: tasty recipes, activity ideas for kids, natural living tips, and some genuine mom thoughts and encouragement!
If your starter takes less time to activate, then feed your starter in the early afternoon.
2. Mix your Dough in the Evening
Mix your active starter with the water and set aside. At this point if the measured starter floats on top of the measured water, you know it’s going to be a great rising pizza dough! Sometimes my timing has been a little off due to life getting crazy, and my starter doesn’t float (even though it looked bubbly and risen in the starter jar). If this happens to you, just add another 1-2 tablespoons of starter and it should still rise good.
Mix the flour and salt together in larger bowl, then add the wet ingredients and stir together until it forms a sticky ball. I find it easier to finish mixing it with my hands. If it is dry, resist the urge to add any water!
Cover with beeswax cover or plastic wrap and rest for 30 minutes.
3. Stretch & Fold: 1st Way
Wet one hand and gently loosen dough from edges of bowl. Take a handful of dough from the top of the bowl and pull towards you *See picture. Turn bowl 1/4 turn and repeat for a total of 4 stretch & folds to complete circle.
Cover and rest 20 minutes.
Repeat stretch and fold full circle.
Cover and rest 20 minutes.
Repeat stretch and fold full circle.
Cover and rest overnight 10-12 hours.
Directions: Day Two
1. Lift & Fold: 2nd Way
Wet both hands and loosen dough from edges of bowl. Using both hands, pick up dough from middle and let it droop over the sides of your hands. *See picture. Gently lower into bowl and let it fold on top of itself. Turn bowl 1/4 turn and repeat for total of 4 to complete full circle.
Note: If it is stiff at first, you can pick it up and gently stretch a little with your wet hands to encourage the gluten. *See picture.
Cover and rest 20 minutes
Repeat 2nd way of stretch & fold full circle
Cover and rest 20 minutes
2. Prepare dough & put in fridge
Grease pizza pans with olive oil, and sprinkle cornmeal onto it to help the bottom not to stick later.
Separate the dough into two balls. Roll out on lightly floured counter and press into prepared pizza pans.
Put pizza pans in the fridge for minimum 1 hour, or for several until closer to when you want to bake the pizzas off. I like to get it all prepped up to this point in the morning, then it’s just a quick decorate and bake before dinner.
3. Decorate dough
Preheat the oven to 425 degrees fahrenheit.
Rehydrate any dehydrated veggies in water prior to putting on the pizza: (mushrooms, peppers, onions, dried meats, etc)
Brush pizza sauce on top of dough.
Decorate pizza with desired toppings and cover with shredded cheese. Herbs are nice sprinkled on top (see above list of suggestions).
Optional: You can stuff the pizza crust with cheese if you want by pulling the dough edges outward, putting a wad of cheese into it and rolling and pinching it back.
Optional: A final touch that I like to do is brushing the crust with olive oil.
4. Bake the Pizza
Bake the pizzas for 15-20 minutes (depending on your oven!) until crust is hard and golden and cheese has browned on top. I usually take a peek of the underside to see if it looks doughy or cooked. You can also broil for a minute to crisp the top more if desired (but keep a close eye on it!)
Let cool for 5 minutes before slicing it up.
Nutrition
For 1 of 16 pizza slices, crust only: 121.6 calories; 1 g fat; 23.8 g carbohydrates;
3.2 g protein; 290 mg sodium.
This post contains affiliate links. As an Amazon associate, I earn from qualifying purchases. This means that I make a small commission at no extra cost to you. You can read my full disclosure HERE.
Yes! It not only cleans our laundry extremely well, but also has a bright & fresh scent from any essential oils that are added.
There are a lot of homemade laundry soap recipes that I’ve seen, and I’ve tried a few different ones but this is the one I keep coming back to. Credits to my-sister-in law K, for first sharing a laundry bar recipe with me several years ago!
Is Homemade Laundry Soap Less Expensive?
This is one of the biggest money savers I have used over the past five years of living in remote communities. I honestly don’t remember how much it cost for a small jug of laundry detergent at the first fly-in community we lived in, but I remember being completely shocked at the price. That year I was ever so thankful to already know about a few household budget-savers!
I stock up on “The Soap Works” laundry stain remover bars purchased from the Bulk Barn whenever I am in the south, and with some cartons of baking soda I am all set for a few years!
You can also purchase them directly from The Soap Works website HERE. I have found that 2 of these laundry soap bars and 3-4 small cartons of baking soda are all we need for a year’s supply of laundry soap, for 4 people (Approximately 3 loads a week). When you compare that to buying liquid laundry detergent or pods for a year, the price difference is pretty clear.
Are Commercial Laundry Detergents Bad for the Environment?
Making your own laundry detergent is not only better for your bank account, but also for the environment. Commercial detergents use harsh chemicals that can have harmful effects on the environment.
Phosphates are found in most laundry detergents and cause algal blooms in waterways, lakes and streams which block sunlight from reaching lower aquatic plants, eventually depleting oxygen from the water. This is one example of how chemicals from littered garbage can make changes to the ecosystem. You can read more HERE about this.
Why is Homemade Laundry Soap Better for Your Health?
Natural, homemade laundry soap is not only non-toxic, chemical-free and artificial fragrance-free, but also way more gentle on your skin. You are using safe and natural ingredients, some of which you may already have in your pantry!
When combined with pure essential oils, Homemade Laundry Soap is much more beneficial to your health and wellness than using commercial detergents.
Why are Pure Essential Oils Better to Use than Artificial Scents?
Artificial fragrances and perfumes are everywhere: in candles, in air fresheners, hand soaps, body lotions, shampoos & conditioners, and very heavily in most commercial based laundry products. (One reason why it is so important to check labels!)
Synthetic scents are usually petroleum based and these chemicals have very serious effects on the human body. Some common chemicals used include benzophenone and styrene (carcinogenic) and phthalates (endocrine disruptors). You can read more about this HERE.
I suppose that makes sense why there are so many allergies and asthmatic reactions to strong scents!
What Essential Oils are Commonly Used for Laundry Soap?
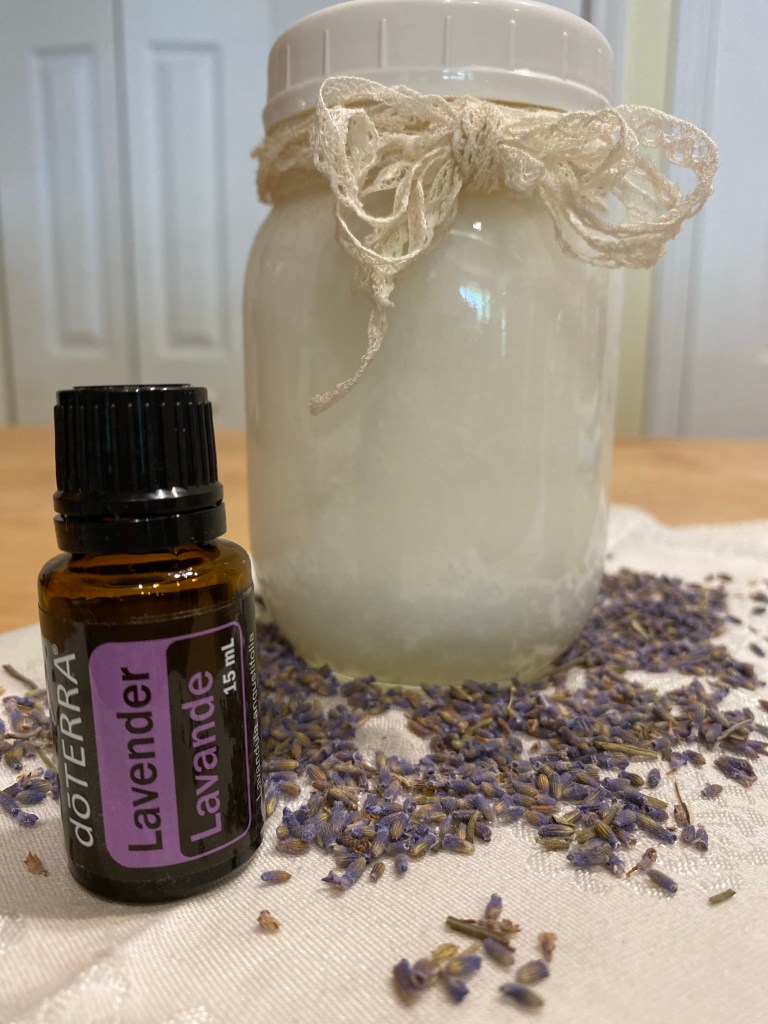
My personal favourites that I alternate for adding to the laundry soap recipe are lavender and lemon. I have also included a few other scents that people enjoy using for homemade laundry soap, and the medicinal and natural properties that these oils have for use in laundry soap.
Lavender: Relaxing and calming, this is great to use for washing bedding.
Citrus Oils (Lemon, Grapefruit, & Orange): A bright, fresh and deodorizing scent. This is my favourite for washing clothing in.
Tea Tree: Anti-fungal and anti-viral, this is good for washing clothing and bedding after someone has been sick.
Peppermint: Fresh and bright scent, this is also anti-bacterial, anti-microbial and anti-viral.
Eucalyptus: Refreshing and clean scent. I like to use this for towels.
Rosemary: A fresh and woodsy scent, it is also anti-bacterial, anti-microbial and anti-viral.
You can also opt out of adding any essential oils for an unscented batch of homemade laundry soap!
1/4 Cup white vinegar (add separately to wash load)
Directions:
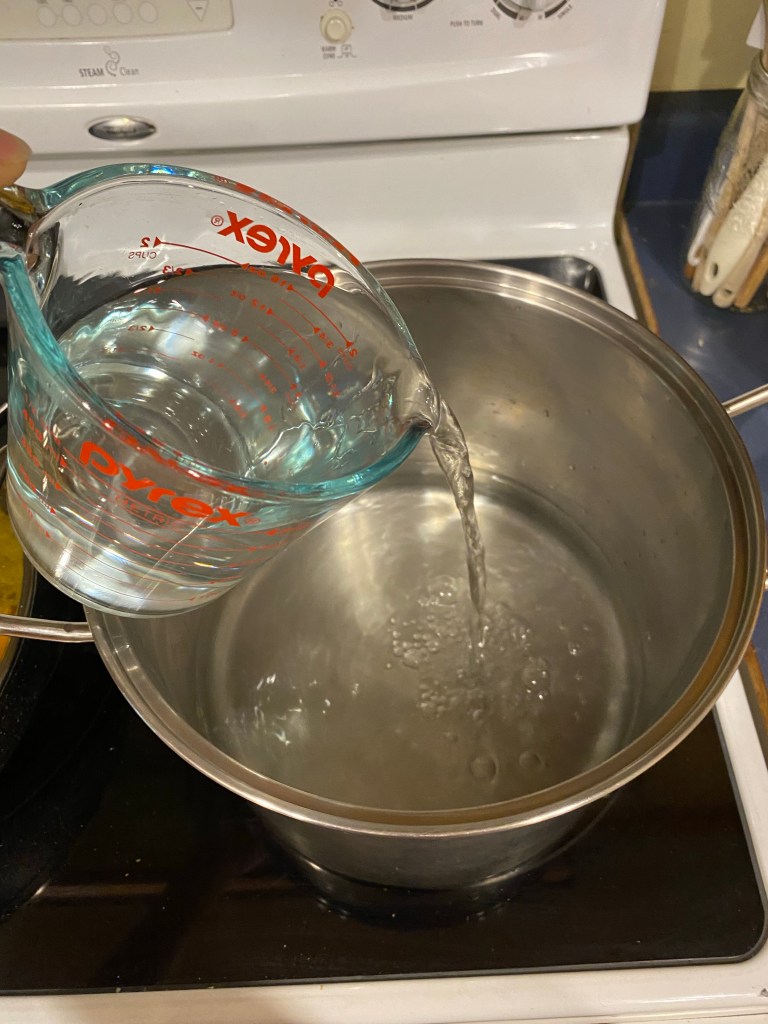
1. Boil 2 litres of water in a large stock pot, and turn burner off when it hits a rolling boil.
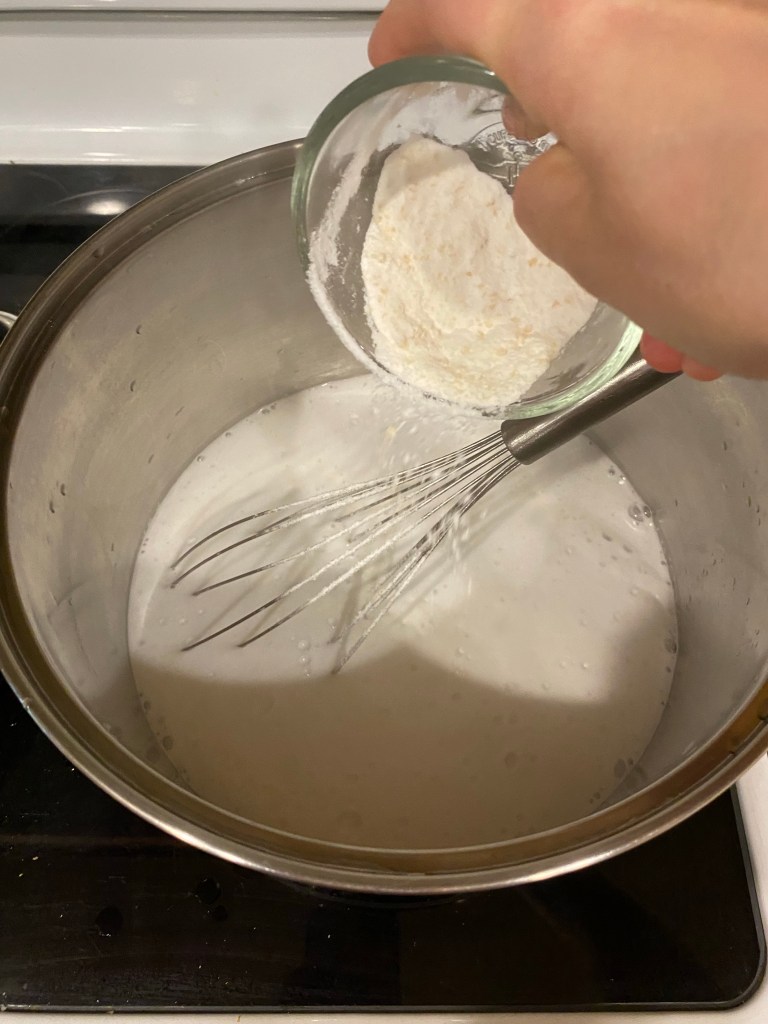
2. Mix laundry bar shavings with baking soda in small bowl. Add slowly to boiled water in small amounts, whisking in constantly. (*The first time I made this I just dumped it all in and then had to deal with all the soap bubbles spilling all over the stove, into the stove, onto the floor…it was everywhere! But I had a very clean stove after that.)
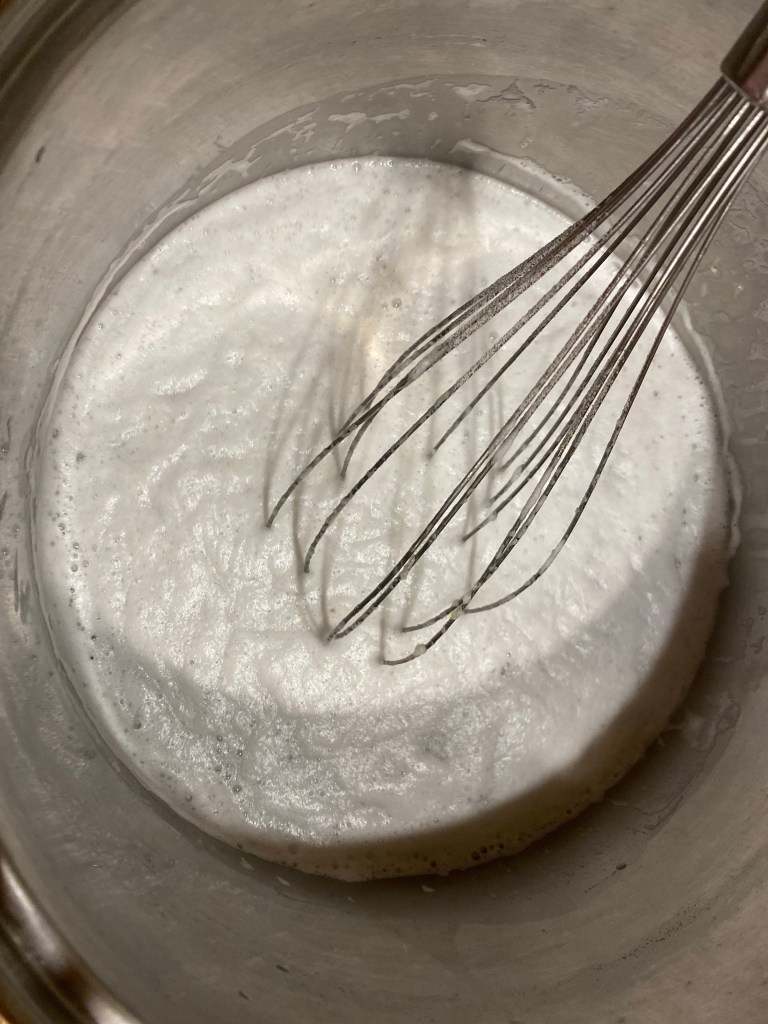
3. After dry mix has dissolved in the water, let cool completely for several hours, whisking occasionally. It may clump up into jelly-like consistency as it cools, just whisk it out.
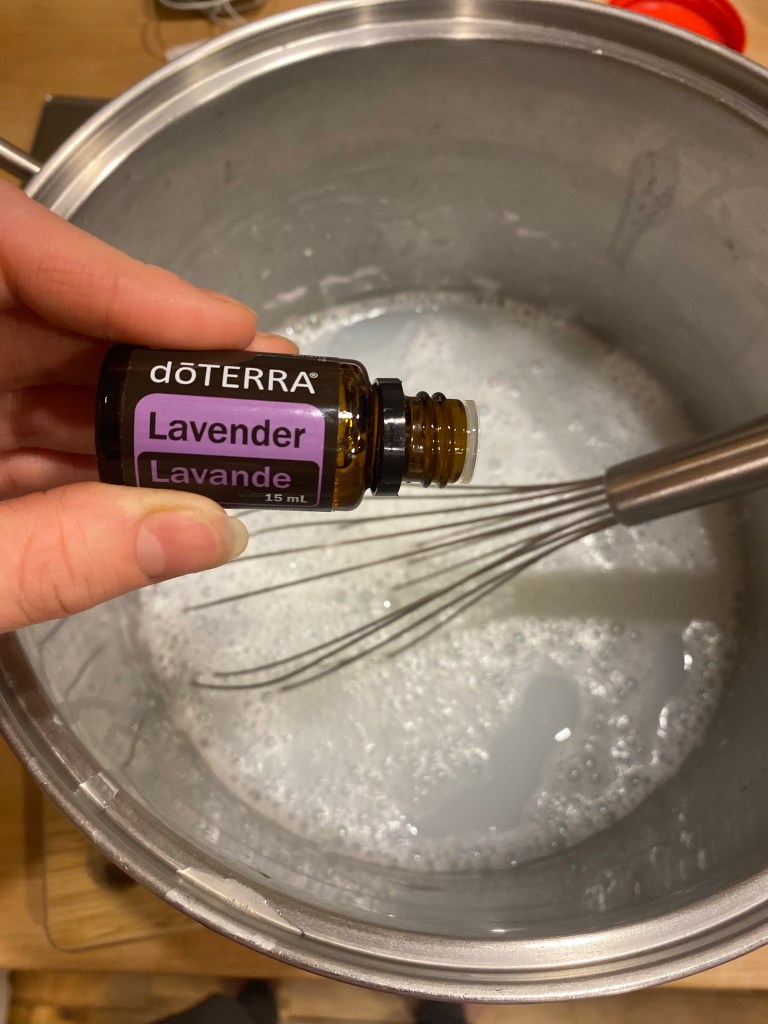
4. When completely cool, whisk in approximately 10 drops of pure essential oil. This amount can be more or less, depending on your oil selected, and how strong of a scent you like your clean laundry to have. You can see some suggestions above of what oils are nice to use in laundry detergent.
5. Pour with funnel into your choice of storage container for liquid laundry soap. In the past, I have used glass jars and recycled pourable juice containers. But a lot of people also use refillable glass jug dispensers (see “Shop This Post” for ideas).
6. When you are ready to do a load of laundry, you can use 1/3 cup of homemade laundry soap for a medium sized load (1/2 cup if laundry is really soiled!), and add 1/4 cup of white vinegar directly to the clothes. If the laundry liquid has become jelly-like, just give the jug or jar a little shake. It will still work well if it comes out clumpy.
Optional: Funnel into a glass jar, label and tie ribbon or twine around it for a cute homemade housewarming gift!
I’m a Wife and Homeschooling Mom living in a remote town in Northern Ontario, Canada.I love making wholesome meals for my family from scratch, homeschooling our girls and learning more about natural living.
Subscribe to Northbird’s email list to get weekly posts on: tasty recipes, activity ideas for kids, natural living tips, and some genuine mom thoughts and encouragement!
An on-going picture collection of various herbs, vegetables, fruits, oils, etc and highlighting some of the amazing health benefits that they have to offer us!
1/4 Cup white vinegar (add separately to wash load)
Directions
Boil 2 litres of water in a large stock pot, and turn burner off when it hits a rolling boil.
Mix laundry bar shavings with baking soda in small bowl. Add slowly to boiled water in small amounts, whisking in constantly.
After dry mix has dissolved in the water, let cool completely for several hours, whisking occasionally. It may clump up into jelly-like consistency as it cools, just whisk it out.
When completely cool, whisk in approximately 10 drops of pure essential oil. This amount can be more or less, depending on your oil selected, and how strong of a scent you like your clean laundry to have. You can see some suggestions above of what oils are nice to use in laundry detergent.
Pour with funnel into your choice of storage container for liquid laundry soap. In the past, I have used glass jars and recycled pourable juice containers. But a lot of people also use refillable glass jug dispensers (see “Shop This Post” for ideas)
When you are ready to do a load of laundry, you can use 1/3 cup of homemade laundry soap for a medium sized load (1/2 cup if laundry is really soiled!), and add 1/4 cup of white vinegar directly to the clothes. If the laundry liquid has become jelly-like, just give the jug or jar a little shake. It will still work well if it comes out clumpy.
Optional: Funnel into a glass jar, label and tie ribbon or twine around it for a cute homemade housewarming gift!
This post contains affiliate links. As an Amazon associate, I earn from qualifying purchases. This means that I make a small commission at no extra cost to you. You can read my full disclosure HERE.
I was honestly asking myself this a year ago, and never really looked into it because we had so many transitions in our life: A new baby, moving OUT of the north, buying a house, moving BACK to the north…you get the idea.
We were way too busy for me to start a new hobby and spend the time to learn something new. And “sourdough” was a complicated process, right? Or so I thought!
We were out for dinner at another family’s house and my friend P had some fresh sourdough bread. She encouraged me to try it and gave some starter with instructions and a website to check out.
I was apprehensive and unsure if I was up for the challenge, but wanted to give it a try. After researching and building up my tiny starter for a few days, I made my first loaf. I was amazed at HOW EASY it really was!
After that, I decided that we would no longer buy bread, but would make it ourselves as much as possible. And the result: I learned to make and create a few different sourdough recipes, my tummy was happier because it could digest the fermented bread better and it largely cut down on our grocery bill. Not to mention the pride I felt in serving my family fresh baking made from scratch!
What is Sourdough Bread?
Sourdough bread is a natural leavening bread, which means that it rises without the use of commercial yeast. It is made using a fermented mixture of flour and water, called the starter, and mixed with more water, flour, and usually salt. The bread naturally rises as the dough ferments during resting stages. There are hundreds of variations of sourdough bread with different flavourings, texture and shapes.
Is Sourdough Good for You?
Yes! I have a sensitive tummy when it comes to bread products, and although I’m sure those struggling with celiac would still find sourdough bread hard to digest, I personally have no digestive problems with sourdough, compared to the traditional yeasted store-bought breads.
1. Sourdough bread is easier to digest than other breads. The fermenting that takes place while making sourdough breads produces amino acids, which in turn produces enzymes that help to break down proteins and lower the overall gluten levels in the bread (making it easier to digest).
2. Whole grain sourdough breads have a lower glycemic index than other types of bread, specifically white flour breads that have been processed and are packed full of preservatives. This means that sourdough breads have less of a glycemic spike, and more of a gradual release on the glycemic scale, making it a healthier option for those struggling with balancing blood sugar levels.
3. Sourdough bread contains higher levels of protein, fibre and nutrientsthan most breads.
Sourdough bread still contains many of the natural nutrients that are processed out of the majority of other kinds of breads.
It contains lower levels of phytate, which helps your body to absorb the nutrients easier than other breads.
Whole grain sourdough is considered a high-fiber food, which feeds the good bacteria in your gut and digestive system.
Common vitamins and minerals found in sourdough bread: Calcium, Iron, Manganese, B1-B6, B12, Potassium, Magnesium, Folate, Niacin, Zinc, Thiamin, Riboflavin, Selenium, Phosphorus, and Vitamin E.
What is a Sourdough Starter?
A sourdough starter is basically a fermented mixture of flour and water. Every day it is “fed” flour and water, and within several hours it becomes bubbly and the amount doubles in size. This is now called “active starter”. The “active” timing depends on your kitchen’s temperature and humidity, and also the feeding ratio of flour and water.
HOW & WHAT do I feed a Sourdough Starter?
The current starter I use every day is mostly made from all purpose flour. I have used bread flour, spelt flour and whole wheat flour to feed it in the past, but now I find it is easiest to use basic all purpose flour for feeding it with the ratio I have developed, (and can also better predict the bubbling up timing!) I am sure there is more science behind using different flours and ratio of starter/new flour/new water, so when I have learned and researched more then I will share this with you.
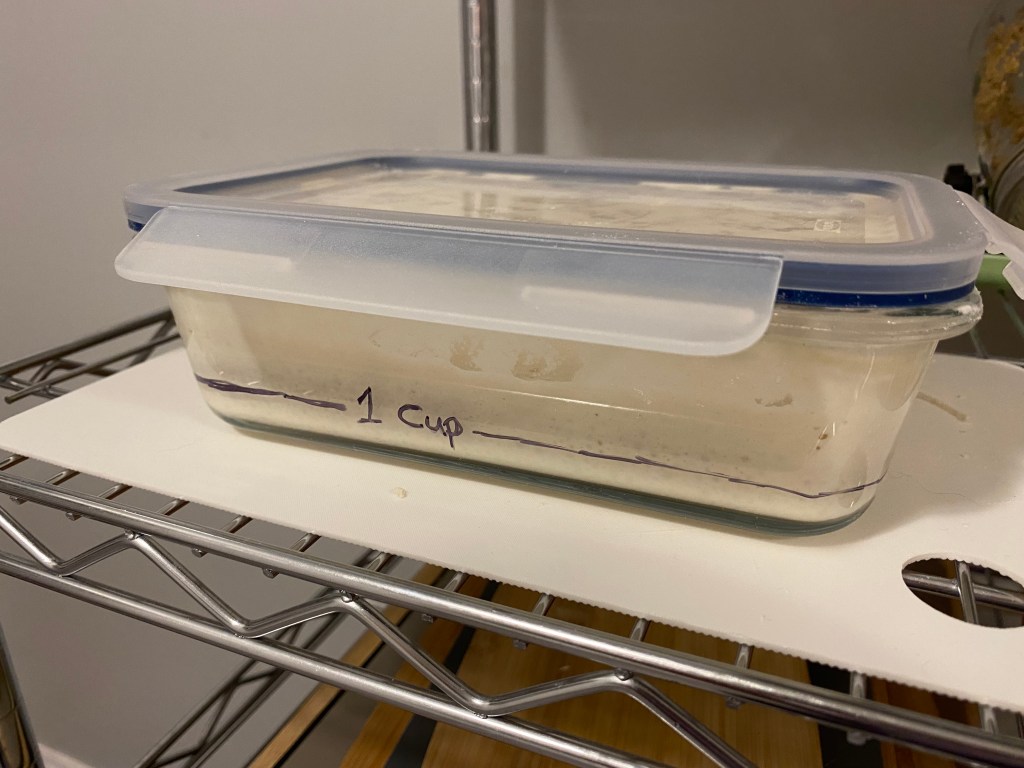
When I first started “sourdoughing”, I used a glass jar to store my starter, but have since started using a glass rectangle dish with clamp on lid. I was inspired by my friend R’s sourdough dish when I looked after it for a week, and loved how easy it was to measure amounts and stir.
I got this particular glass container from Ikea, and wrote on the side a “1 Cup” marking line with permanent marker that I use as a baseline to determine how much to feed it.
On the days that I plan on feeding it (because it’s not every day!) I will usually discard (spoon out/skim off the top) until I reach the 1 cup measuring line.
With 1 cup of starter in there, I will then add about 2/3 cup of all purpose flour and 1/3 cup of lukewarm/room temperature water. I have read that it’s best to use well water or distilled water instead of “town water” for feeding your starter, but have also had great results with unfiltered town water. Typically we use filtered water for feeding and recipes.
General feeding rule of thumb that I use: 1:1 ratio of {1 PART current starter : 1 PART added flour+added water}
After a good stir, the starter rests in a warm area of the kitchen on the counter (not in a cupboard!) and within 4-8 hours is bubbly, more than doubled in size, and ready. A great test is to take a cup of water and put a tiny spot of starter in it to see if it floats. If it floats, then it is ready!
As mentioned above, the timing of active starter readiness will be determined by the warmth and humidity of your kitchen. I have also found the active timing to change with the seasons.
Here in Northern Ontario we get temperatures nearing -50 degrees Celsius in the winter months, and our old kitchen has the furnace contained on one side of it. This means that when the other rooms of the house get chillier, the air vents in the kitchen will tend to come on more frequently and blast hot air into an already warm kitchen (especially if I am already cooking or baking that day!). On those days, the sourdough starter doesn’t take too long to bubble up for me.
I don’t have time to feed it and bake with it every day. What should I do?
I don’t make bread or other sourdough stuff everyday, so as soon as I’ve measured out the active starter I need for a recipe, I’ll put my starter container in the fridge with the lid clamps on. This will slow down the fermenting process and let it go a little dormant in the fridge until I’m ready to feed it and make something else again in a few days.
When in the fridge, the typical rule is to feed it once a week. To maintain a consistent amount of starter while in the fridge, then you will need to discard/spoon out some of the inactive starter until you reach your base amount. (for example, I always try to keep a minimum of 1 cup of starter when it is taking a break in the fridge.
How does the timing work?
There are so many ways of doing it, and honestly everyone does it a little differently! The routine that has worked for me is as follows for most of my sourdough recipes:
Feed the starter in the morning…(somewhere between getting the kids breakfast and sitting down to coffee!)
Sometime after lunch or mid afternoon I’ll check on it and if its ready then I’ll mix up the dough. (And put the rest of my starter in the fridge to go dormant for a few days)
Depending on the recipe, it may need a few extra stretches (like for bread) that I’ll do while making dinner.
Bulk fermenting overnight. Usually this is easier to do overnight and the timing can be very forgiving for generally most sourdough recipes.
Next morning, depending on the recipe there may need to be more stretches (bread), or rolling out, shaping, letting rise for a few hours, putting in fridge, etc. Most timing is quite forgiving and I try to plan the baking part of the recipe according to what that day holds.
I accidently used too much starter in a recipe and am only left with a few tablespoons. How do I build it back up?
I have definitely done this a few times, for example doubling a recipe then forgetting that I actually need 1 CUP of starter instead of 1/2 CUP. Ooops.
To build your starter back up when it has settled back down from the active stage, you can simply measure the amount you currently have, then add an equal amount of flour and water. For example, If you have 3 tablespoons of starter, you can add 2 tablespoons of flour and 1 tablespoon of water.
Oops, I missed the active timing and it has started to bubble down again! Can I still use it?
Sometimes my timing gets off if we have a busy morning, or (as mentioned above) it bubbles up faster than I anticipated or had planned, and has already started to shrink down again. It still looks bubbly but doesn’t float. When this happens (and yes, has happened many times!), I still use the starter, but just add another 1-2 tablespoons of starter to the regular recipe.
What can I do with the Sourdough Discard?
The idea of “discarding” your starter is there for a reason: if you never discard or remove a portion of your starter from the jar, but keep feeding it and never take any out for baking in recipes, then if you are following the 1:1 feeding ratio it will quickly multiply and you will have to keep feeding it higher quantities of flour/water each day!
As a result of this multiplying “problem” there are now oodles of “sourdough discard” recipes and ideas to be found on the internet, to incorporate the inactive starter into a recipe instead of throwing it in the trash.
How can I get a Sourdough Starter?
There are dehydrated sourdough starters that you can purchase online, or you can make your own from scratch (it takes about 10 days, I am still developing a post post to follow soon with instructions), or if possible, see if a friend can give you a portion of theirs.
Sourdough starters that have been fed and cultured for years are pure gold to beginners!
How to Make Sourdough Bread
This recipe’s timing has been written to bake the loaf off on the 2nd day late morning. Adjust the start time to bake off in the evening.
You can read above HERE for more suggestions on feeding your starter.
If your kitchen is more humid and warmer, than your starter may take less time to activate. You could feed your starter in the early afternoon instead to keep with this recipe’s timing.
2. Mix your Dough in the Evening
Mix your active starter with the water and set aside. Mix the flour and salt together in larger bowl, then add the wet ingredients and stir together until it forms a sticky ball.
I find it easier to finish mixing it with my hands. If it is dry, resist the urge to add any water! Cover with beeswax cover/plastic wrap/tea towel and rest for 30 minutes.
3. Stretch & Fold: 1st Way
Wet one hand and gently loosen dough from edges of bowl. Take a handful of dough from the top of the bowl and pull towards you *See picture. Turn bowl 1/4 turn and repeat for a total of 4 stretch & folds to complete circle.
Cover and rest 20 minutes
Repeat stretch & fold full circle
Cover and rest 20 minutes
Repeat stretch & fold full circle
Cover and rest overnight 10-12 hours.
Day Two:
4. Lift & Fold: 2nd Way
Wet both hands and loosen dough from edges of bowl. Using both hands, pick up dough from middle and let it droop over the sides of your hands. *See picture. Gently lower into bowl and let it fold on top of itself. Turn bowl 1/4 turn and repeat for total of 4 to complete full circle.
Note: If it is stiff at first, you can pick it up and gently stretch a little with your wet hands to encourage the gluten. *See picture.
Cover and rest 20 minutes
Repeat lift & fold full circle
Cover and rest 20 minutes
5. Transfer to Fridge
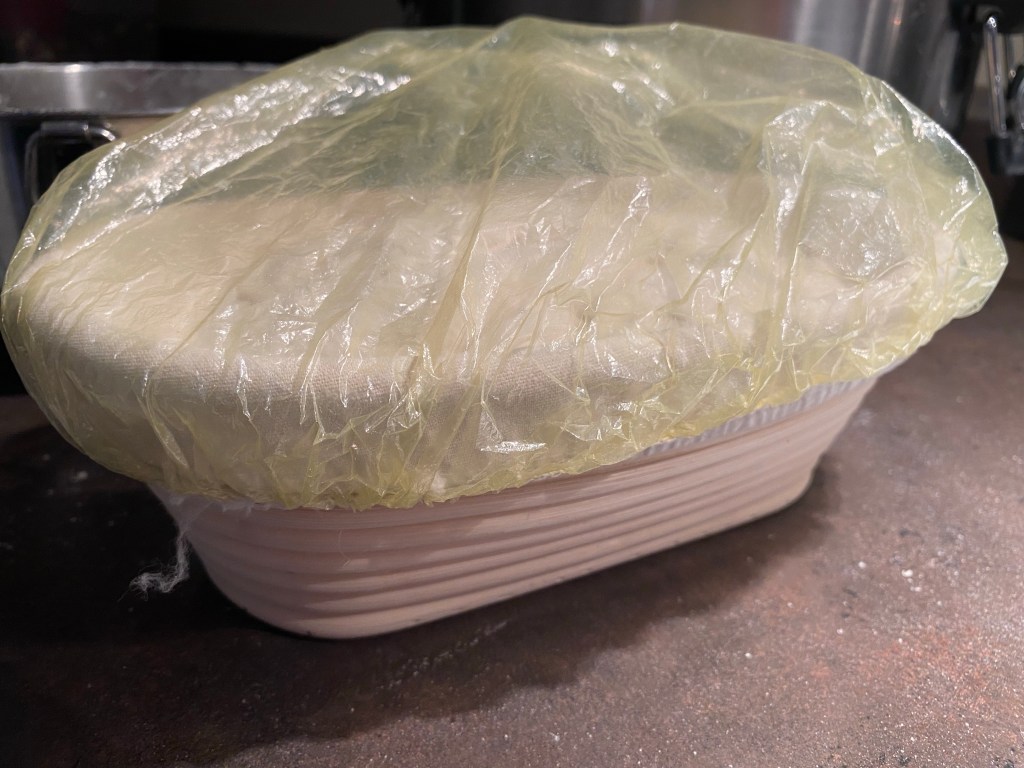
Put on floured surface and form into soft ball with floured hands. Put into banneton basket with smoothest side down and cover OR into a clean bowl lined with parchment paper, smoothest side up.
Cover and place in fridge for 1-24 hours. *This step is great, because you can keep the bread dough in there until you are ready to use it. It will continue cold fermenting and “proofing” during this time.
Note: If in fridge for longer than 1 hour, start preheating 1 hour from when you plan to bake.
6. Bake
Put your dutch oven or roasting pan in oven with lid on and preheat oven to 450 degrees.
Approximately 1 hour from the time you turned the oven on, take dough out of the fridge.
If using a banneton, transfer to parchment lined baking sheet. (I like to place a big piece of parchment on top of banneton, place cookie sheet upside down on top of parchment, then flip it right side up and gently pull banneton off, revealing the smooth side of the dough).
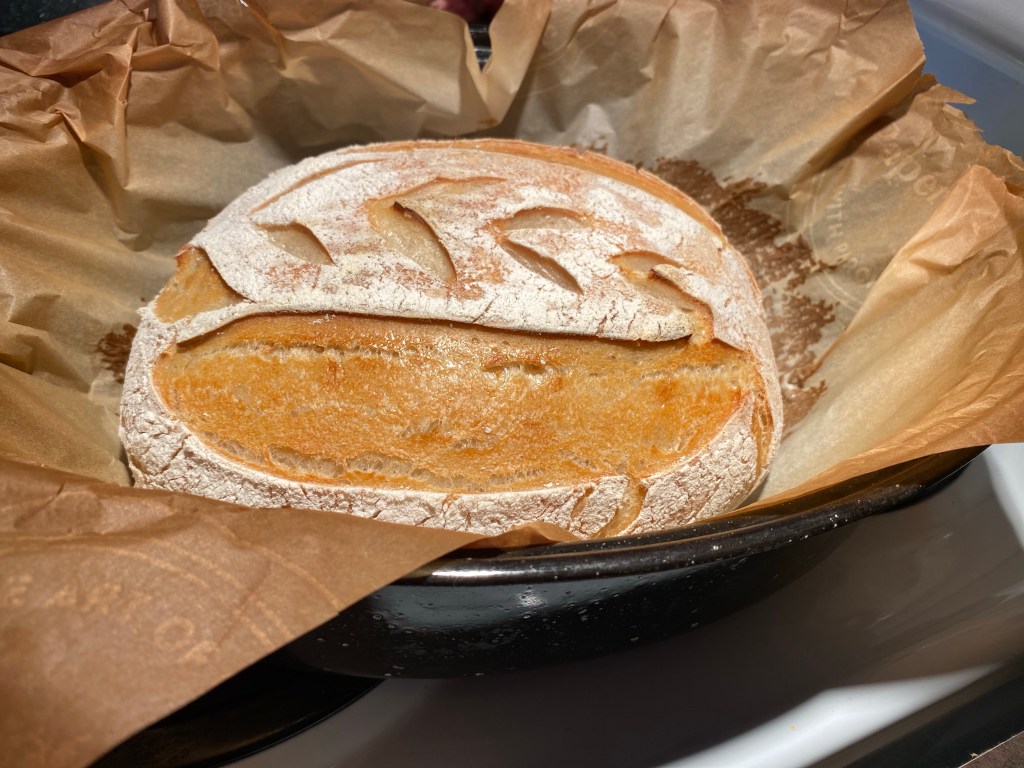
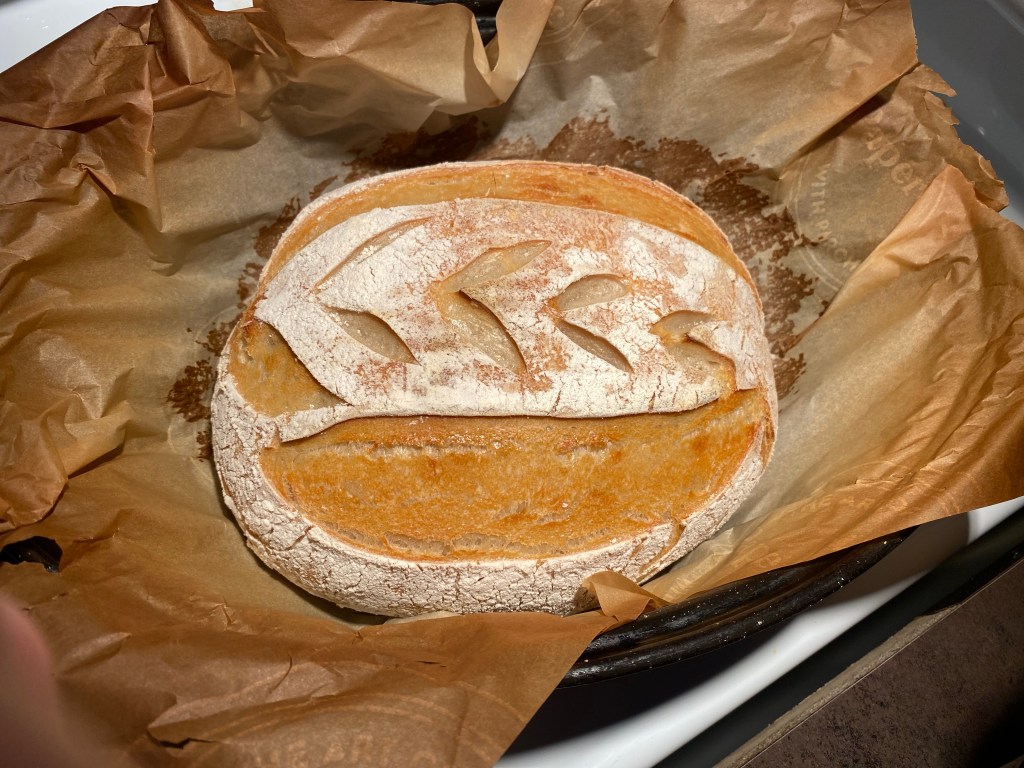
If desired, lightly dust the top of the bread with flour.
Proceed to score the top with sharp knife, razor blade or baking “lame”.
If using a bowl already lined with parchment, continue to score.
Take dutch oven or roaster out of oven, take lid off, and transfer dough by lifting up the parchment corners. Put lid back on and bake for 20 minutes.
After 20 minutes, take lid off and continue to bake for another 15-20 minutes or until golden and crusty.
7. Cool
Cool on wire rack, and let air harden the crust a little as desired. Store in airtight container or ziplock bag at room temperature to maintain freshness.
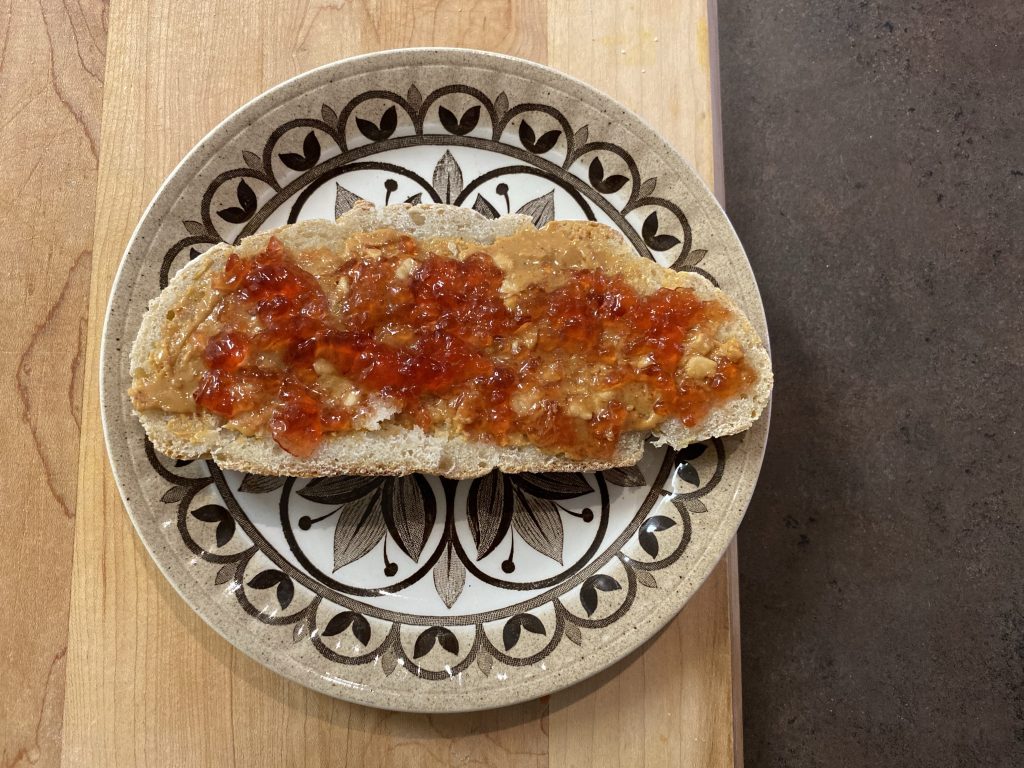
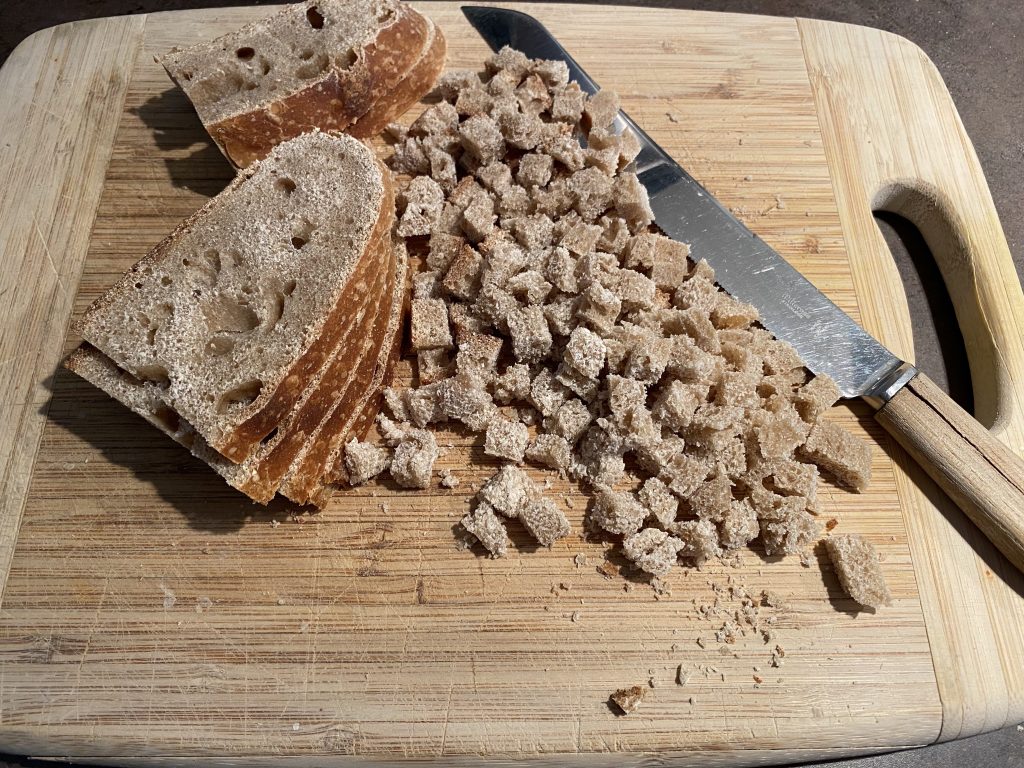
These are some of my favourite ways to eat Sourdough Bread:
Peanut butter and homemade jamSlathered in butter and dipped into a hearty soupDiced and toasted up into croutons for a saladToasted and blended into bread crumb for breaded chicken
I’m a Wife and Homeschooling Mom living in a remote town in Northern Ontario, Canada.I love making wholesome meals for my family from scratch, homeschooling our girls and learning more about natural living.
Subscribe to Northbird’s email list to get weekly posts on: tasty recipes, activity ideas for kids, natural living tips, and some genuine mom thoughts and encouragement!
Please Note: This recipe’s timing has been written to bake the loaf off on the 2nd day late morning. Adjust the start time to bake off in the evening.
Directions: Day One
1. Feed Your Starter In the Morning
You can read above HERE for more suggestions on feeding your starter.
If your kitchen is more humid and warmer, than your starter may take less time to activate. You could feed your starter in the early afternoon instead to keep with this recipe’s timing.
2. Mix your Dough in the Evening
Mix your active starter with the water and set aside. Mix the flour and salt together in larger bowl, then add the wet ingredients and stir together until it forms a sticky ball. I find it easier to finish mixing it with my hands. If it is dry, resist the urge to add any water!
Cover with beeswax cover/plastic wrap/tea towel and rest for 30 minutes.
3. Stretch & Fold: 1st Way
Wet one hand and gently loosen dough from edges of bowl. Take a handful of dough from the top of the bowl and pull towards you *See picture. Turn bowl 1/4 turn and repeat for a total of 4 stretch & folds to complete circle.
Cover and rest 20 minutes.
Repeat stretch and fold full circle.
Cover and rest 20 minutes.
Repeat stretch and fold full circle.
Cover and rest overnight 10-12 hours.
Directions: Day Two
4. Lift & Fold: 2nd Way
Wet both hands and loosen dough from edges of bowl. Using both hands, pick up dough from middle and let it droop over the sides of your hands. *See picture. Gently lower into bowl and let it fold on top of itself. Turn bowl 1/4 turn and repeat for total of 4 to complete full circle.
Note: If it is stiff at first, you can pick it up and gently stretch a little with your wet hands to encourage the gluten. *See picture.
Cover and rest 20 minutes
Repeat 2nd way of stretch & fold full circle
Cover and rest 20 minutes
5. Transfer to Fridge
Put on floured surface and form into soft ball with floured hands. Put into banneton basket with smoothest side down and cover OR into a clean bowl lined with parchment paper, smoothest side up.
Cover and place in fridge for 1-24 hours.
Note: If in fridge for longer than 1 hour, start preheating 1 hour from when you plan to bake.
6. Bake
Put your dutch oven or roasting pan in oven with lid on and preheat oven to 450 degrees.
Approximately 1 hour from the time you turned the oven on, take dough out of the fridge.
If using a banneton, transfer to parchment lined baking sheet. (I like to place big piece of parchment on top of banneton, place cookie sheet upside down on top of parchment, then flip it rightside up and gently pull banneton off, revealing the smooth side of the dough).
If desired, lightly dust the top of the bread with flour.
Proceed to score the top with sharp knife, razor blade or baking “lame”.
If using a bowl already lined with parchment, continue to score.
Take dutch oven or roaster out of oven, take lid off, and transfer dough by lifting up the parchment corners. Put lid back on and bake for 20 minutes.
After 20 minutes, take lid off and continue to bake for another 15-20 minutes or until golden and crusty.
7. Cool
Cool on wire rack, and let air harden the crust a little as desired. Store in airtight container or ziplock bag at room temperature to maintain freshness.
Nutrition
Per 2 slices: 190 calories; 0.5 g fat; 40 g carbohydrates;
5.4 g protein; 465 mg sodium.
This post contains affiliate links. As an Amazon associate, I earn from qualifying purchases. This means that I make a small commission at no extra cost to you. You can read my full disclosure HERE.
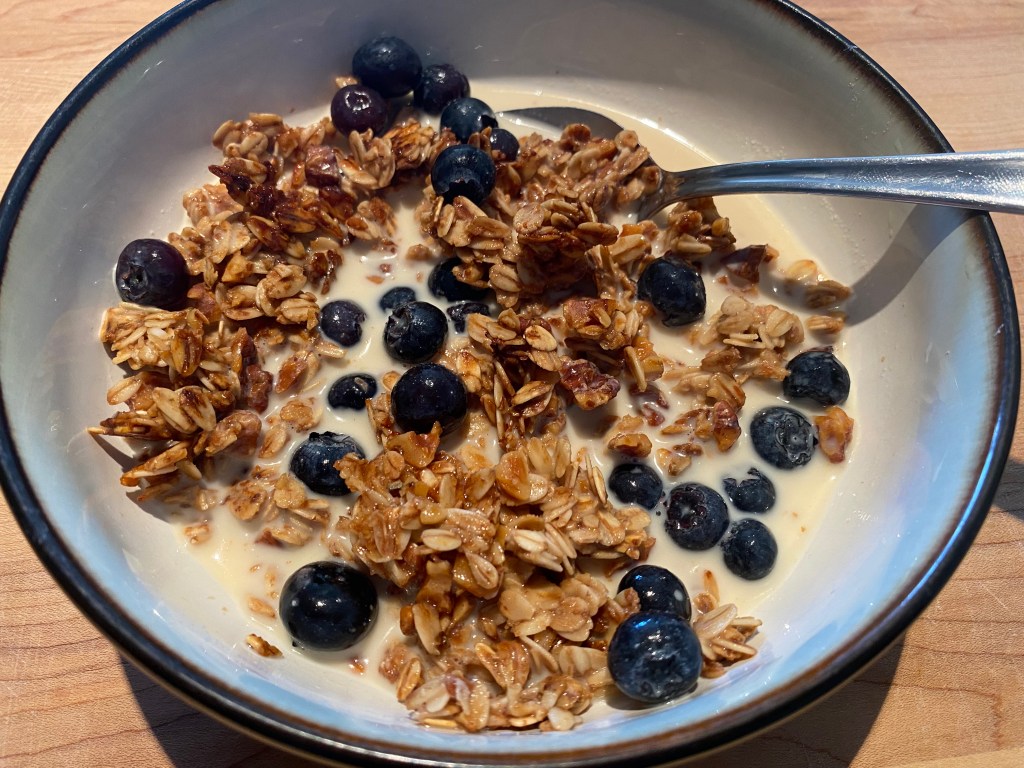
Granola is often associated and advertised as a healthy option for breakfast, and while there are some great brands and mixes on the market, there is a large number of granolas that are full of processed sugars and cheap oils.
This granola recipe uses unpasteurized honey and pure maple syrup as natural sweeteners, and organic unrefined coconut oil to help hold it together. Addicting, delicious and crunchy, you’ll never want to buy from the store again after making this recipe!
Ways to Eat Granola:
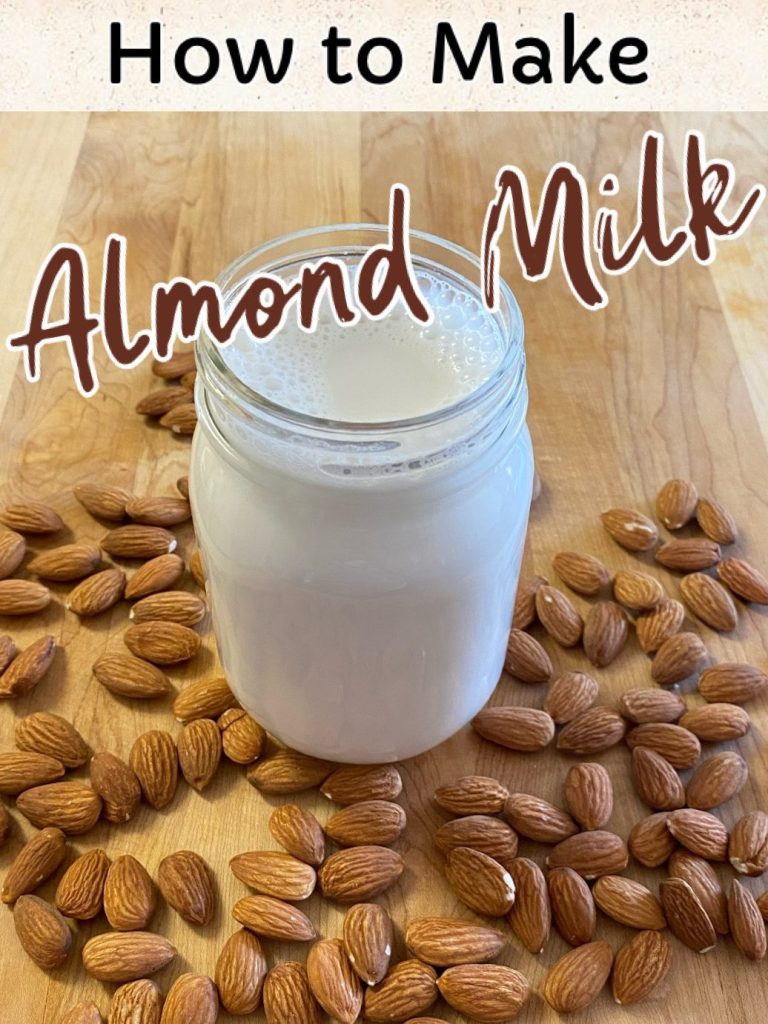
Breakfast bowl with regular milk, oat milk, soy, or nut milks (try it with Homemade Almond Milk!) and add some berries for fresh sweetness.
Take a baggie of granola for your next hike or camping trip and add some dried fruit or seeds and nuts for a delicious trail mix.
Make a Breakfast Parfait with frozen berries and yogurt!
Use it as a baked desert crumb topping (Apple Crisp recipe coming soon!)
Make granola bars from it! (Recipe being developed)
Health Benefits of Granola
Healthy granola recipes are usually high in protein, fibre and healthy fats due to recipe variations that may include oats, nuts, seeds, dried fruits and organic unrefined oils. They are packed full of nutritious options that make a filling, on-the-go quick breakfast or snack option.
Protein:
Protein is essential to the body for not only helping to build muscle mass and bones, but also very important for weight loss and regulating metabolism. Additional functions may consist of:
Slowing appetite and hunger cravings
Feel “full” for longer, less calories eaten
Helps with fat burning
Lowering blood pressure
Helps to maintain weight loss
Boosts metabolism
Builds muscle mass and strength
Lowers risk of osteoporosis and fractures
Helps to repair broken bones and tissues
High Protein Ingredients in Granola
Nuts
Walnuts, Almonds, Cashews, Peanuts, Pistachios, Brazil Nuts, Hazelnuts…
It is soooo easy! Chop… Melt… Mix… Spread… Bake… Eat!
Way less expensive than buying from the store.
Store-bought granolas are often made with lower quality ingredients and usually have more processed sugars and additives mixed in to prolong shelf life.
When you make your own granola you know exactly what ingredients you are eating!
Granola is a versatile recipe: You can add more nuts and seeds, and add dried fruits/berries at the end if desired.
Granola is one of those easy and quick breakfast solutions to help your day start smoothly!
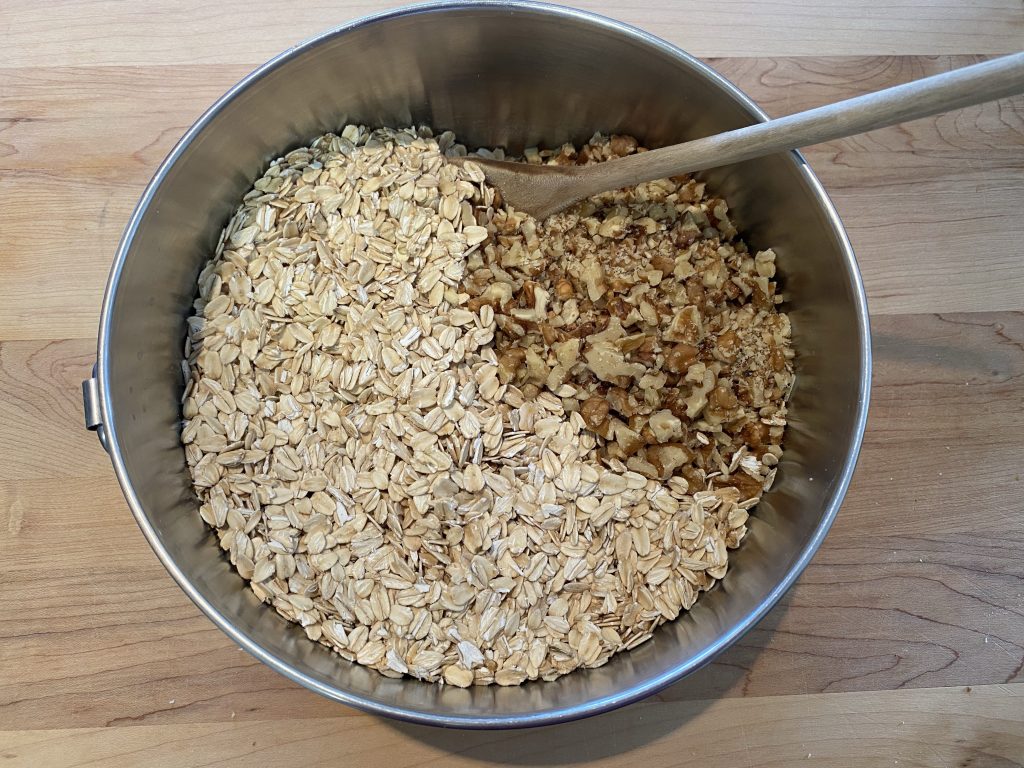
2. Mix the oats and walnuts together in a large bowl.
3. Melt the coconut oil in a small pot and add maple syrup, honey, sea salt and vanilla. Mix well.
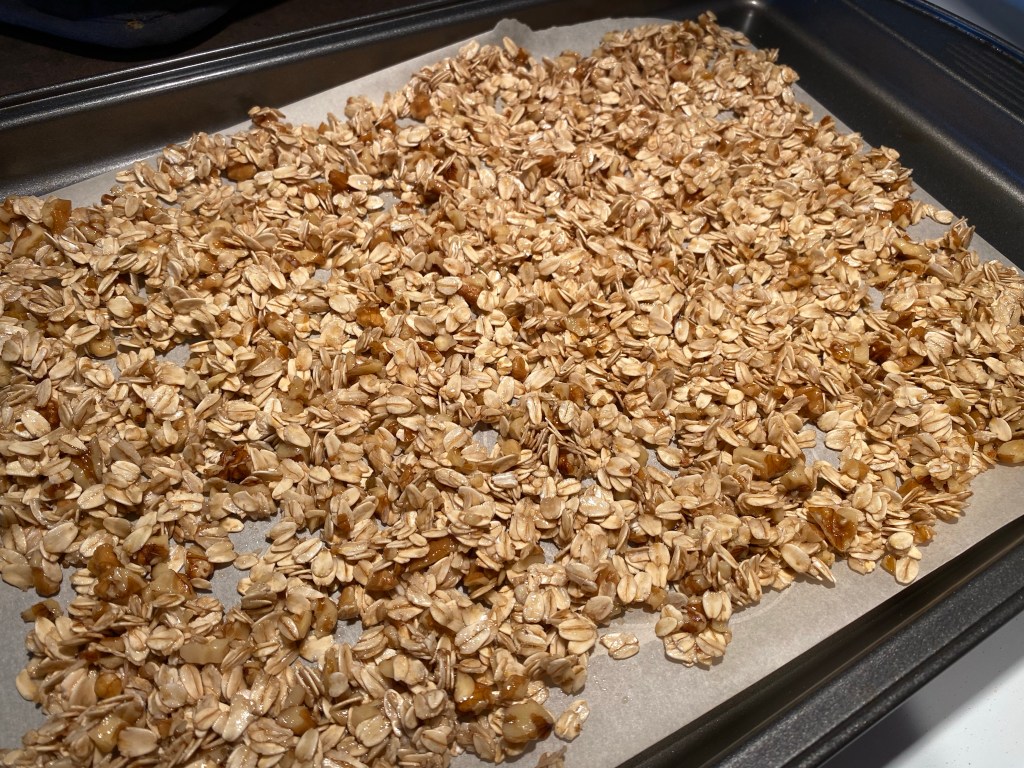
4. Add the wet mix to dry mix and stir well. If it has cooled enough you can finish mixing with your hands (I always find this easiest, but be careful of the hot oil!)
5. Spread granola mix onto parchment covered cookie sheets. Granola should be in a single layer.
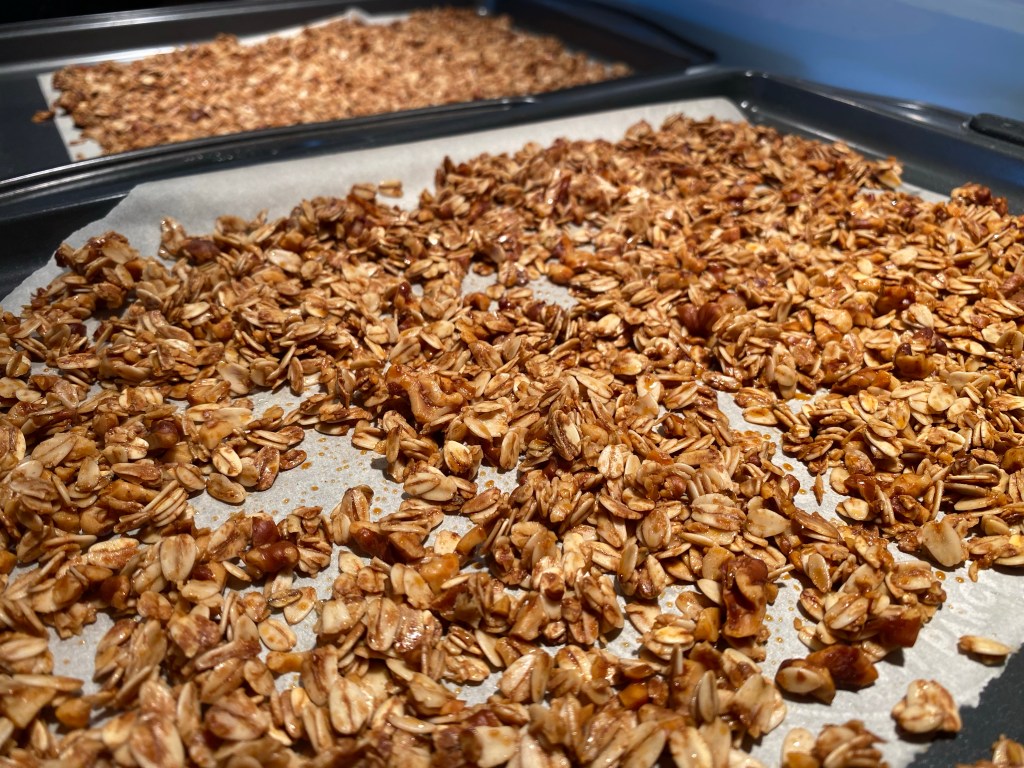
6. Bake for 35-40 minutes (depending on your oven), until golden.
7. Let cool and sit undisturbed for an hour, it will firm up as it cools down.
8. Break into smaller pieces per preference and store in airtight container for up to 1 month.
I’m a Wife and Homeschooling Mom living in a remote town in Northern Ontario, Canada.I love making wholesome meals for my family from scratch, homeschooling our girls and learning more about natural living.
Subscribe to Northbird’s email list to get weekly posts on: tasty recipes, activity ideas for kids, natural living tips, and some genuine mom thoughts and encouragement!
Mix the oats and walnuts together in a large bowl.
Melt the coconut oil in a small pot and add maple syrup, honey, sea salt and vanilla. Mix well.
Add the wet mix to dry mix and stir well. If it has cooled enough you can finish mixing with your hands (I always find this easiest, but be careful of the hot oil!)
Spread granola mix onto parchment covered cookie sheets. Granola should be in a single layer.
Bake for 35-40 minutes (depending on your oven), until golden.
Let cool and sit undisturbed for an hour, it will firm up as it cools down.
Break into smaller pieces per preference and store in airtight container for up to 1 month.
Nutrition
Per 1 Cup Serving: 309 calories; 16.1 g fat; 38.6 g carbohydrates;
6.2 g protein; 0 mg cholesterol; 119.2 mg sodium.
This post contains affiliate links. As an Amazon associate, I earn from qualifying purchases. This means that I make a small commission at no extra cost to you. You can read my full disclosure HERE.
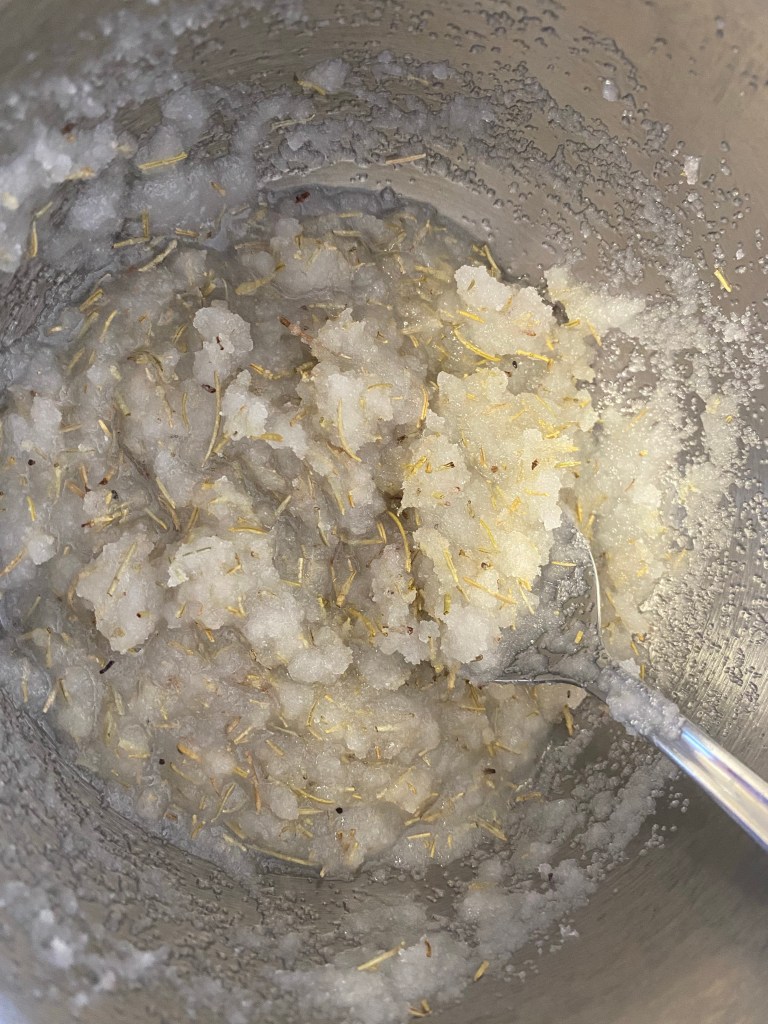
Most scrubs are simply made using products found right in your kitchen! The basis of most scrub recipes consist of: an oil and an exfoliant, with herbs and essential oils used to cleanse and exfoliate the skin, and relax muscles.
The basic recipe for the majority of scrubs out there is a 2:1 ratio of dry exfoliant to oils. Depending on the need of your skin type this ratio can be adjusted. For example, if your skin is dryer you may want to use a little more coconut or other carrier oil. If you have rough skin, you may want to use a little more exfoliant in the ratio.
Sugar and salt are most commonly used as an exfoliant, and while there are many types of sugars and salts, my opinion is that the bigger the granules are, the better it will rub on your skin. For example, I would recommend a coarsely ground sea salt over an iodized-finely ground table salt. However, I have also enjoyed learning of many more creative ingredients that can be used as the rough element in a scrub: oatmeal, coarsely ground coffee beans, rice, some seeds, veggies and fruits.
Dried Herbs and Flowers:
Lavender -Most health food stores carry this, with comparable prices on Amazon due to their popularity.
Rosemary -Check your kitchen spices! Or you can buy at any grocery store.
Peppermint -Easy to grow, or you can forage for wild mint! You can also cut open a peppermint tea bag or purchase larger dried pieces at the grocery store or online.
Rose Petals -You can pick your own wild roses and dry them or look for them at your local health food store, or buy online.
Rosehips -These grow in abundance in the north, so we pick our own wild rosehips and dry them, but you can also purchase them online or check out your local health food store.
Calendula -Easy to grow your own! Also available at health food stores or online.
Chamomile -Look for these growing wild! Just be careful to select flowers that are not near roads or have been sprayed. You can also cut open a Chamomile tea bag, or buy the whole flowers at a health food store or online.
Other Commonly Used Essential Oils for Body Scrubs and Their Medicinal Uses:
Peppermint: A great resource for opening up the sinuses and relieving headaches.
Lemon: A bright and refreshing scent that helps to even out the skin tone.
Tea Tree: Aside from being used to treat lice and insect bites, Tea Tree oil is also known as an anti-fungal, and anti-septic and an anti-inflammatory.
Eucalyptus: An antiseptic, anti-fungal, anti-viral, and anti-bacterial essential oil. Fights infection and promotes healing.
Rosehip: Primarily used for treating eczema, acne and rashes. It has linoleic acid in it which shrinks pimples and reduces inflammation.
Sweet Orange Oil: An anti-bacterial, anti-inflammatory, aides in digestion, but most known to act as a mood enhancer and relaxant.
Geranium: Used to treat depression, balance hormones, improve circulation, and sleep aid to name a few.
Carrot Seed Oil: An antioxidant, anti-fungal and anti-bacterial. Primarily used to treat skin infections and inflammations.
Jasmine: Used to treat depression and anxiety, aides in balancing hormones and improving energy and sleep.
Grapefruit: Treats acne and other skin infections. Mood enhancer and may also help with weight loss.
Other Skin Oils:
Vitamin E Oil is one that I always add a few drops of into whatever skin care products I am making at the time. It is highly beneficial to the skin because of its moisturizing properties and it is also an antioxidant.
Jojoba Oilis another all-around essential skin oil that is a great moisturizer and cleanser. It is also known to help with treating acne, psoriasis and eczema.
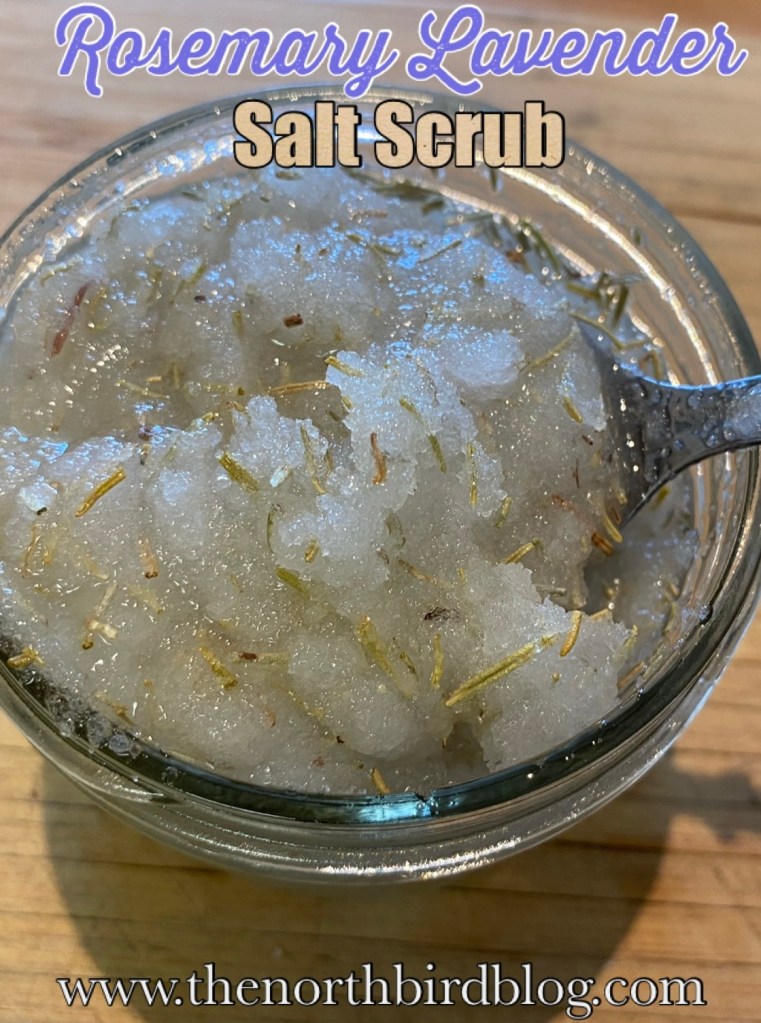
Melt the Coconut oil in microwave or in a small pot on the stove.
Mix in all the other ingredients.
Let cool if the oil is still warm.
Spoon into jar for storage.
Optional: Label and tie ribbon or twine around it for a cute DIY gift!
More Ideas for Natural Living:
Hi, I’m Jessie!
I’m a Wife and Homeschooling Mom living in a remote town in Northern Ontario, Canada.I love making wholesome meals for my family from scratch, homeschooling our girls and learning more about natural living.
Subscribe to Northbird’s email list to get weekly posts on: tasty recipes, activity ideas for kids, natural living tips, and some genuine mom thoughts and encouragement!
An on-going picture collection of various herbs, vegetables, fruits, oils, etc and highlighting some of the amazing health benefits that they have to offer us!
This post contains affiliate links. As an Amazon associate, I earn from qualifying purchases. This means that I make a small commission at no extra cost to you. You can read my full disclosureHERE.
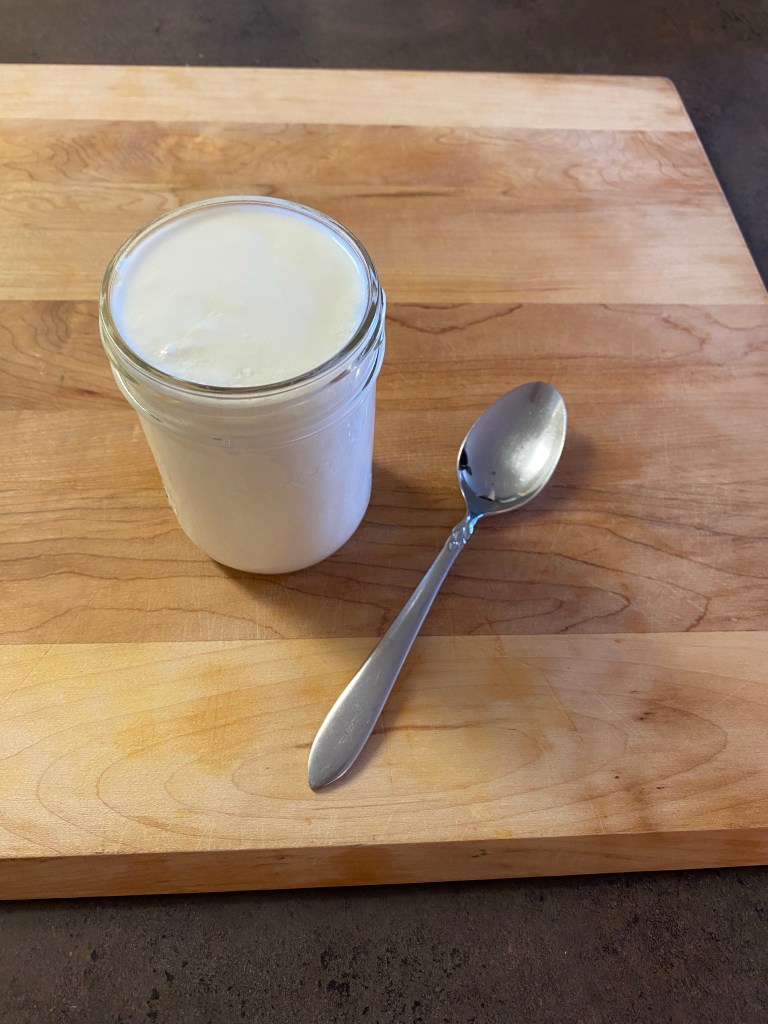
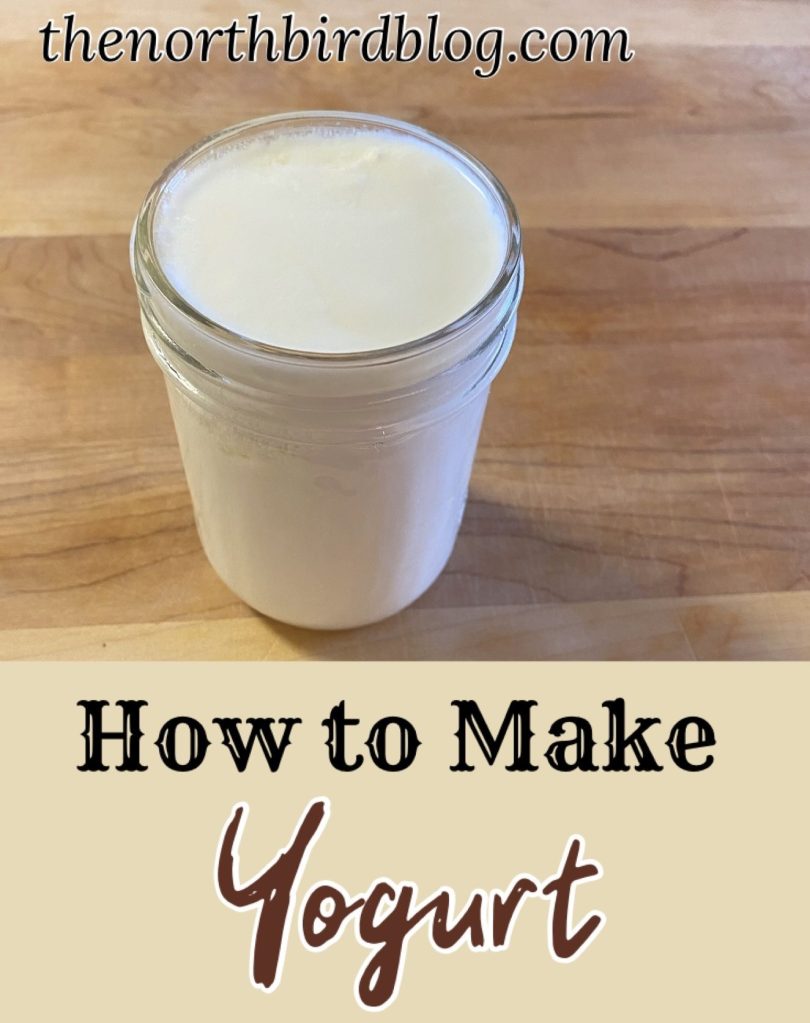
Homemade yogurt? Yes, it’s that easy. And I had no idea just how easy until a few months ago when I started trying it out.
My main reason to learn to make it from scratch was because of the cost of yogurt at our remote small town grocery store, and the fact that our girls liked having some nearly every day for breakfast!
I found several recipes for making it in an instant pot, but because I didn’t have one I wanted to find another option that would be easy and simple. After learning to make it successfully in the crockpot for several weeks, I decided it was worth sharing with the blog just how EASY and MONEY-SAVING homemade yogurt could be…and of course it is absolutely DELICIOUS.
Why Make Your Own Yogurt?
You know exactly what you are eating (no additives/preservatives/added sugar)
Saves on the grocery budget
Cuts down on garbage waste
You can flavour it however you like!
You can adjust the thickness by how much whey you strain out
What Can You do With the Leftover Whey? (It’s High in Protein!)
Store in a sealed jar or container in the fridge
Put the whey in soups and stews
Add it to smoothies
Use it to replace water when making bread or other baked goodies
8 cups 3% whole milk (2% works well too, just add another 1/4 cup starter)
1/2 cup yogurt starter (saved from last batch, or you can use store bought yogurt, unsweetened/unflavoured and if the label says it contains the live bacterial cultures. Dried yogurt starter is also available online)
2. Turn crockpot on low and heat slowly until meat thermometer reads 180 degrees Fahrenheit when you dip it into the milk. For me it takes 3 hours and 10 minutes, but depending on your crockpot it may take less time.
3. At 180 degrees, turn crockpot off with lid on and let cool slowly until temp reaches 110-115 degrees Fahrenheit. This usually takes me around 3 hours. Partway through this time, take out your yogurt starter from the fridge and let it come to almost room temperature.
4. Take out about 2 cups of warm milk and in a separate bowl, whisk in your yogurt starter (or see note above for store bought yogurt). Whisk until there are no lumps and return to crockpot.
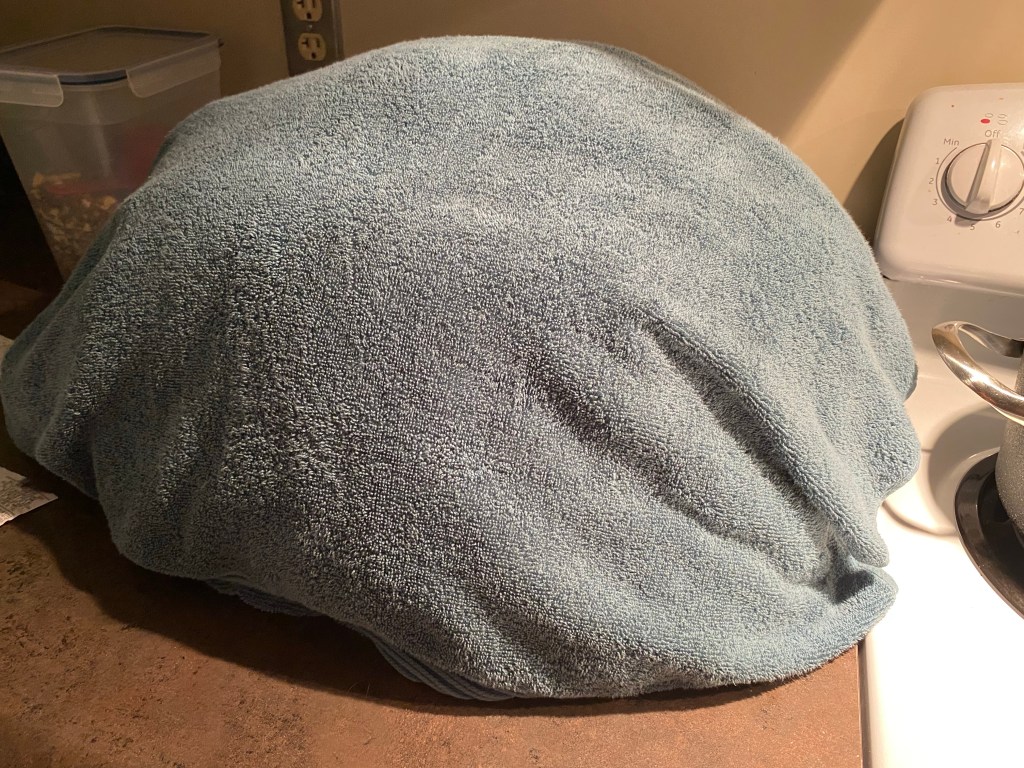
5. Put lid back on, (if you have clamps on your crockpot it’s good to use them at this point!) and cover crockpot with several heavy towels. Let sit undisturbed for around 12 hours or overnight.
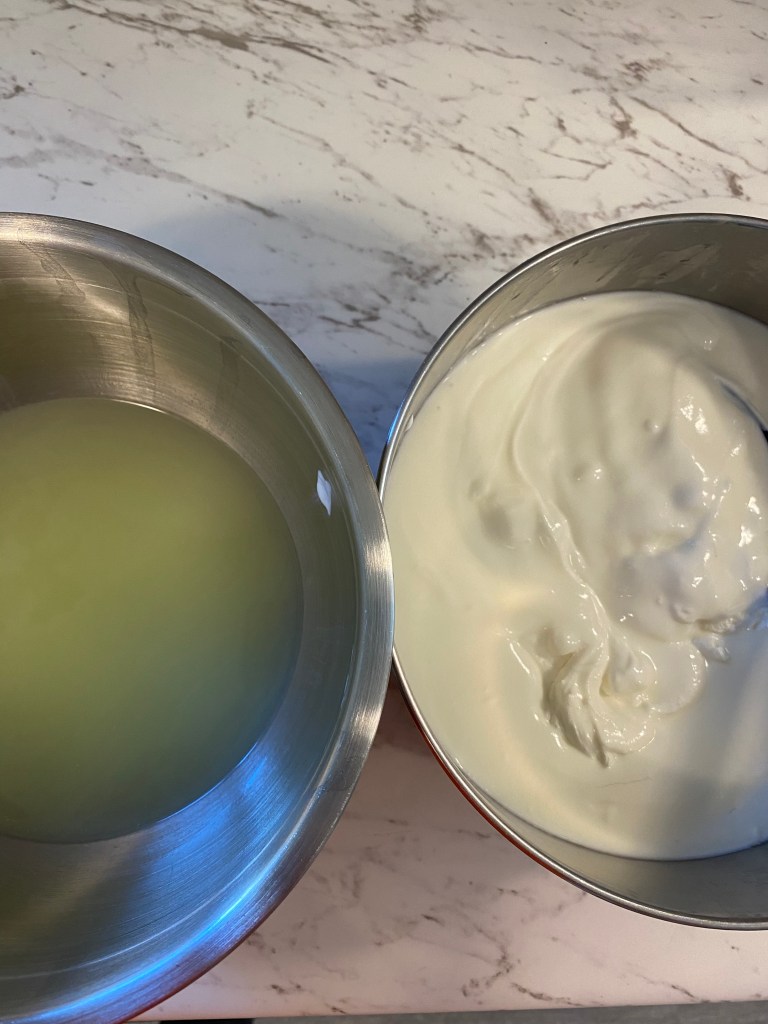
6. The next morning, spoon out the yogurt into a nutmilk bag or tea towel and hang up over a bowl to separate out the whey. Let strain for 1-2 hours for thicker greek yogurt. Strain for less time or omit straining altogether for a thinner, drinkable yogurt.
7. When it has strained out enough whey, pour yogurt into clean glass jars or plastic container and chill in the fridge for 4-6 hours.
8. Use up within 2 weeks. Make sure to save some pure yogurt (unflavoured) for the next batch!
Additional Notes:
For those that like a little more flavour and sweetness, you can try adding one of the suggestions from above. We personally enjoy adding honey and vanilla!
When making greek yogurt, I usually end up with about 2 cups of whey, and 6 cups of thick yogurt. Adjust desired thickness of yogurt by how much whey you strain out.
For making drinkable yogurt, just leave the whey in and omit straining altogether. It is wonderful added protein!
Check out these other Breakfast Recipes from the Northbird Kitchen!
Hi, I’m Jessie!
I’m a Wife and Homeschooling Mom living in a remote town in Northern Ontario, Canada.I love making wholesome meals for my family from scratch, homeschooling our girls and learning more about natural living.
Subscribe to Northbird’s email list to get weekly posts on: tasty recipes, activity ideas for kids, natural living tips, and some genuine mom thoughts and encouragement!
How to make your own greek and drinkable yogurt in the crockpot!
For those that like a little more flavour and sweetness, you can try adding one of the suggestions from above. We personally enjoy adding honey and vanilla!
When making greek yogurt, I usually end up with about 2 cups of whey, and 6 cups of thick yogurt. Adjust desired thickness of yogurt by how much whey you strain out.
For making drinkable yogurt, just leave the whey in and omit straining altogether. It is wonderful added protein!
8 cups 3% whole milk (2% works well too, just add another 1/4 cup starter)
1/2-3/4 cup yogurt starter (saved from last batch, or you can use store bought yogurt, unsweetened/unflavoured, containing live bacterial cultures. Dried yogurt starter is also available online)
Turn crockpot on low and heat slowly until meat thermometer reads 180 degrees Fahrenheit when you dip it into the milk. For me it takes 3 hours and 10 minutes, but depending on your crockpot it may take less time.
At 180 degrees, turn crockpot off with lid on and let cool slowly until temp reaches 110-115 degrees Fahrenheit. This usually takes me around 3 hours. Partway through this time, take out your yogurt starter from the fridge and let it come to almost room temperature.
Take out about 2 cups of warm milk and in a separate bowl, whisk in your yogurt starter (or see note above for store bought yogurt). Whisk until there are no lumps and return to crockpot.
Put lid back on, (if you have clamps on your crockpot it’s good to use them at this point!) and cover crockpot with several heavy towels. Let sit undisturbed for around 12 hours or overnight.
The next morning, spoon out the yogurt into a nutmilk bag or tea towel and hang up over a bowl to separate out the whey. Let strain for 1-2 hours for thicker greek yogurt. Strain for less time or omit straining altogether for a thinner, drinkable yogurt.
When it has strained out enough whey, pour yogurt into clean glass jars or plastic container and chill in the fridge for 4-6 hours.
Use up within 2 weeks. Make sure to save some pure yogurt (unflavoured) for the next batch!
Nutrition
Per 1 cup serving: 173 calories; 8.8 g fat; 13 g carbohydrates;
8.6 g protein; 33 mg cholesterol; 133 mg sodium.
This post contains affiliate links. As an Amazon associate, I earn from qualifying purchases. This means that I make a small commission at no extra cost to you. You can read my full disclosure HERE.
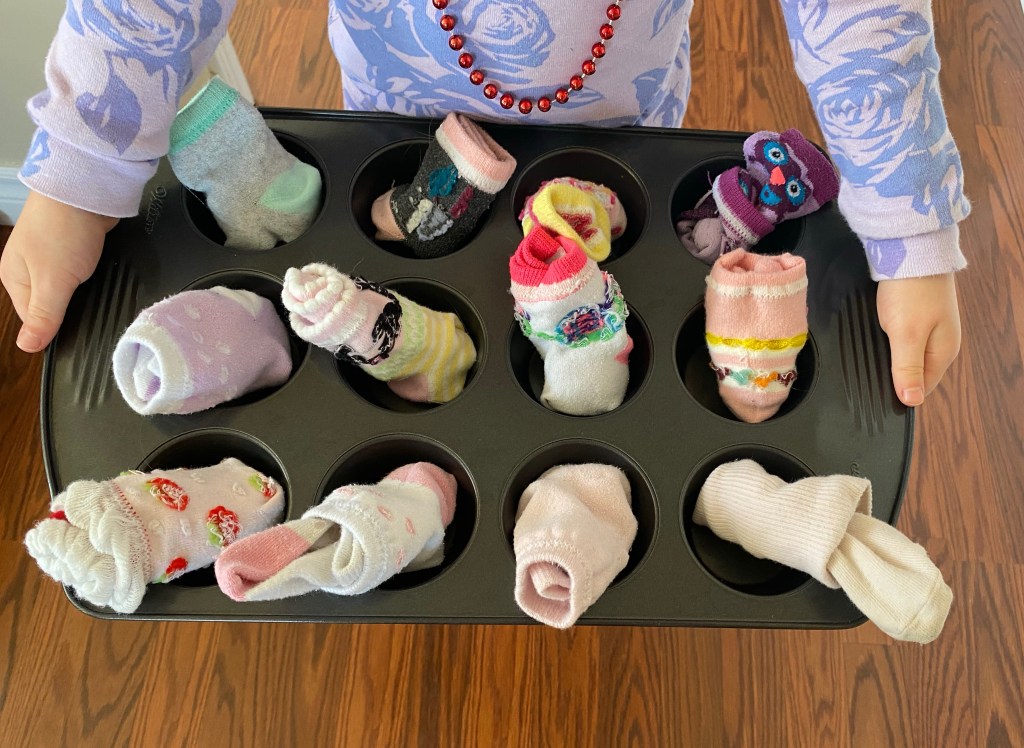
My four year old came up to me the other day and asked if she could play with her sister’s socks, I said yes and before I knew it, other random items from around the house also began disappearing.
I continued with prepping for dinner and didn’t interfere with her creativity or whatever was going on in the girls room. It was a rare moment during their play time that I wasn’t having to come up with an activity or entertain them, so I just let them continue playing.
Several minutes later I was asked to come to their “store” and was given some paper money to buy items. She had arranged the socks in my muffin pans as “cupcakes”, shoes were lined up on the windowsill as items to buy, little puzzle pieces were painstakingly arranged as little “cookies” and “biscuits” in stacks on top of books (cookie sheets), and tupperware was filled with other random items and placed around the room. I was handed a shopping bag and given a thorough tour of their store and what products were for sale.
After carefully selecting items to purchase, and handing her the paper money, she said “Wait a minute Mommy, you need your receipt!” She placed a shoe liner in the crack of her dresser drawer and slowly pulled it out with sound effects “Vvvvvvt!”
I just love moments like these, seeing her have the freedom to explore an idea based on things she has experienced, and implement them with her imagination and creativity. This imagination play has continued for several days now and each time there has been variations on the items available for sale and delicious sounding food from the bakery.
My favourite thing that she “made” me is Avocado chocolate chip and strawberry muffins!
To Continue on Socks…
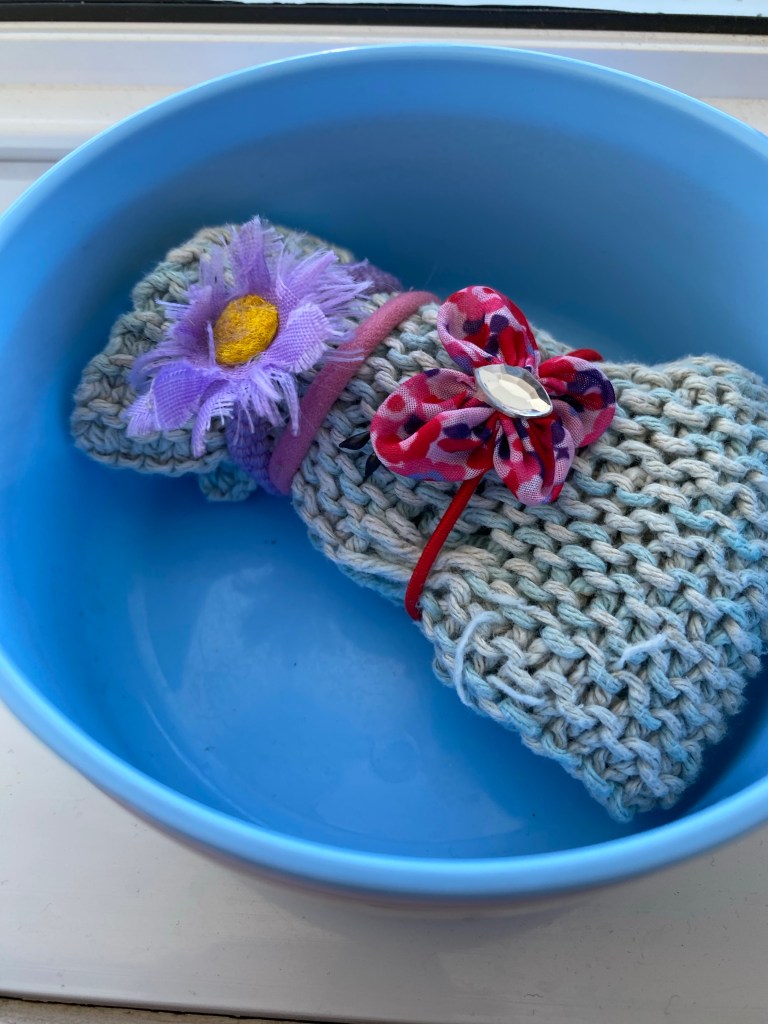
In the weeks that followed, socks began turning up everywhere it seemed. Socks as mittens, socks as purses, socks as sleeping bags for Barbie dolls, socks as oven mitts, socks as dusters, and socks were carefully folded or rolled up as “food” in the girl’s little toy kitchen pots.
It was as if one simple request unleashed an avalanche of ideas and creativity that I was not altogether prepared for.
I found socks in various stages of imagination play, always still “important” and “No Mommy, I still need that!” was the protest when I would pick up a sock to put away.
One day I counted 9 odd socks in the clean laundry!
Now, this may not seem like a big deal to some, and the self-directed playtime has been SO wonderful for both girls (and me, so I can do dinner prep!) But for those that don’t know me, I have struggled for many years with some OCD tendencies. And chaos in the form of clutter and toys strewn about is still quite a challenge!
I have no stress going to other homes that are likewise -very much lived in- and it’s just a given with having kids that life will be messy! But when it’s my home comfort space, that I spend most of my time in…you get the idea.
I have however changed a lot in the past few years since becoming a mom. For example, learning to let go of controlling the state of the living room (at least until the kid’s bedtime) is an area that I have grown in. And for me there’s an energy limit of reminding my oldest to put something away before getting new toys out!
Through all this, my husband is of course the easy-going steady stream of “Relax honey, just let the kids do their thing, and I’ll help tidy up after.”
(I’m sure other moms can relate that sometimes it’s not just the kids that leave puddles of belongings around the house!) But to his credit, he’s a man of his word and always helps when he can.
So at the end of the day, when little eyes have closed for sleep and little feet have stopped rushing around, I look at the puddles of toys and remind myself that there won’t always be chaos. That one day their beautiful blue eyes will see and experience things that they can’t while living with us. And their precious little feet will take them on adventures away from Mum and Dada’s home.
So on those crazy, chaotic and deliciously messy days, I am doing my best to learn to be thankful for this unique time together, and treasure these creative and messy memories made with my kids. It is, after all, fun and precious moments like this that are more important than how clean and tidy my house is!
Here are a few of my favourite quotes to share with anyone who may need some fellow “Mom-couragement”!
“A Mother’s arms are made of tenderness and children sleep soundly in them.” (Victor Hugo)
“Mothers can look through a child’s eyes and see tomorrow.” (Reed Markham)
“To the world you are a mother, but to your family you are the world.” (Unknown)
“Sometimes the strength of motherhood is greater than natural laws.” (Barbara Kingsolver)
“Being a mother is learning about strengths you didn’t know you had, and dealing with fears you didn’t know existed.” (Linda Wooten)
“If you’re a Mom, you’re a superhero. Period.” (Rosie Pope)
“There is no way to be the perfect mother, but a million ways to be a good one.” (Jill Churchill)
“She is clothed with strength and dignity, she can laugh at the days to come. She speaks with wisdom and faithful instruction is on her tongue.” (Proverbs 31:25-26)
“Good Moms have homes that are clean enough to be healthy, and messy enough to be happy.” (Unknown)
“Mother is the heartbeat in the home; and without her, there seems to be no heartthrob.” (Leroy Brownlow)
“For I am the Lord your God, who takes hold of your right hand and says to you ‘Do not fear, I will help you.'” (Isaiah 41:13)
“Cleaning your home while your kids are still growing is like shovelling the drive before it has stopped snowing.” (Unknown)
“Her children rise up and call her blessed.” (Proverbs 31:28)
“We have a secret in our culture, and it’s not that birth is painful. It’s that women are strong.” (Laura Stavo Harm)
“A baby fills a place in your heart that you never knew was empty.” (Unknown)
More Stories from The Mom Page:
Hi, I’m Jessie!
I’m a Wife and Homeschooling Mom living in a remote town in Northern Ontario, Canada.I love making wholesome meals for my family from scratch, homeschooling our girls and learning more about natural living.
Subscribe to Northbird’s email list to get weekly posts on: tasty recipes, activity ideas for kids, natural living tips, and some genuine mom thoughts and encouragement!
This post contains affiliate links. As an Amazon associate, I earn from qualifying purchases. This means that I make a small commission at no extra cost to you. You can read my full disclosureHERE.
Mac and cheese…for most people, its one of those staple comfort foods. However, a quick box of pasta and powdered cheese can mean tummy upset for others. And besides, who honestly likes powdered cheese anyway?
Over the past few years, our family has been exploring meal options and looking for ways to eat less processed foods and cutting down our grocery bill. One of those ways was to simply eat less meat and dairy products.
We are not vegans, but have become more conscious in trying to eat only grass-fed/non-steroid pumped meats, or wild game (which my sister-in-law K, calls “happy meat”!)
I also prefer to support small local farms whenever possible. For most dairy products in recipes it is easy to substitute with nut milks, creams, and cheese (still on my bucket list!).
So that brings us to why we like to cook vegan and vegetarian for some of our meals during the week: It not only helps with the grocery bill, but also encourages us to plan ahead (as most of them require soaking nuts, seeds, beans and legumes).
The end result: Happy tummies, and a little more cash in our pocket.
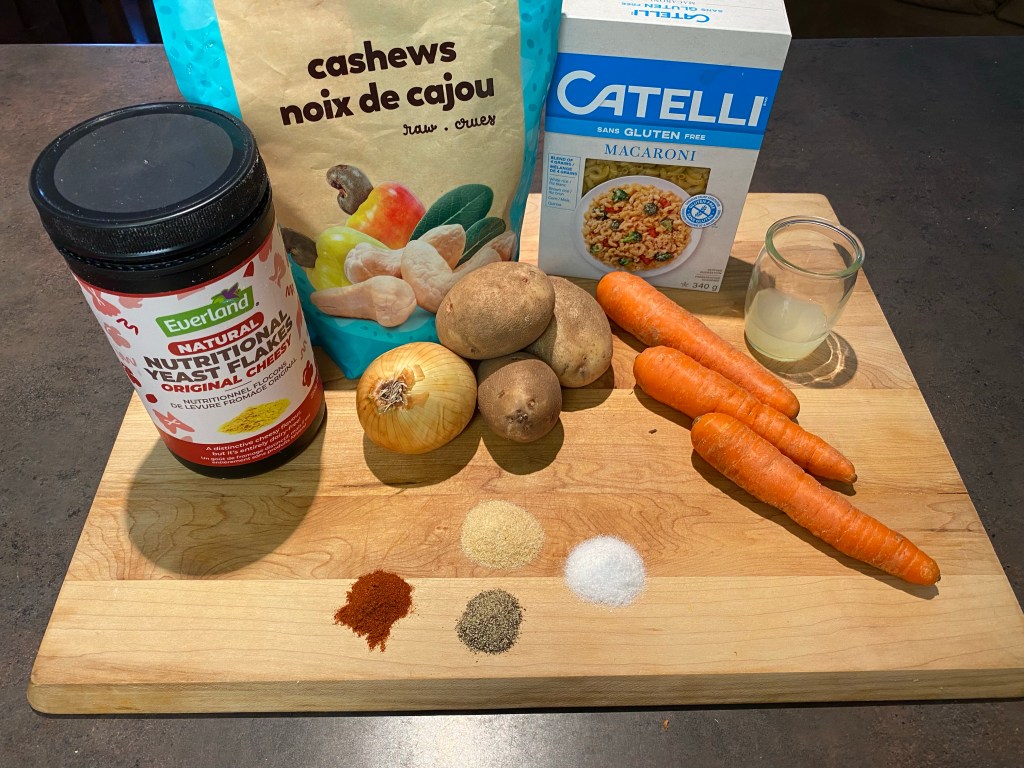
This vegan recipe uses cashews as the delicious creamy base and when mixed with spices and nutritional yeast, it has a nutty and cheesy flavour. The potato helps to thicken the sauce and the carrots give it that lovely cheesy colour and add a little sweetness.
Nutritional Benefits of Cashews:
A great source of plant protein
Rich in heart healthy fats
Low in sugar
Source of fibre
Contains magnesium and manganese (bone health)
Source of copper (brain development & immune system)
Antioxidant
Anti-inflammatory
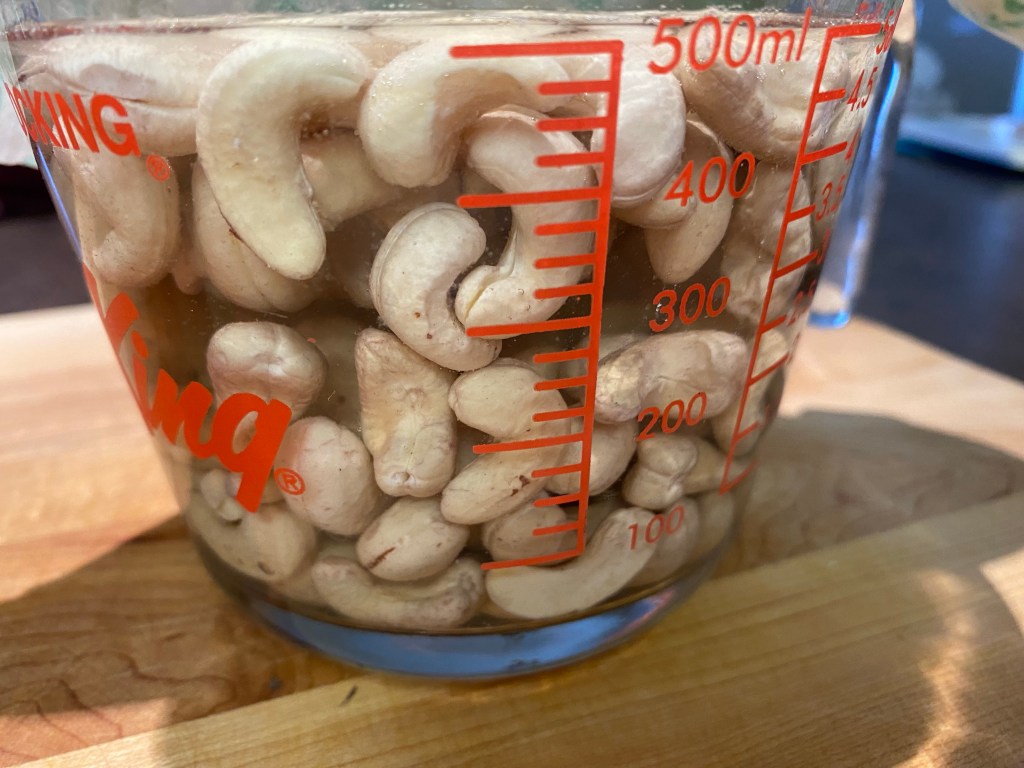
Why is it Important to Soak Cashews?
All nuts contain an enzyme inhibitor called phytic acid, which prevents the body from properly absorbing nutrients and makes it harder to digest. When the nut is soaked in water for 8-12 hours, the phytic acid is released from the nut, and optimal absorption of nutrients can now happen.
What is Nutritional Yeast?
Nutritional Yeast is a plant-based protein that is a deactivated yeast, and comes from a strain of Saccharomyces cerevisiae. It is often used in vegan recipes and loved for it’s cheesy and nutty-like flavour. In addition to being a great source of protein, it also contains trace amounts of minerals and B vitamins.
1 cup breadcrumbs (I toast up our leftover sourdough crusts)
Directions:
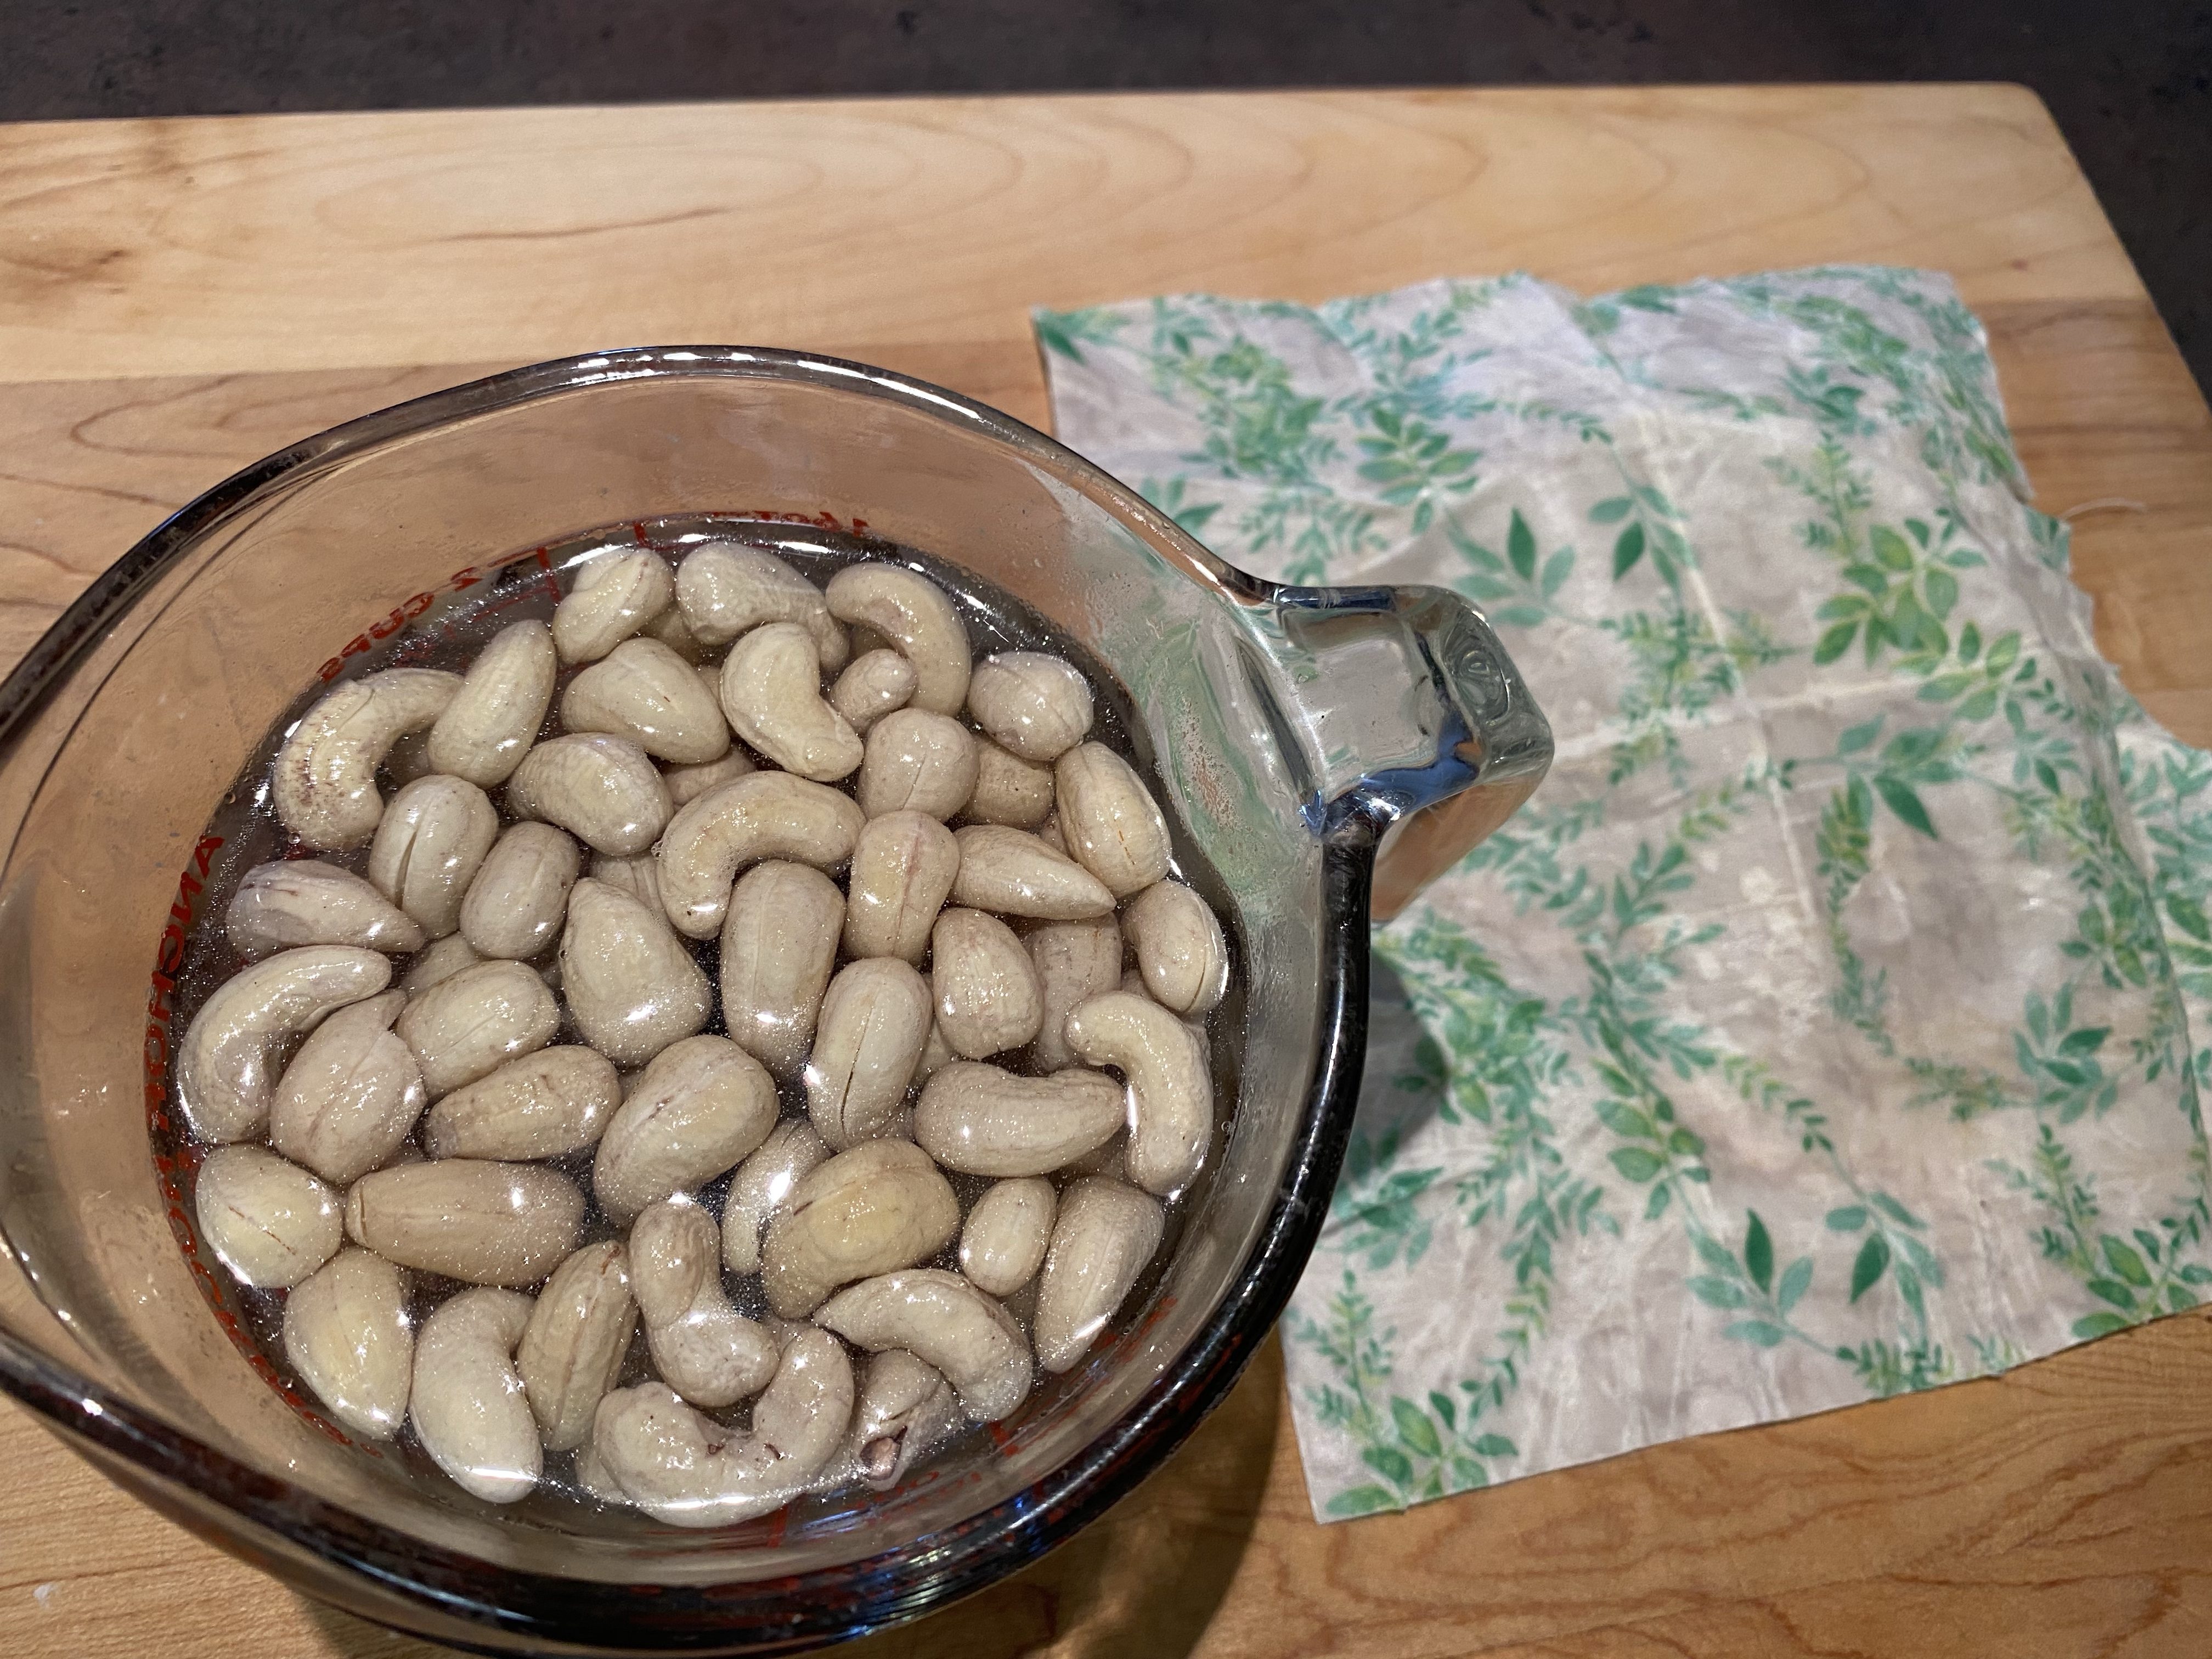
1. 8-12 hours prior to dinner, put 1 cup of cashews in water (submerged). Cover and keep on the counter until dinner prep.
2. Boil the macaroni pasta until tender, but do not over-cook! As soon as they are done, put through strainer and pour cold water over them. This will keep them firm until the end.
3. Peel carrots and potatoes and cut into chunks. Dice onion.
4. Boil vegetables with 2 cups water in small pot until tender. Strain, but save the broth!
5. Add cooked vegetables with 3/4 cup of the vegetable broth to the blender.
6. Add garlic powder, sea salt, black pepper, paprika, nutritional yeast and lemon juice to the blender.
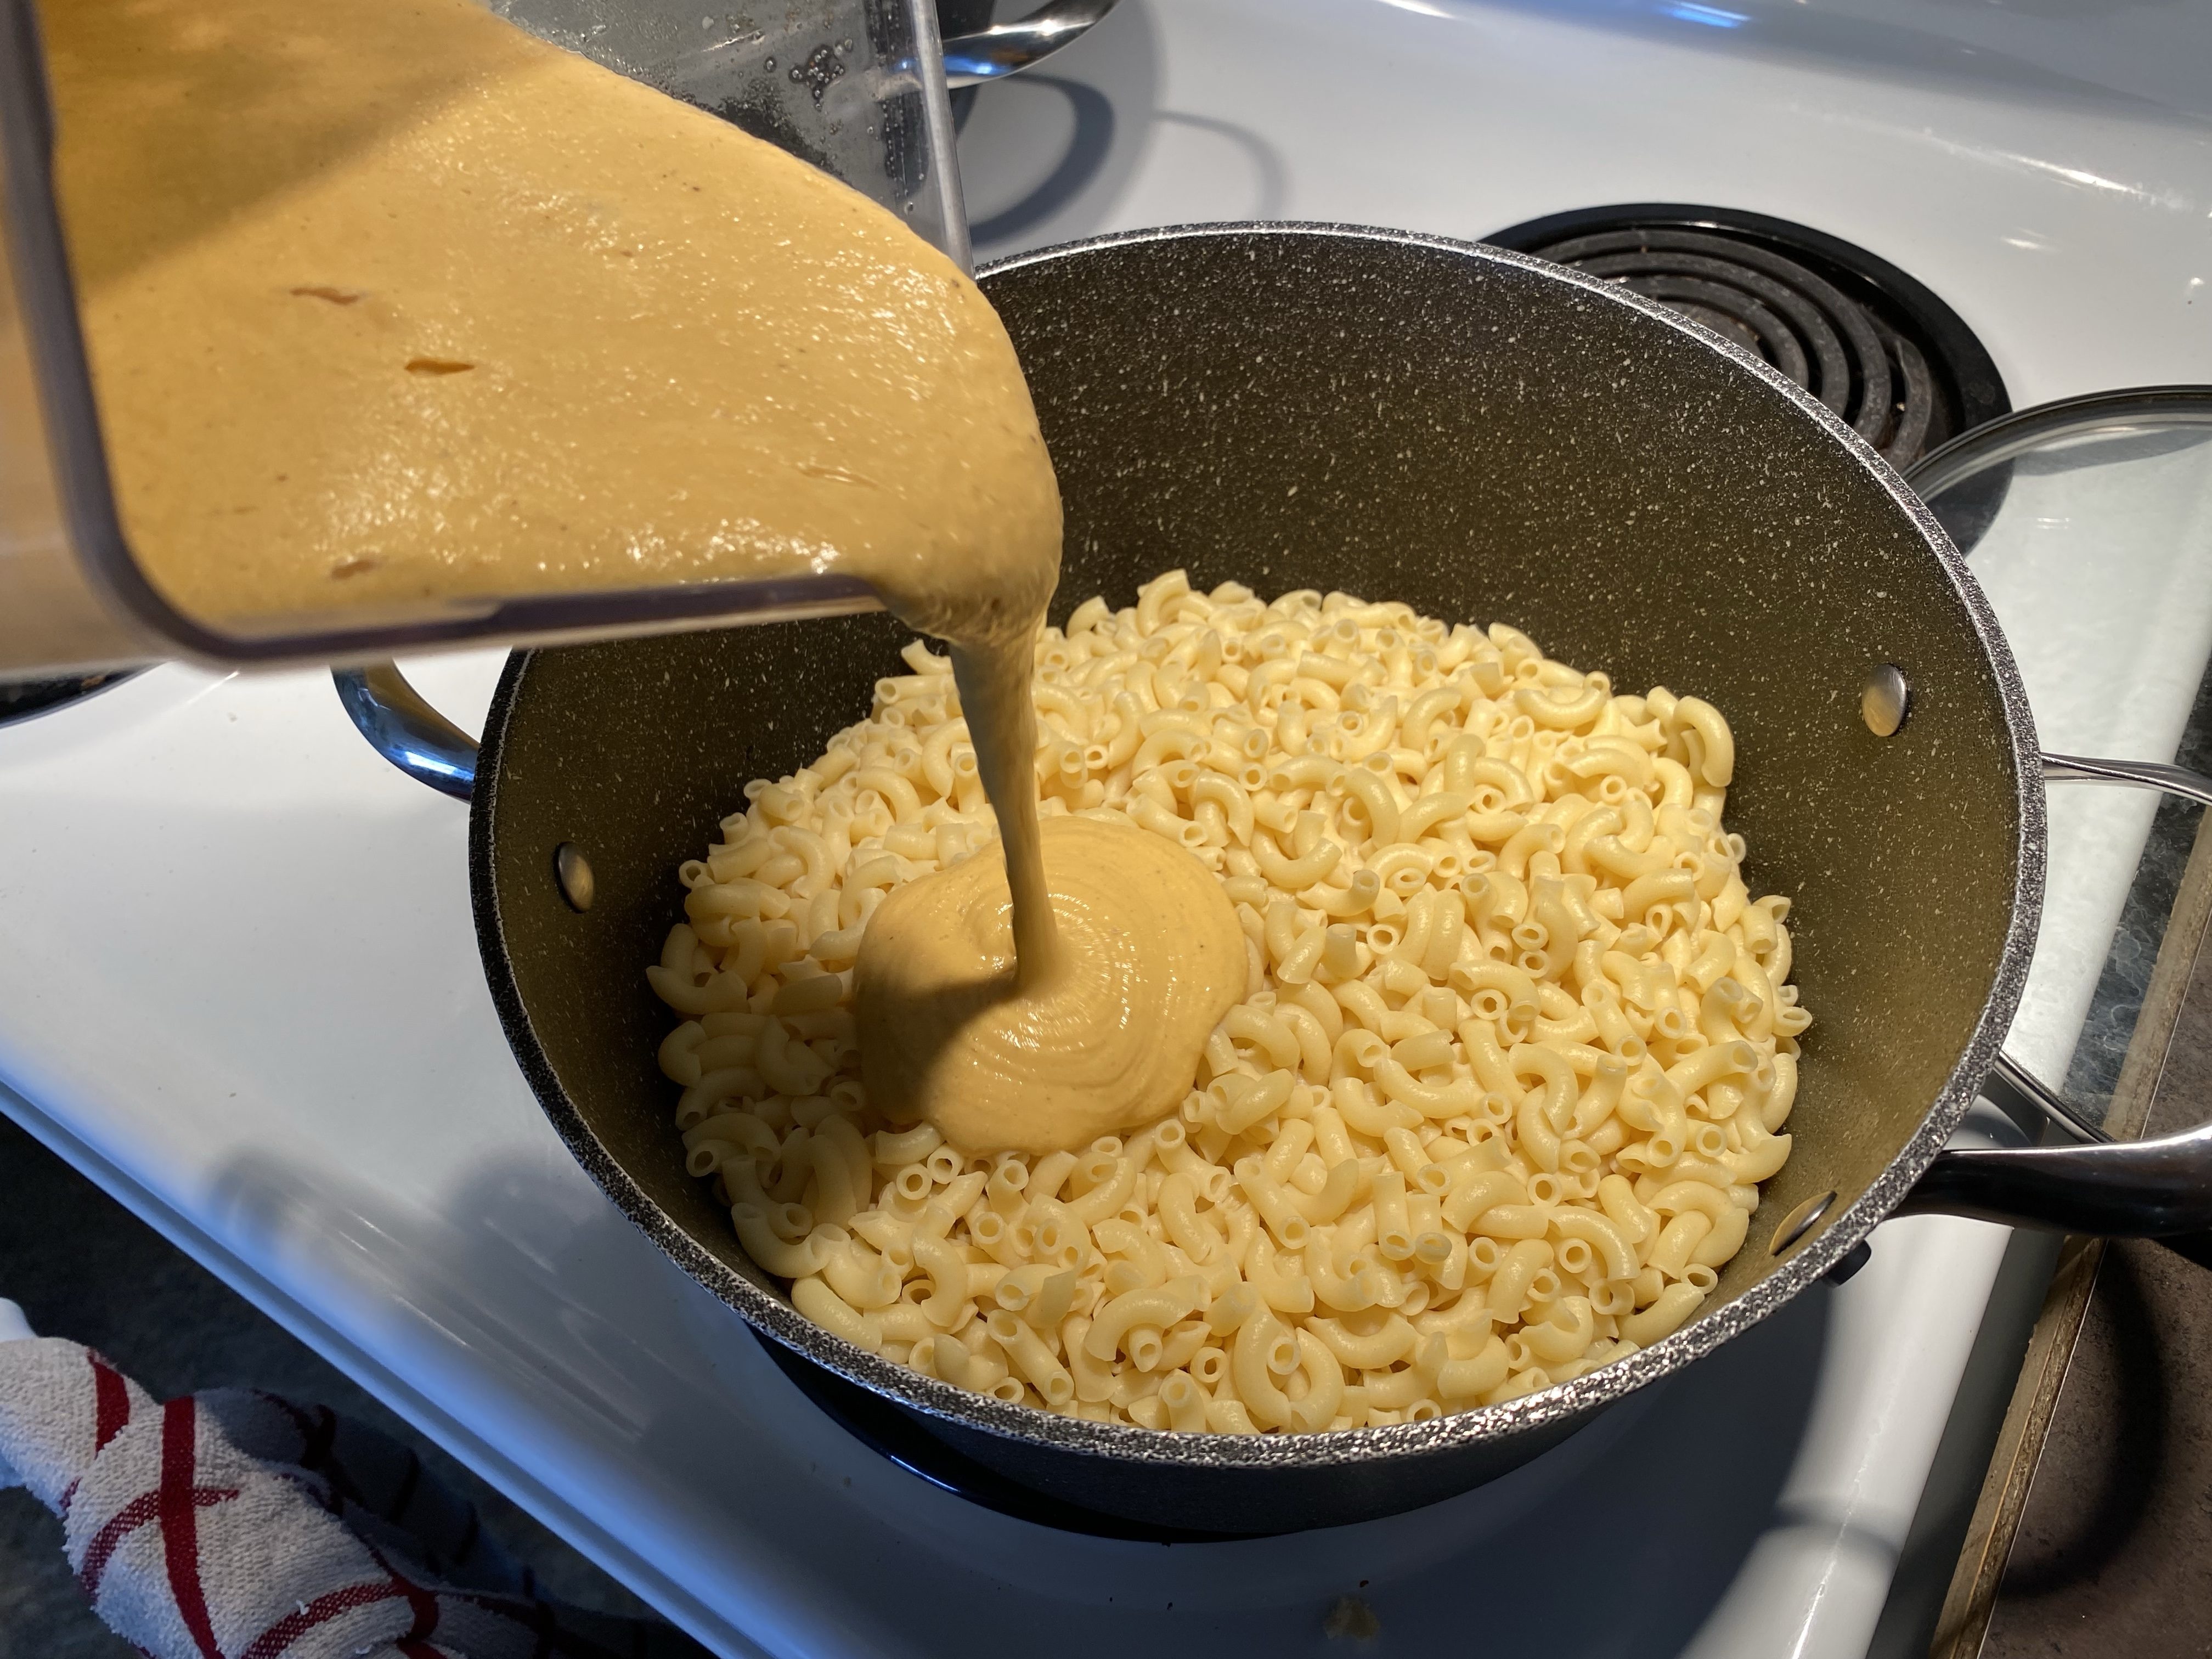
7. Strain and rinse soaked cashews with cold water and add to the blender. Blend until smooth.
For a quick serve:
Put cooked pasta in large serving dish and pour the cashew sauce over it, mixing part way. It will continue to thicken as it sits.
Serve and garnish with your favourite herbs (we like using chives, parsley and spring onions)
For a gourmet finish:
Put the cooked pasta in a large casserole dish and pour the cashew sauce over it, mix well.
Melt vegan butter and mix with bread crumbs. Spread on top of macaroni.
Bake at 300 degrees F for 20 minutes.
Other Soups and Entrees to Check Out:
Hi, I’m Jessie!
I’m a Wife and Homeschooling Mom living in a remote town in Northern Ontario, Canada.I love making wholesome meals for my family from scratch, homeschooling our girls and learning more about natural living.
Subscribe to Northbird’s email list to get weekly posts on: tasty recipes, activity ideas for kids, natural living tips, and some genuine mom thoughts and encouragement!
1 cup breadcrumbs (I toast up our leftover sourdough crusts)
Directions
8-12 hours prior to dinner, put 1 cup of cashews in water (submerged). Cover and keep on the counter until dinner prep.
Boil the macaroni pasta until tender, but do not over-cook! As soon as they are done, put through strainer and pour cold water over them. This will keep them firm until the end.
Peel carrots and potatoes and cut into chunks. Dice onion.
Boil vegetables with 2 cups water in small pot until tender. Strain, but save the broth!
Add cooked vegetables with 3/4 cup of the vegetable broth to the blender.
Add garlic powder, sea salt, black pepper, paprika, nutritional yeast and lemon juice to the blender.
Strain and rinse soaked cashews with cold water and add to the blender. Blend until smooth.
For a Quick Serve:
Put cooked pasta in large serving dish and pour the cashew sauce over it, mixing part way. It will continue to thicken as it sits.
Serve and garnish with your favourite herbs (we like using chives, parsley and spring onions)
For a Gourmet Finish:
Put the cooked pasta in a large casserole dish and pour the cashew sauce over it, mix well.
Melt vegan butter and mix with bread crumbs. Spread on top of macaroni/cashew mix.
Bake at 300 degrees F for 20 minutes.
Nutrition
Per Serving: 706 calories; 14.7 g fat; 121.6 g carbohydrates;
26 g protein; 0 mg cholesterol; 1303 mg sodium.
This post contains affiliate links. As an Amazon associate, I earn from qualifying purchases. This means that I make a small commission at no extra cost to you. You can read my full disclosure HERE.
Sugar scrubs! These are timeless, easy and a fun DIY for personal care products.
I have many fond memories of making these with friends and then giving each other foot scrubs and pedicures afterward! I love the creativity and endless possibilities that one can come up with for mixing sugar and salt scrubs, and doing it with friends: even better!
Why use Green Tea?
Green tea not only has a calming taste and many health benefits, but for some (most importantly) it contains caffeine.
Do you know what I learned recently? Our bodies can absorb caffeine THROUGH OUR SKIN. Certainly not as effective as drinking a cup of coffee, but there have been some studies that prove it to work as a stimulant when applied topically.
Most studies seem to agree that caffeine can help protect your skin cells from UV radiation, reduces baggy skin under the eyes, and help prevent fine lines and wrinkles. Some disadvantages from overuse of topically applying caffeinated skin care products is dry skin.
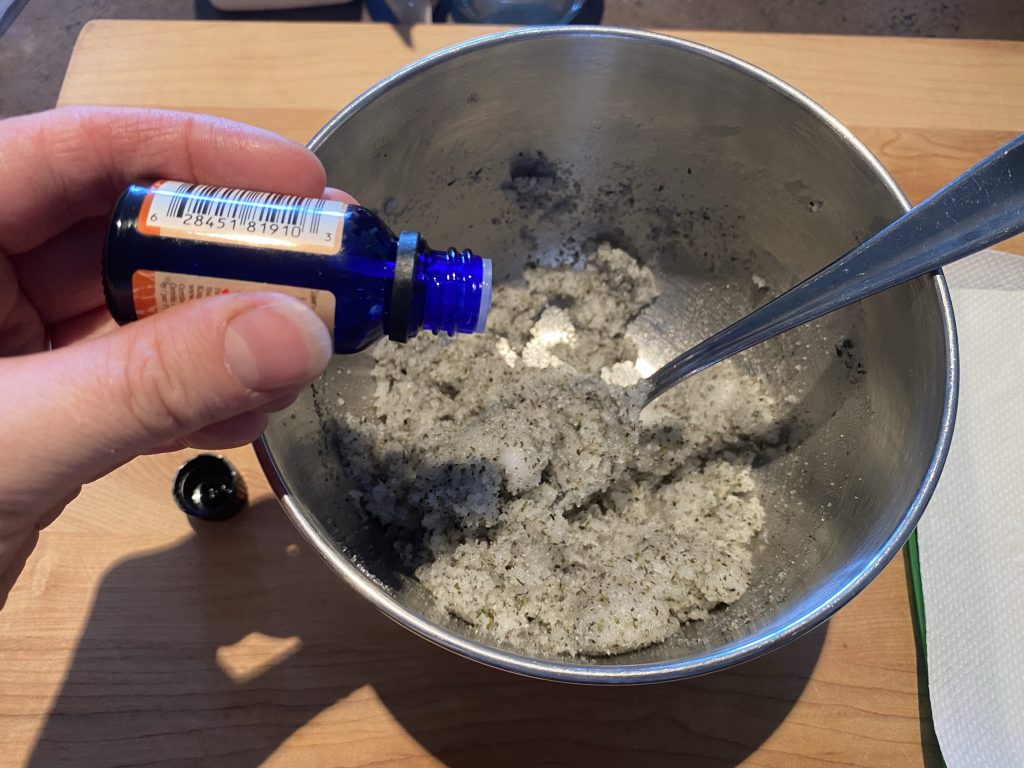
Melt the Coconut oil in microwave or in a small pot on the stove.
Mix in all the other ingredients.
Let cool if the oil is still warm.
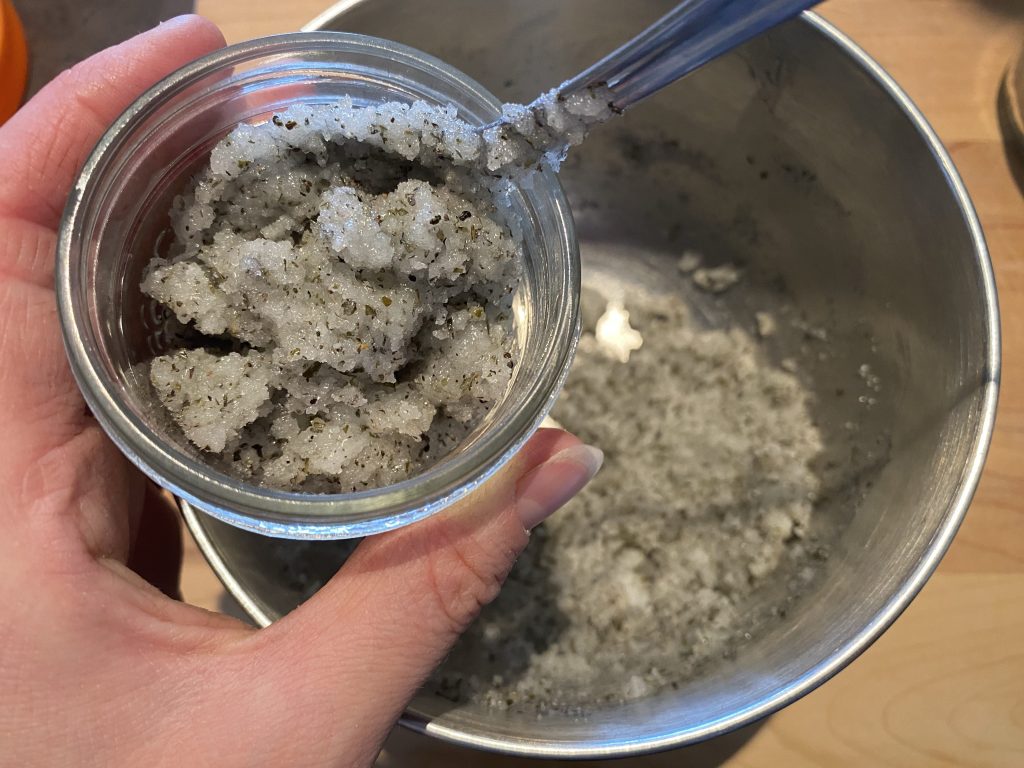
Spoon into jar for storage.
Optional: Label and tie ribbon or twine around it for a cute DIY gift!
Benefits of using a sugar scrub on your skin:
Improves circulation
Cleanses the skin pores
Removes any dead skin
Moisturizes the skin
Muscle relaxant
Helps to remove toxins
Smooths the skin
What are sugar scrubs made of?
Most scrubs are simply made using products found right in your kitchen! The basis of most scrub recipes consist of: an oil and an exfoliant, with herbs and essential oils used to cleanse and exfoliate the skin, and relax muscles.
Sugar and salt are most commonly used as an exfoliant, and while there are many types of sugars and salts, my opinion is that the bigger the granules are, the better it will rub on your skin.
For example, I would recommend a coarsely ground sea salt over an iodized-finely ground table salt. However, I have also enjoyed learning of many more creative ingredients that can be used as the rough element in a scrub: oatmeal, coarsely ground coffee beans, rice, some seeds, veggies and fruits.
Dried Herbs/Flowers:
Here’s some that I have tried so far (and also a few that I plan to do next!):
Lavender -Most health food stores carry this, with comparable prices on Amazon due to their popularity.
Rosemary -Check your kitchen spices! Or you can buy at any grocery store.
Peppermint -Easy to grow, or you can forage for wild mint! You can also cut open a peppermint tea bag or purchase larger dried pieces at the grocery store or online.
Rose Petals -You can pick your own wild roses and dry them or look for them at your local health food store, or buy online.
Rosehips -These grow in abundance in the north, so we pick our own wild rosehips and dry them, but you can also purchase them online or check out your local health food store.
Calendula -Easy to grow your own! Also available at health food stores or online.
Camomile -Look for these growing wild! Just be careful to select flowers that are not near roads or have been sprayed. You can also cut open a Chamomile tea bag, or buy the whole flowers at a health food store or online.
…and Yes! Green Tea -I used the Tetley Green Tea bags for this recipe, but there are many other types of Green Tea.
Essential Oils:
There are so many wonderful oils to use, but I’ll just name a few of my favourites that I use most often in scrubs:
Lavender: Probably the most commonly used essential oil out there! Wonderful muscle and nerve relaxant.
Peppermint: A great resource for opening up the sinuses and relieving headaches.
Lemon: A bright and refreshing scent that helps to even out the skin tone.
Tea Tree: Aside from being used to treat lice and insect bites, Tea Tree oil is also known as an anti-fungal, and anti-septic and an anti-inflammatory.
Other Oils:
Vitamin E Oil is one that I always add a few drops of into whatever skin care products I am making at the time. It is highly beneficial to the skin because of its moisturizing properties and it is also an antioxidant.
Jojoba Oilis another all-around essential skin oil that is a great moisturizer and cleanser. It is also known to help with treating acne, psoriasis and eczema.
More Ideas for Natural Living:
Hi, I’m Jessie!
I’m a Wife and Homeschooling Mom living in a remote town in Northern Ontario, Canada.I love making wholesome meals for my family from scratch, homeschooling our girls and learning more about natural living.
Subscribe to Northbird’s email list to get weekly posts on: tasty recipes, activity ideas for kids, natural living tips, and some genuine mom thoughts and encouragement!