Find Northbird on social media:
This post contains affiliate links. As an Amazon associate, I earn from qualifying purchases. This means that I make a small commission at no extra cost to you. You can read my full disclosure HERE.

One spring during planting time, some squash seeds were carefully started indoors and then later planted outside in a rich and fertile “hugelkultur” garden bed. They were cared for, and watered and little helpers watched the plants grow and vine and start to produce their fruit.
The dream was to have an abundance of treasured Hokkaido squash to share with the family. What came up was not the beautiful and delicious Hokkaidos, but yes, dozens upon dozens of spaghetti squash!
(This was one of those home-seed-saving scenarios resulting in very unfortunate labeling errors!)
Don’t get me wrong, I do enjoy spaghetti squash, and get a total rush of pride in seeing piles of squash stored for the long winters! But even after giving tons of them away, we were still left with several dozen and we realized that we needed to get creative with ways of eating them up or we’d get bored pretty quick.

My sister-in-law L, found a Mexican taco boat recipe with ground beef, and cooked about a dozen of them for one of our large family gatherings. Problem solved!
This vegetarian version of the recipe was inspired from that spaghetti squash summer.
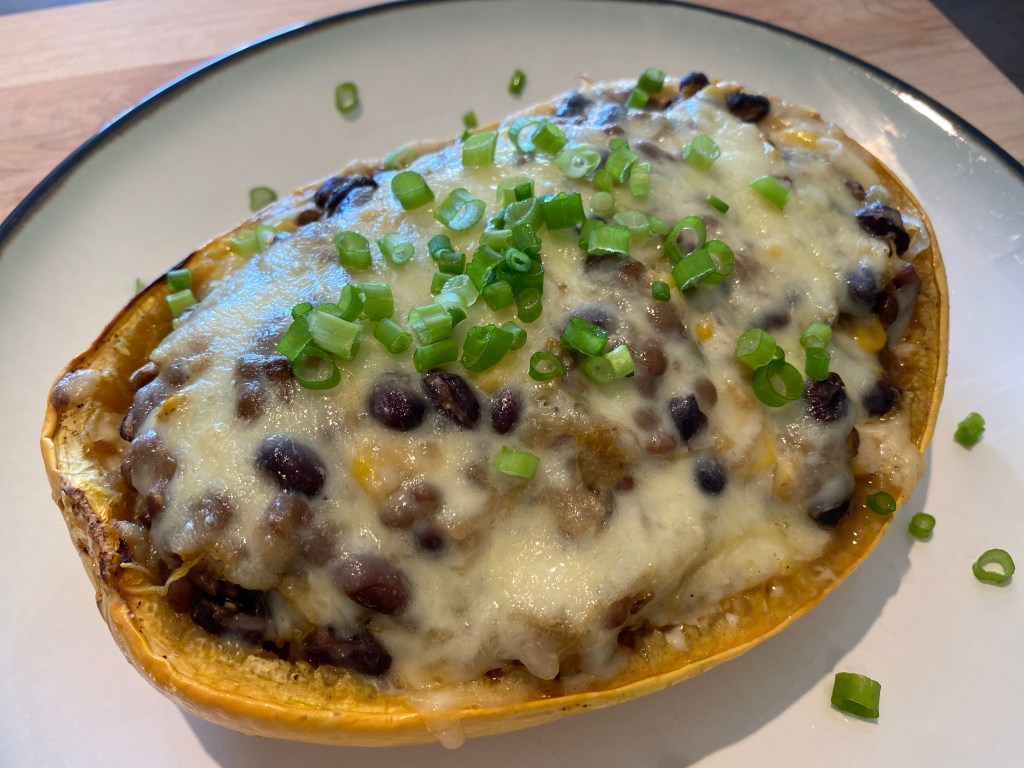
Vegetarian Spaghetti Squash Taco Bowls
Supplies Needed:
- Knife
- Cutting board
- Cookie sheets
- Parchment paper
- Wok or large skillet
- Bowls for soaking
- Small pot for cooking lentils in
- Stirring spoon
- Cheese grater
- Measuring cups and teaspoons
- Glass measuring cup
Ingredients:
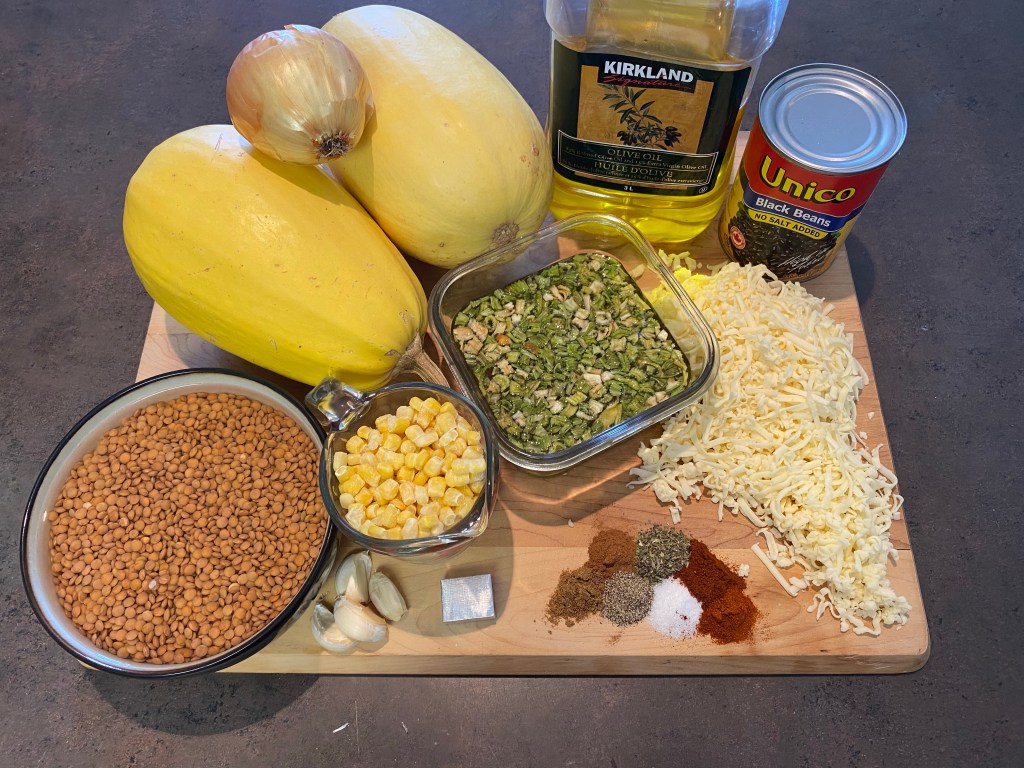
- 2 spaghetti squash
- 4 garlic cloves
- 2 cups cheese, grated
- 1 onion
- 2 tablespoons olive oil
- 1 cup dried lentils, or 1-2 cans of lentils (depending on size)
- 1 cube chicken, vegetable or beef stock
- 1 3/4 cup water
- 1 teaspoon sea salt
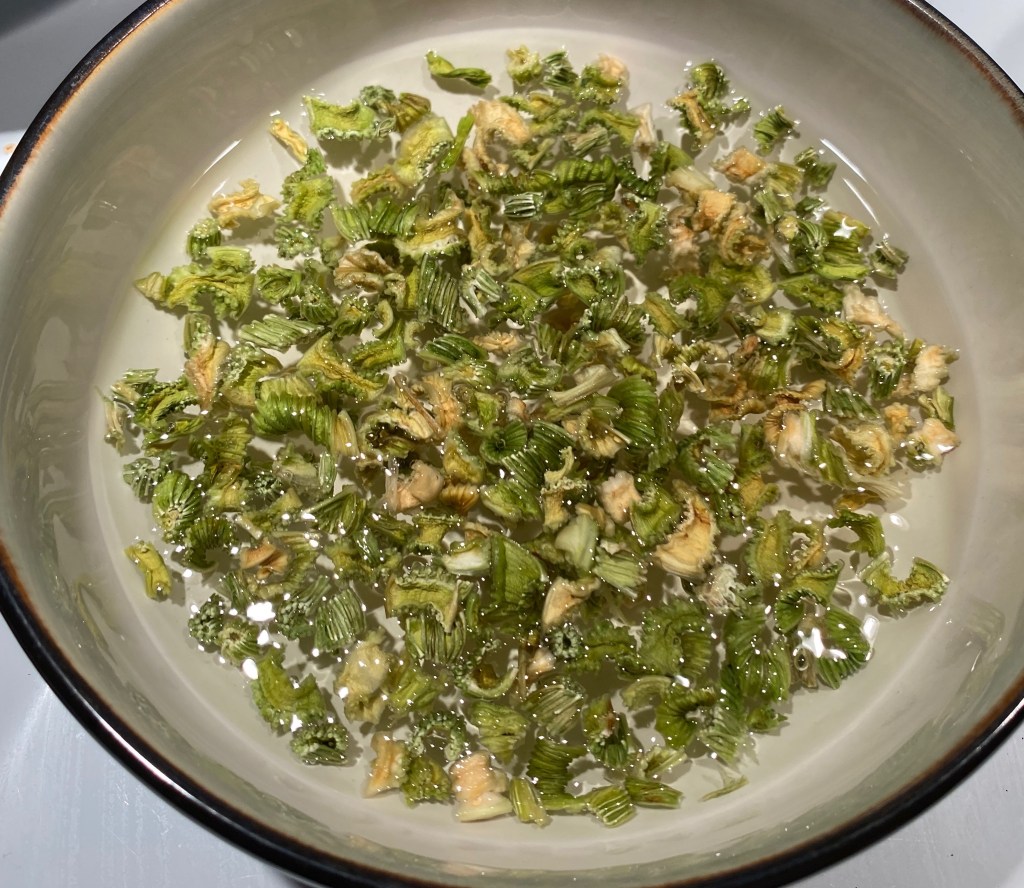
- 1/2 cup dried celery, soaked (or 2 stalks fresh)
- 1/2 teaspoon chili powder
- 1/2 teaspoon cinnamon
- 1 teaspoon Italian seasoning
- 1/2 teaspoon black pepper
- 1/2 teaspoon cumin
- 1/2 teaspoon paprika
- 1 cup frozen or canned corn
- 1 can 540ml/19oz black beans
- Scallions/fresh parsley/cilantro to garnish
Directions:
1. In the morning, soak dried lentils and dried celery in separate bowls, covered with water.
2. Start cooking lentils 2 hours before serving time. Rinse and put in pot of water, bring to boil and simmer until step 9.
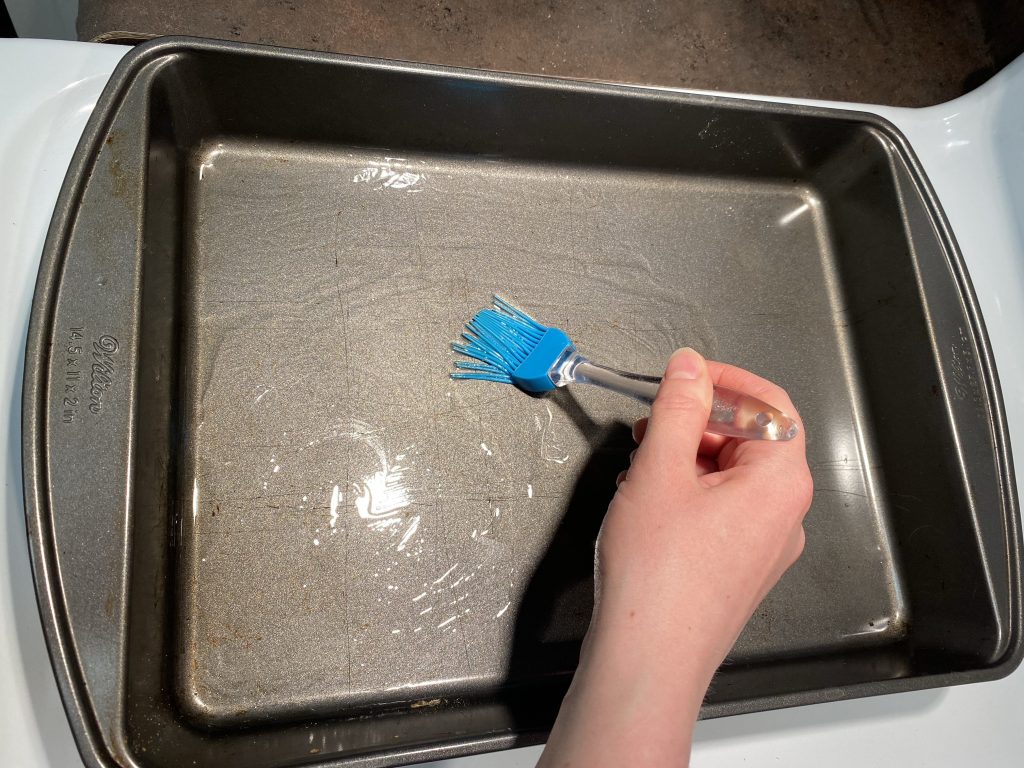
3. At meal prep time, preheat oven to 400 degrees F, and cut spaghetti squash lengthwise.


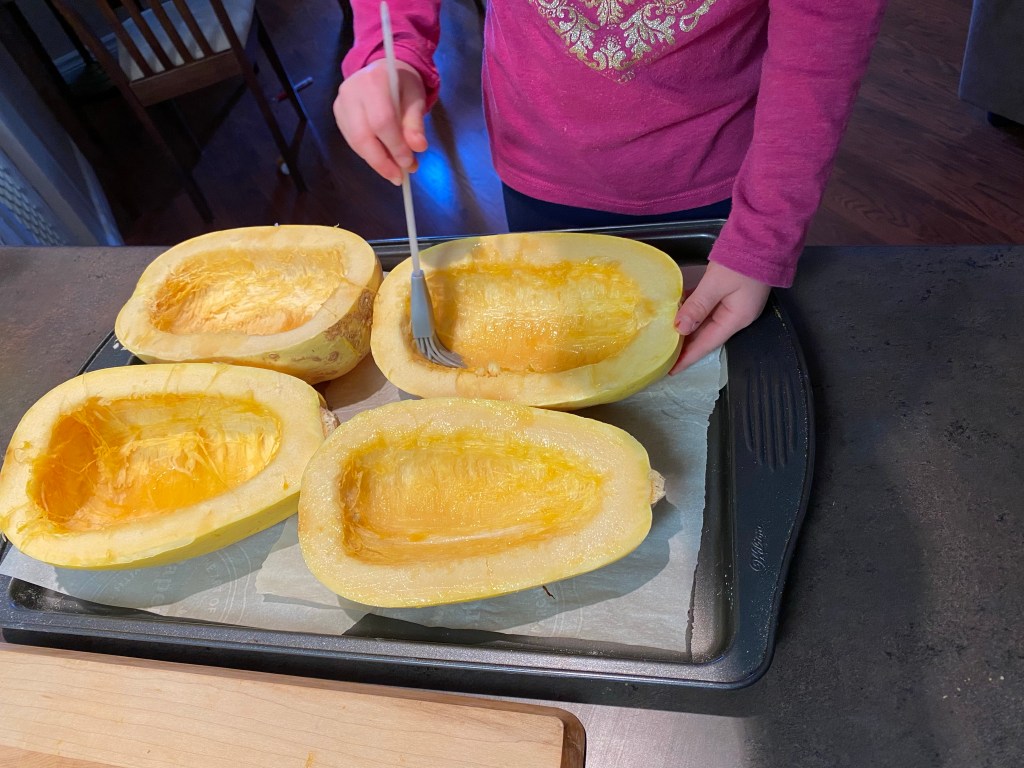
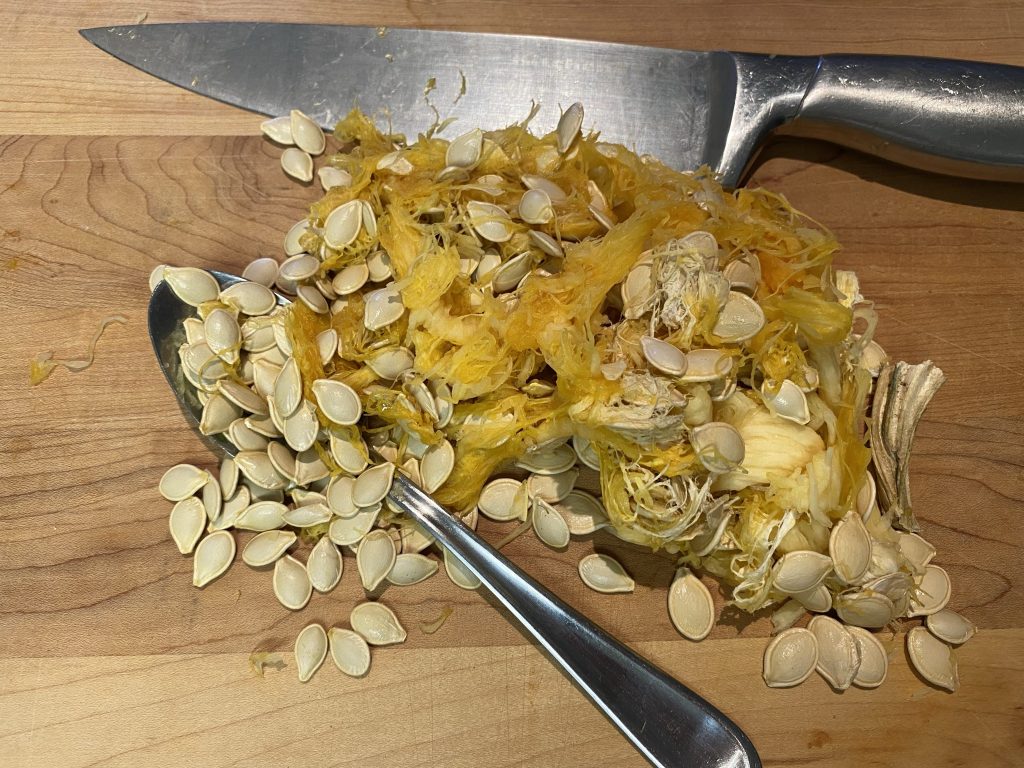
4. Scoop out seeds and brush insides with olive oil. Sprinkle with salt and pepper.
5. Turn upside down and roast for 30-35 minutes or until the insides are soft and cooked through.
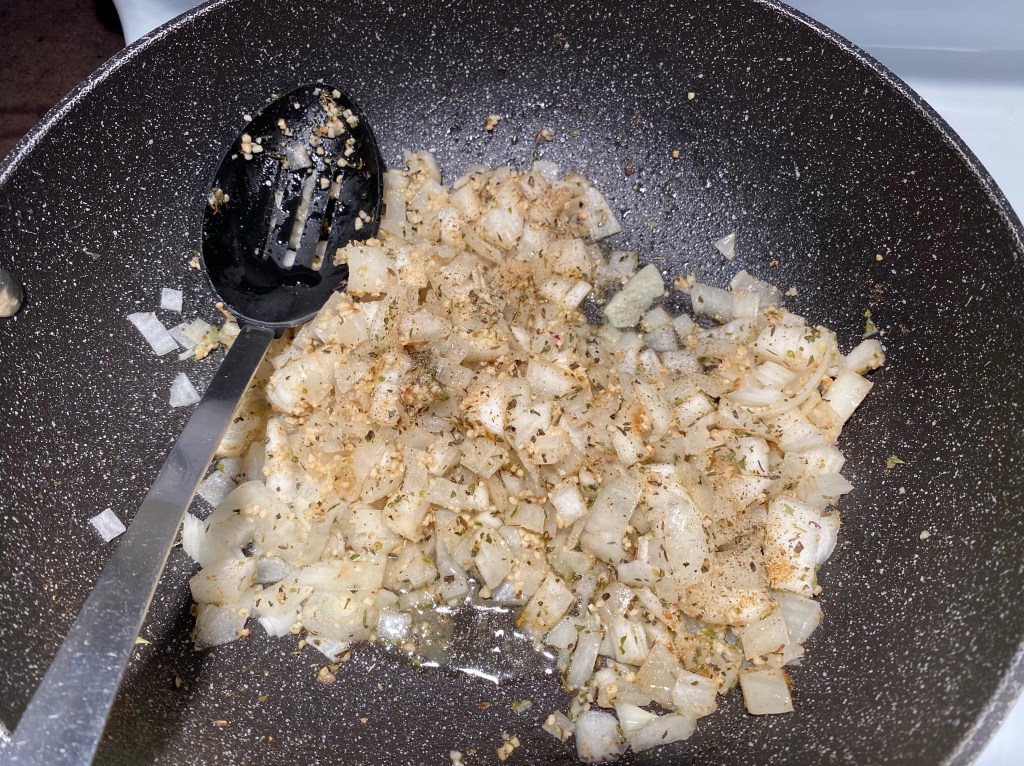
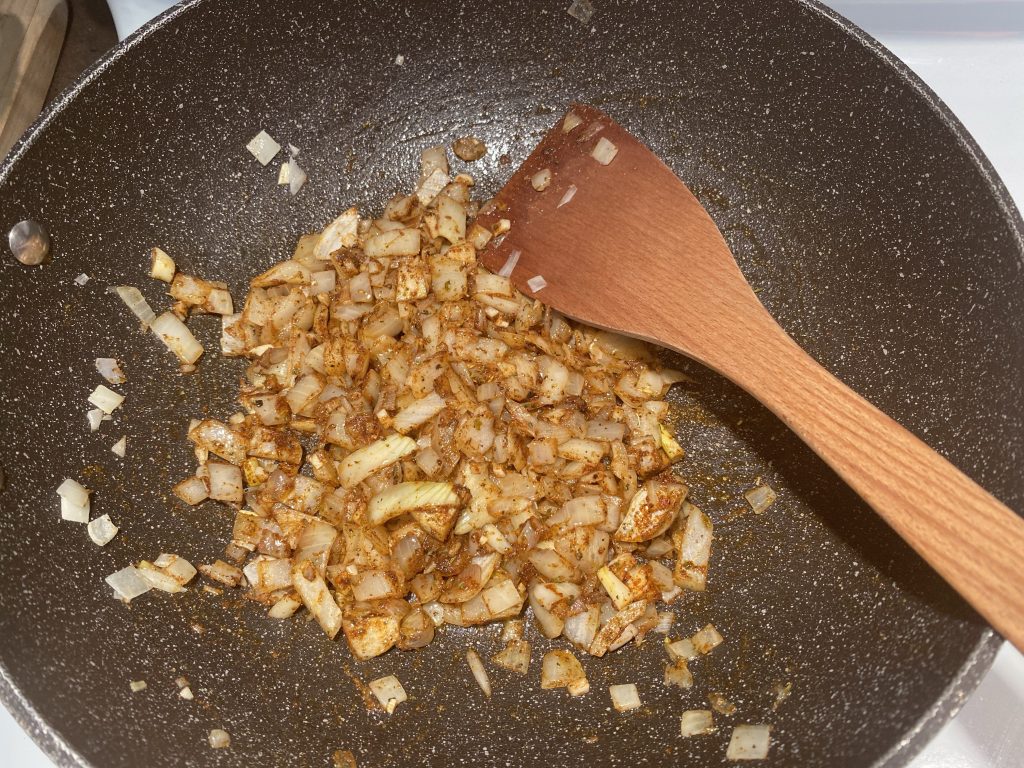
6. While the squash are baking, sauté the onion and garlic with olive oil in a large skillet over medium heat.
7. Add the salt, chili, cinnamon, Italian herbs, pepper, cumin and paprika. Stir well.


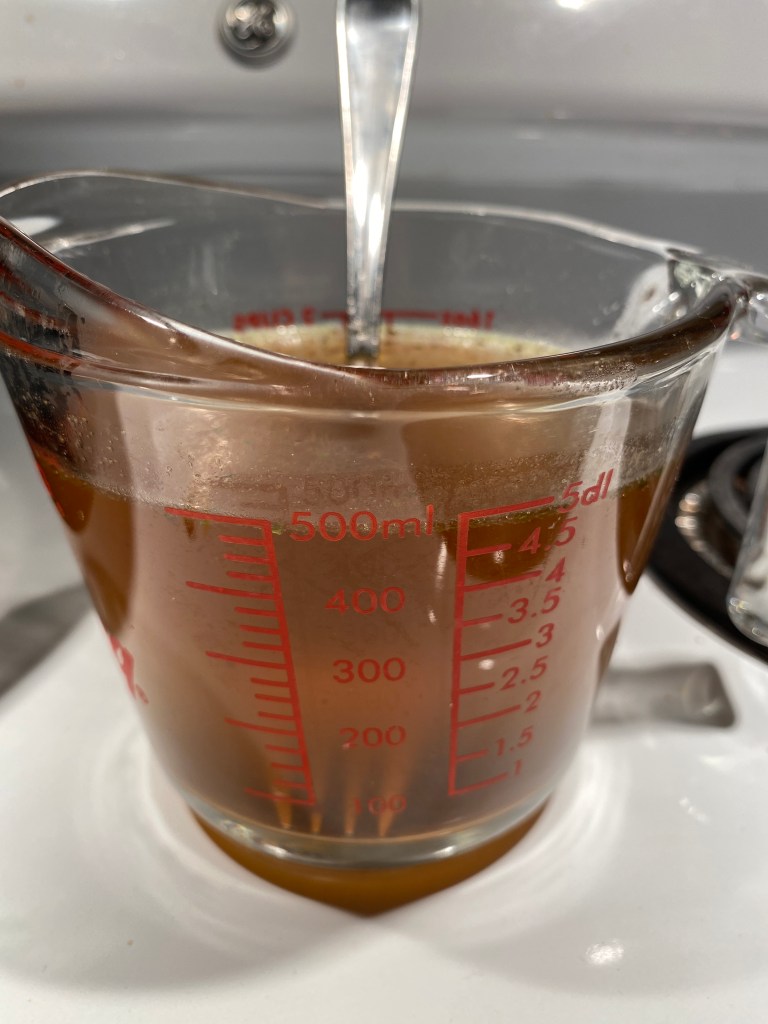
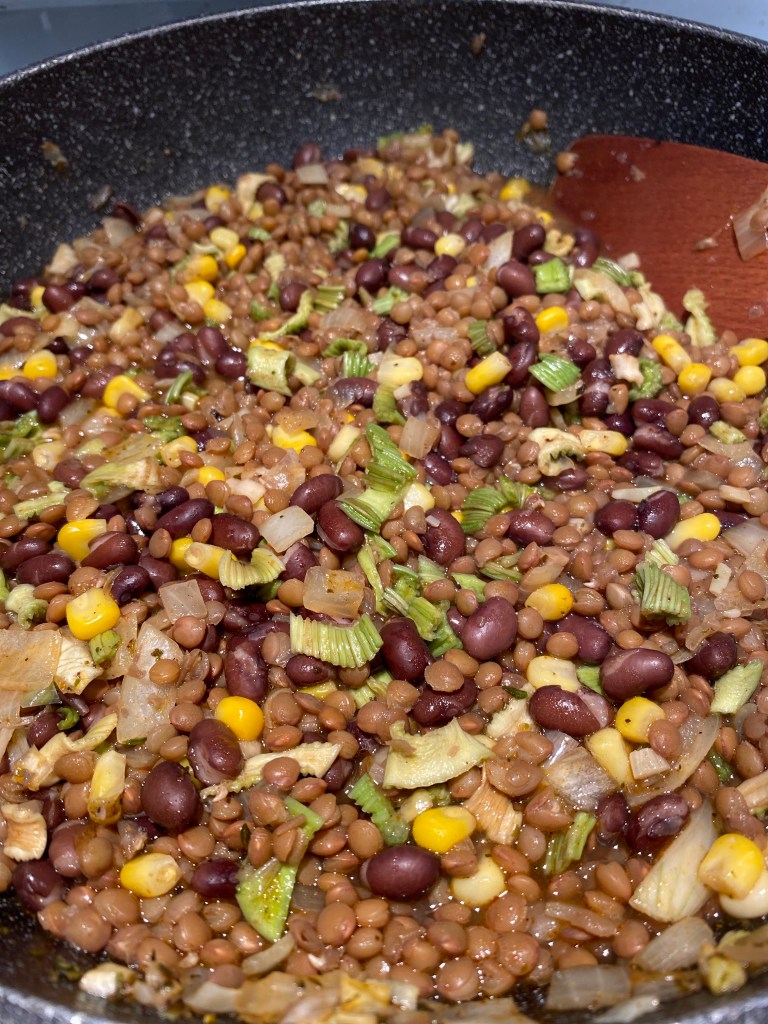
8. Dissolve the stock cube in 1 13/4 cup boiling water and add.
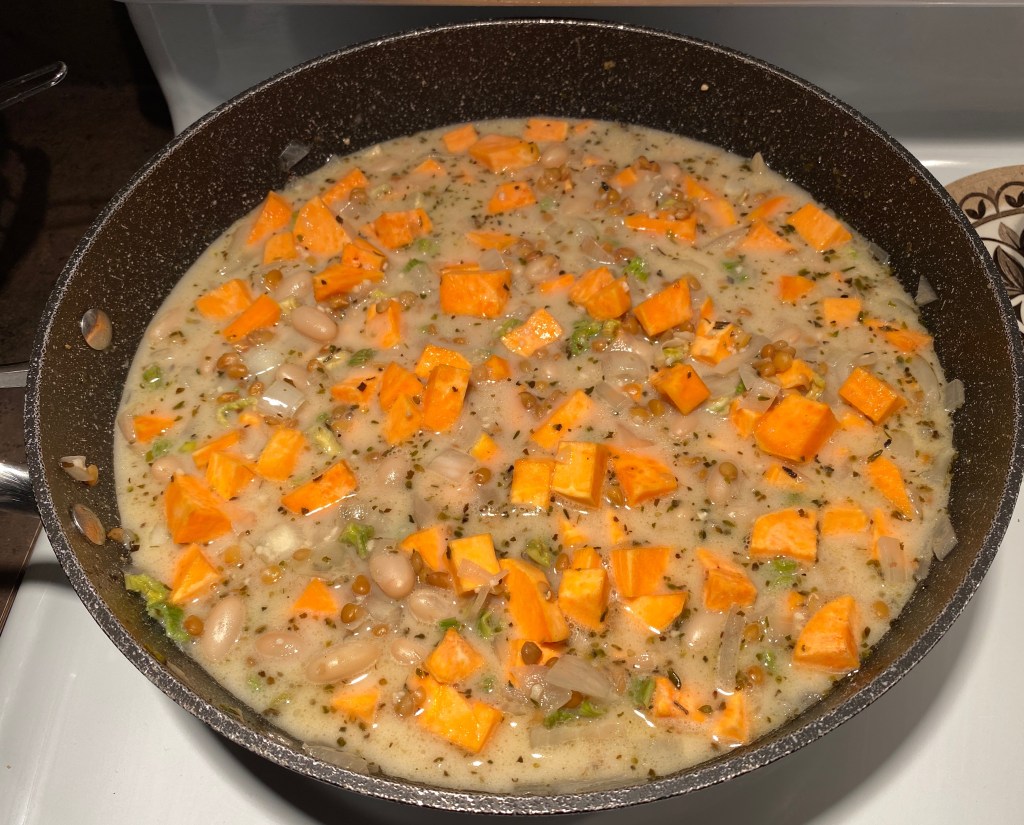
9. Add the black beans (rinsed), corn, lentils, and rehydrated (or fresh) celery.

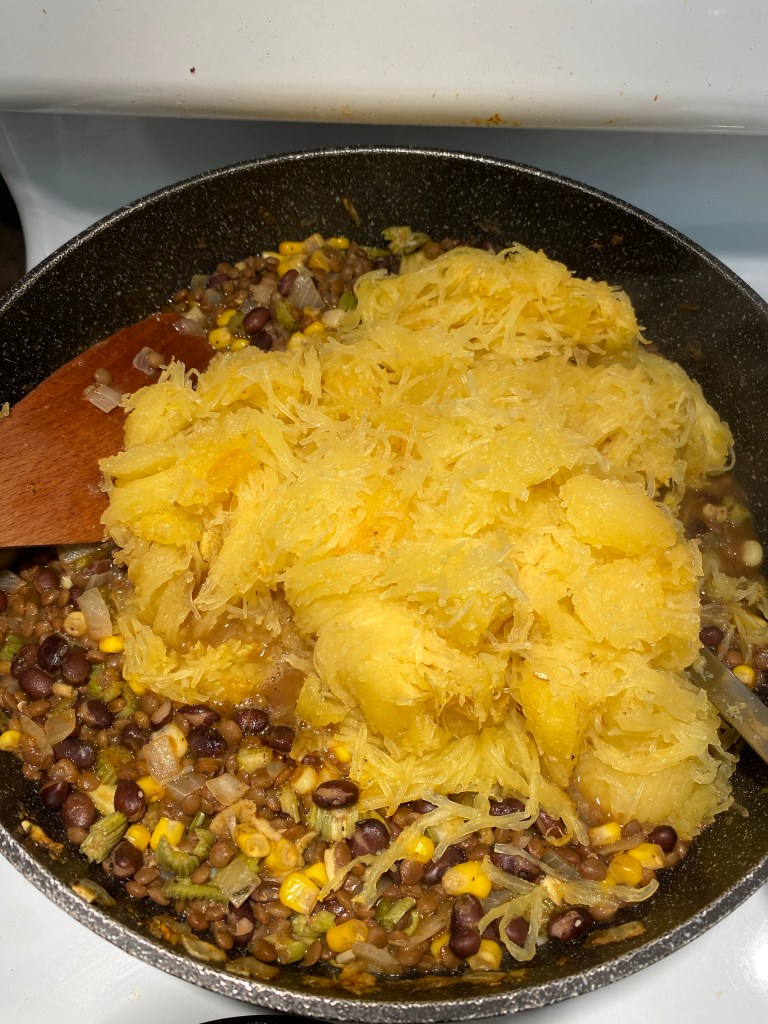
10. Cook through and simmer until the squash are finished in the oven.
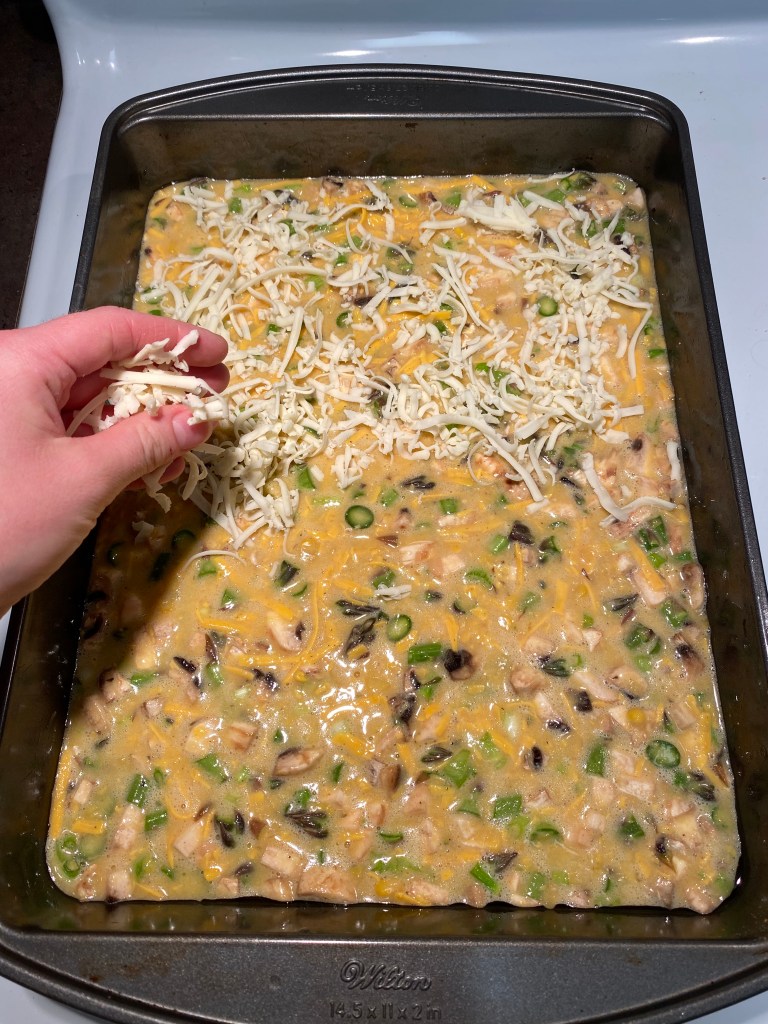
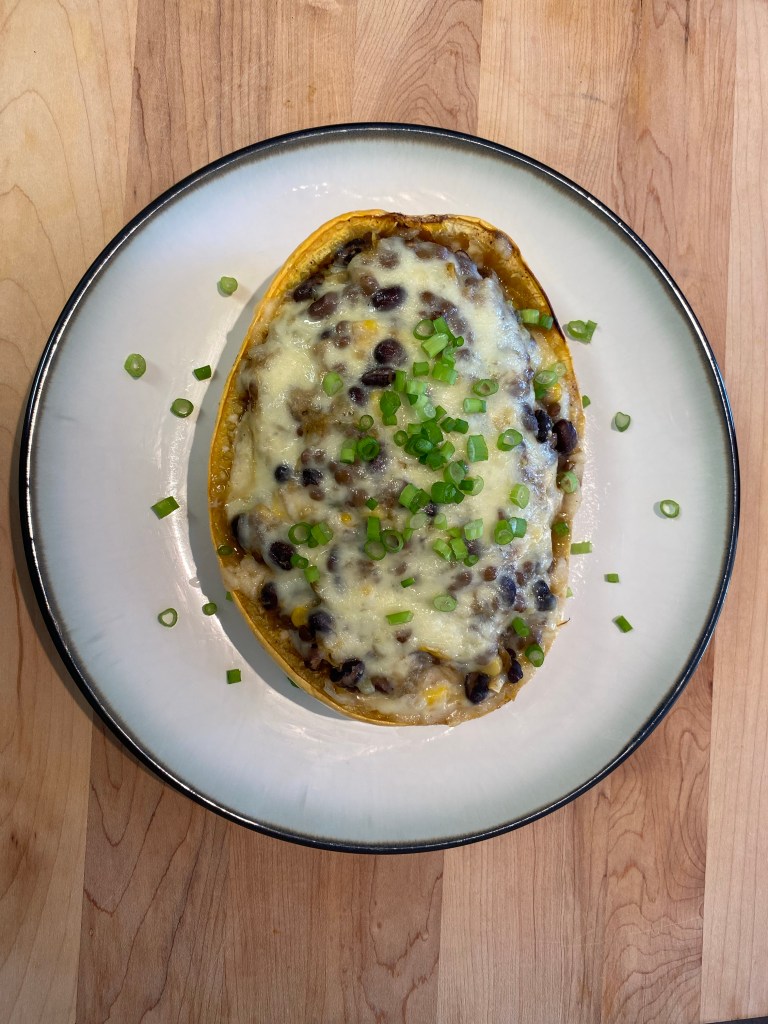
11. Scoop out insides of squash and mix in the skillet, then return to the squash shells and cover with cheese.
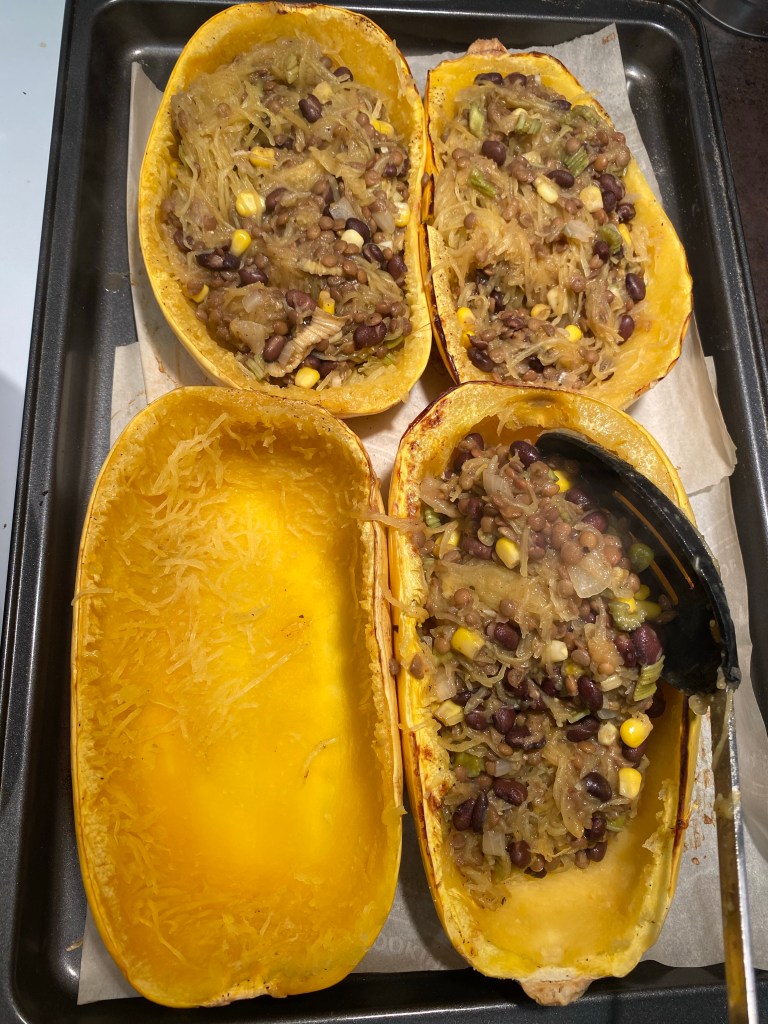

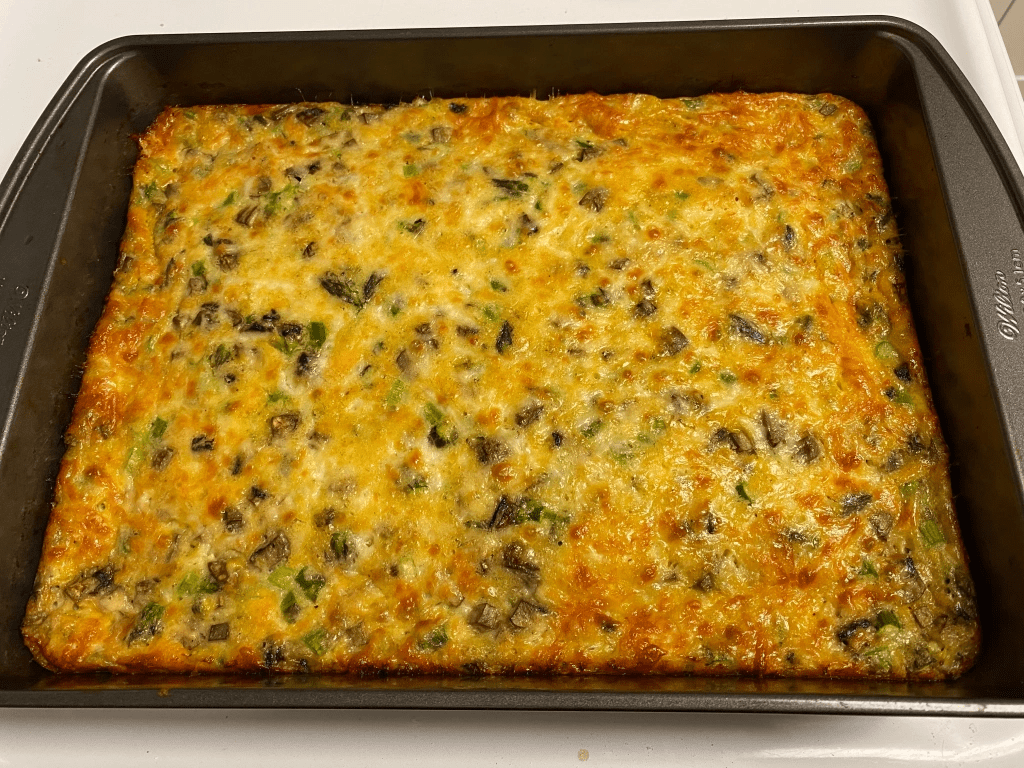
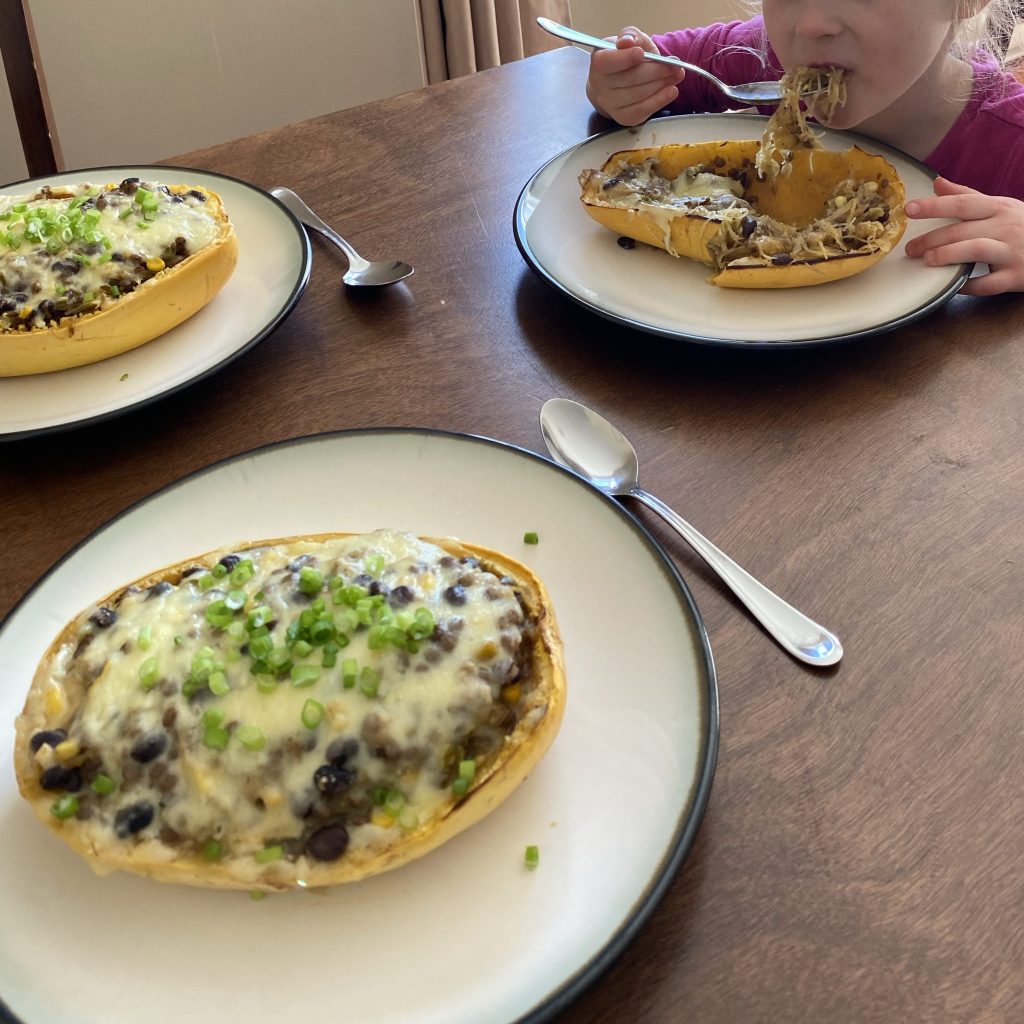
12. Return to oven and cook for another 10 minutes. Finish with a quick broil to brown the cheese nicely.
13. Garnish with fresh herbs or scallions and enjoy!
Note: Store any leftovers in an airtight container in the fridge for up to 3 days.

Our kids LOVED this meal! (Our oldest especially enjoyed it because she helped to make it!)

Can You Eat the Spaghetti Squash Seeds?
Yes! Absolutely! They are delicious and packed full of nutrients, and you can roast them the same way as pumpkin seeds. They contain lots of omega 3 fatty acids, protein, Vitamin C and beta-carotene.
How to Roast Spaghetti Squash Seeds:
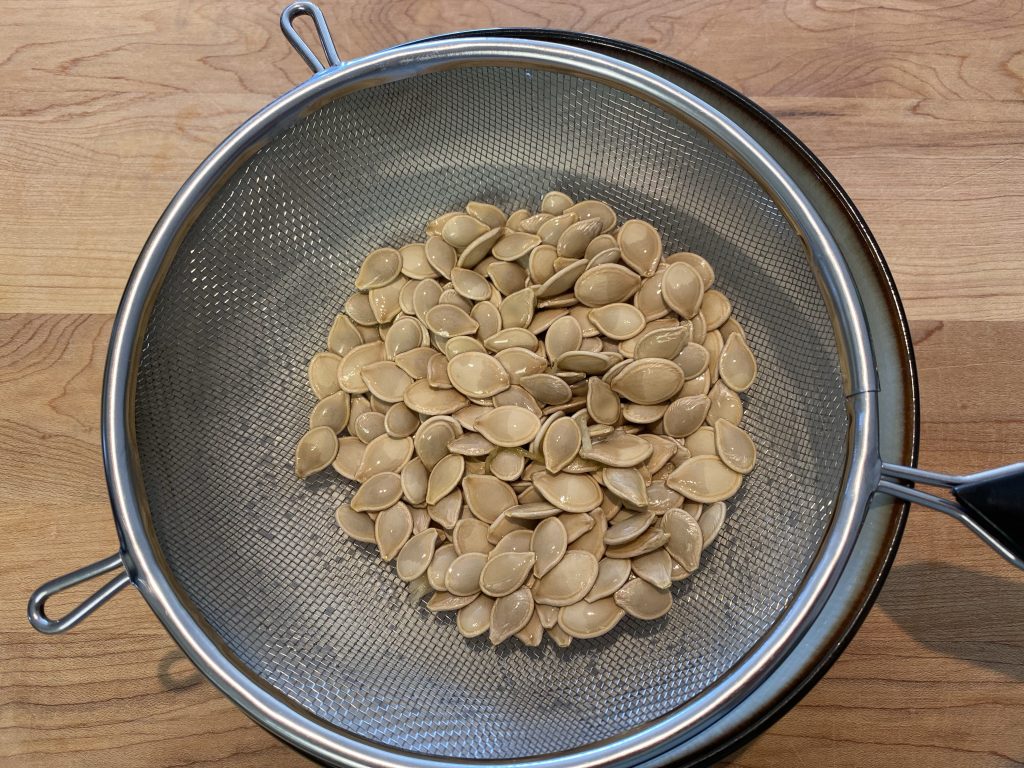
1. Wash the seeds and separate from the pulp.
2. Mix in a small bowl with olive oil or (my favourite) Avocado oil. Add sprinklings of salt, pepper and also a dash of paprika.


3. Spread in single layer on parchment paper.
4. Broil on low for about 5 minutes, or until crispy (every oven is different!)

5. Store in an airtight container at room temperature for up to one week.
Ways to Eat Roasted Spaghetti Squash Seeds:
- Enjoy as a salty counter snack
- Add to a trail mix with other seeds, nuts and dried fruits
- As a salad topping
- As a pumpkin or squash soup garnish

How to Save the Squash Seeds for Planting:
1. Clean seeds in a bowl of water and separate out any pulp or broken seeds. Select the biggest and best seeds to save.
2. Drain off as much water as possible.
3. Pat dry with a towel and put on a parchment paper to continue drying for several days.

4. Put in a paper envelope and label.
5. If you are using the seeds the following planting season, you can store it in a cool, dry pantry, or in the freezer to last for several years.

Other Soups and Entrees to Check Out:


Hi, I’m Jessie!
I’m a Wife and Homeschooling Mom living in a remote town in Northern Ontario, Canada. I love making wholesome meals for my family from scratch, homeschooling our girls and learning more about natural living.
Read more about my story HERE.

Subscribe to Northbird’s email list to get weekly posts on: tasty recipes, activity ideas for kids, natural living tips, and some genuine mom thoughts and encouragement!
Recent posts from Northbird:


Vegetarian Spaghetti Squash Taco Boats
An Easy and Delicious Way to Eat Spaghetti Squash
See above for the recipe to roast the squash seeds!
Supplies Needed
Ingredients
Directions
- In the morning, soak dried lentils and dried celery in separate bowls, covered with water (Or use canned lentils and fresh celery)
- Start cooking lentils 2 hours before serving time. Rinse and put in pot of water, bring to boil and simmer until step 9.
- At meal prep time, preheat oven to 400 degrees F, and cut spaghetti squash lengthwise.
- Scoop out seeds and brush insides with olive oil. Sprinkle with salt and pepper.
- Turn upside down and roast for 30-35 minutes or until the insides are soft and cooked through.
- While the squash are baking, sauté the onion and garlic with olive oil in a large skillet over medium heat.
- Add the salt, chili, cinnamon, Italian herbs, pepper, cumin and paprika. Stir well.
- Dissolve the stock cube in 1 13/4 cup boiling water and add.
- Add the black beans (rinsed), corn, lentils, and rehydrated (or fresh) celery.
- Cook through and simmer until the squash are finished in the oven.
- Scoop out insides of squash and mix in the skillet, then return to the squash shells and cover with cheese.
- Return to oven and cook for another 10 minutes. Finish with a quick broil to brown the cheese nicely.
- Garnish with fresh herbs or scallions and enjoy! Store any leftovers in an airtight container in the fridge for up to 3 days.
Nutrition
Per Serving: 725 calories; 31.9 g fat; 86 g carbohydrates; 46.8 g protein; 240 mg cholesterol; 1614 mg sodium.