Find Northbird on social media:
This post contains affiliate links. As an Amazon associate, I earn from qualifying purchases. This means that I make a small commission at no extra cost to you. You can read my full disclosure HERE.
Jump to Printable Activity Card
Return to “Homeschooling Activities & Resources”
What is density?
Why do some things float in water and others sink? It all comes down to density.
Density is the measurement of how compact an item is. If an item generally feels heavy, then it has high density, and if an item feels light then it has low density.
For example, a rock has high density and will sink when you throw it in the water. But if you throw a dry stick in the water, it will float because the particles that make it up are more spread apart, and it is less dense than the water.


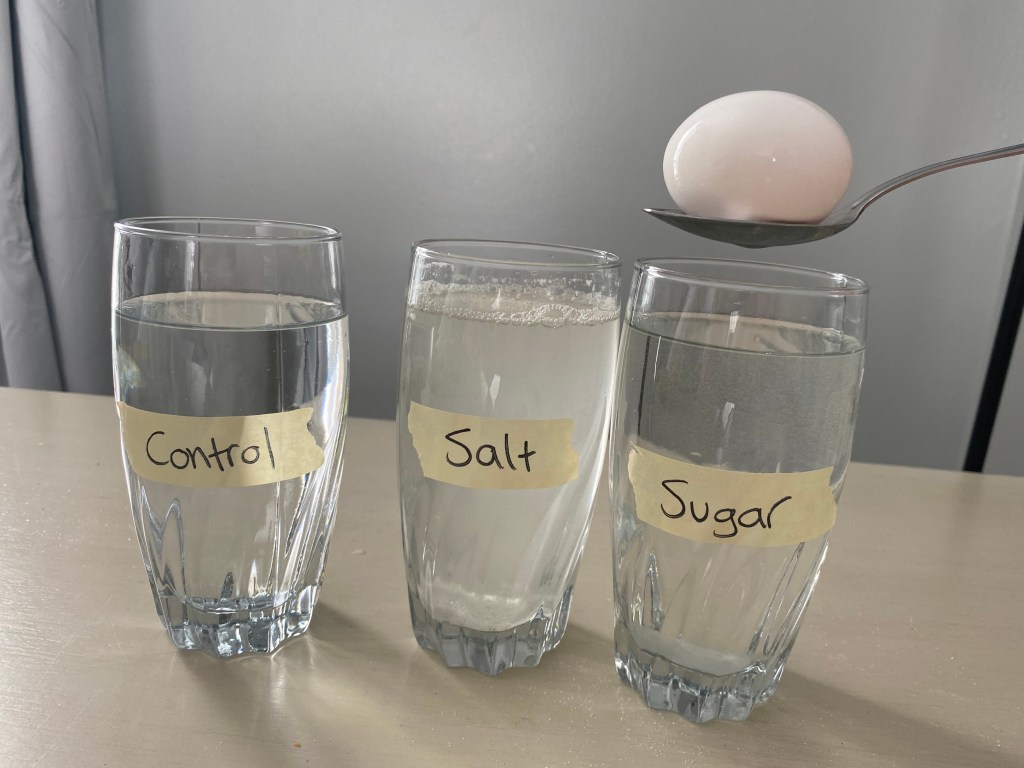
We did a little experiment at home to test the buoyancy of an egg when first submerged in water, then sugar water, then lastly in salted water. This was to test the different levels of density in each of these water glasses, and compare it to the egg’s own density.
This was my oldest’s first time learning about density and salinity. She was quite baffled that we were actually able to make the egg float!
(My toddler’s favourite part was watching the glasses be stirred and the sugar and salt getting dissolved!)
Check out the directions below to do this yourself at home!
Here’s a short video of the process and the kid’s delight in seeing the egg bobbing in the glass!
Egg Density Experiment:
Supplies Needed:
- 3 tall glasses
- 6 Tablespoons of table salt
- 6 Tablespoons of granulated sugar
- An egg
- A spoon
- Label & marker
- PDF printed experiment page
Directions:
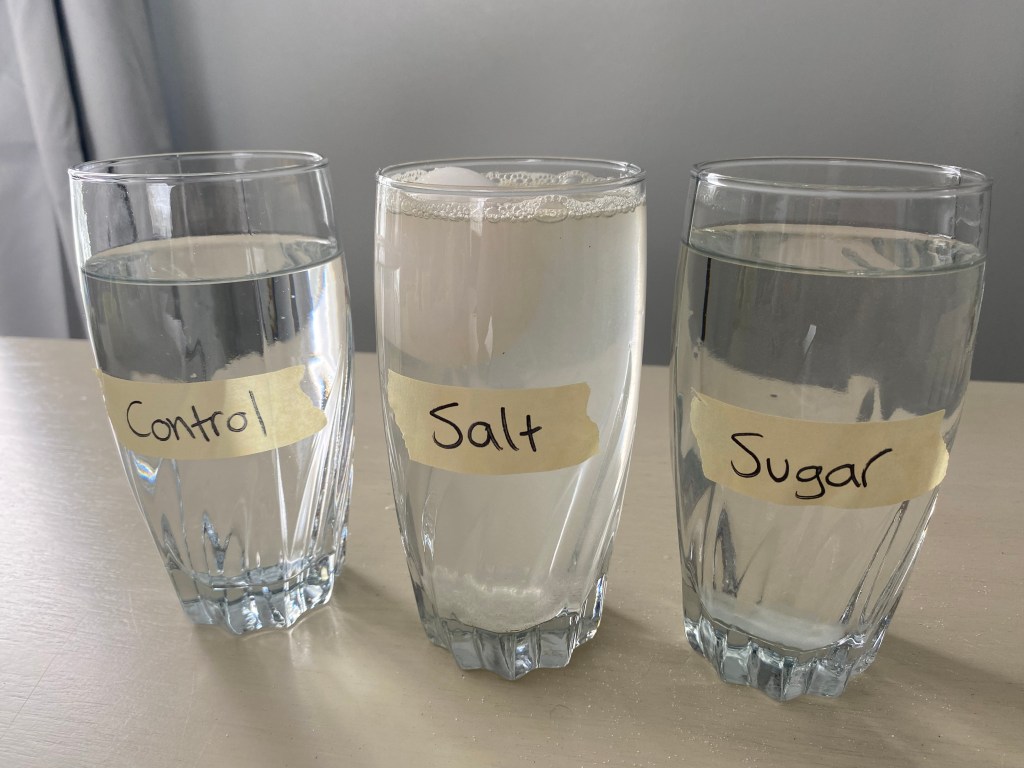
- Fill the 3 glasses with equal amounts of cold water.
- Label each glass: 1-Control, 2-Salt, 3-Sugar.

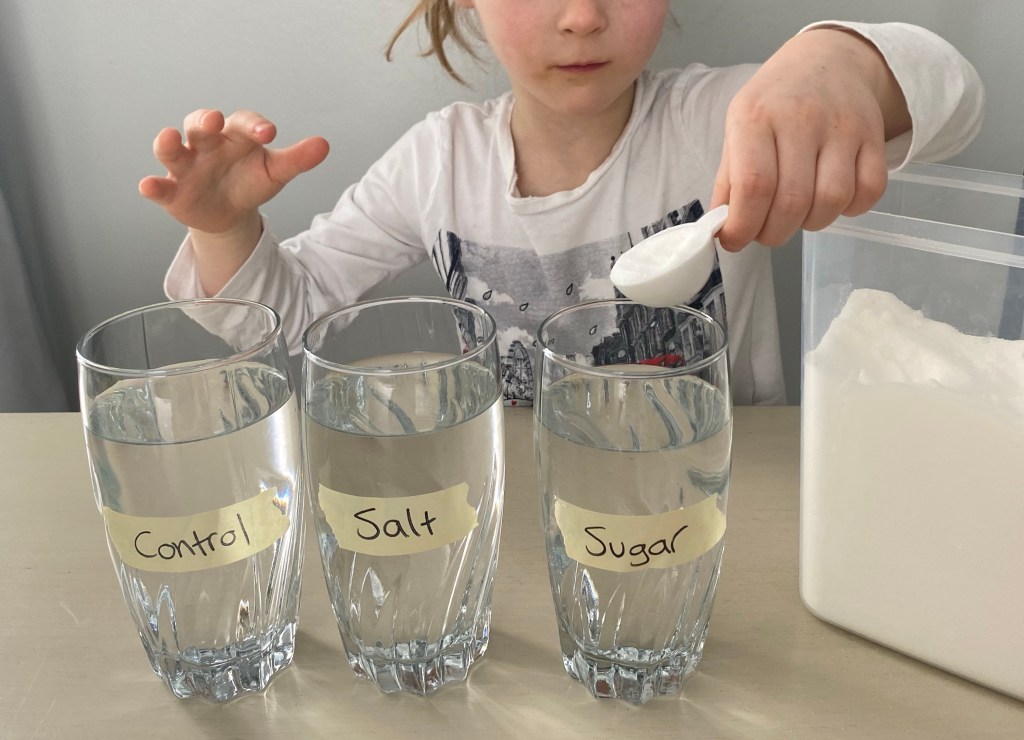
3. Put 8 Tablespoons of table salt in the “Salt” glass and stir well until dissolved.
4. Put 8 Tablespoons of granulated sugar in the “Sugar” glass and stir well until dissolved.

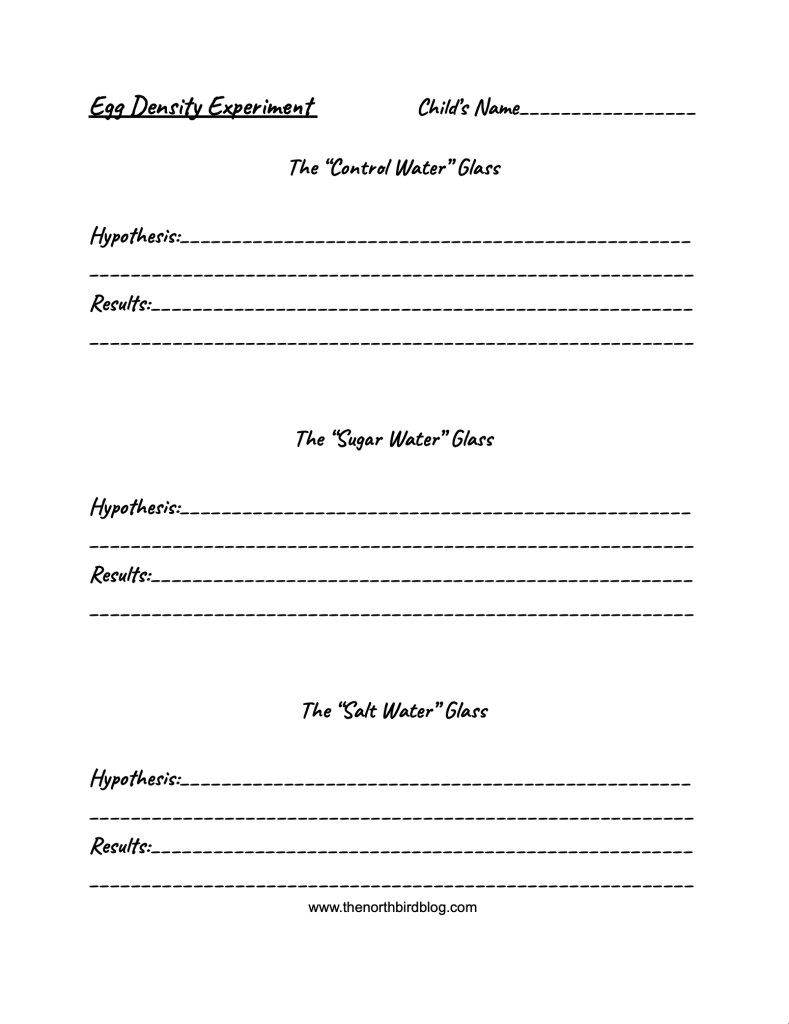
5. Ask the kids what they think will happen. They can write their “hypothesis” in the attached PDF printable at this point.
6. Place egg carefully in the “Control” glass (you might want to use the spoon to lower it in…!)
7. Then put egg in the “Sugar” glass, followed by the “Salt” glass, and see the results! If easier, use two eggs for these glasses to compare the egg’s buoyancy.
8. Document your findings and compare your results to the hypothesis made earlier. See if you guessed right or were surprised!

Our Findings:
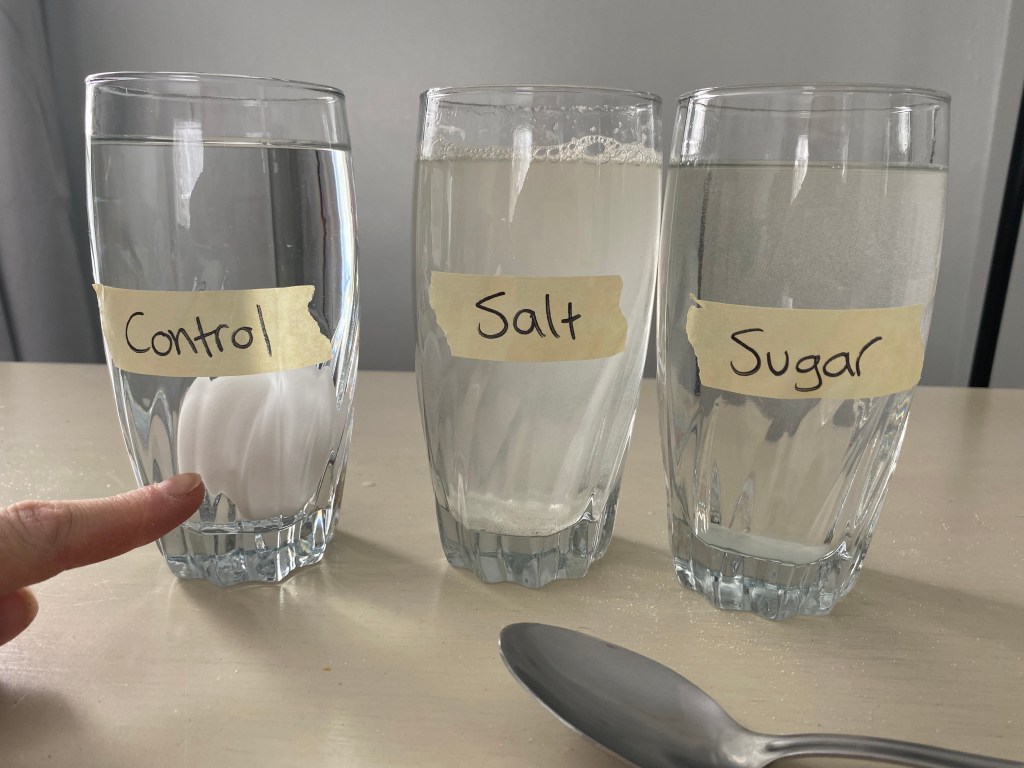
We discovered that in the “Control” glass of water, the egg was more dense than the water, so it sank.
The “Sugar” glass of water was more dense than the “Control” water, but not more dense than the egg, so the egg lifted a bit in the water but didn’t float on the surface.
The “Salt” glass of water had the highest density. We discovered that when the egg was put in it, it floated on the water’s surface. This showed that the egg had a lower density than the salted water.
Educational Videos
“Why is it called “Dead Sea”? Why does everyone float in this sea?” by Science ABC
This is a very detailed thorough video about the density of salt in the Dead Sea (Israel). They discuss why people can effortlessly float in it, and how there is such a high amount of salt in that particular body of water. This video is definitely geared toward older kids (my 6 year old’s eyes sort of “glazed over” after a few minutes in!)
“Why is the Ocean Salty?” by Mystery Science
This video is well done and designed to engage younger grades. It is full of questions that younger kids ask (at least ones that my oldest has asked me and I had no idea the answer to!).
I love how there is also a part where they recommend pausing the video to discuss with the kids “Why do you think the ocean is salty but lakes and rivers aren’t?”
“Sink or Float?” by SciShow Kids
This cute video discusses the topic of density and how the density of different items compare with the density of water. There is a simple experiment that you can do at home alongside the video so that younger kids can test this concept out for themselves. The conclusion of the study is communicated clearly, making it easy for younger kids to understand the concept of density.
Other posts on Ocean Life:

Make Mini Ocean Zones in a Jar! An Experiment on Liquid Viscosity
A fun experiment illustrating the Zones of the Ocean, and learning about liquid Viscosity.

Ocean Pelagic Zone Booklet: A Fun Learning Resource for Students
In Ocean studies, students can make their own mini pelagic zone booklet! This fun craft helps to illustrate how the deeper the ocean layers go in distance from the sun, the darker it gets from increasing lack of sunlight.

Fun Salt Water Painting Activity for Kids
Here is a fun way to paint using salt and watered down paints! Our kids loved the texture the salt left on the paper, as well as the way the salt affected the way their pictures turned out!
More Homeschooling Crafts & Activities to Check Out:


Hi, I’m Jessie!
I’m a Wife and Homeschooling Mom living in a remote town in Northern Ontario, Canada. I love making wholesome meals for my family from scratch, homeschooling our girls and learning more about natural living.
Read more about my story HERE.

Subscribe to Northbird’s email list to get weekly posts on: tasty recipes, activity ideas for kids, natural living tips, and some genuine mom thoughts and encouragement!
Recent posts from Northbird:


Exploring Salt Water Density: Homeschooling Egg Experiment
Supplies Needed
Directions
- Fill the 3 glasses with equal amounts of cold water.
- Label each glass: 1-Control, 2-Salt, 3-Sugar.
- Put 8 Tablespoons of table salt in the “Salt” glass and stir well until dissolved.
- Put 8 Tablespoons of granulated sugar in the “Sugar” glass and stir well until dissolved.
- Ask the kids what they think will happen. They can write their “hypothesis” in the attached PDF printable at this point.
- Place egg carefully in the “Control” glass (you might want to use the spoon to lower it in…!)
- Then put egg in the “Sugar” glass, followed by the “Salt” glass, and see the results! If easier, use two eggs for these glasses to compare the egg’s buoyancy.
- Document your findings and compare your results to the hypothesis made earlier. See if you guessed right or were surprised!