Find Northbird on social media:
This post contains affiliate links. As an Amazon associate, I earn from qualifying purchases. This means that I make a small commission at no extra cost to you. You can read my full disclosure HERE.
Jump to Binocular Activity Card
Return to “Homeschooling Activities & Resources”

Birds: A Natural Homeschooling Inquiry…
Learning about birds in our homeschool studies is one of the easiest topics to investigate in my opinion, simply because it is on-going, and the kid’s curiosity is spring boarded from seeing “who” comes to our bird feeders!
This is such a natural discovery process that leaps into questions of:
“Where do the birds go when it is raining or snowing?”
“What do birds eat when we forget to fill up the bird feeder?”
“Why are the birds chasing each other in the sky?”
Even though questions from these little treasures may be nearly constant some days, I am learning to pray for patience and view them as a golden opportunity for the kids to learn.
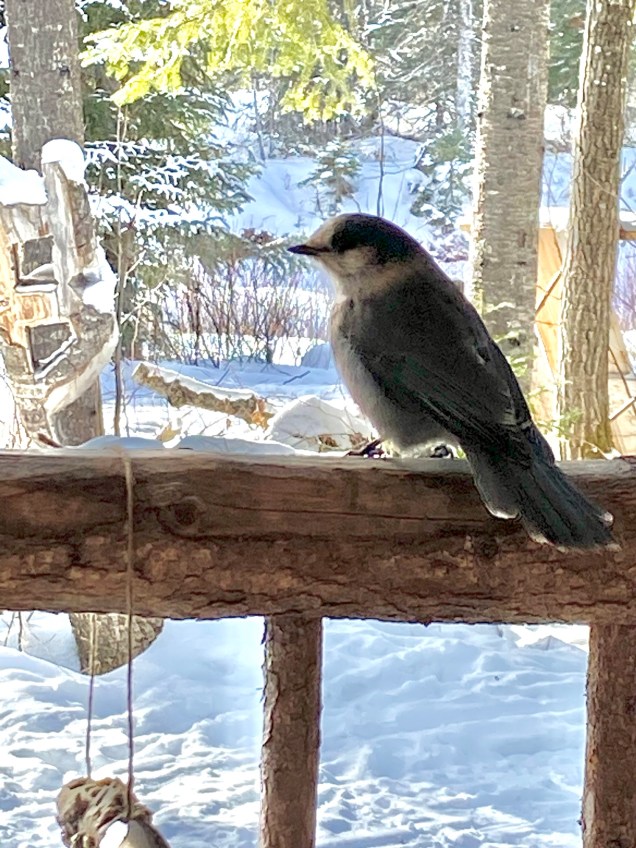
Moose River area, Northern Ontario
Honestly, there are so many days that we have dropped the math or language arts lessons to simply go stare out the window for several minutes to watch the various feathered creatures fly around, eat at our feeders, scratch for worms and bugs, or pick up grass for their nests.
There is always something to learn from watching birds, even if it is to realize our need to sit still, and step away from whatever business is in our lives while we quietly observe these beautiful creatures. Birdwatching is so calming, both for myself and also my very busy children!
I love how one can almost hear a pin drop if they are watching the birds from our window. They have learned to be as quiet as they can and not move so the birds don’t get spooked!

One of our favourite types of bird feeders is the clear plastic one above ↑ (The Window Cafe, similar to THIS ONE available on Amazon) that suctions right onto the window glass!
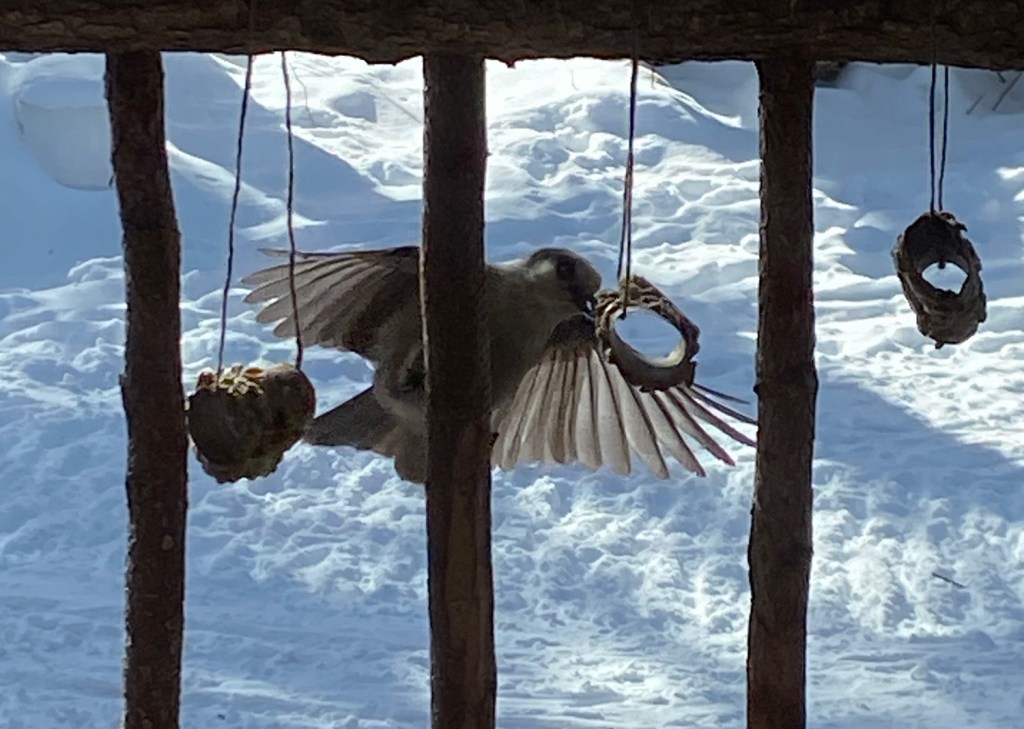
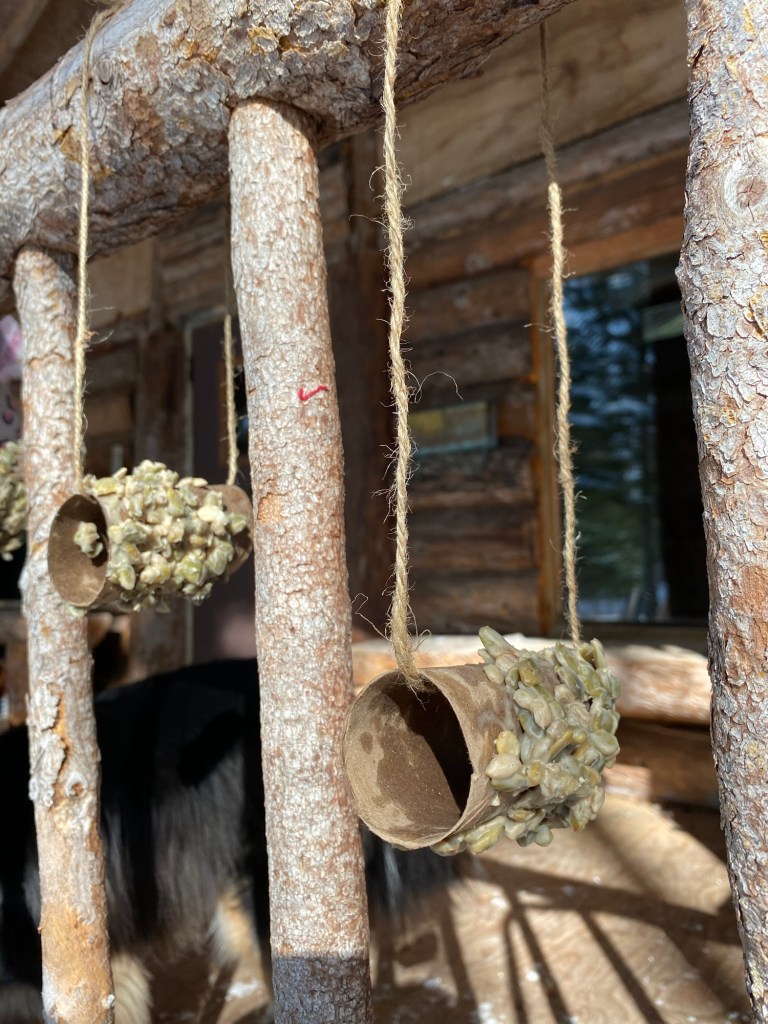
A “Whisky Jack” eating from one of our homemade bird feeders.
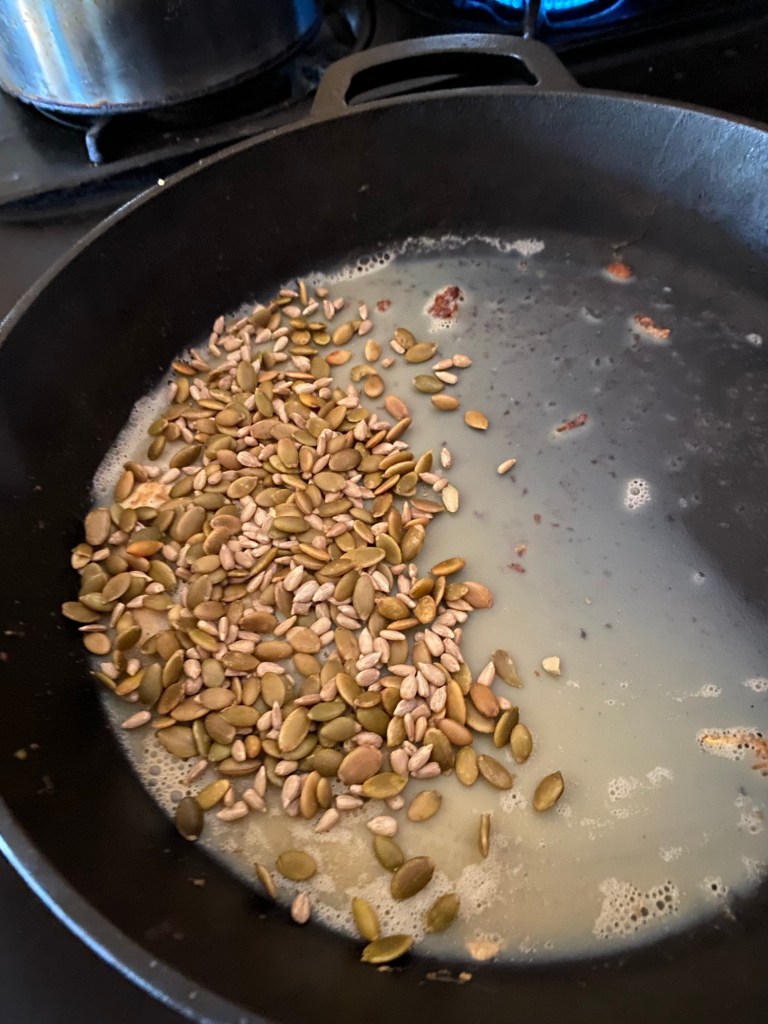
You can check out THIS POST if you are interested in seeing how we made these easy & seedy paper roll bird feeders.
About this Craft:
This bird-based inquiry craft is an easy set up, inexpensive, and can be completed as simple or fancy as you like!
I must give credit to my sister-in-law “L” for first having the idea several years ago and making two quick sets for our toddlers to decorate with stickers when they were having trouble getting along with each other!
I hope you and your students have fun making this simple fun birding craft!
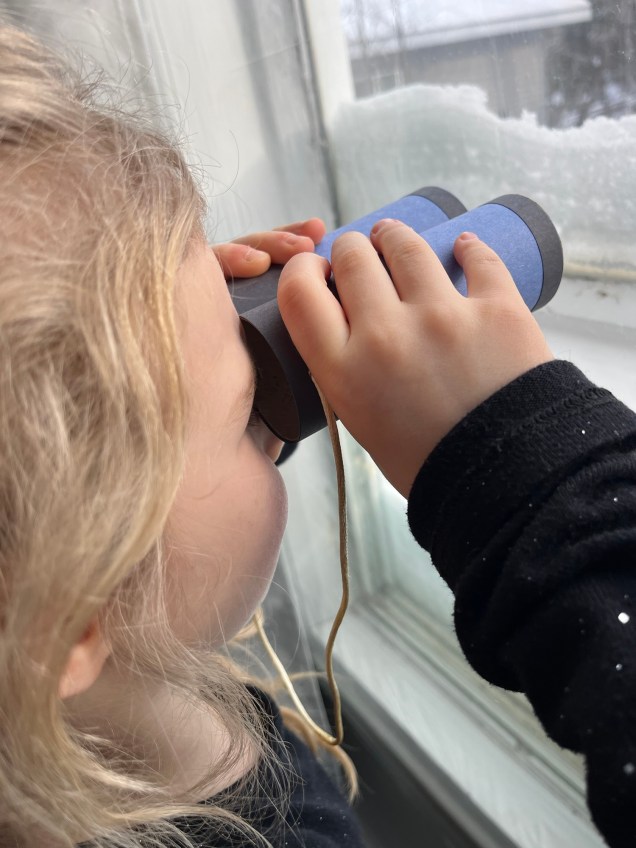
Watch and Record!
Don’t forget to watch and record what types of birds your kids can find using their new birdwatching binoculars!
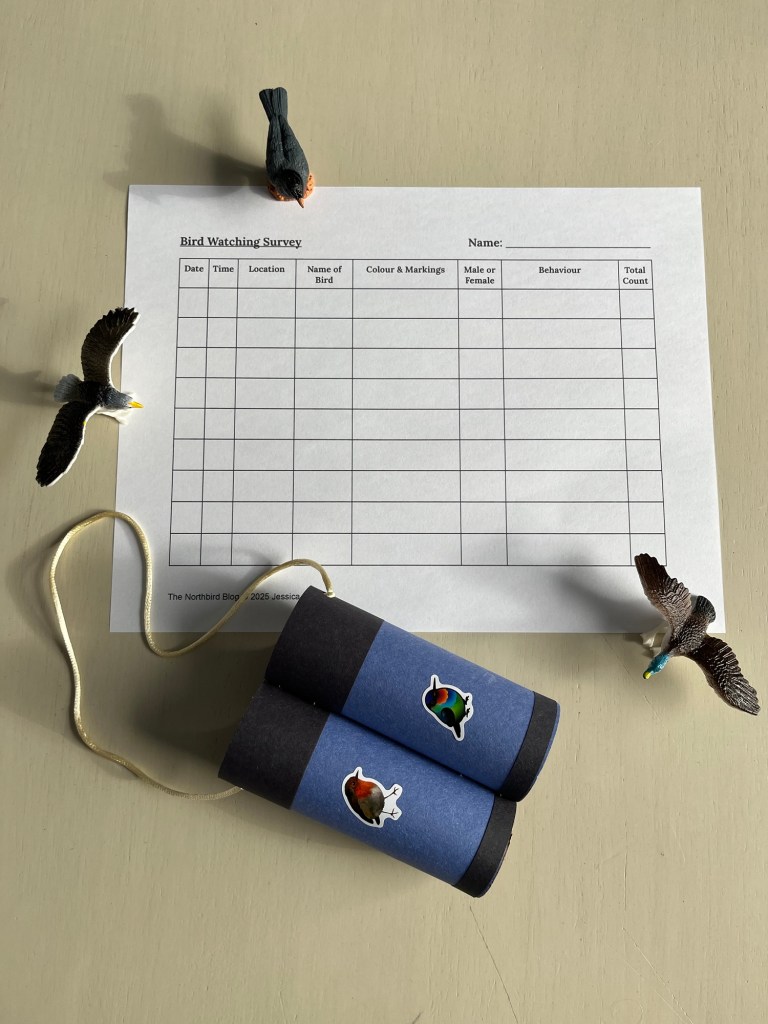
You can download this Free Birdwatching Survey Sheet PDF HERE.
Have a student that loves to record and draw?
My daughter loves drawing! I created this bird survey tool as a way for her to record and draw the different birds that she finds around our home in Northern Ontario. It will be a great keepsake in years to come.

This birdy resource will encourage students to get outside into nature and watch and listen for the many amazing different bird species out there! It is non-specific to any geographical area, and is to be used as an interactive survey tool.
On each page students can record:
- The name of the BIRD sighted
- Date/Time
- Location of the BIRD
- Colour and any notable markings of the BIRD
- Behavior of the BIRD (what was the bird doing?)
At the bottom of each page there is a framed box where students can DRAW their impression of what the bird looked like, or what it was doing (flying, perching, nesting, etc)
This PDF file has been designed to be easily printed, folded and stapled together, making it an easy handout to either print and make ahead of time for younger students, or have the older students assemble it themselves!
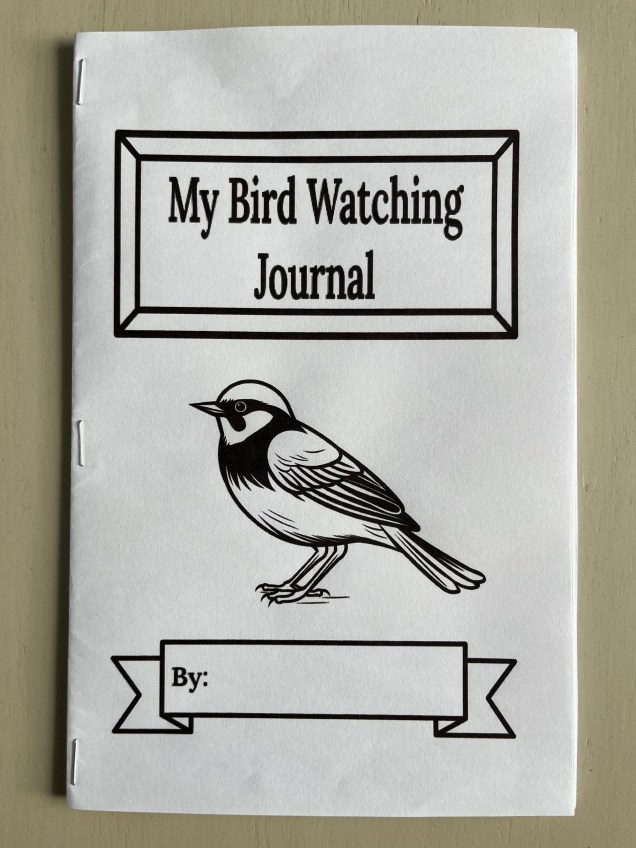
This Bird Watching Printable Journal is available to purchase and download from my store on Teachers Pay Teachers HERE.
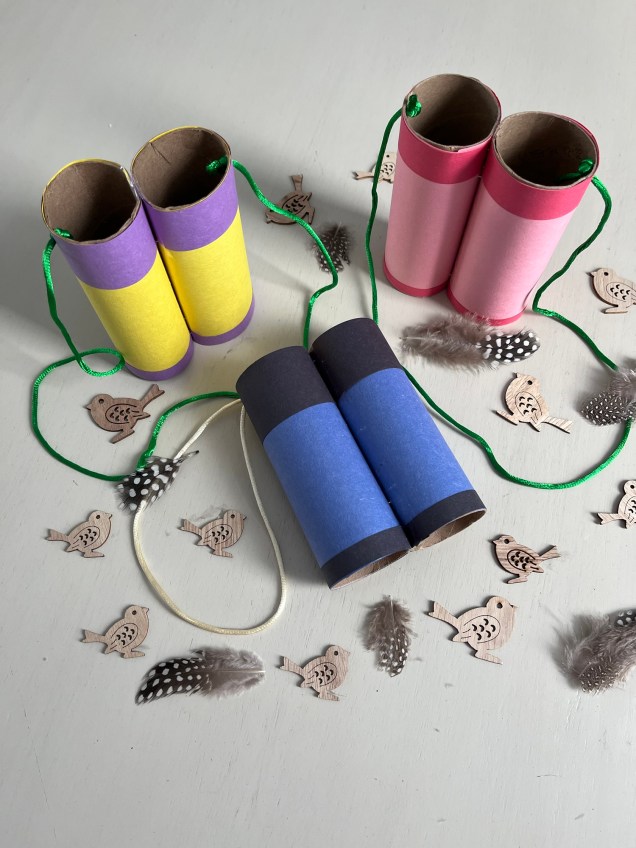
How to Make Paper Binoculars

Supplies Needed:
- String or Twine
- Scissors
- Stapler
- Tape
- Single Hole Punch
- Coloured Paper
- Inside cardboard roll from toilet paper or paper towel rolls
Decorating suggestions:
- Paint
- Markers
- Stickers (These watercolour bird stickers are gorgeous!)
- Coloured Ribbons
- Washi Tape
Directions:
1. If you are using paper towel rolls, first cut them in half. If using toilet paper rolls, make sure they are completely bare!
2. Cut coloured paper into strips for a background, then wrap around and tape in place.

3. Cut a different colour of paper into thinner strips and also wrap and tape into place. (*Note: it helps to have all the tape along one side, so that when you staple it together, the tape can be hidden)

4. Staple together the two rolls where they touch when held together, (tape side in), stapling twice both at the top and bottom.

5. Use a single hold punch, make a small hole about 1/2 inch below the eye hole top, opposite from the staples (see picture).

6. Insert string into hole and tie a large knot at the end of the string to hold it in place.
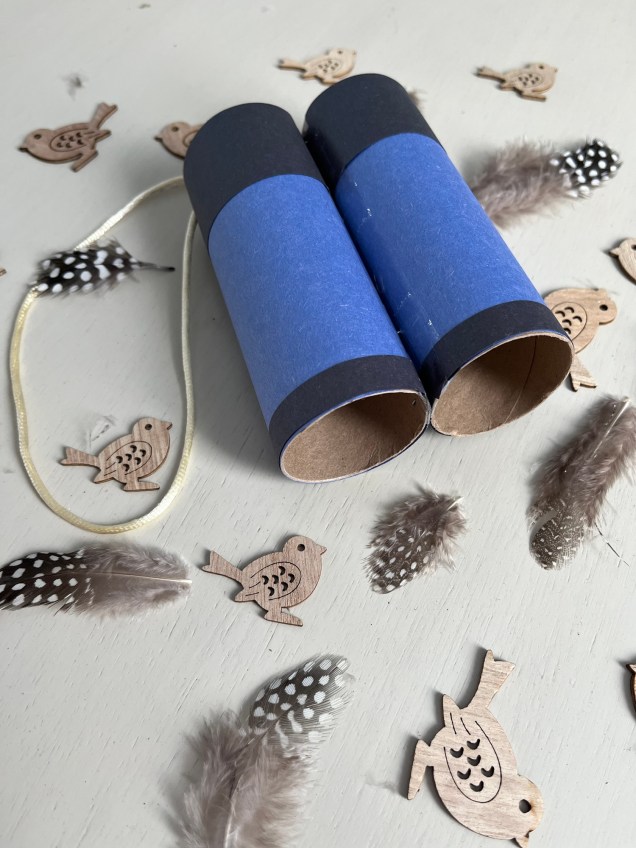
7. It’s time to begin using the binoculars!
Made this Craft?
I’d LOVE to see your results!! Feel free to post to your social media account and tag Northbird using one of the links below or post in the comments!
More Homeschooling Crafts & Activities to Check Out:


Hi, I’m Jessie!
I’m a Wife and Homeschooling Mom living in a remote town in Northern Ontario, Canada. I love making wholesome meals for my family from scratch, homeschooling our girls and learning more about natural living.
Read more about my story HERE.

Subscribe to Northbird’s email list to get weekly posts on: tasty recipes, activity ideas for kids, natural living tips, and some genuine mom thoughts and encouragement!
Recent posts from Northbird:


Birdwatching Binocular Craft
This is a fun bird inquiry craft to make at home: Kids can make their own binoculars and decorate them as simple or as decorative as they like!
Supplies Needed:
Decorating Ideas:
Directions:
- If you are using paper towel rolls, first cut them in half. If using toilet paper rolls, make sure they are completely bare!
- Cut coloured paper into strips for a background, then wrap around and tape in place.
- Cut a different colour of paper into thinner strips and also wrap and tape into place. (*Note: it helps to have all the tape along one side, so that when you staple it together, the tape can be hidden)
- Staple together the two rolls where they touch when held together, (tape side in), stapling twice both at the top and bottom.
- Use a single hold punch, make a small hole about 1/2 inch below the eye hole top, opposite from the staples (see picture).
- Insert string into hole and tie a large knot at the end of the string to hold it in place.
- It’s time to begin using the binoculars!