Find Northbird on social media:
This post contains affiliate links. As an Amazon associate, I earn from qualifying purchases. This means that I make a small commission at no extra cost to you. You can read my full disclosure HERE.

I LOVE this time of year! So many good things to harvest from your gardens, bushes, foraging, and fruit trees!
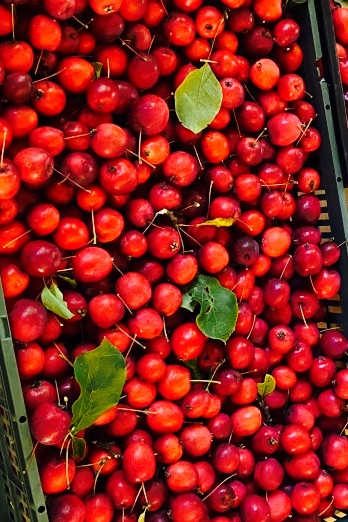
In southern Ontario, my parents have some wonderful neighbours that have an incredibly plentiful crabapple tree. Each year, some members of our family have spent an hour or two picking apples and then spent the next few days turning the thousands of tiny apples into delicious jellies, juice, and some deliciously tart pink applesauce.
The kids have always been particularly fascinated with the mini red apples, and our oldest was always taking a handful of them to snack on throughout her day!
Nutrition:
Did you know that crabapples contain high levels of vitamin C? As a result, they are a great source for keeping your immune system strong! They are also packed full of other essential vitamins and minerals that our bodies need such as: phosphorus, calcium, iron, magnesium and manganese.
Crabapples have naturally high levels of pectin, which not only helps the jelly to “set”, but also has numerous health benefits for our bodies (some of these I didn’t even know about until researching for this post!)

Another important thing to note about crabapples (and all apple varieties) is that the seeds contain amygdalin, which is a compound made of a mixture of sugars and cyanide. You definitely want to avoid eating apple seeds whenever possible!
Mini Jellies Make Great Gifts!
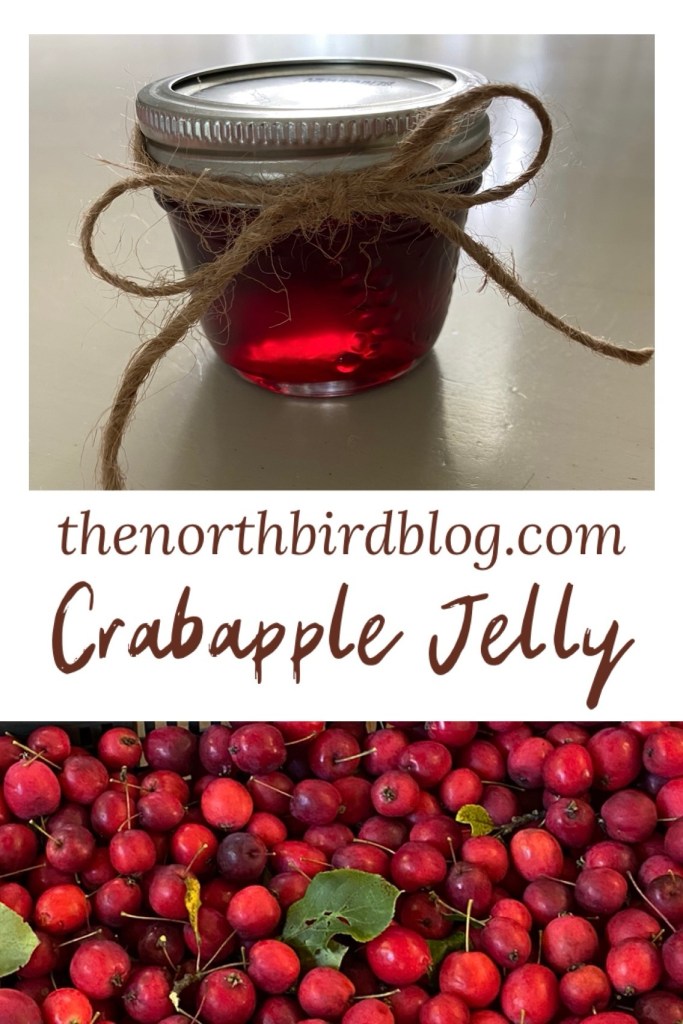
For a few years now, I have made numerous batches of crabapple jelly, apple butter, and other jams to give away at Christmas time to family and friends.
I love using these smaller 125ml jars for the various jars and then doing up little boxes from the dollarstore with a variety of preserves in each box.
Here’s a video showing each step in the process of making Crabapple Jelly!
How to Make Crabapple Jelly
Supplies Needed:
- Water bath canner
- Canning tongs
- Canning funnel
- Canning jars, lids and rings
- Paper towel
- Non-metallic utensil
- Juice strainer or fine mesh colander
- Stock pot
- Measuring cups
- Paring knife
- Bowls
- Candy thermometer
- Spoon
Ingredients:
- Fresh crabapples
- Cold water
- Granulated sugar
Stage 1 Directions: Making the Juice
- Wash crabapples in cold water and remove any bad ones.
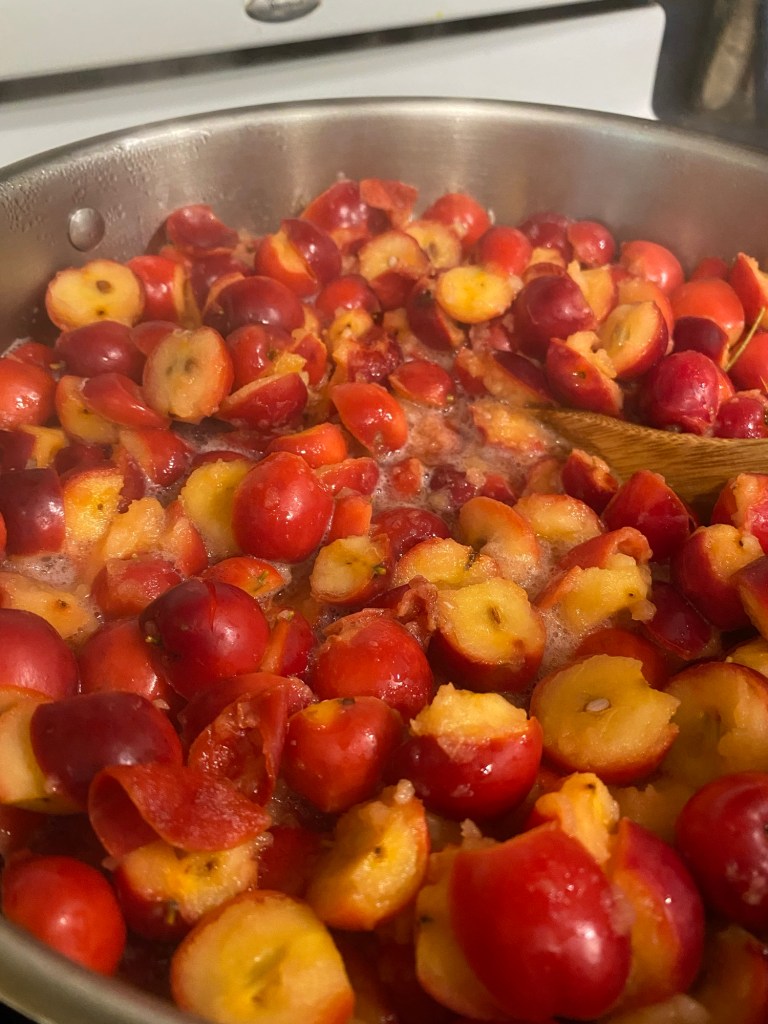
- With paring knife, cut off stem and blossom ends, and cut in half. Put prepared pieces in large stock pot.


3. Add cold water to pot until you can see the water through the top layer of apples. Too much water will result in more watery jelly and might have trouble setting, and not enough water might make it too thick or the apples might burn while cooking down!
4. Cook for several minutes on medium, stirring frequently until you can mush the apples easily with a spoon.

5. Remove from heat and let it cool while you set up to strain the juice.
6. Carefully scoop out the cooked crabapples and let the juice slowly drain through a canning strainer. ***Do not squeeze the bag! See note below.
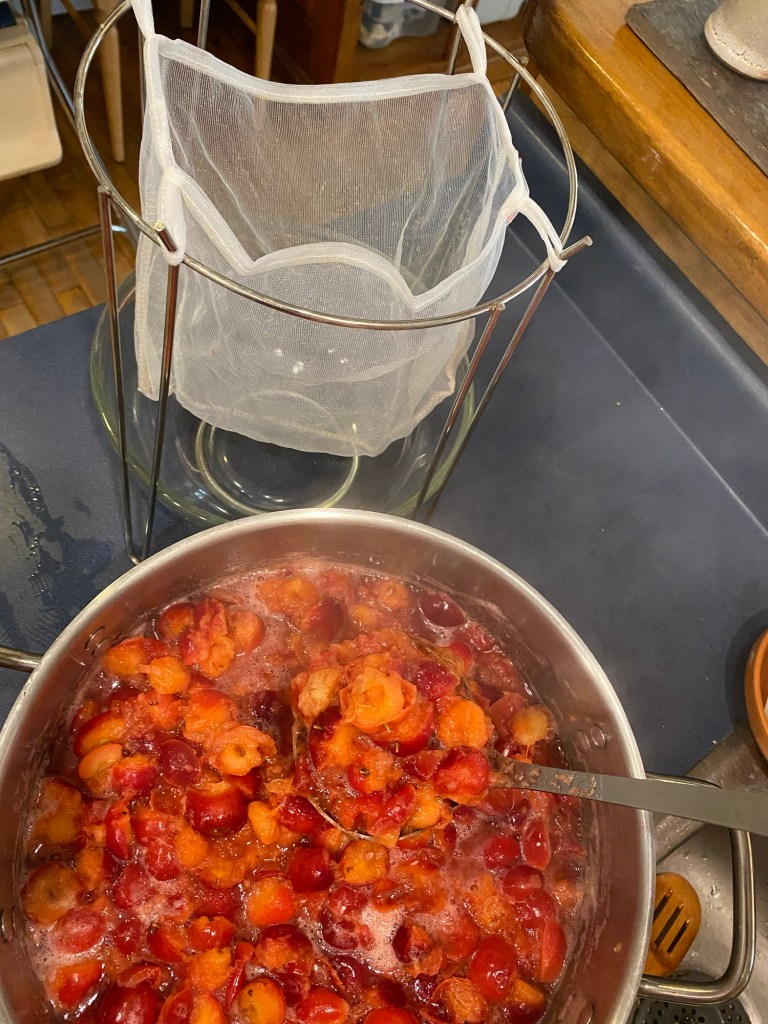

7. Leave for several hours or overnight to fully drain through. You can discard the remaining pulp or push it through into a separate bowl to make some crabapple sauce.
8. After your juice has been collected, you can either store it in a sealed container in the fridge for up to 3 days, or start the canning process below.
Additional Notes for Stage 1:
- If you don’t have a canning strainer, you can also use a fine mesh colander or hang nut milk bags suspended over a bowl. Get creative with what you have!
- It is important to let the juice drain through slowly on its own without being squeezed or hurried along. This will prevent the juice from becoming cloudy and instead have the beautiful clear dark red that every canner aims toward!
- Sometimes I do the apples in batches over a few days, so its helpful to store the containers of crabapple juice in the fridge while I finish cooking the remaining crabapples. Then I like to do the canning all on one day since it takes so much work to set up everything needed!
Stage 2 Directions: Cooking the Jelly
- Before you start: Begin by prepping and setting up for the canning process. (There’s nothing worse than being ready to pour into the canning jars and realizing that you are missing something!)
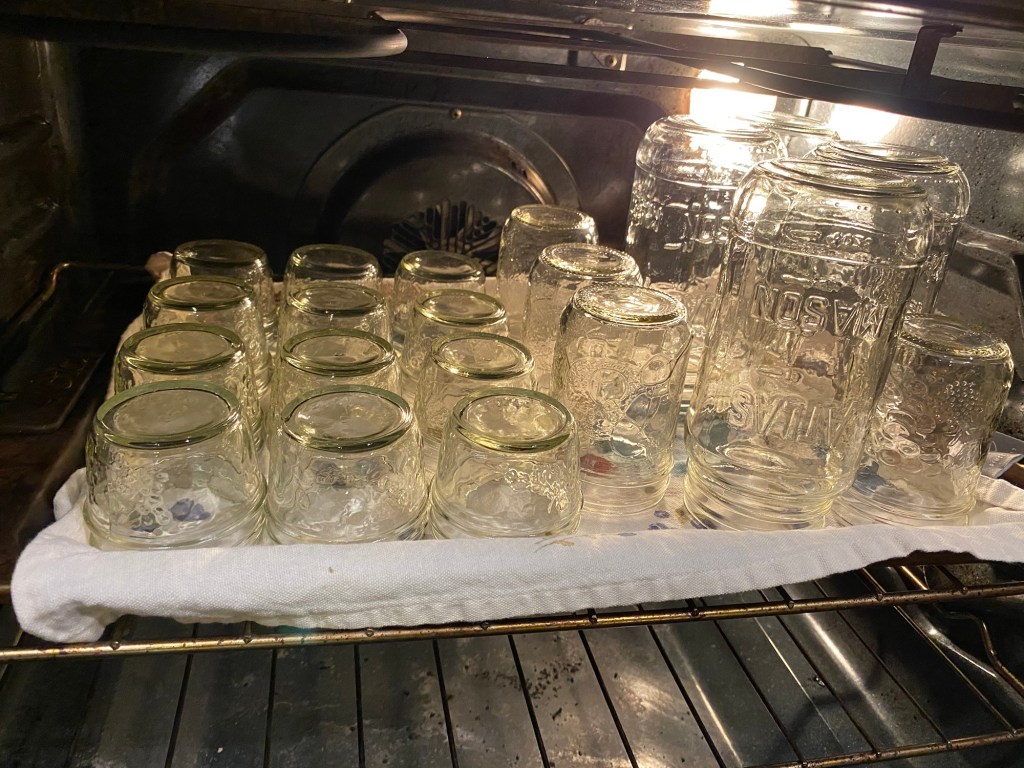
- Clean your glass jars, lids and rings in hot soapy water and rinse thoroughly. Place jars upside down on a clean tea-towel covered baking sheet. Place in the oven, preheat oven to 180 degrees fahrenheit.
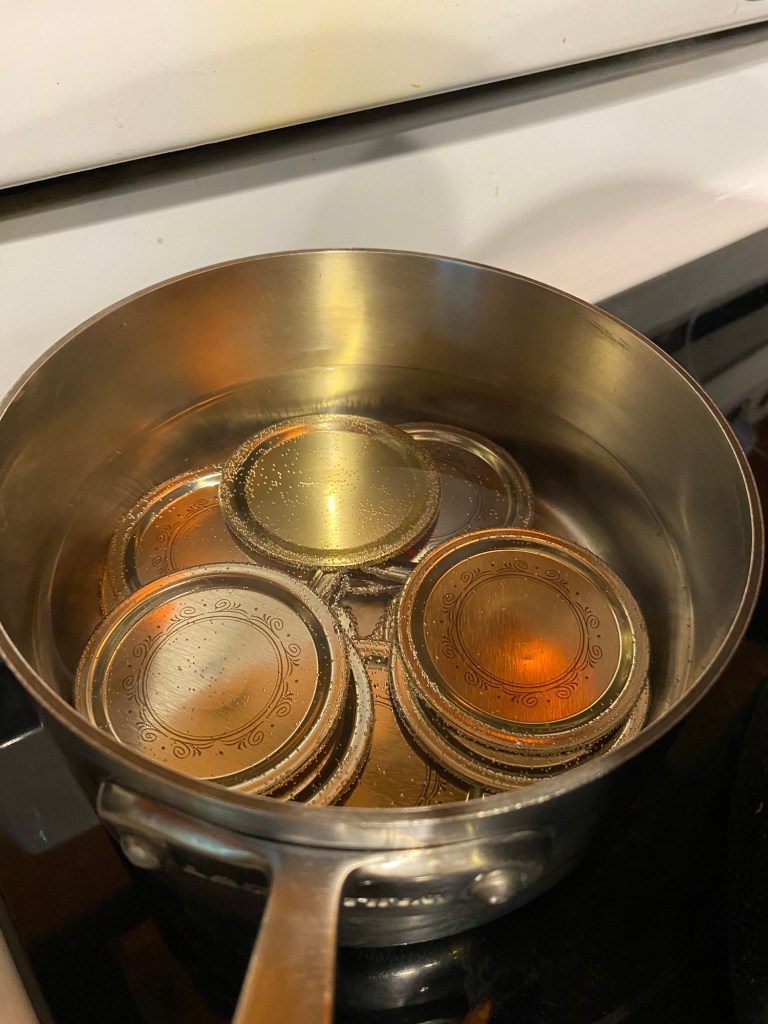
- Place cleaned lids in a small saucepan and put on low/med on the stove.
- Set out: canning tongs, paper towel, ladle spoon, non-metallic utensil, tongs or magnetic lid lifter, and lid rings.
- Fill large water bath canner with cold water and set on stove, cover with lid. Bring to a boil then turn to low to simmer until ready.
- If you don’t know already know this, research your current geographical altitude to see if you will need to modify some timing of this recipe. See notes below for testing for the jelly-set stage, as well as later on for the water bath canning stage.
2. Measure out prepared juice into large saucepan. The amount will depend on your pot size, I usually start with 4 cups.
3. Boil the strained clear juice for 5 minutes, stirring frequently and skimming the foam off as needed.

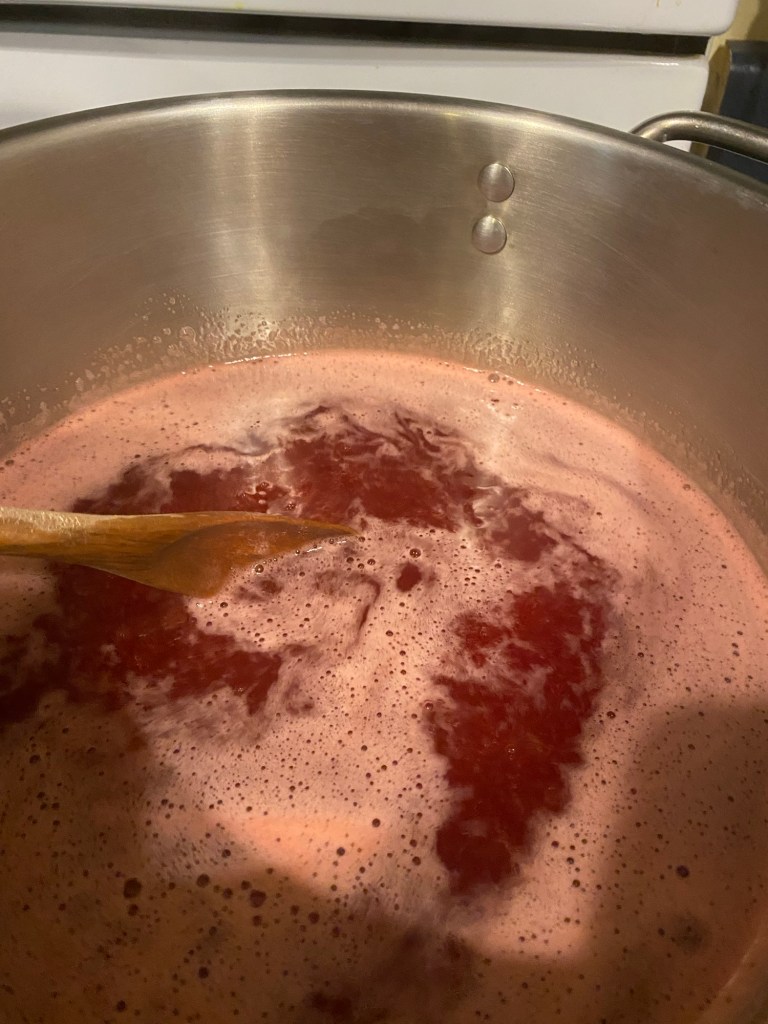
4. Add sugar: The general rule is 3/4-1 cup of sugar per 1 cup of juice. So if you start with 4 cups of juice, you will need to add between 3-4 cups of sugar. This is based on personal preference of desired taste (how sweet you want your jelly to be!).
5. Return to a boil, stirring constantly, and after a minimum of 5 minutes, start testing for the jelly stage. If it is not ready yet, keep boiling and stirring constantly, checking every minute. Note: Timing of this will vary based on altitude, and also the quantity and ratio of juice/sugar in your pot. (See below). When I made this recipe in Southern Ontario, it took less time to reach the jell stage, than when I made it here in Northern Ontario, because the location at sea level affects the boiling point, (which in turn affects the jell stage).


6. Once the jelly stage has been reached, remove pot from heat, and lightly skim off any remaining foam.
Testing for the Jelly Stage:
If you have a candy thermometer, the optimal temperature for jelly to set is 220 degrees fahrenheit, or 8 degrees fahrenheit above the boiling point of water if you are at sea level.
Note: For every 1000 feet above sea level, subtract 2 degrees fahrenheit to reach the stage for the jelly to set.
For example, at 1,000 feet above sea level, the setting stage is 218 degrees fahrenheit. At 2,000 feet above sea level, the setting stage is 216 degrees fahrenheit, etc.
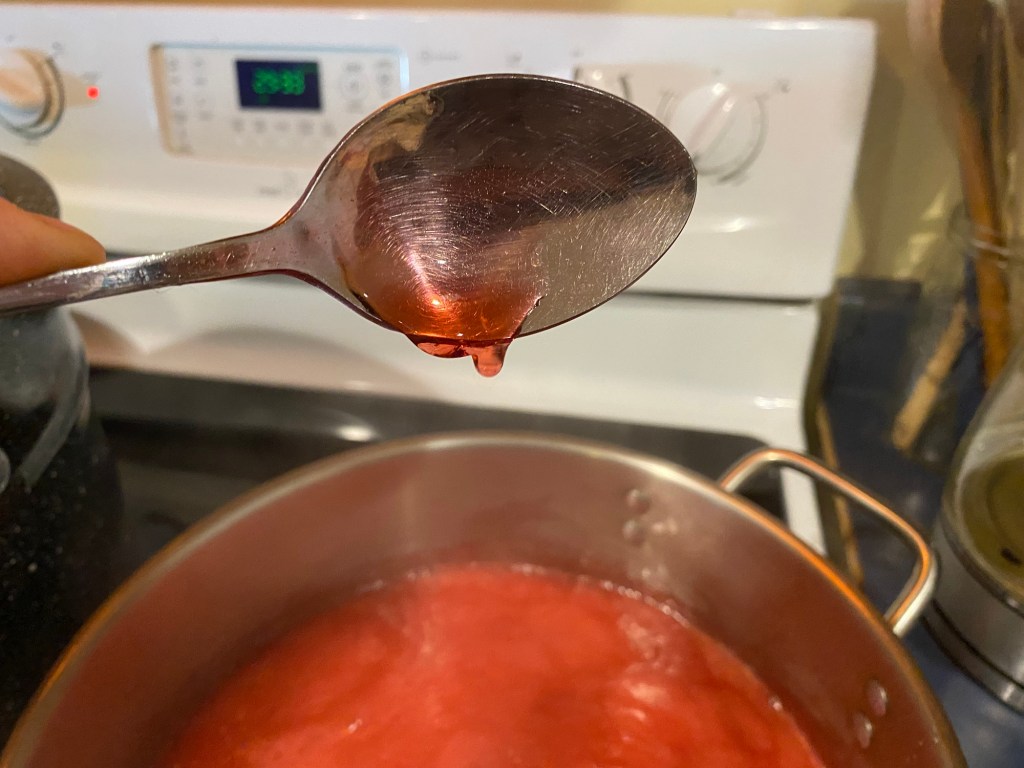
If you don’t have a candy thermometer, you can use a few items in your kitchen to check with every minute or so after it has been boiling with sugar for 5 minutes. I have made jelly with each of these methods, but my favourite one is using a spoon.
- Fork: Dip a fork into the boiling jelly and lift up vertically. The jelly will have a few drips then start to clump together within the spokes of the fork.
- Spoon: Dip a spoon into the boiling jelly and lift up horizontally. The jelly will have a drip or two then start to hold in place.
- Cold plate: Keep a few small saucers or ceramic plates in your freezer until you are ready to test. Spoon a tiny dab onto one of the cold plates and tilt the place horizontally to see if the dab of jelly starts to run. If it holds in place, then the jelly is done. If it runs, then wait another minute or so then test on another cold plate.
Stage 3 Directions: Water Bath
- With canning tongs, pull out a few jars from the oven and make sure all supplies are ready for the canning stage.
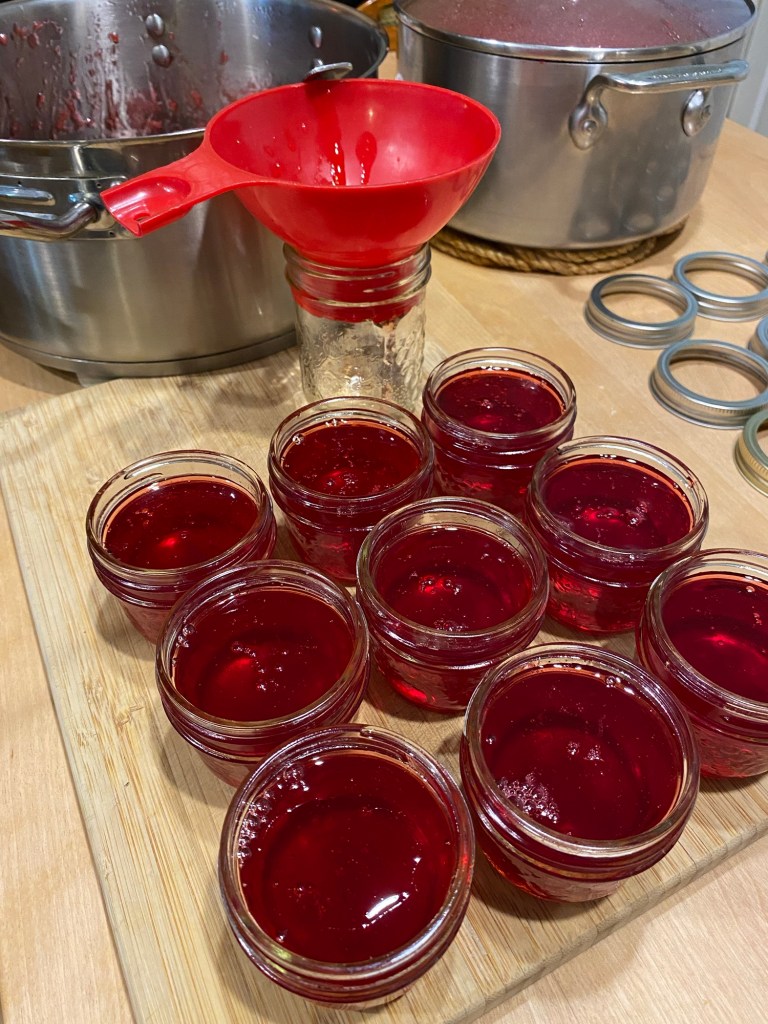
- Carefully ladle the hot crabapple liquid into the jars through the funnel.
3. Gently stir each of the filled jars with a non-metallic utensil.
4. Wipe the tops of the filled jars with a clean/wet paper towel.


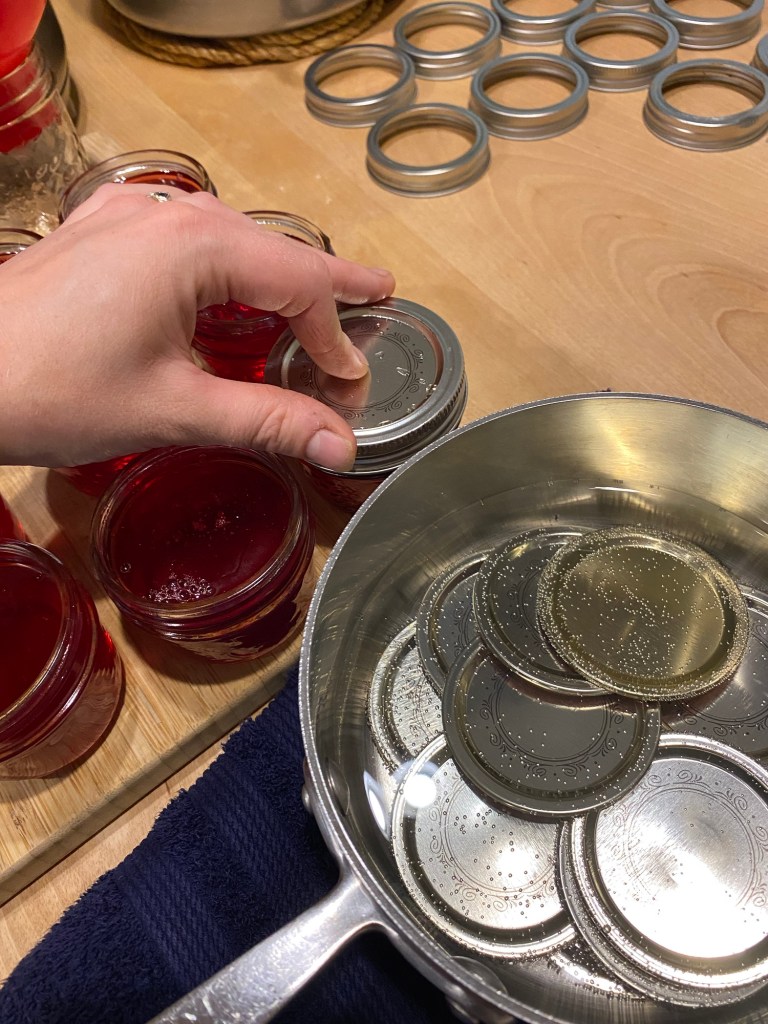
5. Put a warm canning lid on each one, pressing down while you twist on a screw band. Only tight enough to hold in place.
6. With canning tongs, put into water bath canner. When all the jars are filled and inside, return water to a boil.
7. Process jars in the water bath for 10 minutes, at sea level. See note below for altitudes above 1,000 feet.

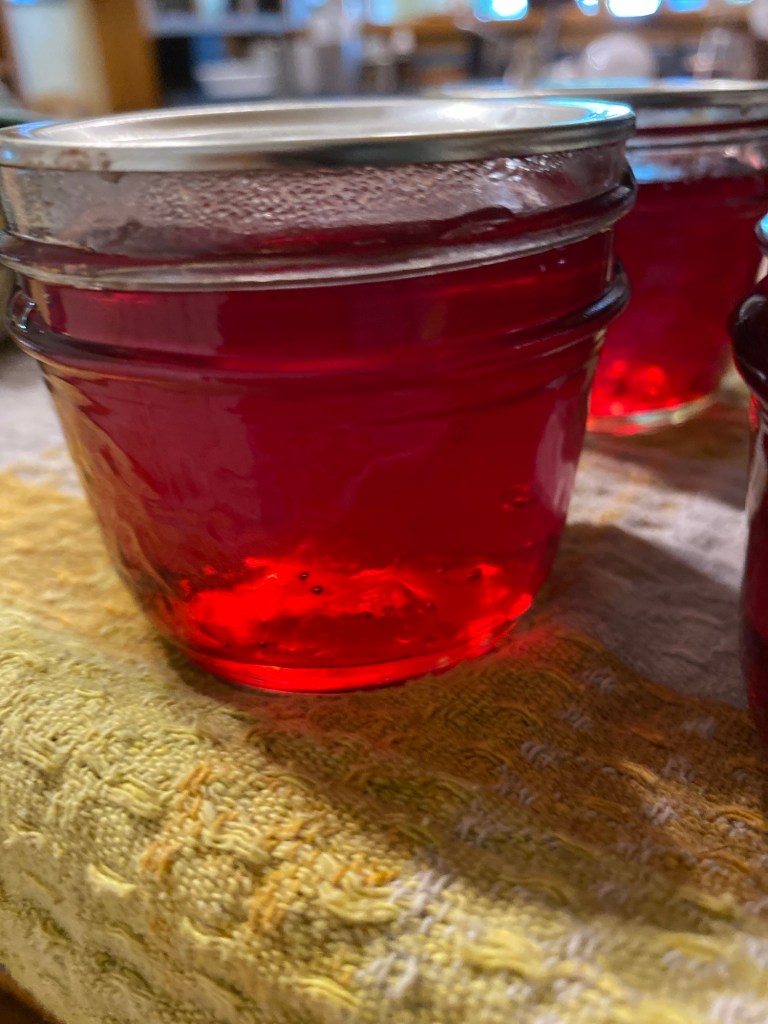
8. Lift jars from canner, being careful not to tilt. Place on towel-covered baking sheet and wait for the jar lids to start to “pop” as they naturally vacuum seal over the next little while.
9. When lids have finished “popping”, without lifting the jars you can gently remove the screw bands and wipe off any excess water.


10. Let sit for 24 hours undisturbed so the jelly can finish setting.
11. Store at room temperature for 12-18 months, refrigerate after opening.
12. Makes about 2 pints.
Water Bath Canner: Altitude Adjustments
| Altitude in Feet: | Altitude in Meters: | Increase Processing Time |
| 1,001-3,000 | 306-915 | 5 minutes |
| 3,001-6,000 | 916-1,830 | 10 minutes |
| 6,001-8,000 | 1,831-2,440 | 15 minutes |
| 8,001-10,000 | 2,441-3,050 | 20 minutes |
More Great Ideas for Your Homemade Pantry!


Hi, I’m Jessie!
I’m a Wife and Homeschooling Mom living in a remote town in Northern Ontario, Canada. I love making wholesome meals for my family from scratch, homeschooling our girls and learning more about natural living.
Read more about my story HERE.

Subscribe to Northbird’s email list to get weekly posts on: tasty recipes, activity ideas for kids, natural living tips, and some genuine mom thoughts and encouragement!

It’s Harvest Season!

Recent posts from Northbird:


How to Make Crabapple Jelly
Preserve the fresh taste of summer crabapples with this delicious homemade Crabapple Jelly Recipe (no added pectin), step-by-step instructions and visuals included for the beginner canner.
Supplies Needed:
Stage 1 Directions: Making the Juice
- Wash crabapples in cold water and remove any bad ones.
- With paring knife, cut off stem and blossom ends, and cut in half. Put prepared pieces in large stock pot.
- Add cold water to pot until you can see the water through the top layer of apples. Too much water will result in more watery jelly and might have trouble setting, and not enough water might make it too thick or the apples might burn while cooking down!
- Cook for several minutes on medium, stirring frequently until you can mush the apples easily with a spoon.
- Remove from heat and let it cool while you set up to strain the juice.
- Carefully scoop out the cooked crabapples and let the juice slowly drain through a canning strainer. ***Do not squeeze the bag! See notes above.
- Leave for several hours or overnight to fully drain through. You can discard the remaining pulp or push it through into a separate bowl to make some crabapple sauce.
- After your juice has been collected, you can either store it in a sealed container in the fridge for up to 3 days, or start the canning process below.
Stage 2 Directions: Cooking the Jelly
- Before you start, begin by prepping and setting up for the canning process.
- Clean your glass jars, lids and rings in hot soapy water and rinse thoroughly. Place jars upside down on a clean tea-towel covered baking sheet. Place in the oven, preheat oven to 180 degrees fahrenheit.
- Place cleaned lids in a small saucepan and put on low/med on the stove.
- Set out: canning tongs, paper towel, ladle spoon, non-metallic utensil, tongs or magnetic lid lifter, and lid rings.
- Fill large water bath canner with cold water and set on stove, cover with lid. Bring to a boil then turn to low to simmer until ready.
- Measure out prepared juice into large saucepan. The amount will depend on your pot size, I usually start with 4 cups.
- Boil the strained clear juice for 5 minutes, stirring frequently and skimming the foam off as needed.
- Add sugar: The general rule is 3/4-1 cup of sugar per 1 cup of juice. So if you start with 4 cups of juice, you will need to add between 3-4 cups of sugar. This is based on personal preference of desired taste (how sweet you want your jelly to be!).
- Return to a boil, stirring constantly, and after a minimum of 5 minutes, start testing for the jelly stage. If it is not ready yet, keep boiling and stirring constantly, checking every minute. Note: Timing of this will vary based on altitude, and also the quantity and ratio of juice/sugar in your pot. For more information on testing the jelly stage (with and without a thermometer), see notes above.
- Once the jelly stage has been reached, remove pot from heat, and lightly skim off any remaining foam.
Stage 3 Directions: Water Bath
- With canning tongs, pull out a few jars from the oven and make sure all supplies are ready for the canning stage.
- Carefully ladle the hot crabapple liquid into the jars through the funnel.
- Gently stir each of the filled jars with a non-metallic utensil.
- Wipe the tops of the filled jars with a clean/wet paper towel.
- Put a warm canning lid on each one, pressing down while you twist on a screw band. Only tight enough to hold in place.
- With canning tongs, put into water bath canner. When all the jars are filled and inside, return water to a boil.
- Process jars in the water bath for 10 minutes, at sea level. See note above for altitudes above 1,000 feet.
- Lift jars from canner, being careful not to tilt. Place on towel-covered baking sheet and wait for the jar lids to start to “pop” as they naturally vacuum seal over the next little while.
- When lids have finished “popping”, without lifting the jars you can gently remove the screw bands and wipe off any excess water.
- Let sit for 24 hours undisturbed so the jelly can finish setting.
- Store at room temperature for 12-18 months, refrigerate after opening.
Nutrition
Per 1 serving: 94 calories; 0 g fat; 24 g carbohydrates;
0 g protein.