How to Grow Your Own Nutritious Sprouts: Our Favourite Superfood!

Find Northbird on Social Media:

Return to “More Recipes”/ “Sprouted Nutrition

Return to “Natural Living

Growing vegetables and greens at home is something I’ve always tried to do wherever we’ve lived. Sometimes there’s been a nice bit of sunny lawn to put a garden in, but other times we’ve lived in areas where it’s just not possible and we rely on other ways to grow food indoors.

I am proud to begin this post by highlighting my amazing parents, Steve and Sharon Bacon, and their business Four Season Greens. They are located in Muskoka, Ontario, and one part of their farm is dedicated to growing Organic, Non-GMO sprouts, which are delivered to stores and restaurants all over Muskoka. In addition to growing sprouts, they also grow many different herbs, microgreens, and lettuces (aquaponics).

Steve and Sharon Bacon at Four Season Greens, Muskoka

When I first went off to nursing school, my parents gave me my own sprouting kit and I frequently grew my own healthy sprouts on the counter in the little residence apartment. Every home since then has had either a jar or basket on the go at some point. I have noticed a huge difference in my health when I regularly eat sprouts, compared to when I forget to make some for a while. No colds or illness, high energy, and good sleep!

Why are sprouts so important?

Sprouts are categorized as “Super Foods”, which essentially means that they have an incredibly high concentration of vitamins, minerals, antioxidants, and many other nutritional factors to support health and wellness.

Often, the sprouted seeds will have much more nutritional value then the fully grown vegetable.

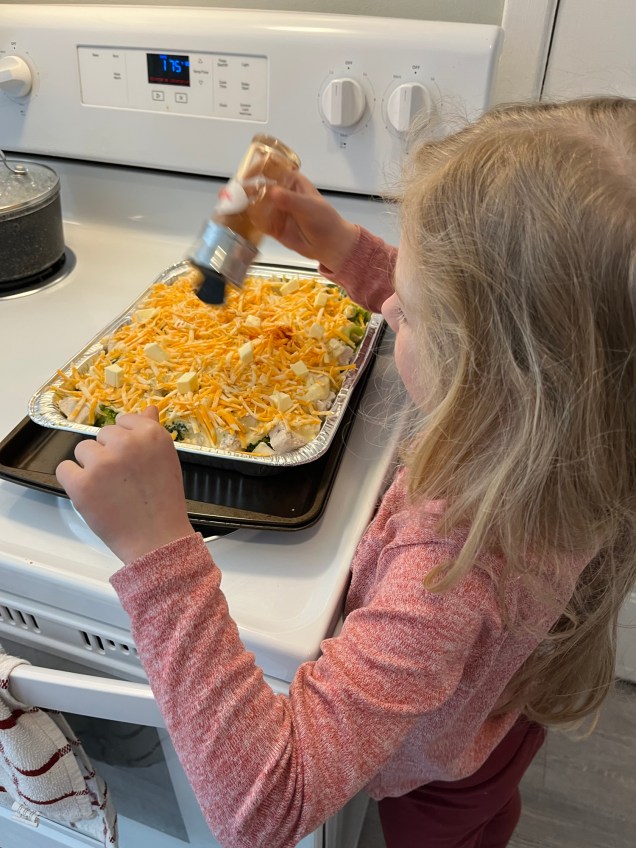
My favourite example of this is broccoli. We love eating the mature broccoli, and have it at least once a week in a stir fry or as a cooked green vegetable next to our protein entree. (Our oldest calls broccoli her “little trees” and nibbles away at the “leaves”!)

But essentially, 2 tablespoons of dry broccoli seed can be sprouted into approximately 270g when finished growing in the steel sprouting basket, and has the same nutritional benefits as 29.5lbs when fully grown. That’s like 30 large heads of broccoli!

For a little more insight into this, you can see the video below that my father Steve did, explaining more of the science and giving a great visual example. (Yes, he bought 30 heads of broccoli for this illustration, and yes, we were eating and tooting all that broccoli for the next few weeks!)

New to Sprouting?

When new to sprouting, and not sure what to sprout first, it is best to try something that you know your tastebuds will like. For example, we have two young kids who do not like anything spicy or strong flavours, so we prefer to sprout gentler tastes such as:

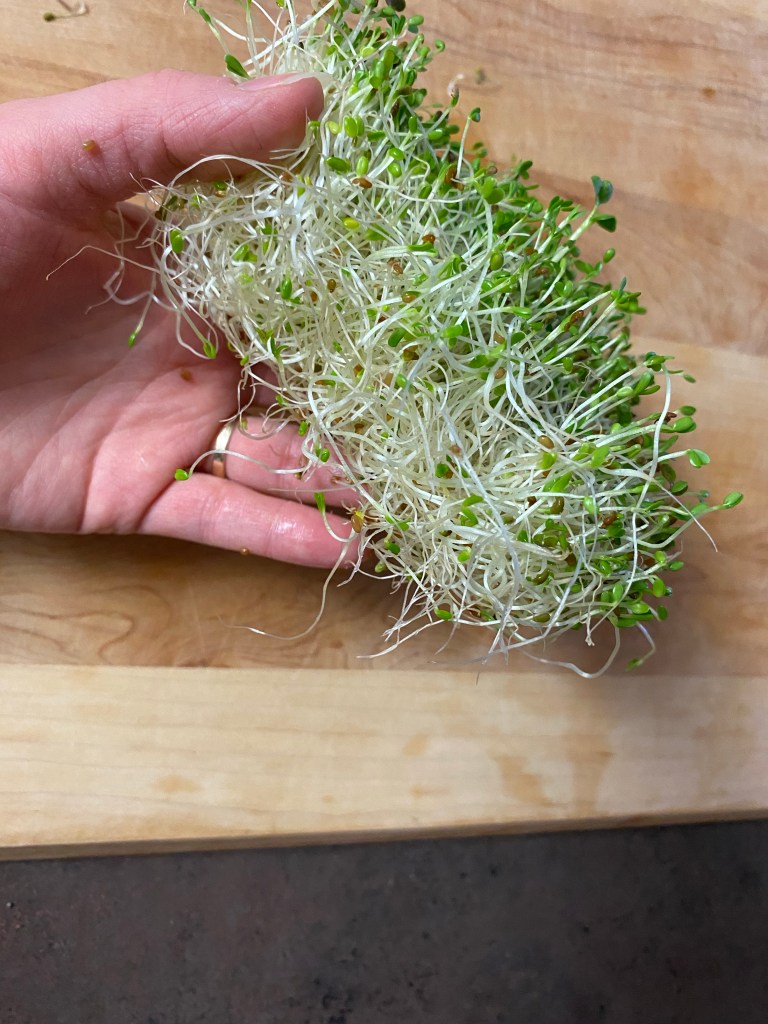
  • Clover (protein, packed with vitamins & minerals)
  • Alfalfa (builds up immune system and lowers cholesterol)
  • Or a mix like sandwich booster (you can check out many tasty sprout seed blends from Mumm’s Sprouting Seeds)

If you are a bit more adventurous and want to try a stronger taste then there is

  • broccoli (regulates blood pressure, anti-cancer, lowers cholesterol & inflammation)
  • radish (colds/urinary infections)
  • Garlic chives (lowers cholesterol and supports immune system)
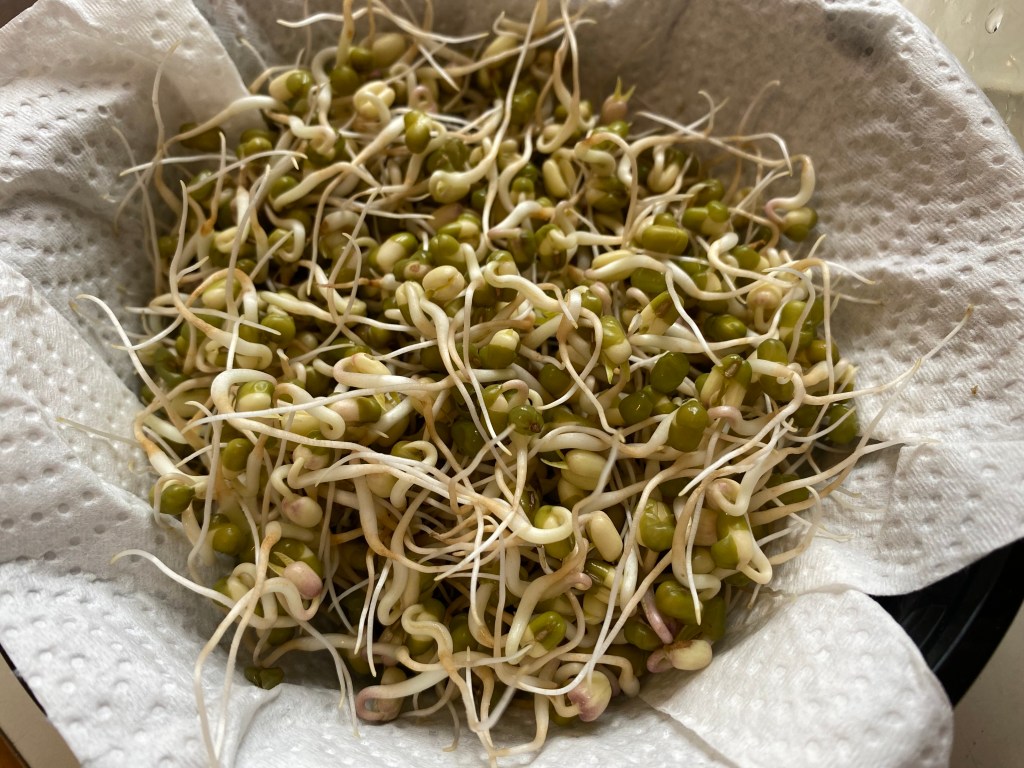
  • Mung beans (rich in protein, anti-cancer)

These are only a few of the more well known types of sprouts and I have only highlighted a crumb of the health benefits. Click HERE to see more information on sprouting nutrition from Four Season Greens.

Sprouting is easy, and once you make it a part of your daily routine to take care of growing them, your body will LOVE the good nutrition!

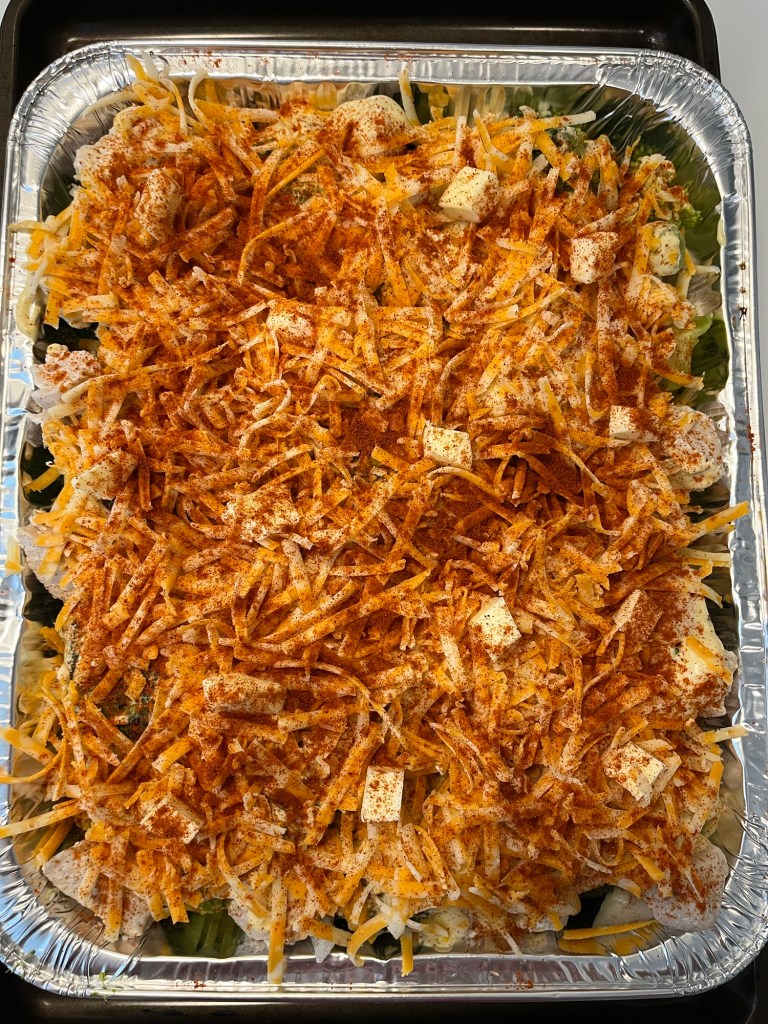
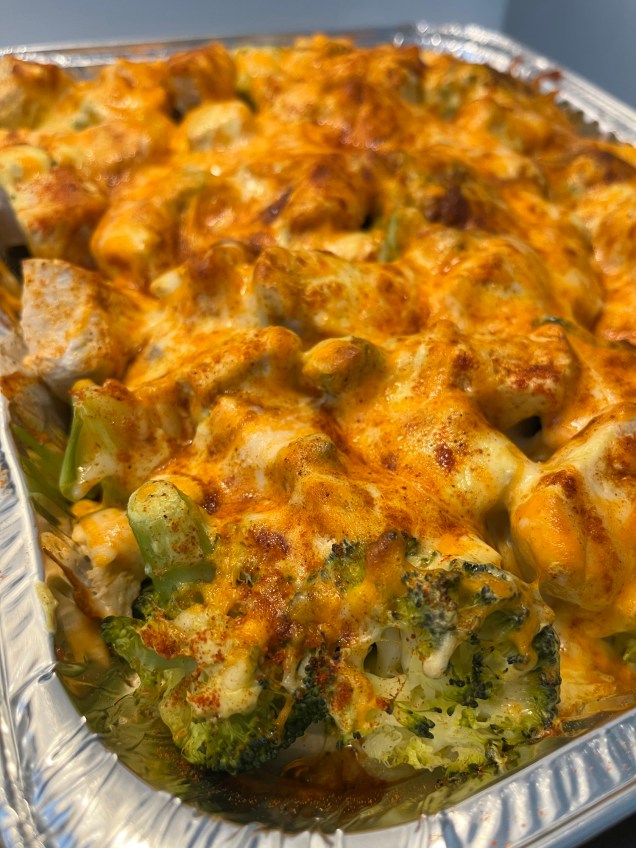
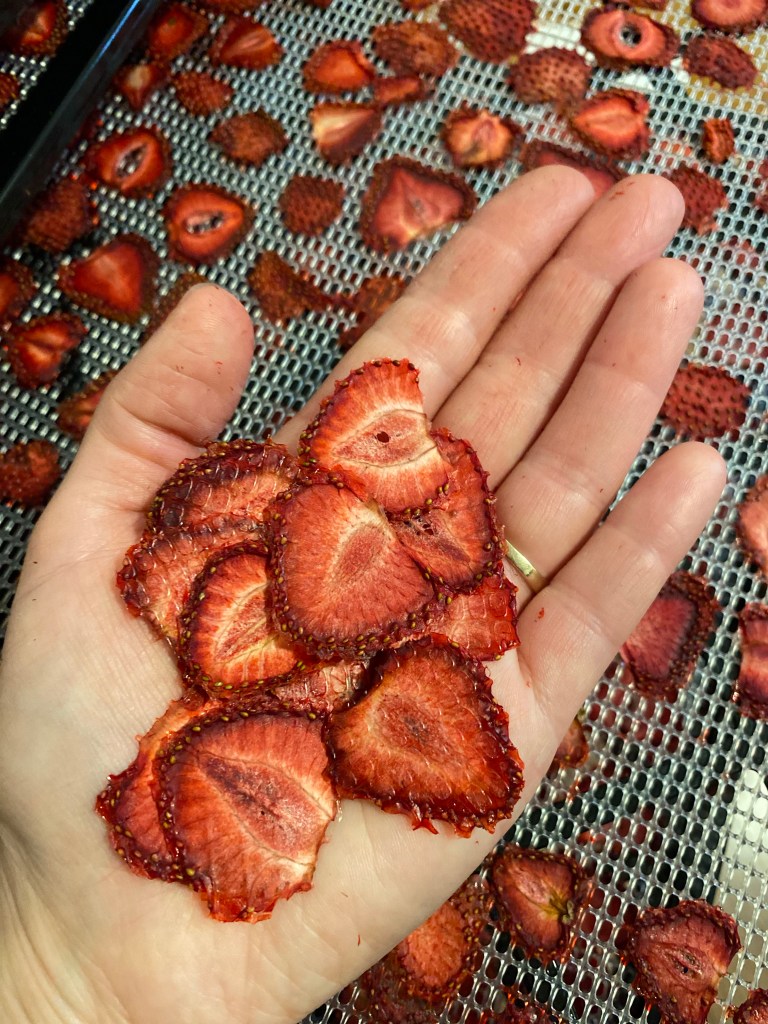
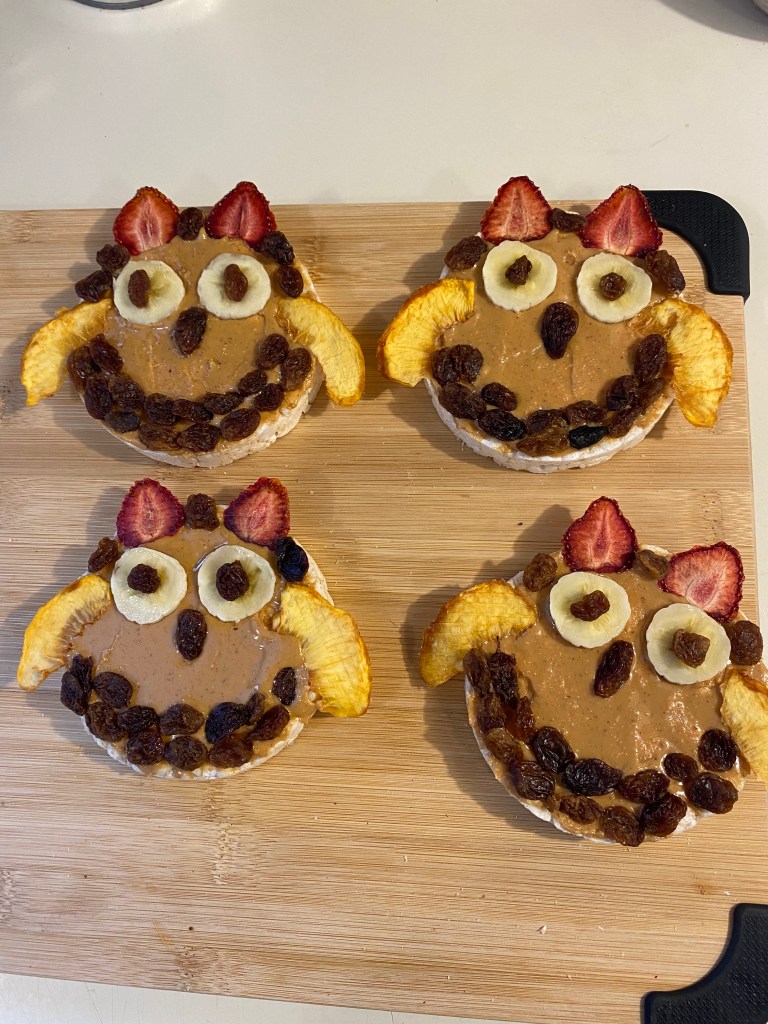
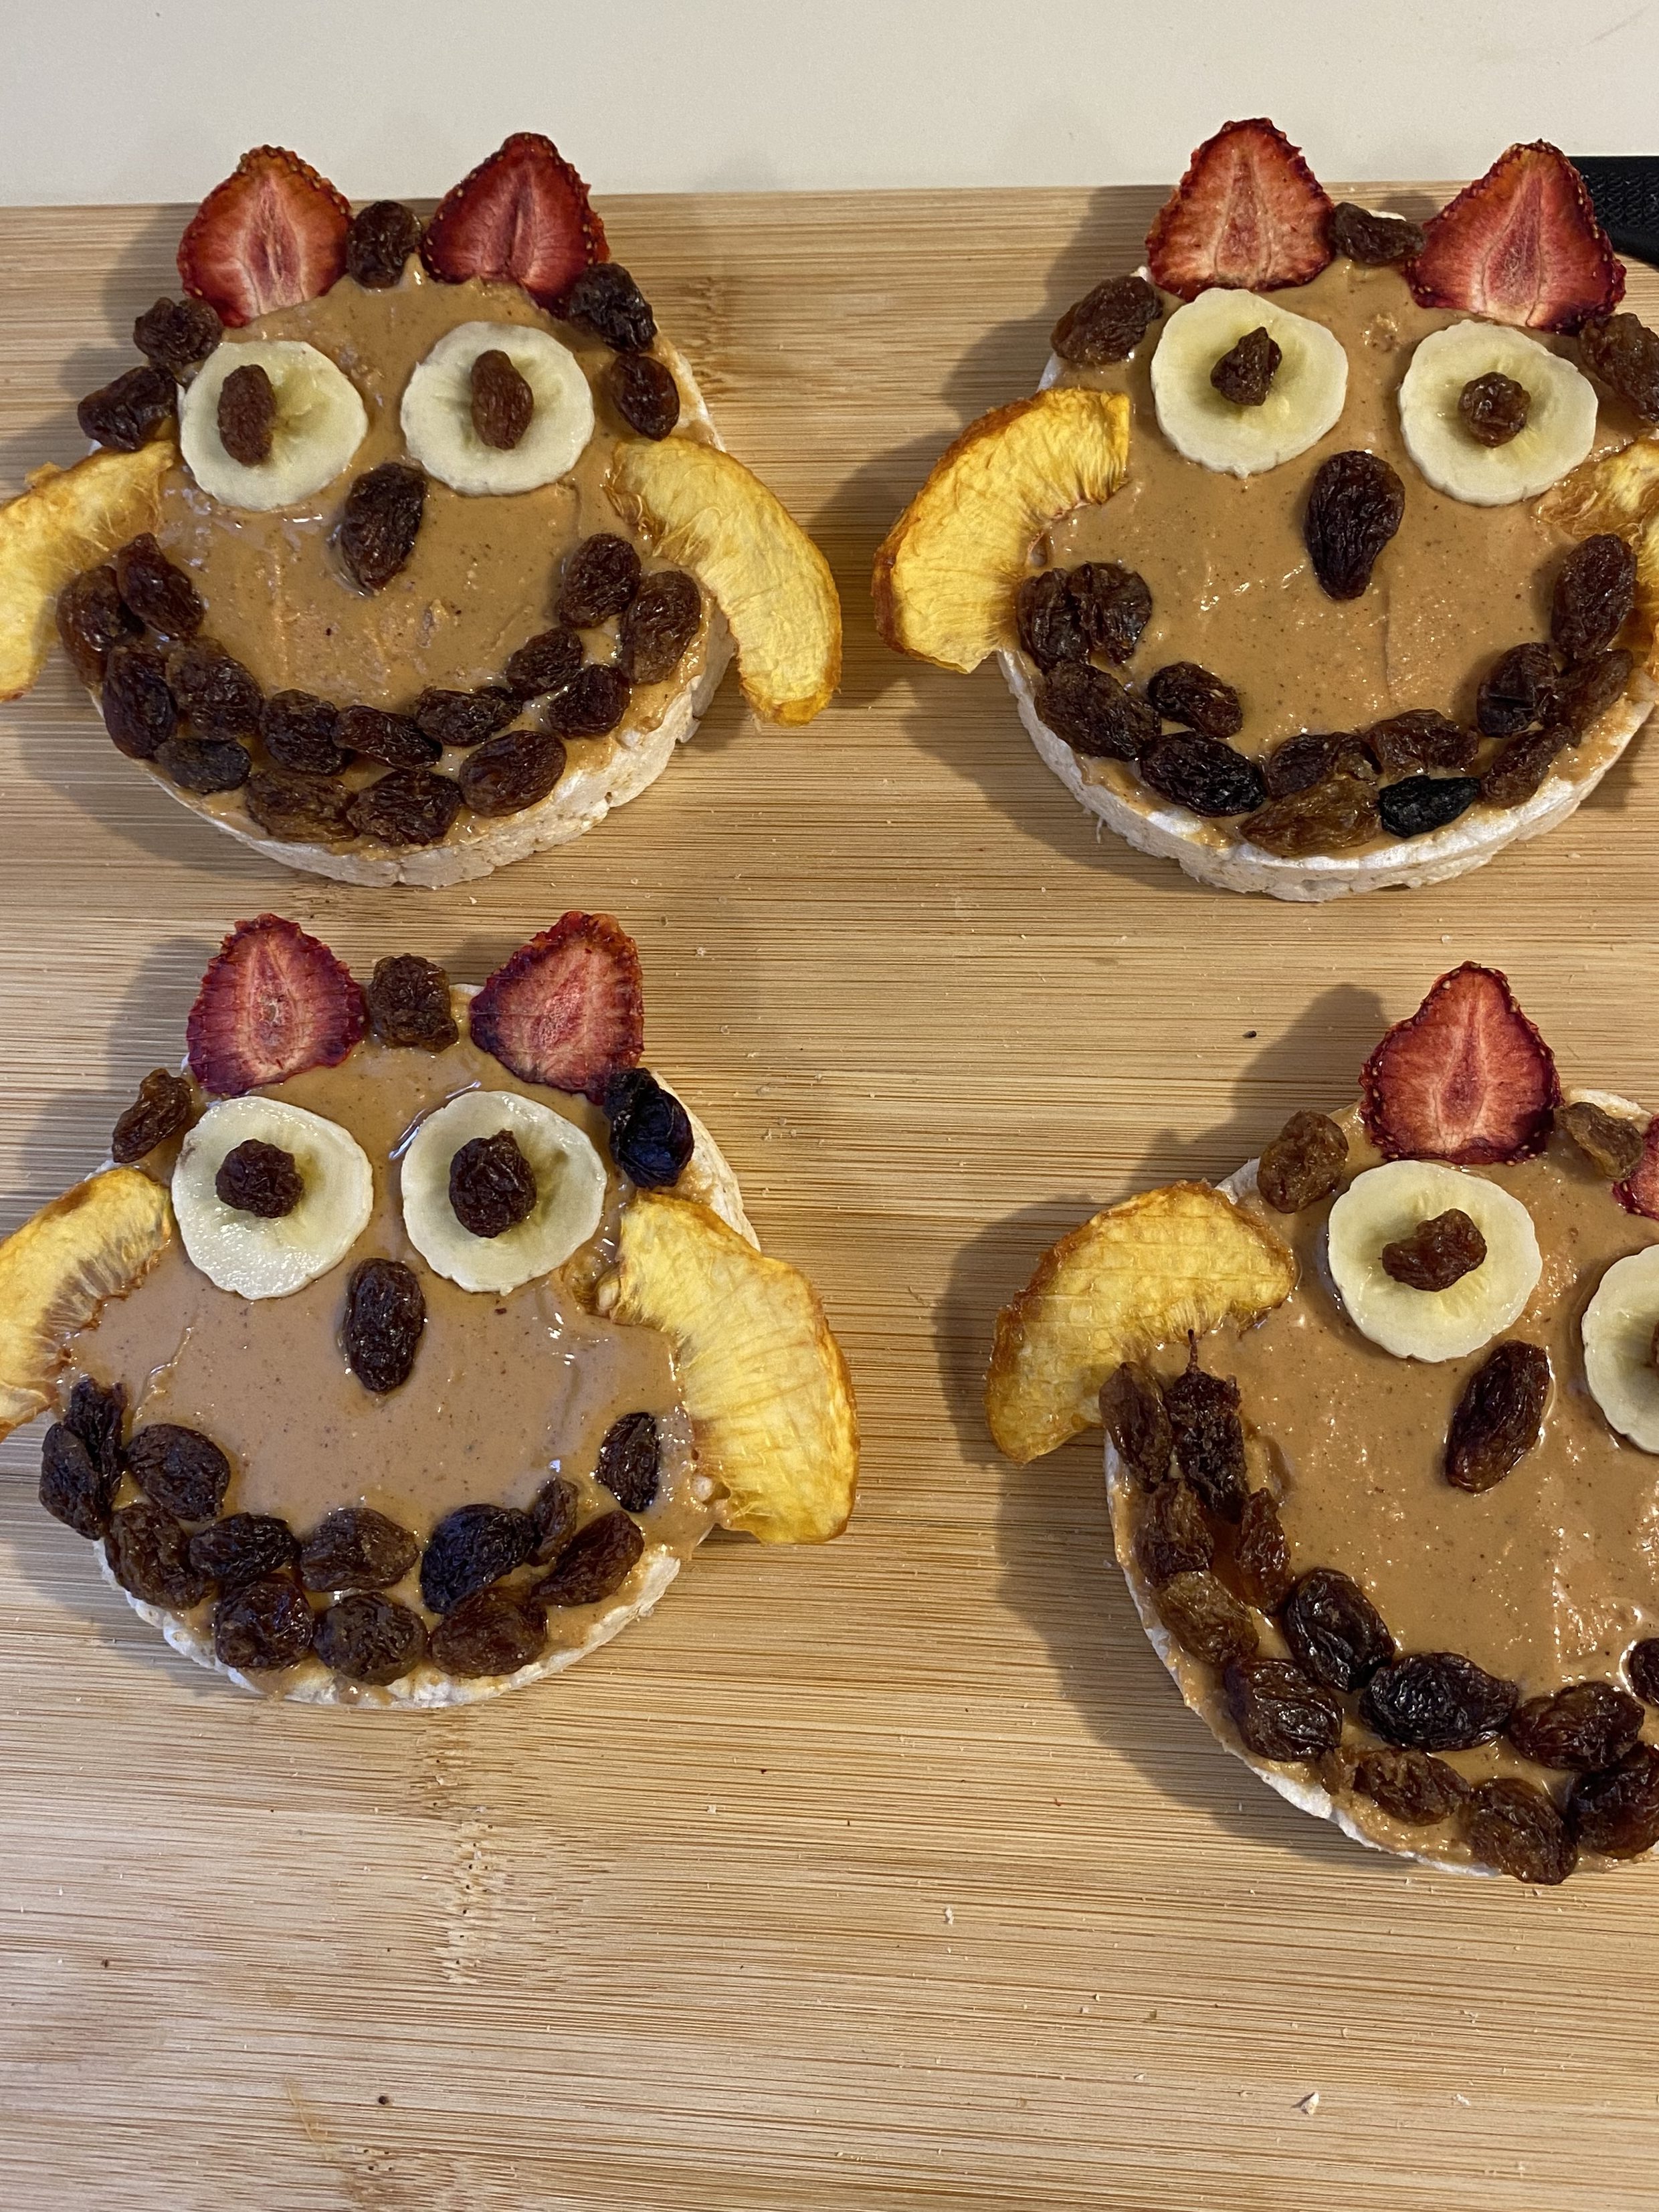
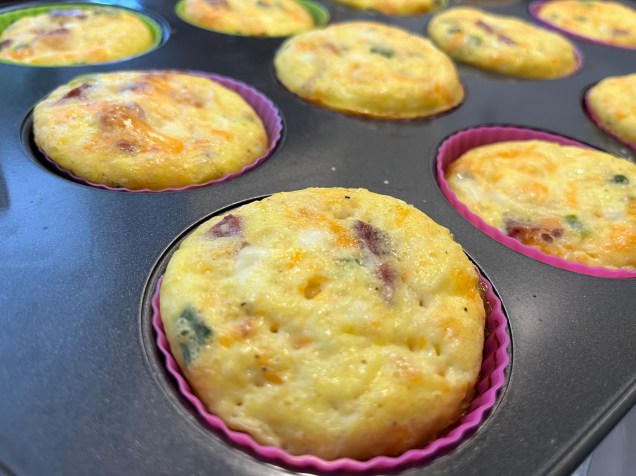
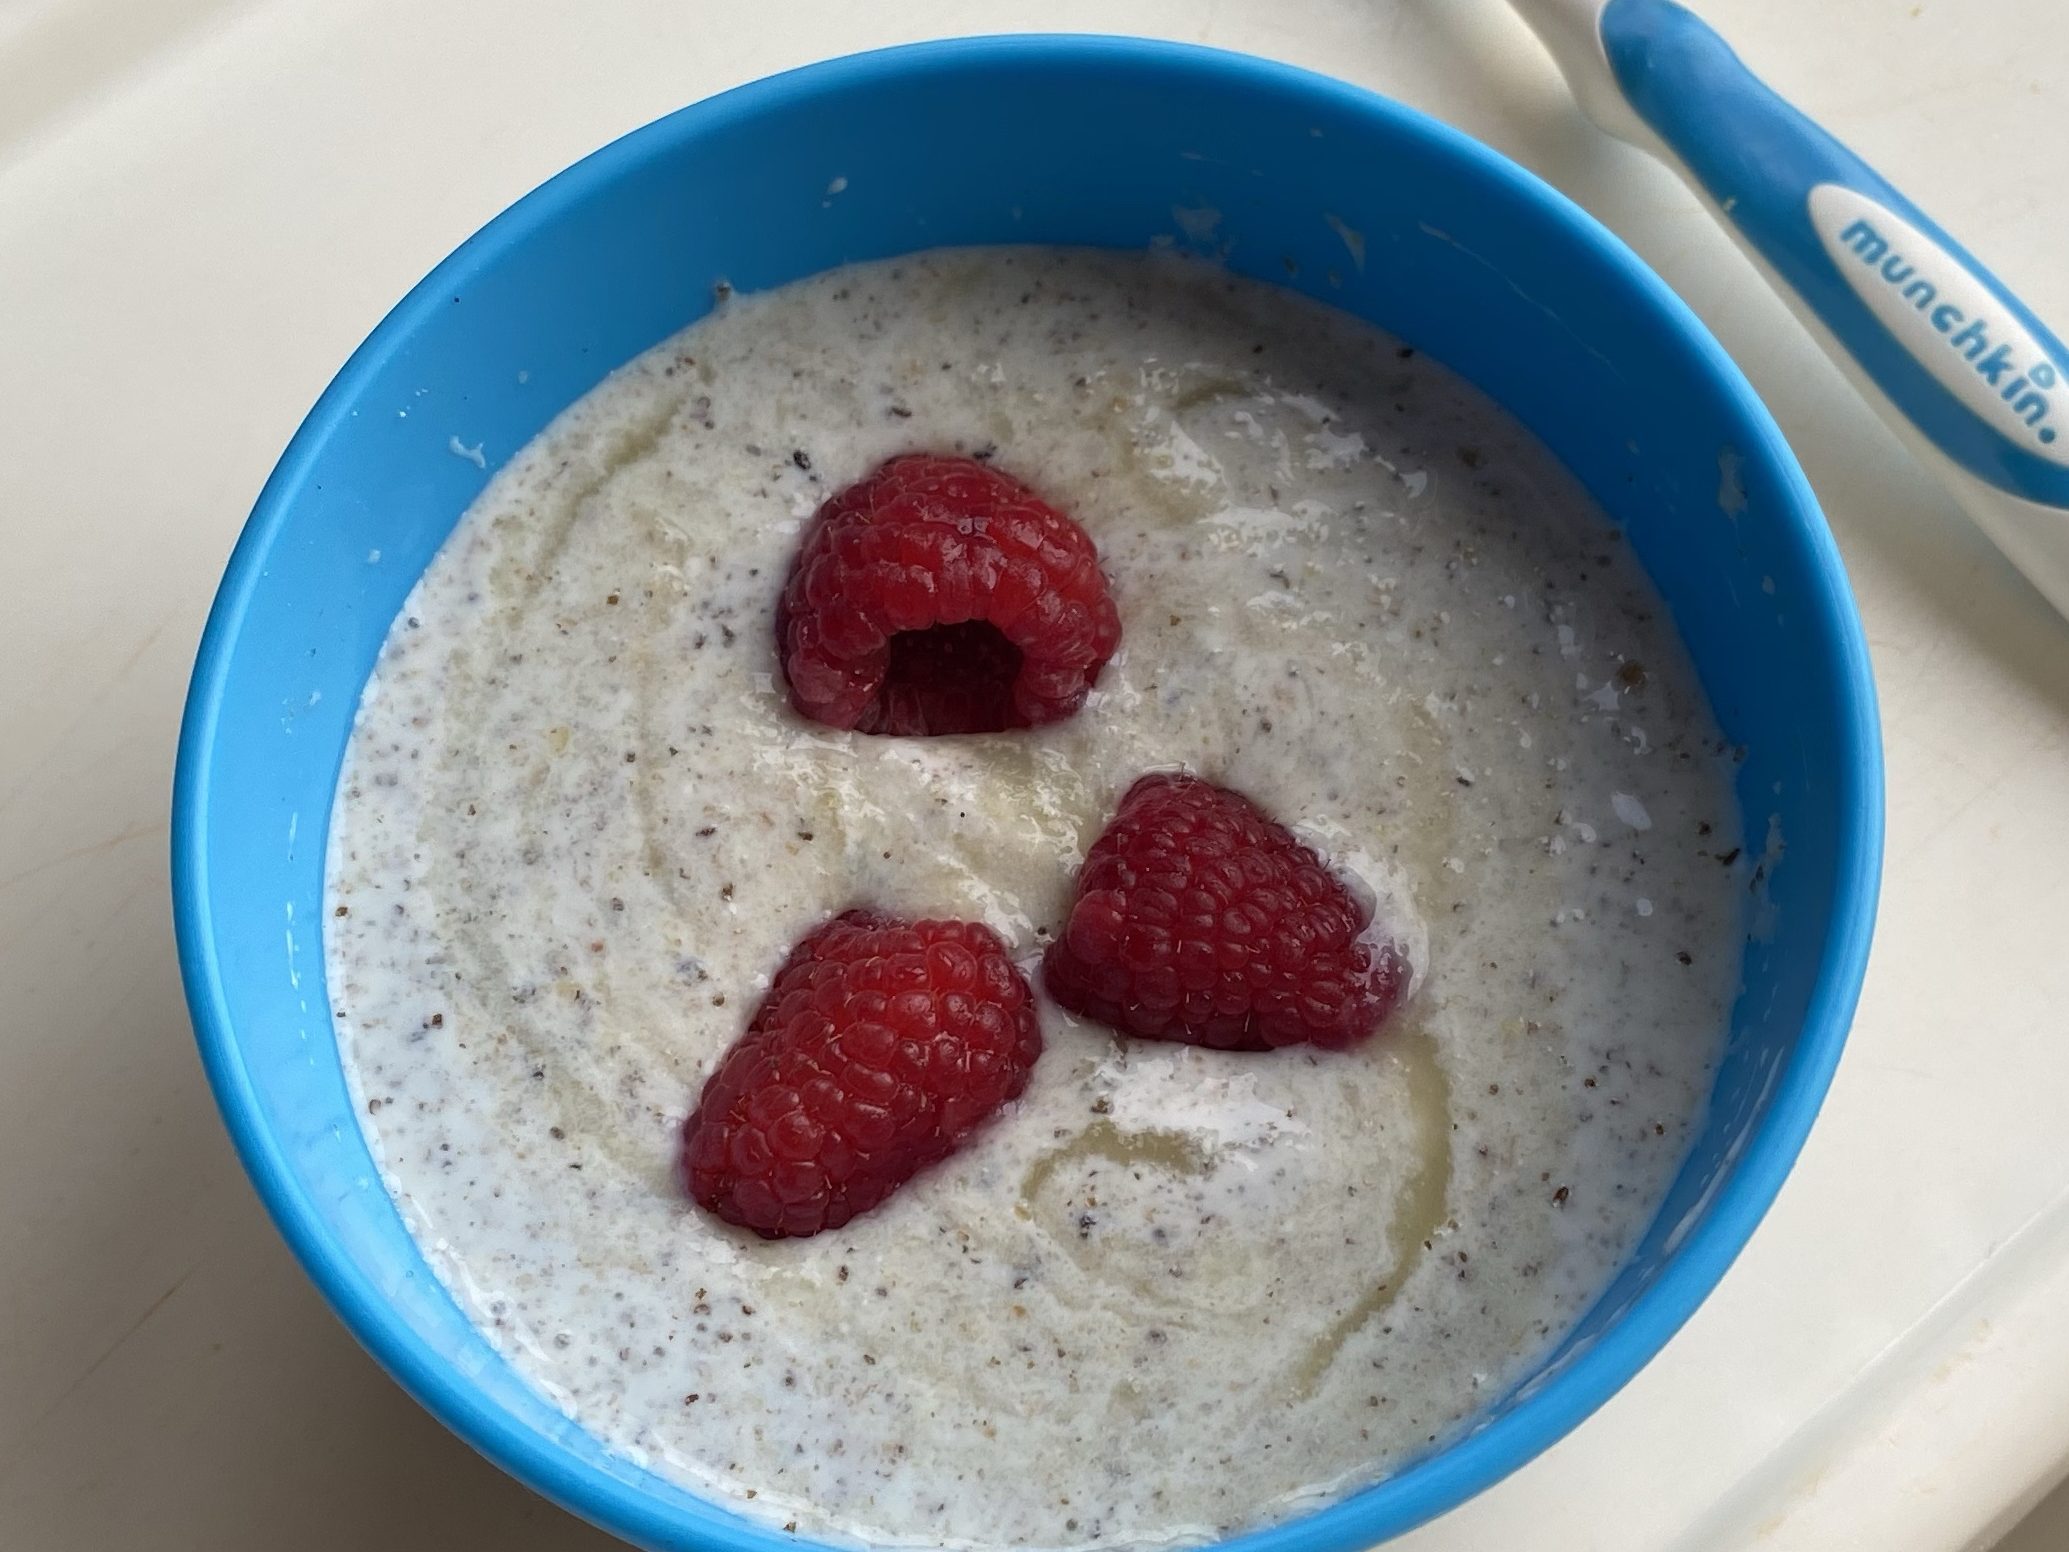
A Few Ways to eat Delicious, Home-Grown Sprouts:

Grab a handful and chew away!

Mung Beans: These take 2-3 days to sprout. I like to serve them on top of soup or curry.

Make a sprout and wildflower salad. Perfect for hot summer days!

Serve in a sandwich or wrap.

There are many other ways to enjoy healthy and nutritional sprouts! (My next project to learn about is sprouted bread! If I can learn how to make it successfully, I will share on here at some point).

How to Grow Your Own Sprouts (Jar/Basket Method):

Instructions below have been taken from my parent’s business: Four Season Greens. There is a free printable PDF that you can download from their website at this link: HERE. There are also some great daily videos on this link’s page that are a step-by-step guide of what to expect each day when growing your own sprouts. (This might be particularly helpful when learning how to transition the sprouts from the jar to growing basket).


Sprouting requires approx. 2 minutes per day, mostly rinsing in the morning (breakfast) and evening (dinner), 12 hours apart. A third rinse, particularly in hot weather, is ideal.

1. Soaking Phase (Day 1):

  • Fill a 500 ml jar ½ full of (cold) water.
  • If you are on well water: Add 7-8 drops of food grade Hydrogen Peroxide (35% solution). You have now created an 3% dilution. Disregard if you are on town/city water, as there is already chlorine added to the tap water.
  • Add 2 Tbsp seed. Place screen, cheesecloth or lid in place on jar.
  • Let soak* (see below for soaking times for different seeds):

2. Jar Rinsing Phase (Days 1-3):

  • At end of soaking time, drain off water, turn jar on 45 degree angle to continue draining.
  • (Place in bowl or dish rack. Be careful not to let the seed block the mouth of the jar too much; sprouts need ventilation.)
  • Let drain for 8-12 hours*.
  • Fill jar with cold water. Gently agitate for a couple of seconds. Drain immediately.
  • Repeat (fill, drain) for the next 48 hours.
  • *Rinse in 8 or 12 hour cycles; breakfast and dinnertime works best.
  • Rinsing greater than 12 hours apart will result in seed drying out.
  • Rinsing 3 x per day is ideal.

3. Basket Transition (Day 4):

  • Fill jar with water.
  • Shake gently to loosen any seeds stuck to the screen.
  • Remove screen (or cheesecloth).
  • Place basket in the sink.
  • Empty jar into basket.
  • To evenly spread seed around: (without handling the seeds, which can damage them, causing them to rot) Use the “panning for gold” technique:
    • Fill a bowl (slightly bigger than basket) with water.
    • Immerse basket. Seed shells will float, which you can gently scoop out.
    • Gently even the remaining seed out with your hand.
    • Lift basket out of the water.
    • Place in plastic drip tray.
    • Cover with dome.
  • Continue to rinse every 12 hours (minimum), replacing dome each time.
  • (For continuous supply of sprouts, begin soaking next batch of seed in the jar on day 5.)

4. Basket Rinsing (Days 5-7):

  • Day 5: Continue to rinse every 12 hours (minimum). Place dome lid ½ on to encourage air flow.
  • Day 6 & 7: Continue to rinse every 12 hours (minimum). Remove dome
  • For these last 3 days, if you want greener sprouts (more chlorophyll):
    • Place basket near window (no direct sunlight), or under grow-lights.

5. Harvesting:

  • Gently grab a clump of sprouts, wiggle and gently pull out.
  • Place sprouts in an airtight container in fridge.
  • Sprouts will keep for a week or more.
  • To clean basket:
    • Pull out most of the sprout bits.
    • Let dry upside-down (1/2 day).
    • Using dry brush, gently brush off dry sprout bits.
    • Place in dishwasher or hand wash. (Plastic dome and tray must be hand washed.)

Seed soaking times:

1-2 hours: Broccoli
3-5 hours: Small seeds (alfalfa, radish, garlic chives, clover, fenugreek),
8-12 hours: Grains, peas, sunflower, and other big seeds
(Grains, such as wheat, barley, spelt, oats, kamut, etc., are not grown in baskets.)

Where to Buy Non-GMO/Organic Sprouting Seed:

We buy our seeds in bulk from a Non-GMO/Organic company in Saskatchewan, Canada: Mumm’s Sprouting Seeds. They are a family run company with wonderfully sourced product! For orders within Canada, shipping is free over $40, and for USA orders it is free if over $100.

To some folks that might seem like a lot to get the free shipping, but nutritionally it is so worth it. We usually buy bulk orders every 2 years to get the free shipping and make it worth shipping it all the way to our remote part of Ontario.

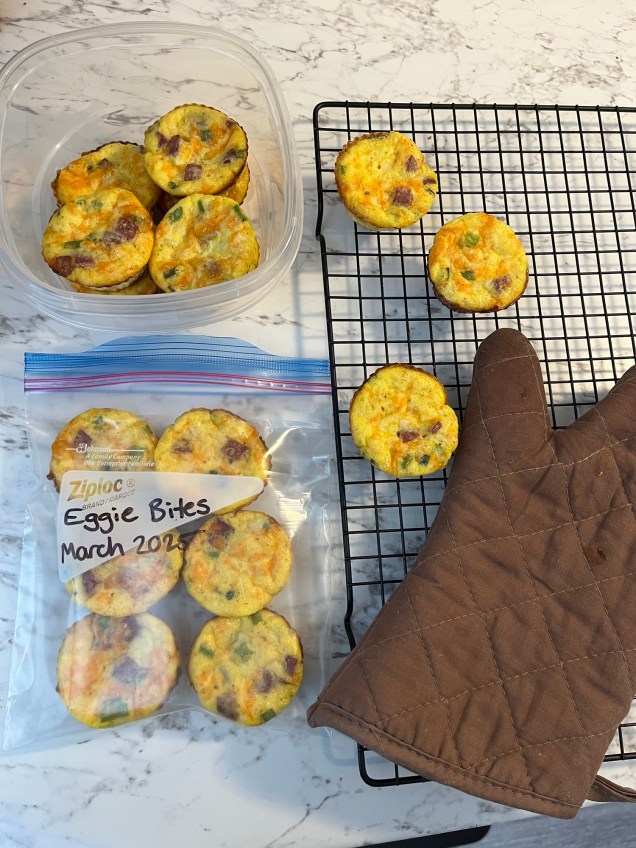
As a side note, when buying in bulk and not using seed up as quickly, you can put the sprouting seeds in a sealed bag in the freezer, and this will prolong the germination quality until you are ready to use it. (I learned this seed hack from my father Steve!)

What Supplies do I Need to Grow My Own Sprouts?

Technically, all you need is a large glass jar, an elastic, and some fine screen mesh (you can usually find this at your local hardware store). When the sprouts get too full in the glass jar, simply take them out, rinse out the seed hulls, let them dry a little on some fresh paper towel, and then store them in the fridge in a sealed container. The nice thing about the growing basket is that it extends the growing time so that your sprouts produce more. It also leaves the option for them to get greener during the last 2 days in the basked and produce more chlorophyll.

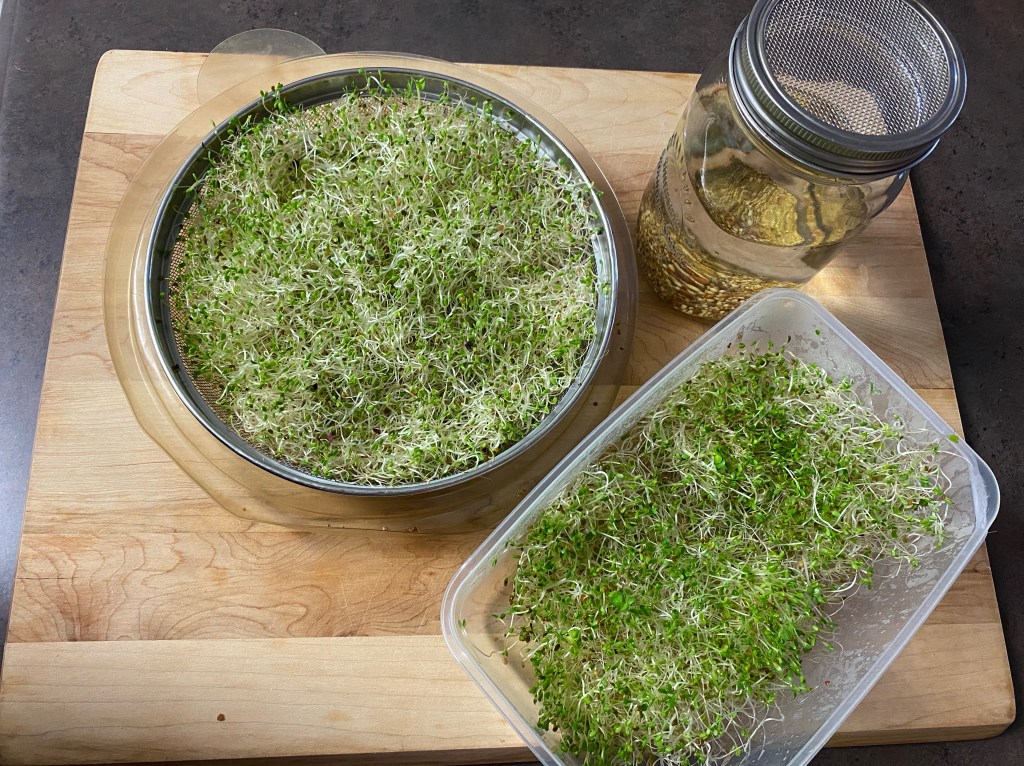
Personally, I love starting my sprouts in a large 1 litre glass jar and then transferring the sprouts into our steel growing basket, just like in the directions listed above. The sprout grower kit is available to purchase from Four Season Greens at this link HERE. We also have a jar stand similar to THIS ONE on Amazon, to hold the jar when it is in the rinsing and draining stage for Days 1-3. But a clean drain rack in your kitchen will work just as well.

Planning to Grow your own Sprouts?

Let me know how it goes!! Feel free to post to your social media account and tag Northbird using one of the links below or post in the comments!

More Ideas for Natural Living:

Hi, I’m Jessie!

I’m a Wife and Homeschooling Mom living in a remote town in Northern Ontario, Canada. I love making wholesome meals for my family from scratch, homeschooling our girls and learning more about natural living.

Read more about my story HERE.

Subscribe to Northbird’s email list to get weekly posts on: tasty recipes, activity ideas for kids, natural living tips, and some genuine mom thoughts and encouragement!

Check out on the Natural Living Page:

Nature’s Medicine

An on-going picture collection of various herbs, vegetables, fruits, oils, etc and highlighting some of the amazing health benefits that they have to offer us!

This post may contain affiliate links. As an Amazon associate, I earn from qualifying purchases. This means that I make a small commission at no extra cost to you. You can read my full disclosure HERE.

Return to Top

Delicious Broccoli Chicken Divan Recipe

Find Northbird on social media:

Jump To Printable Recipe Card

Return to “Soups & Entrees”

About This Dish…

This is one of my grandmother’s tried-and-true recipes, and trust me, its a gold one! Since finding it in her recipe book last year we have made it many times and enjoyed a few emergency freezer meals that of it too!

Full of excellent nutrition, this tasty dish is a great no-stress meal to serve hot on top of some fluffy rice!

I love the way the flavours of broccoli and chicken are wrapped together with a creamy mix and coated with a generous layer of cheese (and many of those crave-able dinner dishes have that bubbly delicious cheese, am I right?!).

I hope you enjoy this as much as my family does!

History of Chicken Divan:

This dish is a classic American casserole, often dubbed nowadays as a “comfort food”. Although there are many variations, this recipe always seems to consist of chicken and broccoli and is baked in a bubbly cheese sauce. It is thought to have originated in early 1900s in New York City at the Divan Parisien Restaurant. It was served for many years as their signature dish.

How to Make Broccoli Chicken Divan:

Supplies Needed:

Ingredients:

  • 4 chicken breasts, cubed and browned
  • 3 medium stalks broccoli, broken into florets (you could also sub in cauliflower, or frozen broccoli/cauliflower)
  • 1 small yellow onion, diced
  • 1 can cream of mushroom soup, 10oz / 284ml (cream of chicken or celery is also nice)
  • 1/2 cup sour cream
  • 1 teaspoon curry powder
  • 1 cup grated cheese (I like cheddar with this recipe)
  • 2 Tablespoons butter
  • Paprika, sprinkled

Directions:

1. Preheat oven to 375 ℉

2. Cut and brown the chicken in a little oil or butter, then set aside.

3. Cut the broccoli into small florets and steam or boil until mostly cooked through (skip this step if using frozen broccoli as it has already been par-boiled).

4. Put the broccoli and cooked chicken into a greased 9″ x 13″ pan or casserole dish.

5. Dice up the onion and sprinkle on top.

6. In a small bowl, blend together the creamed soup (undiluted!), sour cream and curry powder.

7. Pour and spread as a next layer in the dish.

8. Grate cheese and spread over top.

9. Cut butter into small bits and dot over the cheese.

10. Sprinkle the top with paprika.

11. Bake at 375 ℉ for 20-25 minutes or until browned on top.

12. Let sit for 5 minutes and serve warm over rice.

13. Makes 6-8 servings.

Saving the Leftovers?

  • Store leftovers in a sealed container in the fridge and eat up within 3 days.
  • For the freezer: put in a sealed container, label, and best to use up within 3 months. To thaw, put in fridge overnight and then reheat in microwave/oven.

Make it a Bake-From-Frozen Freezer Meal!

  • Follow the directions above, and use an aluminum freezer safe dish to layer the chicken divan in.
  • Tightly wrap the top in aluminum foil and label. If possible, put the wrapped divan in an extra large freezer bag to keep it fresh longer and prevent freezer burn. Alternately, add another layer of aluminum foil, wrapping it completely around and tightly pressing it down. Label!
  • To bake: preheat oven to 400 ℉, and remove all wrappings except 1 layer of aluminum foil on the top.
  • Let sit for 5 minutes then serve warm with rice.

Made this Recipe?

I’d LOVE to see your results!! Feel free to post to your social media account and tag Northbird using one of the links below or post in the comments!

Other Soups and Entrees to Check Out:

Hi, I’m Jessie!

I’m a Wife and Homeschooling Mom living in a remote town in Northern Ontario, Canada. I love making wholesome meals for my family from scratch, homeschooling our girls and learning more about natural living.

Read more about my story HERE.

Subscribe to Northbird’s email list to get weekly posts on: tasty recipes, activity ideas for kids, natural living tips, and some genuine mom thoughts and encouragement!

Easy Broccoli Chicken Divan Casserole

  • Servings: 9x13 inch dish
  • Difficulty: Easy
  • Print

Full of excellent nutrition, this tasty dish is a great no-stress meal to serve hot with some rice!


Jessica Burman via Juanita Lambert, 2025 © The Northbird Blog. https://www.thenorthbirdblog.com

Ingredients

  • 4 chicken breasts, cubed and browned
  • 3 medium stalks broccoli, broken into florets (you could also sub in cauliflower, or frozen broccoli/cauliflower)
  • 1 small yellow onion, diced
  • 1 can cream of mushroom soup, 10oz / 284ml (cream of chicken or celery is also nice)
  • 1/2 cup sour cream
  • 1 teaspoon curry powder
  • 1 cup grated cheese (I like cheddar with this recipe)
  • 2 Tablespoons butter
  • Paprika, sprinkled
  • Directions:

    1. Preheat oven to 375 ℉
    2. Cut and brown the chicken in a little oil or butter, then set aside.
    3. Cut the broccoli into small florets and steam or boil until mostly cooked through (skip this step if using frozen broccoli as it has already been par-boiled).
    4. Put the broccoli and cooked chicken into a greased 9″ x 13″ pan or casserole dish.
    5. Dice up the onion and sprinkle on top.
    6. In a small bowl, blend together the creamed soup (undiluted!), sour cream and curry powder.
    7. Pour and spread as a next layer in the dish.
    8. Grate cheese and spread over top.
    9. Cut butter into small bits and dot over the cheese.
    10. Sprinkle the top with paprika.
    11. Bake at 375 ℉ for 20-25 minutes or until browned on top.
    12. Let sit for 5 minutes and serve warm over rice.
    13. Makes 6-8 servings.

    Additional Notes: Leftovers

    • Store leftovers in a sealed container in the fridge and eat up within 3 days.
    • For the freezer: put in a sealed container, label, and best to use up within 3 months. To thaw, put in fridge overnight and then reheat in microwave/oven.

    Additional Notes: Make a Freezer Meal

    • Follow the directions above, and use an aluminum freezer safe dish to layer the chicken divan in.
    • Tightly wrap the top in aluminum foil and label. If possible, put the wrapped divan in an extra large freezer bag to keep it fresh longer and prevent freezer burn. Alternately, add another layer of aluminum foil, wrapping it completely around and tightly pressing it down. Label!
    • To bake: preheat oven to 400 ℉, and remove all wrappings except 1 layer of aluminum foil on the top.
    • Bake for 45 minutes, then remove the last layer of aluminum foil and bake for another 10-15 minutes or until fully heated through.
    • Let sit for 5 minutes then serve warm with rice.

    Nutrition


    Per serving: 411 calories; 32 g fat; 13.2 g carbohydrates;
    21.2 g protein.

    Return to Top

    This post contains affiliate links. As an Amazon associate, I earn from qualifying purchases. This means that I make a small commission at no extra cost to you. You can read my full disclosure HERE.

    Fun Owl Bird Snack Recipe for Kids

    Find Northbird on social media:

    Jump To Printable Recipe Card

    Return to “Deserts & Snacks”

    Return to “Discovering Birds”

    Somedays, our 3 kids remind me of little birds…one is contentedly “peeping”, while another is incessantly “chirping”, and of course there’s one that just noisily “squawks” if basic needs have not been met (sometimes constant cuddles with Mom strongly falls under this category!)

    Let me just say, I love these darlings. Period. However… there are days when the constant noises of active and most-of-the-time happy kids becomes too much for my ears! (Am I right fellow parents?!)

    My coping solutions to the noise?? Calming music for me (usually classical), and a good supply of nutritious snacks for these kiddos! Most of the time they can be easily distracted with food… because the majority of the time a contented tummy and full mouth doesn’t need to squack, right?!

    About this Snack/Activity:

    This snack was fun to make! It not only challenged the creative/artistic side of my brain, but was super tasty to eat too!

    The kids and I had been learning about owls and nocturnal animals in homeschooling and this was a perfect mid-morning snack to go along with it! (The hubby was also home that day from teaching at the high school and was quite happy to get a snack that was more interesting than his usual)

    Ingredients to Use:

    • Rice cakes were used for the body of the owl. Any large round one works, there are so many types and flavours! We like the plain ones best for this snack though.
    • For the base we used natural peanut butter, but you could also use other nut or seed butters, or hummus! Lather it on thick, this is the main protein part of this snack!
    • We used dehydrated strawberry chips for the owl ears, but you could also use fresh strawberries or another fruit and cut it to size. If you want to learn how to dehydrate your own strawberry chips like we did, you can check out THIS POST to find out more.

    • For the eyes, we sliced on fresh “banana dollars“. (My kids love their bananas!)
    • The wings were made using dehydrated peach slices, which could of course be substituted for fresh slices of peach. Apple or pear slices would work great too!
    • Raisins are the decorative part that tie it all in. You could also sub in cranberries, or other dried berries for this part.

    Activities to do with this Owl Bird Snack:

    Kids can not only have fun putting this tasty snack together, but they can also use the following resources for learning more about owls.

    Craft Activity:

    Cut out and paste shapes to create an Owl. You can download this free pdf HERE.

    Educational Videos:

    This is a a super fun video for younger learners, lots of energy, diagrams and some amazing facts discussed about owls.

    This video is longer, at 14 + 1/2 minutes, and probably better suited for grades 1 and up. It is a very well done video by BBC Earth, and shows some baby owlets hatching! It also answers some questions such as “How can Owls fly so quietly?” and “How does an Owl’s hearing work?”
    As a heads up: there are some mice that you see getting gobbled up!

    How to Make this Owl Bird Snack:

    Supplies Needed:

    Ingredients:

    Directions:

    1. Spread the peanut/seed butter or hummus on the rice cake nice and thick.
    2. Place the Strawberry slices as ears, banana slices as eyes, and peach (or other) slices as wings.
    3. Place the raisins for additional feathers, a beak, and in the center of the banana eyes.
    4. Eat!!!

    Made this Recipe?

    I’d LOVE to see your results!! Feel free to post to your social media account and tag Northbird using one of the links below or post in the comments!

    More Desert & Snack Recipes:

    Posts on “Discovering Birds”

    Hi, I’m Jessie!

    I’m a Wife and Homeschooling Mom living in a remote town in Northern Ontario, Canada. I love making wholesome meals for my family from scratch, homeschooling our girls and learning more about natural living.

    Read more about my story HERE.

    Subscribe to Northbird’s email list to get weekly posts on: tasty recipes, activity ideas for kids, natural living tips, and some genuine mom thoughts and encouragement!

    Owl Bird Healthy Snack for Kids

    • Servings: 1 Owl
    • Difficulty: Easy
    • Print

    Jessica Burman, 2025 © The Northbird Blog. https://www.thenorthbirdblog.com

    Supplies Needed:

  • Paring Knife
  • Cutting Board
  • Spreading Knife
  • Ingredients

  • Round Rice Cakes (Body)
  • Natural Peanut Butter, Seed Butter or Hummus (Colouring)
  • Strawberry slices, dried or fresh (Ears)
  • Round Banana slices (Eyes)
  • Peach, Apple or Pear slices (Wings)
  • Raisins (Feathers, Beak, Eyeballs)
  • Directions:

    1. Spread the peanut/seed butter or hummus on the rice cake nice and thick.
    2. Place the Strawberry slices as ears, banana slices as eyes, and peach (or other) slices as wings.
    3. Place the raisins for additional feathers, a beak, and in the center of the banana eyes.
    4. Eat!!!

    Return to Top

    This post contains affiliate links. As an Amazon associate, I earn from qualifying purchases. This means that I make a small commission at no extra cost to you. You can read my full disclosure HERE.

    Make-Ahead Eggie Bites: Easy and Nutritious

    Find Northbird on social media:

    This post contains affiliate links. As an Amazon associate, I earn from qualifying purchases. This means that I make a small commission at no extra cost to you. You can read my full disclosure HERE.

    Jump To Recipe Card

    Return to “Breakfast”

    Why we love making these baked “Eggie Bites”:

    Packed full of protein, these Eggie Bites are a great source of energy to start the day off or to recharge with at lunch time!

    Our kids love them for their soft, cheesy taste and each have their favourite preferences for meat protein. “L” likes it with bacon, while “F” likes it with Salami. (My favourite is with sausage bits!)

    I love making large batches of most things that I can freeze and then save time and energy on preparing later. This recipe is of course a wonderful make-ahead-and-freeze meal that thaws and reheats very well.

    I have made other baked egg recipes where the egg tasted a little “rubbery” (I doubt I’m not the only one that doesn’t like this!) After trying a few recipes and experimenting, I have found the solution to making a softer baked “Eggie Bite” is with adding cottage cheese to the mix.

    This recipe makes approximately 2 dozen Eggie Bites, depending on how many additional ingredients you add in.

    Nutritional Information:

    Each Eggie Bite Contains:

    • 135 calories
    • 8.3 g fat
    • 2.6 g carbohydrates
    • 12.5 g protein

    How to Make Eggie Bites

    Supplies Needed:

    Ingredients:

    • 1 dozen eggs, whisked smooth
    • 1 small tub 500g cottage cheese (2 cups)
    • 1 cup cheddar or other cheese, shredded (reserve some for the tops)
    • 1.5 cups of cooked meat, cut up into small pieces (bacon, salami, ham, chicken, sausage, etc)
    • 1/2 teaspoon salt
    • 1/2 teaspoon pepper

    Additional Vegetable Ideas:

    • Mushrooms, chopped
    • Green Onion/Scallions chopped (we cut up the tops with kitchen scissors)
    • Peppers, diced
    • Tomatoes, diced
    • Asparagus, chopped

    Directions:

    1. Preheat oven to 325 degrees Fahrenheit.

    2. Whisk up the eggs, then add all other ingredients and mix well together.

    3. If using, set the silicone cups into muffin pan, or simply grease muffin pan well with oil.

    4. Fill muffin cups nearly full (they will slightly puff up in oven then shrink down again as cooling)

    5. Bake for 30-35 minutes until Eggie Bites are golden on top and firm when poked gently.

    6. Cool in pan for 5-10 minutes before transferring them to a cooling rack. If in silicone cups, simply pop out. If in regular muffin pan, gently twist and lift out with a thin spatula.

    7. Serve while hot and enjoy!

    Storing instructions:

    In the fridge: cool completely and store in a sealed container in the fridge for 3-4 days. To serve: eat them cool or gently reheat in the microwave or oven.

    In the freezer: cool completely and transfer to a sealed container or ziploc freezer bag. Remove extra air of the bag with a straw (to prevent it from getting freezer burn). Label, and eat up within 3 months. To thaw: Reheat in the microwave or oven!

    Made this Recipe?

    I’d LOVE to see your results!! Feel free to post to your social media account and tag Northbird using one of the links below or post in the comments!

    Check out these other Breakfast Recipes from the Northbird Kitchen!

    Hi, I’m Jessie!

    I’m a Wife and Homeschooling Mom living in a remote town in Northern Ontario, Canada. I love making wholesome meals for my family from scratch, homeschooling our girls and learning more about natural living.

    Read more about my story HERE.

    Subscribe to Northbird’s email list to get weekly posts on: tasty recipes, activity ideas for kids, natural living tips, and some genuine mom thoughts and encouragement!

    Make-Ahead Eggie Bites: Easy and Nutritious

    • Servings: 24
    • Difficulty: Easy
    • Print

    Jessica Burman, 2025 © The Northbird Blog. https://www.thenorthbirdblog.com

    Supplies Needed:

  • Mixing Bowl
  • Whisk
  • Measuring cups/Teaspoons
  • Muffin Baking Tray
  • Silicone Muffin Cups (optional, but I do find these work really well to “pop out” afterwards!)
  • Cheese Grater
  • Cutting Board
  • Knife
  • Ingredients:

    • 1 dozen eggs, whisked smooth
    • 1 small tub 500g cottage cheese (2 cups)
    • 1 cup cheddar or other cheese, shredded (reserve some for the tops)
    • 1.5 cups of cooked meat, cut up into small pieces (bacon, salami, ham, chicken, sausage, etc)
    • 1/2 teaspoon salt
    • 1/2 teaspoon pepper

    Additional Vegetable Ideas:

    • Mushrooms, chopped
    • Green Onion/Scallions chopped (we cut up the tops with kitchen scissors)
    • Peppers, diced
    • Tomatoes, diced
    • Asparagus, chopped

    Directions:

    1. Preheat oven to 325 degrees Fahrenheit.
    2. Whisk up the eggs, then add all other ingredients and mix well together.
    3. If using, set the silicone cups into muffin pan, or simply grease muffin pan well with oil.
    4. Fill muffin cups nearly full (they will slightly puff up in oven then shrink down again as cooling)
    5. Bake for 30-35 minutes until Eggie Bites are golden on top and firm when poked gently.
    6. Cool in pan for 5-10 minutes before transferring them to a cooling rack. If in silicone cups, simply pop out. If in regular muffin pan, gently twist and lift out with a thin spatula.
    7. Serve while hot and enjoy!

    Storing Instructions:

    • In the fridge: cool completely and store in a sealed container in the fridge for 3-4 days. To serve: eat them cool or gently reheat in the microwave or oven.
    • -In the freezer: cool completely and transfer to a sealed container or ziploc freezer bag. Remove extra air of the bag with a straw (to prevent it from getting freezer burn). Label, and eat up within 3 months. To thaw: Reheat in the microwave or oven!

    Nutrition


    Per 1 Eggie Bite: 135 calories; 8.3 g fat; 2.6 g carbohydrates;
    12.5 g protein.

    Return to Top

    Apple Cinnamon Raisin Granola

    Find Northbird on social media:

    This post contains affiliate links. As an Amazon associate, I earn from qualifying purchases. This means that I make a small commission at no extra cost to you. You can read my full disclosure HERE.

    Jump to Recipe Card

    Jump to Video

    Return to “Breakfast”

    Apple Cinnamon Raisin…So so good! This recipe was created a few weeks ago when we randomly ran out of maple syrup and dates, so I couldn’t make any of my other homemade granola recipes that usually call for those natural sweeteners.

    My parents were making the long trip up north here to visit and I was scrambling to have some homemade things prepared ahead of time. This improvised yet delicious recipe was created from scouring the pantry to see what I could use, and I’m quite proud of the tasty results!

    Ways to Eat Granola:

    • Breakfast bowl with regular milk, oat milk, soy, or nut milks (try it with Homemade Almond Milk!) and add some berries for fresh sweetness.
    • Enjoy a bowl on top of yogurt (try it with a fresh batch of Homemade Crockpot Yogurt).
    • Take a baggie of granola for your next hike or camping trip and add some dried fruit or seeds and nuts for a delicious trail mix.
    • Make a Breakfast Parfait with frozen berries and yogurt!
    • Use it as a baked desert crumb topping (Apple Crisp recipe coming soon!)
    • Make granola bars from it! (Recipe being developed)

    Health Benefits of Granola:

    Healthy granola recipes are usually high in protein, fibre and healthy fats due to recipe variations that may include oats, nuts, seeds, dried fruits and organic unrefined oils. They are packed full of nutritious options that make a filling, on-the-go quick breakfast or a delicious snack option.

    Protein is essential to the body for not only helping to build muscle mass and bones, but also very important for weight loss and regulating metabolism. Additional functions may consist of:

    • Slowing appetite and hunger cravings
    • Feel “full” for longer, less calories eaten
    • Helps with fat burning
    • Lowering blood pressure
    • Helps to maintain weight loss
    • Boosts metabolism
    • Builds muscle mass and strength
    • Lowers risk of osteoporosis and fractures
    • Helps to repair broken bones and tissues

    High Protein Ingredients You can put in Granola:
    NutsWalnuts, Almonds, Cashews, Peanuts, Pistachios, Brazil Nuts, Hazelnuts…
    SeedsChia, Hemp, Sesame, Sunflower, Pumpkin, Flax…
    Dried Fruits & BerriesApricot, Kiwi, Blackberries, Cherries, Raisins, Banana…

    Fibre is mostly known for helping to keep the digestive system happy. Some other benefits of increased fibre may include:

    • Regulating bowel movements
    • Keeps you feeling fuller for longer
    • Assists in lowering cholesterol
    • Preventing blood sugar from spiking
    • Helps to lower blood pressure

    High Fibre Ingredients You can put in Granola:
    NutsChestnuts, Almonds, Hazelnuts…
    SeedsChia, Flax, Pumpkin, Sesame, Sunflower…
    Dried FruitsDates, Figs, Prunes, Apricots, Raisins…
    OatsOrganic Rolled Oats

    Fats are not only used as a source of energy in the body, but also aid in the following:

    • Help to insulate and protect the organs
    • Gives your body energy
    • Supports cell growth
    • Helps to regulate blood pressure and cholesterol
    • Assists the body in absorbing vitamins A, E & D
    • Reduces inflammation
    • Assists in cell growth
    High Fats Ingredients You can put in Granola:
    NutsWalnuts, Macadamia, Coconut, Cashews…
    SeedsSunflower, Pumpkin, Flax, Chia, Hemp…
    OilsCoconut oil, Avocado oil, Olive oil…
    Seed & Nut ButtersPeanut butter, Almond butter, Tahini, Sunflower seed butter, Pumpkin seed butter
    Dried Fruits & BerriesPlantain, Strawberries, Raspberries, Kiwi, Raisins

    Reasons to Make Your Own Granola:

    • It is soooo easy! Chop… Melt… Mix… Spread… Bake… Eat!
    • Way less expensive than buying from the store.
    • Store-bought granolas are often made with lower quality ingredients and usually have more processed sugars and additives mixed in to prolong shelf life.
    • When you make your own granola you know exactly what ingredients you are eating!
    • Granola is a versatile recipe: You can add more nuts and seeds, and add dried fruits/berries at the end if desired.
    • Granola is one of those easy and quick breakfast solutions to help your day start smoothly!

    How to Make Apple Cinnamon Raisin Granola

    Supplies Needed:

    Ingredients:

    Directions:

    1. Preheat oven to 300 degrees F.

    2. Mix the oats, pecans, walnuts and cinnamon together in a large bowl. Set aside.

    3. Melt the coconut oil in a small pot and add honey, sea salt and vanilla. Stir well.

    4. Add the wet mix to dry mix and stir well. If it has cooled enough you can finish mixing with your hands (I always find this easiest, but be careful of the hot oil!)

    5. Spread granola mix onto parchment covered cookie sheets. Granola should be in a single layer.

    6. Bake for 30-35 minutes (depending on your oven), until golden.

    7. Let cool and sit undisturbed for an hour, it will firm up as it cools down.

    8. Break the granola into smaller pieces and add the dehydrated apple bits and raisins. *Or if you don’t have any dehydrated apple, simply add some fresh slices when you make up your breakfast bowl!

    9. Mix well and store granola in an airtight container for up to 1 month.

    Made this Recipe?

    I’d LOVE to see your results!! Feel free to post to your social media account and tag Northbird using one of the links below or post in the comments!

    Try this Granola recipe with some Homemade Almond Milk or Easy Crockpot Yogurt!

    Check out these other Breakfast Recipes from the Northbird Kitchen!

    Hi, I’m Jessie!

    I’m a Wife and Homeschooling Mom living in a remote town in Northern Ontario, Canada. I love making wholesome meals for my family from scratch, homeschooling our girls and learning more about natural living.

    Read more about my story HERE.

    Subscribe to Northbird’s email list to get weekly posts on: tasty recipes, activity ideas for kids, natural living tips, and some genuine mom thoughts and encouragement!

    Apple Cinnamon Raisin Granola

    • Servings: 8 cups
    • Difficulty: Easy
    • Print

    Get your bowl ready to scoop up this tasty, brand-new homemade granola recipe! Sweetened with honey, dehydrated apple and raisins, and flavoured with cinnamon and vanilla, this delicious nutty crunch is one to remember!


    By Jessica Burman © 2025 The Northbird Blog. http://www.thenorthbirdblog.com


    Ingredients

  • 4 cups organic rolled oats
  • 1 cup chopped pecans
  • 1 cup chopped walnuts
  • 1 1/2 Tablespoon ground cinnamon
  • 1/2 cup melted organic, unrefined coconut oil
  • 1/2 cup unpasteurized liquid honey
  • 1/2 teaspoon sea salt
  • 1 teaspoon pure vanilla
  • 1 cup dehydrated apple slices, cup into smaller pieces (optional) (or fresh added when you make your bowl!)
  • 1 cup raisins

  • Directions

    1. Preheat oven to 300 degrees F.
    2. Mix the oats, pecans, walnuts and cinnamon together in a large bowl. Set aside.
    3. Melt the coconut oil in a small pot and add honey, sea salt and vanilla. Stir well
    4. Add the wet mix to dry mix and stir well. If it has cooled enough you can finish mixing with your hands (I always find this easiest, but be careful of the hot oil!)
    5. Spread granola mix onto parchment covered cookie sheets. Granola should be in a single layer.
    6. Bake for 30-35 minutes (depending on your oven), until golden.
    7. Let cool and sit undisturbed for an hour, it will firm up as it cools down.
    8. Break into smaller pieces per preference, and add the dehydrated apple bits and raisins. *Or if you don’t have any dehydrated apple slices, simply add some fresh slices when you make up your breakfast bowl!
    9. Mix well and store in an airtight container for up to 1 month.

    Nutrition


    Per 3/4 Cup Serving: 256 calories; 11.7 g fat; 33.9 g carbohydrates;
    5.4 g protein.

    Return to Top

    Easy Green Split Pea & Bacon Soup Recipe: Jar Soup Mix Version Included!

    Find Northbird on social media:

    This post contains affiliate links. As an Amazon associate, I earn from qualifying purchases. This means that I make a small commission at no extra cost to you. You can read my full disclosure HERE.

    Jump To Recipe Card

    Jump to Recipe Card (shelf-stable version)

    Return to “Soups & Entrees”

    About This Recipe…

    I love cooking with dried legumes and dehydrated vegetables in these winter months! One of the most comforting meals (in my opinion) is a tasty soup or stew with freshly made bread to dip in it!

    There are two versions of this recipe that you can see below:

    The first version is the basic soup recipe with bacon in it (which is also very tasty subbing ham or pork tenderloin chunks!). You can make it with fresh or dehydrated vegetables. Makes about 6-8 servings.

    The other version has been altered to make a shelf-stable ready-to-cook soup mix, made from dehydrated vegetables (same ingredients as first recipe) and is approximately 4-6 servings.

    How to Make Green Split Pea & Bacon Soup

    Supplies Needed:

    Ingredients:

    • 1 medium onion, diced
    • 2 large cloves garlic, diced
    • 2 tablespoons olive oil or butter
    • 2 cups dry green split peas
    • 8 cups water
    • 2 cubes of chicken/vegetable stock
    • 1 cup dried/diced carrots (or sub 2 cups fresh)
    • 1 cup dried/diced parsnips (or sub 2 cups fresh)
    • 1/2 cup dried/diced celery (or 1 cup fresh)
    • 1 teaspoon sea salt (more or less to taste–remember, there’s bacon coming!)
    • 1/2 teaspoon black pepper
    • 1 pound of bacon, cut into small pieces

    Directions:

    1. Soak dry green split peas overnight in cold water. If this step is missed, start soaking for 4-6 hours before cooking soup, so that peas can still partially sprout. Rinse well in cold water. (See below for more information on why it is so important to soak peas and legumes)

    2. Saute onion and garlic with olive oil or butter in large soup pot. Add 8 cups of cold water and the rest of the ingredients.

    3. Bring to boil, then reduce to simmer on medium for 1-2 hours until all vegetables are soft and tender, stirring occasionally.

    4. I like to use the immersion blender at this point to puree some of the soup but leave a few chunks in.

    5. When soup is nearly done, cut bacon into small pieces and fry in separate pan until cooked through. (I use kitchen scissors, only reserved for cutting bacon!) Add to soup, along with a little tasty bacon grease (if desired!).

    6. Serve and enjoy!

    Nutritional Benefits of Green Split Peas:

    Green split peas are high in fibre, high in protein, and low in calories. They have been found to contain rich amounts in: iron, protein, magnesium, zinc, phosphorus and potassium (among many others!).

    Split peas help to lower high cholesterol, blood pressure, and have anti-inflammatory benefits. They also have been found to help to prevent heart disease, diabetes, osteoporosis, cancer, and many other chronic illnesses.

    Why Soak the Split Peas?

    Soaking the split peas overnight (or at least for several hours before cooking) not only softens them and shortens their cooking time, but it also helps the split peas to release the lectins that are in them.

    Lectins are toxins that are found in beans, peas, soybeans, peanuts, lentils and whole grains. Although many people say it doesn’t matter to soak the dried split peas before cooking them, I always feel better to soak and rinse them first, and know that our digestive systems are the happier for it!

    Some side effects of un-soaked but cooked green split peas have been noted to include: bloating, gas, stomach pains and diarrhea. These split peas are very good for you–especially when they’ve been prepared and cooked properly!

    Interested in learning more about dehydrating your own vegetables?

    You can check out the post: How to Dehydrate Celery for Flavourful Recipes HERE.

    Want to make this recipe into a ready-made soup mix?

    I had some fun turning this recipe into a completely dry vegetarian soup mix, fitting easily into a 1 L glass mason jar. Perfect for a nutritious emergency pantry meal or to use on a camping trip. You just need to add water! (and bacon or other meat if desired, or sprinkle dried bacon bits on the top when serving)

    Using mason jars also make these ready-to-cook meals a cute gift!

    Supplies Needed:

    Ingredients:

    Directions:

    1. Measure dried green split peas into the bottom of the jar.
    2. Next, put the ziploc bag inside and begin filling with the remaining ingredients, except stock cubes.
    3. Close ziploc bag, poke inside jar, and place stock cubes on top. Seal jar with lid.

    Additional Note:

    You can of course use whatever container type you like for storing the soup mix, my personal preference for storing in my pantry is 1 Litre mason jars, so I made measurements to fit in this size.

    For camping I would put it all into a large ziploc bag, just separating the green split peas in a separate bag inside.

    To Cook:

    1. Pull out the stock cubes and set aside. Open up the ziploc bag and pour contents into a separate bowl.
    2. Green split peas are now separate from the rest of ingredients and can be soaked in the jar or another bowl overnight.
    3. Rinse split peas well with cold water and put in soup pot with 4 + 1/2 cups of cold water.
    4. Add remaining ingredients, and bring to a boil.
    5. Reduce to medium-low and simmer 1-2 hours, stirring occasionally until dried vegetables are cooked through and tender. Add more water as needed.
    6. If desired, you can sprinkle dried bacon bits on the top.

    Made this Recipe?

    I’d LOVE to see your results!! Feel free to post to your social media account and tag Northbird using one of the links below or post in the comments!

    Other Soups and Entrees to Check Out:

    Subscribe to Northbird’s email list to get weekly posts on: tasty recipes, activity ideas for kids, natural living tips, and some genuine mom thoughts and encouragement!

    Hi, I’m Jessie!

    I’m a Wife and Homeschooling Mom living in a remote town in Northern Ontario, Canada. I love making wholesome meals for my family from scratch, homeschooling our girls and learning more about natural living.

    Read more about my story HERE.

    Green Split Pea and Bacon Soup

    • Servings: 6-8
    • Difficulty: Easy
    • Print

    A highly nutritious and tasty winter soup recipe.


    Ingredients

  • 1 medium onion, diced
  • 2 large cloves garlic, diced
  • 2 tablespoons olive oil or butter
  • 2 cups dry green split peas
  • 8 cups water
  • 2 cubes of chicken/vegetable stock
  • 1 cup dried/diced carrots (or sub 2 cups fresh)
  • 1 cup dried/diced parsnips (or sub 2 cups fresh)
  • 1/2 cup dried/diced celery (or 1 cup fresh)
  • 1 teaspoon sea salt (more or less to taste–remember, there’s bacon coming!)
  • 1/2 teaspoon black pepper
  • 1 pound of bacon, cut into small pieces

  • Directions:

    1. Soak dry green split peas overnight in cold water. If this step is missed, start soaking for 4-6 hours before cooking soup, so that peas can still partially sprout. Rinse well in cold water. (See below for more information on why it is so important to soak peas and legumes)
    2. Saute onion and garlic with olive oil or butter in large soup pot. Add 8 cups of cold water and the rest of the ingredients.
    3. Bring to boil, then reduce to simmer on medium for 1-2 hours until all vegetables are soft and tender, stirring occasionally.
    4. I like to use the immersion blender at this point to puree some of the soup but leave a few chunks in.
    5. When soup is nearly done, cut bacon into small pieces and fry in separate pan until cooked through. (I use kitchen scissors, only reserved for cutting bacon!) Add to soup, along with a little tasty bacon grease (if desired!).
    6. Serve and enjoy!

    Nutrition


    Per 1 serving: 442 calories; 29.3 g fat; 36.1 g carbohydrates;
    13.8 g protein.

    Green Split Pea and Bacon Soup (Shelf-Stable Version)

    • Servings: 4-6
    • Difficulty: Easy
    • Print

    A ready to cook soup mix: Just Add Water! Great for make-ahead camping meals or stocking in your pantry for an emergency.


    Ingredients

  • 1 + 1/2 cups of dried green split peas
  • 3/4 cup dried & diced carrot
  • 3/4 cup dried & diced parsnips
  • 1/2 cup dried & diced celery
  • 1 teaspoon sea salt
  • 1/4 teaspoon black pepper
  • 1 teaspoon dried onion powder
  • 1 teaspoon dried garlic powder
  • 2 cubes of chicken/vegetable stock

  • Directions:

    1. Measure dried green split peas into the bottom of the jar.
    2. Next, put the ziploc bag inside and begin filling with the remaining ingredients, except stock cubes.
    3. Close ziploc bag, poke inside jar, and place stock cubes on top. Seal jar with lid.

    Cooking Directions:

    1. Pull out the stock cubes and set aside. Open up the ziploc bag and pour contents into a separate bowl.
    2. Green split peas are now separate from the rest of ingredients and can be soaked in the jar or another bowl overnight.
    3. Rinse split peas well with cold water and put in soup pot with 4 + 1/2 cups of cold water.
    4. Add remaining ingredients, and bring to a boil.
    5. Reduce to medium-low and simmer 1-2 hours, stirring occasionally until dried vegetables are cooked through and tender. Add more water as needed.
    6. If desired, you can sprinkle dried bacon bits on the top.

    Nutrition


    Per 1 serving: 225 calories; 0.8 g fat; 47.1 g carbohydrates;
    11.4 g protein.

    Return to Top

    Pecan Peach Granola

    Find Northbird on social media:

    This post contains affiliate links. As an Amazon associate, I earn from qualifying purchases. This means that I make a small commission at no extra cost to you. You can read my full disclosure HERE.

    Jump to Recipe Card

    Jump to Video

    Return to “Breakfast”

    Yummmm….Honestly there’s not much that can beat fresh summer peaches! This is one reason I love visiting my family in southern ontario: buying peaches and other fruit directly from the farmers.

    This past summer, I planned ahead and knew that I wanted to make several batches of peach jam, peach salsa, freeze peach slices for deserts, but most importantly: dehydrate lots of peaches!

    On my way back north, I was able to buy two huge flats of “seconds” from a local farm that my aunt knew. The next few days were a little crazy as I preserved the peaches as soon as possible to maintain freshness. My kids and hubby loved hanging around to score all the little tastes and samples along the way!

    Now that it is the middle of winter, we still get to enjoy that wonderful taste of Ontario summer peaches through the dehydrated peach slices in our pantry. I had some fun recently with experimenting to create this yummy granola recipe, blending the sweet peach taste with crunchy pecans.

    Ways to Eat Granola:

    • Breakfast bowl with regular milk, oat milk, soy, or nut milks (try it with Homemade Almond Milk!) and add some berries for fresh sweetness.
    • Enjoy a bowl on top of yogurt (try it with a fresh batch of Homemade Crockpot Yogurt).
    • Take a baggie of granola for your next hike or camping trip and add some dried fruit or seeds and nuts for a delicious trail mix.
    • Make a Breakfast Parfait with frozen berries and yogurt!
    • Use it as a baked desert crumb topping (Apple Crisp recipe coming soon!)
    • Make granola bars from it! (Recipe being developed)

    Health Benefits of Granola:

    Healthy granola recipes are usually high in protein, fibre and healthy fats due to recipe variations that may include oats, nuts, seeds, dried fruits and organic unrefined oils. They are packed full of nutritious options that make a filling, on-the-go quick breakfast or a delicious snack option.

    Protein is essential to the body for not only helping to build muscle mass and bones, but also very important for weight loss and regulating metabolism. Additional functions may consist of:

    • Slowing appetite and hunger cravings
    • Feel “full” for longer, less calories eaten
    • Helps with fat burning
    • Lowering blood pressure
    • Helps to maintain weight loss
    • Boosts metabolism
    • Builds muscle mass and strength
    • Lowers risk of osteoporosis and fractures
    • Helps to repair broken bones and tissues

    High Protein Ingredients You can put in Granola:
    NutsWalnuts, Almonds, Cashews, Peanuts, Pistachios, Brazil Nuts, Hazelnuts…
    SeedsChia, Hemp, Sesame, Sunflower, Pumpkin, Flax…
    Dried Fruits & BerriesApricot, Kiwi, Blackberries, Cherries, Raisins, Banana…

    Fibre is mostly known for helping to keep the digestive system happy. Some other benefits of increased fibre may include:

    • Regulating bowel movements
    • Keeps you feeling fuller for longer
    • Assists in lowering cholesterol
    • Preventing blood sugar from spiking
    • Helps to lower blood pressure

    High Fibre Ingredients You can put in Granola:
    NutsChestnuts, Almonds, Hazelnuts…
    SeedsChia, Flax, Pumpkin, Sesame, Sunflower…
    Dried FruitsDates, Figs, Prunes, Apricots, Raisins…
    OatsOrganic Rolled Oats

    Fats are not only used as a source of energy in the body, but also aid in the following:

    • Help to insulate and protect the organs
    • Gives your body energy
    • Supports cell growth
    • Helps to regulate blood pressure and cholesterol
    • Assists the body in absorbing vitamins A, E & D
    • Reduces inflammation
    • Assists in cell growth
    High Fats Ingredients You can put in Granola:
    NutsWalnuts, Macadamia, Coconut, Cashews…
    SeedsSunflower, Pumpkin, Flax, Chia, Hemp…
    OilsCoconut oil, Avocado oil, Olive oil…
    Seed & Nut ButtersPeanut butter, Almond butter, Tahini, Sunflower seed butter, Pumpkin seed butter
    Dried Fruits & BerriesPlantain, Strawberries, Raspberries, Kiwi, Raisins

    Reasons to Make Your Own Granola:

    • It is soooo easy! Chop… Melt… Mix… Spread… Bake… Eat!
    • Way less expensive than buying from the store.
    • Store-bought granolas are often made with lower quality ingredients and usually have more processed sugars and additives mixed in to prolong shelf life.
    • When you make your own granola you know exactly what ingredients you are eating!
    • Granola is a versatile recipe: You can add more nuts and seeds, and add dried fruits/berries at the end if desired.
    • Granola is one of those easy and quick breakfast solutions to help your day start smoothly!

    Making Pecan Peach Granola

    How to Make Pecan Peach Granola

    Supplies Needed:

    Ingredients:

    Directions:

    1. Preheat oven to 300 degrees F.

    2. Mix the oats, chopped pecans and cinnamon together in a large bowl. Set aside.

    3. Melt the coconut oil in a small pot and add chopped dates, honey, sea salt and vanilla. Once the dates are softened, stir and mash or lightly blend with an immersion blender to puree.

    4. Add the wet mix to dry mix and stir well. If it has cooled enough you can finish mixing with your hands (I always find this easiest, but be careful of the hot oil!)

    5. Spread granola mix onto parchment covered cookie sheets. Granola should be in a single layer.

    6. Bake for 30-35 minutes (depending on your oven), until golden.

    7. Let cool and sit undisturbed for an hour, it will firm up as it cools down.

    8. Break the granola into smaller pieces and add the dehydrated peach slices. (I prefer to lightly pulse the slices in a blender or chop into smaller pieces.)

    9. Mix well and store granola in an airtight container for up to 1 month.

    Try this Granola recipe with some Homemade Almond Milk or Easy Crockpot Yogurt!

    Check out these other Breakfast Recipes from the Northbird Kitchen!

    Hi, I’m Jessie!

    I’m a Wife and Homeschooling Mom living in a remote town in Northern Ontario, Canada. I love making wholesome meals for my family from scratch, homeschooling our girls and learning more about natural living.

    Read more about my story HERE.

    Subscribe to Northbird’s email list to get weekly posts on: tasty recipes, activity ideas for kids, natural living tips, and some genuine mom thoughts and encouragement!

    Pecan Peach Granola

    • Servings: 8 cups
    • Difficulty: Easy
    • Print

    This Granola blend has the crunchy delight of roasted pecans, sweetened with honey and dates, and filled with the flavour of summer peaches.


    Ingredients

  • 4 cups organic rolled oats
  • 1 1/2 cups chopped pecans
  • 1 teaspoon ground cinnamon
  • 1/3 cup melted organic, unrefined coconut oil
  • 1/2 cup chopped & pitted dates
  • 3 tablespoons unpasteurized liquid honey
  • 1 teaspoon sea salt
  • 1 teaspoon pure vanilla
  • 1 cup dehydrated peach slices (or fresh peaches)

  • Directions

    1. Preheat oven to 300 degrees F.
    2. Mix the oats, chopped pecans and cinnamon together in a large bowl. Set aside.
    3. Melt the coconut oil in a small pot and add chopped dates, honey, sea salt and vanilla. Once the dates are softened, stir and mash or lightly blend with an immersion blender to puree.
    4. Add the wet mix to dry mix and stir well. If it has cooled enough you can finish mixing with your hands (I always find this easiest, but be careful of the hot oil!)
    5. Spread granola mix onto parchment covered cookie sheets. Granola should be in a single layer.
    6. Bake for 30-35 minutes (depending on your oven), until golden.
    7. Let cool and sit undisturbed for an hour, it will firm up as it cools down.
    8. Break into smaller pieces per preference, and add the dehydrated peach slices and store in airtight container for up to 1 month.

    Nutrition


    Per 1 Cup Serving: 431 calories; 26.9 g fat; 49.8 g carbohydrates;
    6.8 g protein.

    Return to Top

    Chickpea Coconut Curry

    Find Northbird on social media:

    This post contains affiliate links. As an Amazon associate, I earn from qualifying purchases. This means that I make a small commission at no extra cost to you. You can read my full disclosure HERE.

    Jump to Recipe Card

    Jump to Video

    Return to Soups & Entrees

    We LOVE curry night! Once a week we have either a stir fry or curry served with rice. My favourite is curry of course because it’s a little less work and can be easily made ahead and kept warm.

    Before Jesse and I got married (or even met), I spent several months in a bible school that had an outreach focus in Asia. After training, my team and I lived in a missionary’s house in Tokyo, Japan, for a month, followed by another month in Southern Thailand. It was during this time that I grew to love eating different curries and of course rice.

    There are hundreds of different curry recipes, originating from many different countries and cultures. I love trying different ones out and letting my somewhat enthusiastic family try them (they are not as excited to try anything remotely spicy!).

    This Chickpea Coconut Curry has become my go-to recipe for last minute curry cooking. It may change week-to-week based on what vegetables I have available, but I love this particular mix of ingredients. It is generally easier on the more sensitive palate, making it a great choice on the menu for little ones.

    Nutritional Benefits of Chickpeas:

    Chickpeas are also known as garbanzo beans, and are widely used in many different cuisines. From falafel to curries to hummus, there are countless types of dishes that feature chickpeas.

    They are high in protein, which makes them a favourite alternative for replacing meat protein. They are also high in healthy fats, carbs and fibre. Some other nutritional components include: Manganese, Folate (Vitamin B9), Copper, Iron, Zinc, Phosphorus, Magnesium, Thiamine, Vitamin B6, Selenium and Potassium.

    Health Benefits May Include:

    • Help you to feel full longer
    • Weight management
    • Boosts bone & muscle health
    • Helps to regulate blood sugar levels
    • Assists with digestion
    • May reduce risk of chronic illnesses
    • Supports brain function
    • May help relieve anxiety and depression
    • Boosts red blood cell production (Iron deficiency)

    You can read more HERE about why Chickpeas are an amazing addition to your diet.

    Is Coconut Milk good for you?

    Coconut milk is an amazing source of healthy saturated fats and high in calories. It is typically made from grinding the white flesh part of a matured brown coconut and then mixed with water. It is important to not confuse coconut milk with coconut water, which usually comes from an immature green coconut and is estimated 94% water.

    The coconut milk has varying thickness of fat in it, and used for different dishes. In most cuisines, the thicker the milk is, the more likely it is used for deserts and creams. The thinner milk is usually used for making soups, curries and sauces.

    My mother usually has at least one can of coconut milk buried at the back of her fridge. She chills the can so that the milk layers will separate and the thicker cream can be used as desert toppings.

    I heard a story a while ago of how some babies that were born in the south pacific islands were given coconut milk when there was no baby formula or substitute nursing mothers available. And these babies thrived with no developmental concerns.

    Perhaps one thing to note about drinking coconut milk, is that not all store bought brands are actually good for you. Many of them contain preservatives and added sugars, so it’s always a good idea to read the labels!

    Here’s a short video of how to make Chickpea Coconut Curry…!

    How to Make Chickpea Coconut Curry

    Supplies Needed:

    Ingredients:

    Directions:

    1. Melt the coconut oil in wok or large skillet over medium heat.
    2. Add the onion, garlic and ginger. Cook for 2 minutes or until the onions have softened.
    3. Add the spices/herbs: coriander, curry, salt, pepper, and Italian seasoning. Stir for 1 minute.

    4. Add the coconut milk and stir in, followed by the beef stock. Cook for 5 minutes and stir well.

    5. Add the remaining ingredients (sweet potatoes, chickpeas, mushrooms, bay leaves, and any other vegetables you would like to add!).

    6. Continue cooking and stirring occasionally for another 15-20 minutes, until curry thickens and vegetables are tender.

    7. Serve over rice and garnish with fresh basil or parsley.

    Additional Note: This recipe is lovely with some fresh Naan bread for dipping. I am developing a recipe to share on here soon!

    Other Soups and Entrees to Check Out:

    Hi, I’m Jessie!

    I’m a Wife and Homeschooling Mom living in a remote town in Northern Ontario, Canada. I love making wholesome meals for my family from scratch, homeschooling our girls and learning more about natural living.

    Read more about my story HERE.

    Subscribe to Northbird’s email list to get weekly posts on: tasty recipes, activity ideas for kids, natural living tips, and some genuine mom thoughts and encouragement!

    Chickpea Coconut Curry

    • Servings: 8 servings
    • Difficulty: Easy
    • Print

    Delicious and Creamy Curry on your table in under an hour!


    Ingredients:

  • 1/4 cup coconut oil
  • 1 onion, chopped
  • 4 garlic cloves, minced
  • 1 small finger of ginger root, minced
  • 1/2 teaspoon coriander, ground
  • 2 tablespoons yellow curry (or more to taste)
  • Pepper and salt to taste
  • 2 teaspoons Italian seasoning herbs
  • 1 can (14oz/400ml) coconut milk
  • 2 cups beef stock (can use chicken or vegetable)
  • 6 small sweet potatoes
  • 1 can (19oz/540ml) Chickpeas
  • 6 small mushrooms
  • 2 bay leaves

  • Directions:

    1. Melt the coconut oil in wok or large skillet over medium heat.
    2. Add the onion, garlic and ginger. Cook for 2 minutes or until the onions have softened.
    3. Add the spices/herbs: coriander, curry, salt, pepper, and Italian seasoning. Stir for 1 minute.
    4. 4. Add the coconut milk and stir in, followed by the beef stock. Cook for 5 minutes and stir well.
    5. Add the remaining ingredients (sweet potatoes, chickpeas, mushrooms, bay leaves, and any other vegetables you would like to add!).
    6. Continue cooking and stirring occasionally for another 15-20 minutes, until curry thickens and vegetables are tender.
    7. Serve over rice and garnish with fresh basil or parsley.

    Nutrition


    For 1 approximate serving: 192 calories; 13 g fat; 16 g carbohydrates;
    3.7 g protein.

    Return to Top

    Baby Breakfast: Yogurt and 3 Seed Breakfast Bowl

    Find Northbird on social media:

    This post contains affiliate links. As an Amazon associate, I earn from qualifying purchases. This means that I make a small commission at no extra cost to you. You can read my full disclosure HERE.

    Jump to Recipe Card

    Return to “Breakfast”

    This delicious breakfast dish has long been in use within our family, and originated from my parents who faithfully have it nearly every morning. It has many variations, based on what is available for the added toppings, but this particular version is our family favourite. It has been affectionately dubbed the title “splodge”.

    I am very thankful that our beautiful oldest daughter has always enjoyed eating pretty much everything on the menu except onions and spicy foods.

    We also have a very loved and very picky one year old daughter when it comes to food. I have learned that she likes eating anything with a smooth texture, or big cut up soft chunks, but nothing in-between! Pebbly textures, such as soaked whole chia seeds are a definite dislike!

    So that’s one reason why we blend chia up with flax and sunflower seeds in this breakfast blend, so that she still gets the delicious goodness but in a creamy, smooth texture when mixed with applesauce and homemade yogurt.

    How to Make Yogurt and 3 Seed Breakfast Bowl:

    Supplied Needed:

    Ingredients:

    • 1/2 cup Yogurt (Plain, unflavoured)
    • 1/4 cup of 3 Seed Breakfast Blend (Flaxseeds, Sunflower seeds and Chia seeds. *See Instructions below)
    • 1/4 cup of Applesauce (Unsweetened)
    • Toppings (Berries, chopped banana, other fresh fruit)

    Directions:

    1. Mix yogurt, 3 seed breakfast blend and applesauce together in serving bowl and let sit for 10 minutes.
    2. Add desired toppings to dish and serve!

    Additional Notes: Any kind of yogurt can be used, but plain greek or balkan style are lovely as they have less sugar than the flavoured ones and contain those lovely live bacterial cultures that help keep digestion happy.

    (EDIT: Since this post was written, I learned how to make yogurt in the crockpot! We now use homemade yogurt when we make this recipe for breakfast. You can read about it in the crockpot yogurt recipe post HERE.)

    How to Make the 3 Seed Breakfast Blend:

    Supplied Needed:

    Ingredients:

    Directions:

    1. Measure equal batches of seed into blender and pulse until grainy.

    2. Add to Jar and give it a good shake!

    3. Store in fridge for up to one month.

    A little more about the Seeds…

    Organic Golden Flaxseed:

    These are high in fibre and omega-3 fatty acids! They have also been shown to help lower blood pressure and blood sugar, contain protein, improve digestion (hence the fibre) and reduces bloating. Some doctors also claim it to help with weight loss.

    Important to note: Nutrition experts recommend the importance of grinding up flaxseed instead of eating it whole. Ground flaxseed is easier to digest and for your body to absorb the nutrients. Avoid buying it pre-ground, as it is best ground fresh and stored in the fridge. At room temperature it will lose some of its nutritional properties, which is why our Naturopath discouraged us from buying the pre ground sold at bulk barn!

    We buy organic flax seeds in bulk from a health food store in the south and then put in freezer bags and freeze until we need them. Big $ saver this way and ensures we always have some on hand for various recipes.

    Raw, Hulled Organic Sunflower Seeds:

    These are notably high in vitamin E and selenium, which act as a powerful antioxidant and supports your immune system and thyroid function. They also contain protein, magnesium, and linoleic fatty acids.

    We have also been able to buy these in bulk, and store them the same way as the flaxseeds. It is important to buy them raw and unsalted!

    Organic Chia Seeds:

    Chia seeds have had their waves of popularity over the past few years, but the science and nutritional values still speak for themselves. Chia seeds are amazing for lowering blood pressure, blood sugar and cholesterol, and improving overall heart health. They are high in fibre, which aids in digestion and reduces bloating.

    It is important to soak whole chia seeds for at least twenty minutes before eating them so that they become more digestible. This is true of most edible seeds! If we are eating them whole, we like to soak them in almond milk (see our recipe for homemade almond milk), but some people soak them in water as well.

    When they are soaked, the hard seed shell releases a gelatinous-like film around the seed, making it look like frog eggs or custard!

    We prefer to blend them up with Flax and Sunflower seeds in order to get optimal nutritional absorption when soaked in almond milk or yogurt, which this recipe suggests. When blending them, it is not necessary to soak for that long, roughly 10 minutes is all that is needed to thicken up the splodge.

    For our demographic area, the best price we have found is at Costco for Organic Chia Seeds, but you can also buy them from Amazon at a comparable price.

    Check out these other Breakfast Recipes from the Northbird Kitchen!

    Hi, I’m Jessie!

    I’m a Wife and Homeschooling Mom living in a remote town in Northern Ontario, Canada. I love making wholesome meals for my family from scratch, homeschooling our girls and learning more about natural living.

    Read more about my story HERE.

    Subscribe to Northbird’s email list to get weekly posts on: tasty recipes, activity ideas for kids, natural living tips, and some genuine mom thoughts and encouragement!

    Yogurt and 3 Seed Blend

    • Servings: 1
    • Difficulty: Easy
    • Print

    A Delicious and Baby-friendly Breakfast for Busy Mornings.


    This recipe is for 1 small bowl for baby or small child. You can double it for adult portion if desired.

    Ingredients

    • 1/2 cup Yogurt
    • 1/4 cup of 3 Seed Blend (See instructions above)
    • 1/4 cup of Applesauce
    • Berries or other fresh fruit

    Directions

    1. Mix Yogurt, Seed Blend and Applesauce in serving bowl.
    2. Let sit for about 10 minutes for seed blend to activate.
    3. Garnish with berries or other fresh fruit.

    Nutrition


    Per 1 cup Serving: 305 calories; 35 g fat; 29 g carbohydrates;
    15 g protein; 20 mg cholesterol; 73 mg sodium.

    Return to Top