Find Northbird on social media:
Return to “Homeschooling Activities & Resources”

Do you have a child that loves to sit in nature and draw?
I do. My oldest daughter loves sitting outside or by the window and drawing whatever wildlife she can find, or her impressions of nature.
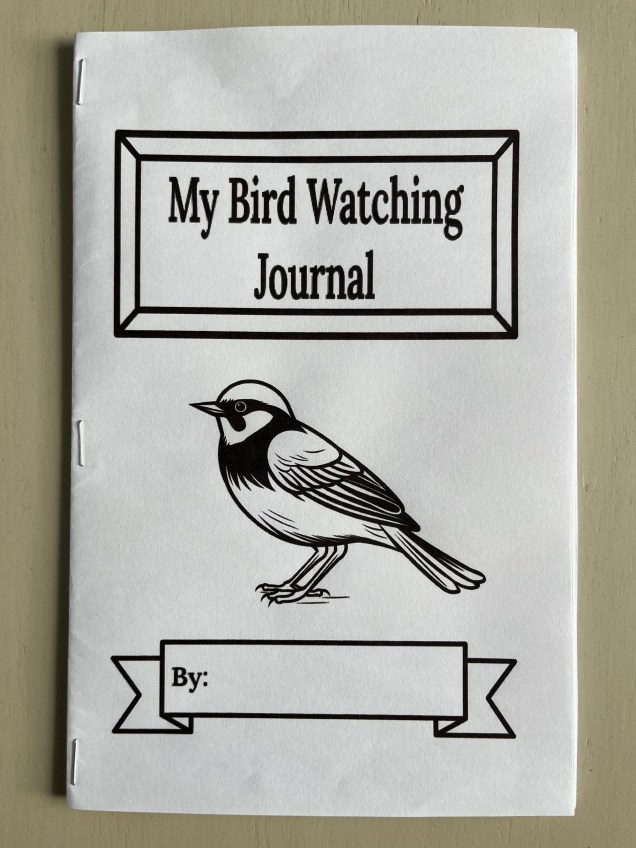
I created this bird survey tool as a way for her to record and draw the different birds that she finds around our community in Northern Ontario. (Her beautiful little six-year-old drawings and observations are so cute!) It will be a special keepsake in years to come.

This birdy resource will encourage students to get outside into nature and watch and listen for the many amazing different bird species out there! It is non-specific to any geographical area, and is to be used as an interactive survey tool.

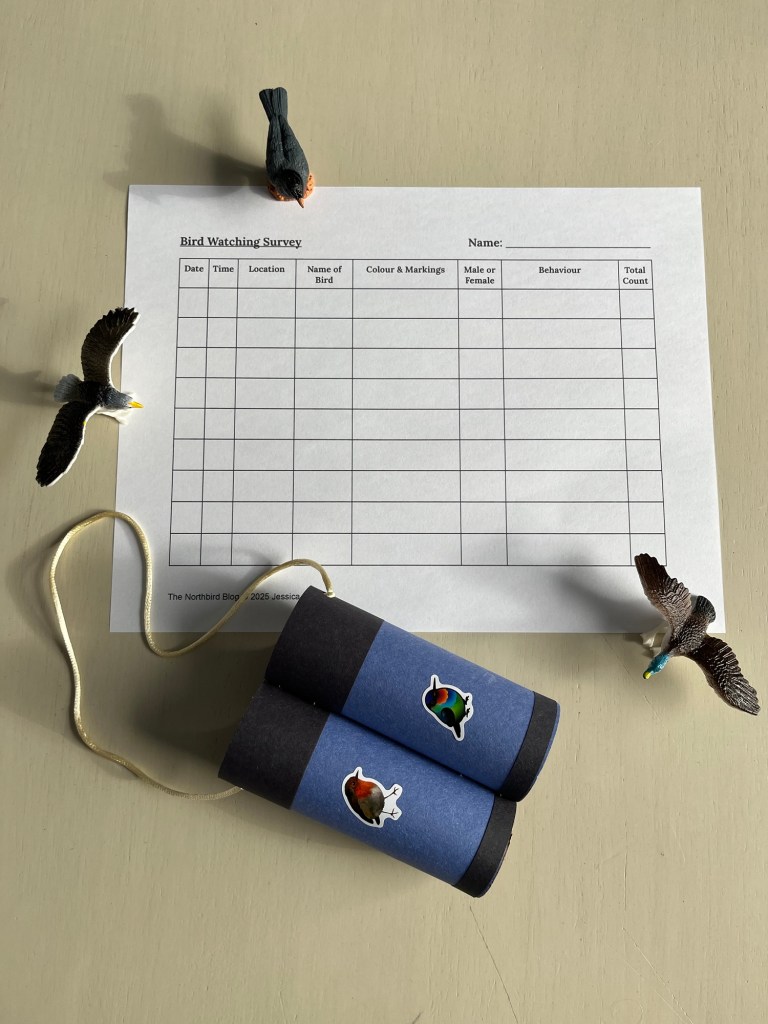
On each page students can record:
- The name of the BIRD sighted
- Date/Time
- Location of the BIRD
- Colour and any notable markings of the BIRD
- Behavior of the BIRD (what was the bird doing?)
At the bottom of each page there is a framed box where students can DRAW their impression of what the bird looked like, or what it was doing (flying, perching, nesting, etc).
This PDF file has been designed to be easily printed, folded and stapled together, making it an easy handout to either print and make ahead of time for younger students, or have the older students assemble it themselves!
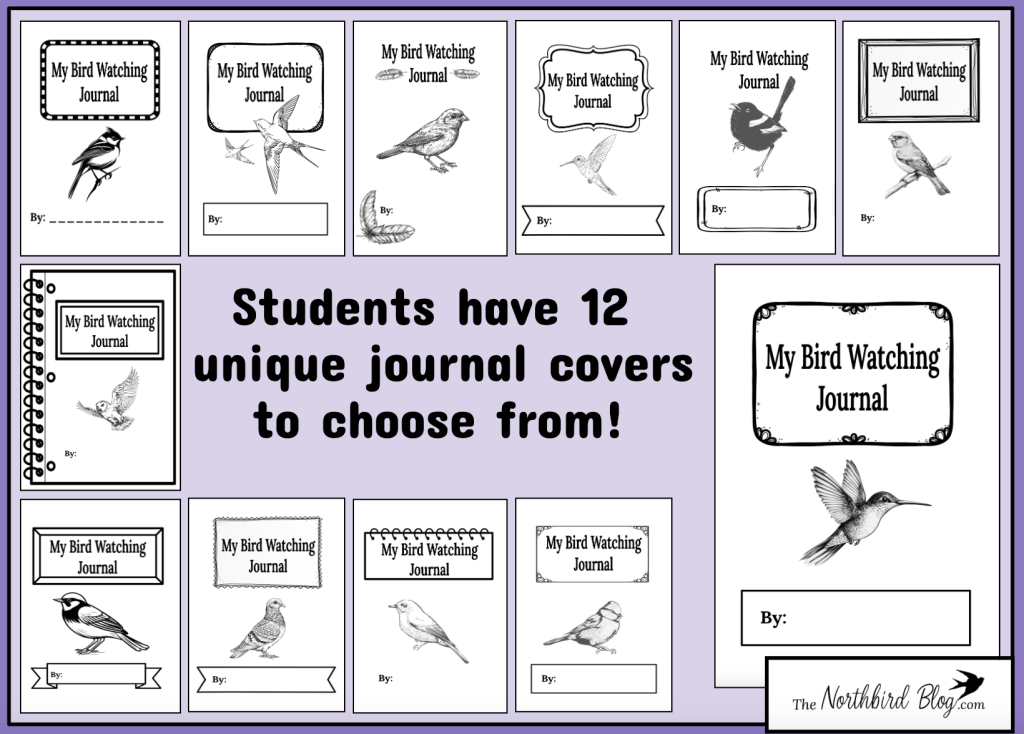
There are 12 different journal covers for students to choose from to use in their nature journals, highlighting a variety of different bird species.
Instructions on assembling this nature journal:
1) Choose 1 of the 12 unique journal covers and print on cardstock, fold in half.
2) Print inner journal pages double-sided, flipping on short edge.
3) Fold inner pages in half and insert into the cover.
4) Put 3 staples along the fold in the cover.
What is Included in this Digital Package? (Total 18 Pages)
- Bird Watching Journal Covers (12 pages)
- Bird Watching Journal: Inner pages (4 pages)
- Terms of Use/Instructions/Graphic Credits (2 pages)
**Please Note that this is a DIGITAL FILE. There is no physical product from this purchase. After purchasing, there is a link that is automatically sent to your email where you can access your new file. (Email address is required at checkout).
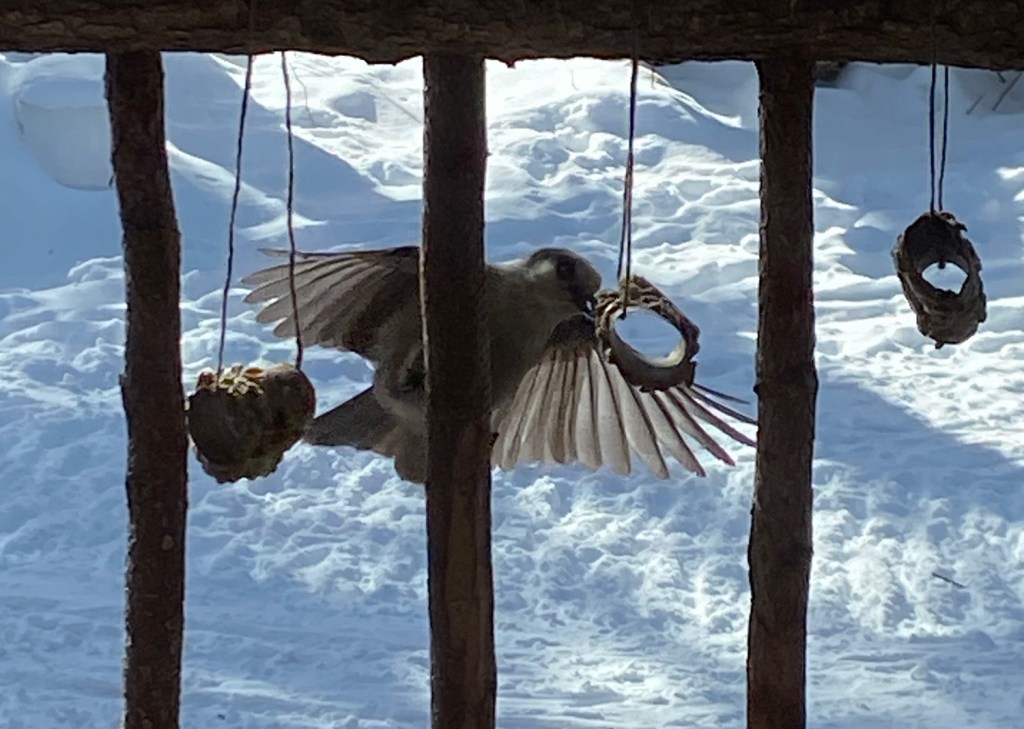
Some of our favourite birds that we have discovered in the north: (and managed to take a picture of!)

“Downy Woodpecker”
Moosonee, Ontario

“Dark Eyed Junco”
Moosonee, Ontario
(Photo Credit: Jesse Burman, my husband)

“Chickadee”
Moosonee, Ontario

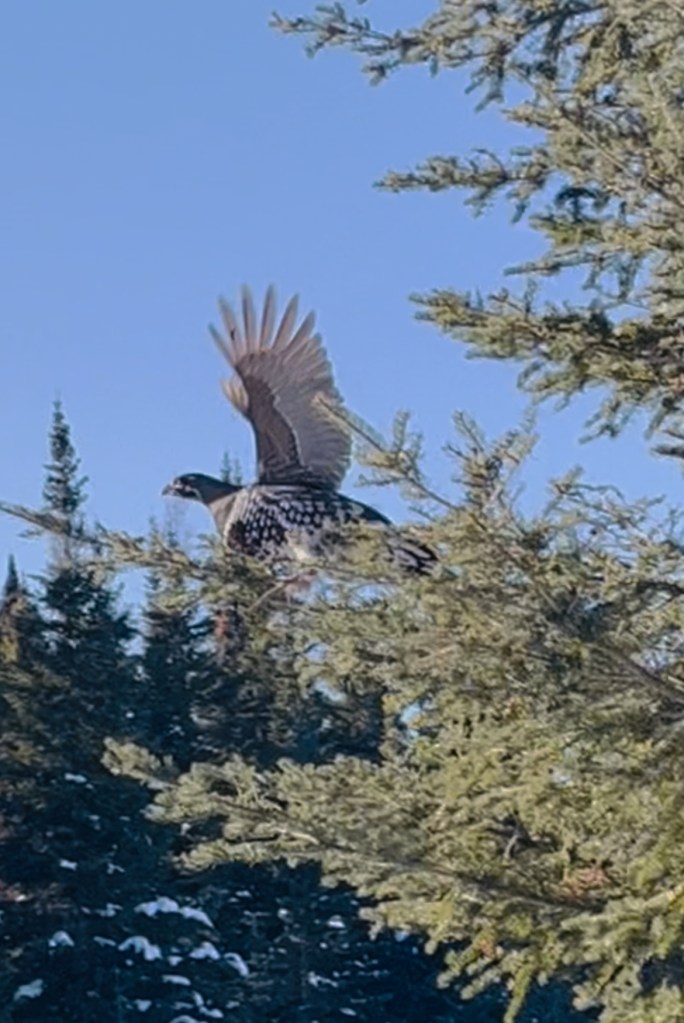
“Willow Ptarmigan”
James Bay, Northern Ontario
“Partridge”
Moose River Area, Northern Ontario
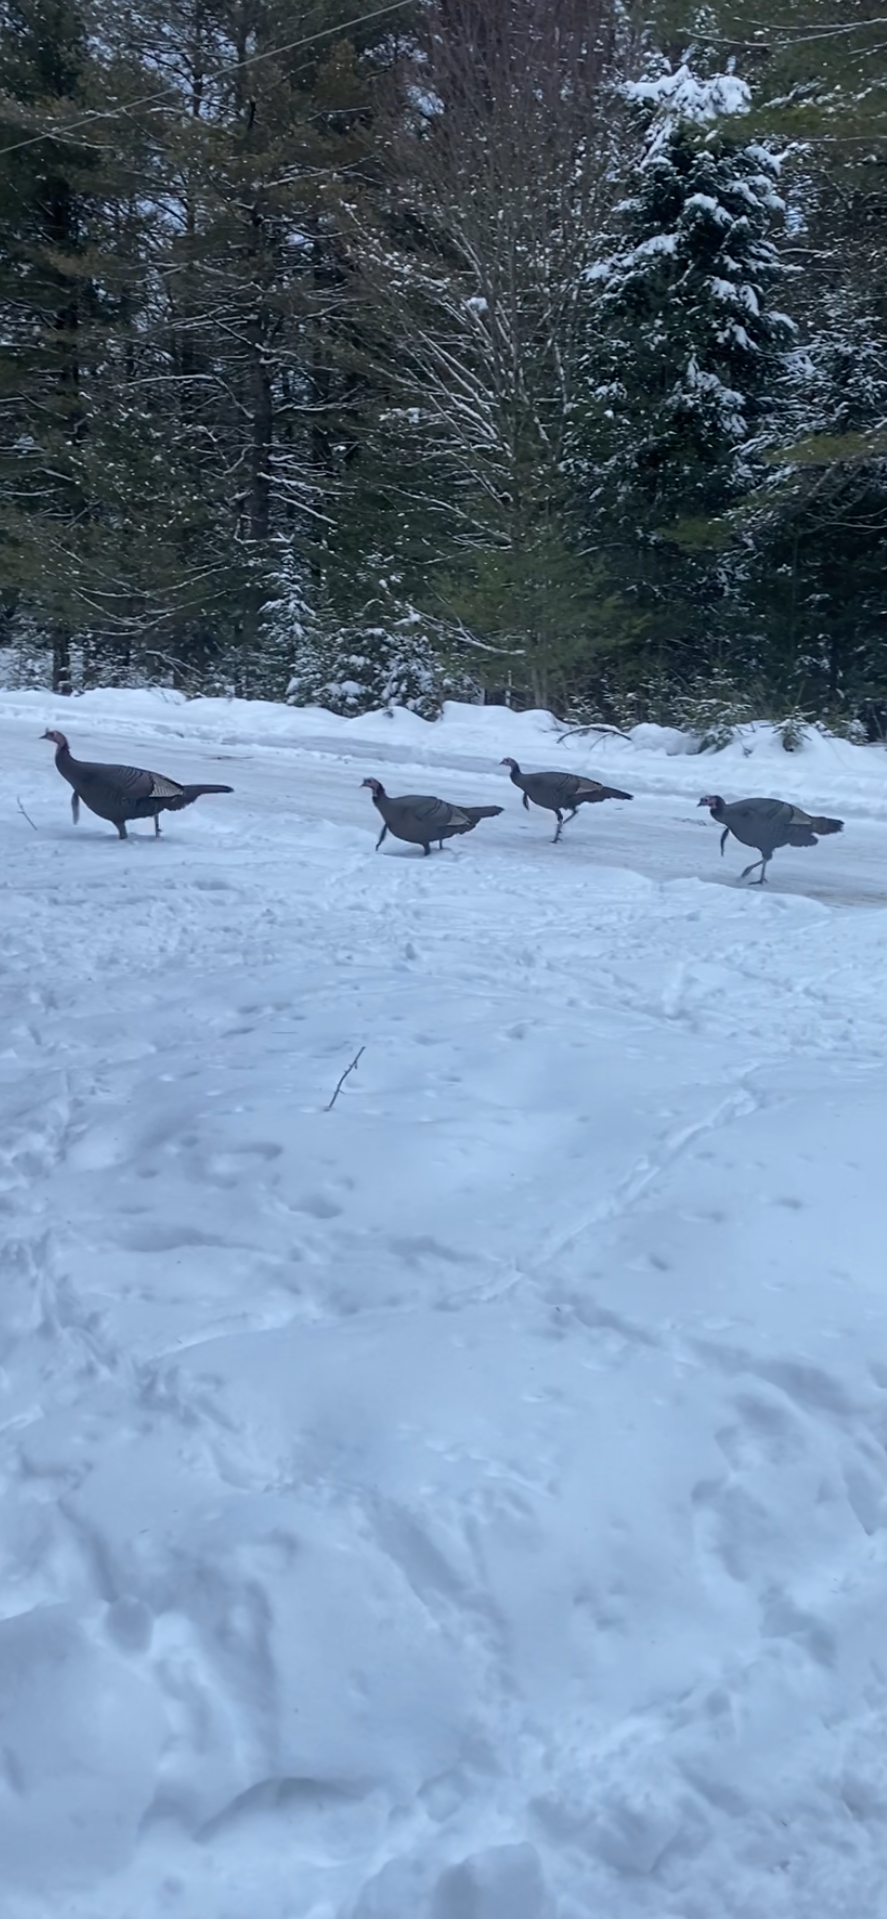
“Wild Turkeys”
Muskoka, Ontario
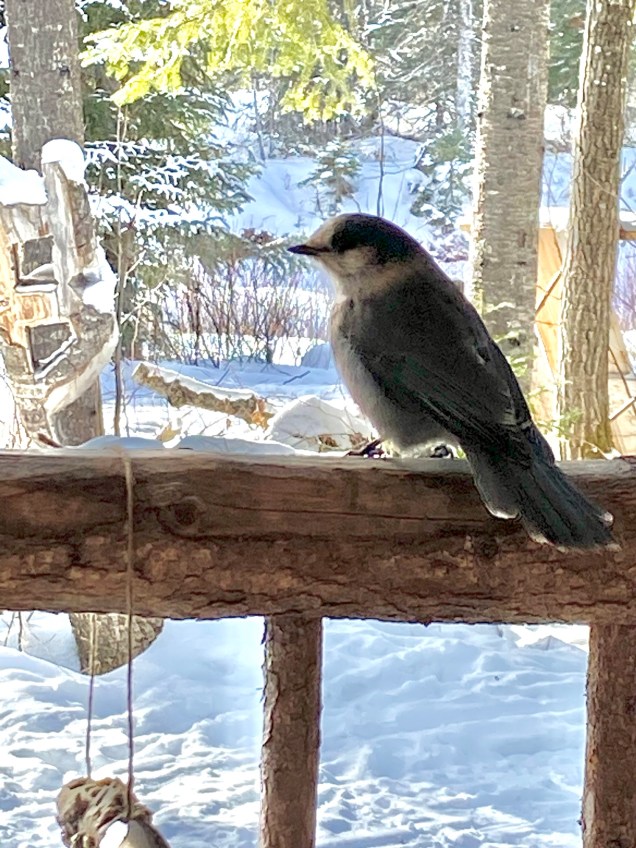
“Whisky Jack”/”Canada Jay”,
Moose River area, Northern Ontario
Thank you for your interest in this product designed by Northbird!
**Please Note that this is a DIGITAL FILE. There is no physical product from this purchase. After purchasing, there is a link that is automatically sent to your email where you can access your new file. (Email address is required at checkout).
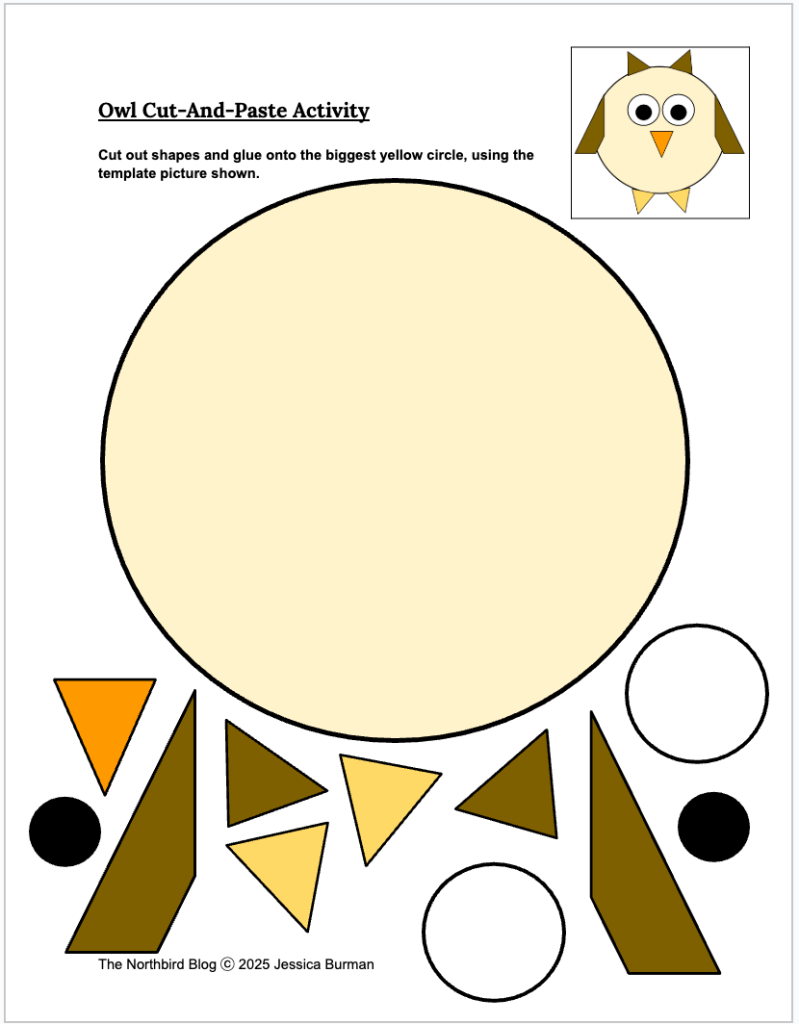
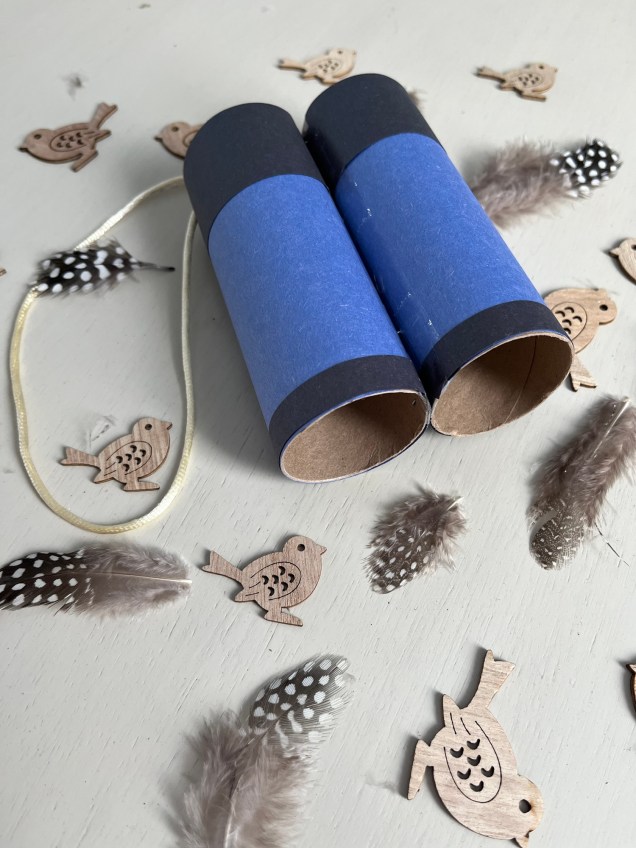
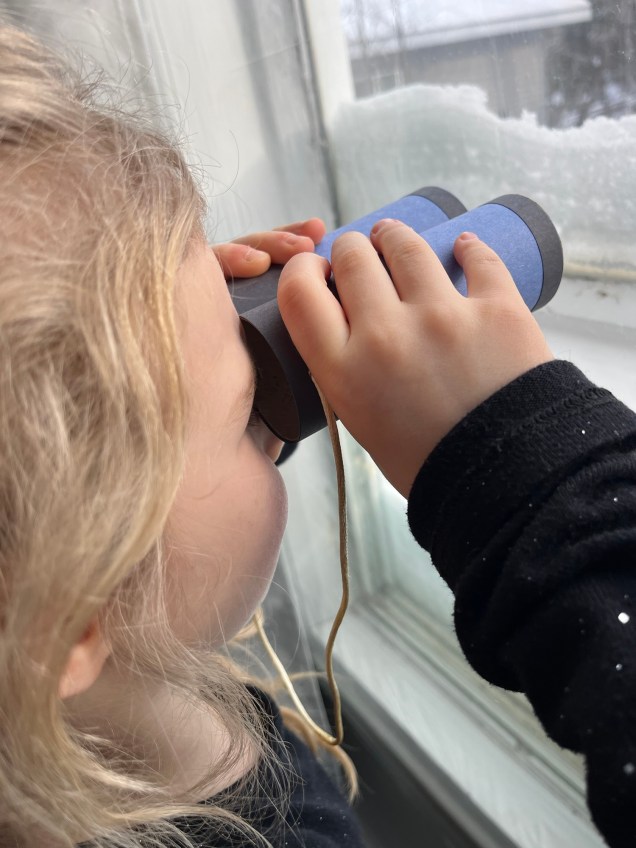
Did your kids or students make this Birdwatching Craft?
I’d LOVE to see your results!! Feel free to post to your social media account and tag Northbird using one of the links below or post in the comments!
This Free Birdwatching Survey Sheet PDF is available to download HERE.
More on “Discovering Birds“:


More Homeschooling Crafts & Activities to Check Out:


Hi, I’m Jessie!
I’m a Wife and Homeschooling Mom living in a remote town in Northern Ontario, Canada. I love making wholesome meals for my family from scratch, homeschooling our girls and learning more about natural living.
Read more about my story HERE.

Subscribe to Northbird’s email list to get weekly posts on: tasty recipes, activity ideas for kids, natural living tips, and some genuine mom thoughts and encouragement!
Recent posts from Northbird:


This post contains affiliate links. As an Amazon associate, I earn from qualifying purchases. This means that I make a small commission at no extra cost to you. You can read my full disclosure HERE.