This post contains affiliate links. As an Amazon associate, I earn from qualifying purchases. This means that I make a small commission at no extra cost to you. You can read my full disclosure HERE.
Our little town recently had a very festive gathering in the town square to come together, decorate and light up a large Christmas tree in the middle of the square. It was super chilly and snowy out, but great fun to be there with our friends, enjoying some freshly popped corn, hear the local school choir do some carolling, and bring our homemade ornaments for the tree.
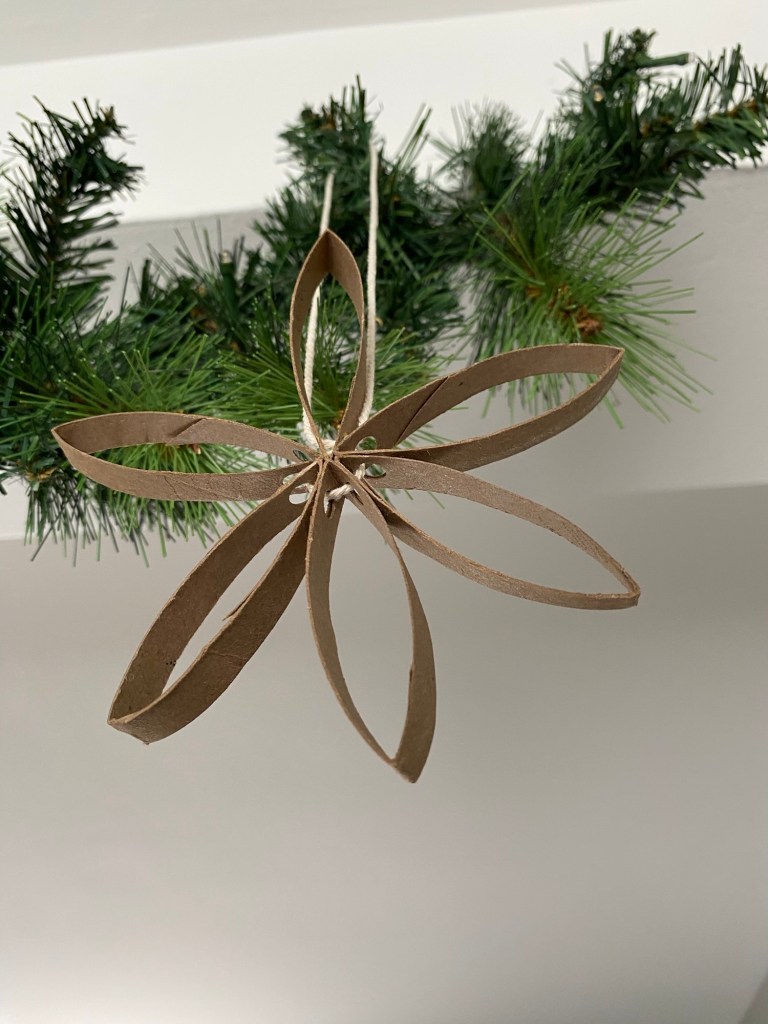
One criteria on the event poster was that the ornaments be eco-friendly. My oldest and I had some fun thinking of ideas and discussing what “eco-friendly” meant, as we have made many ornaments over the years but I don’t think any of them were recycled or ok for the environment!
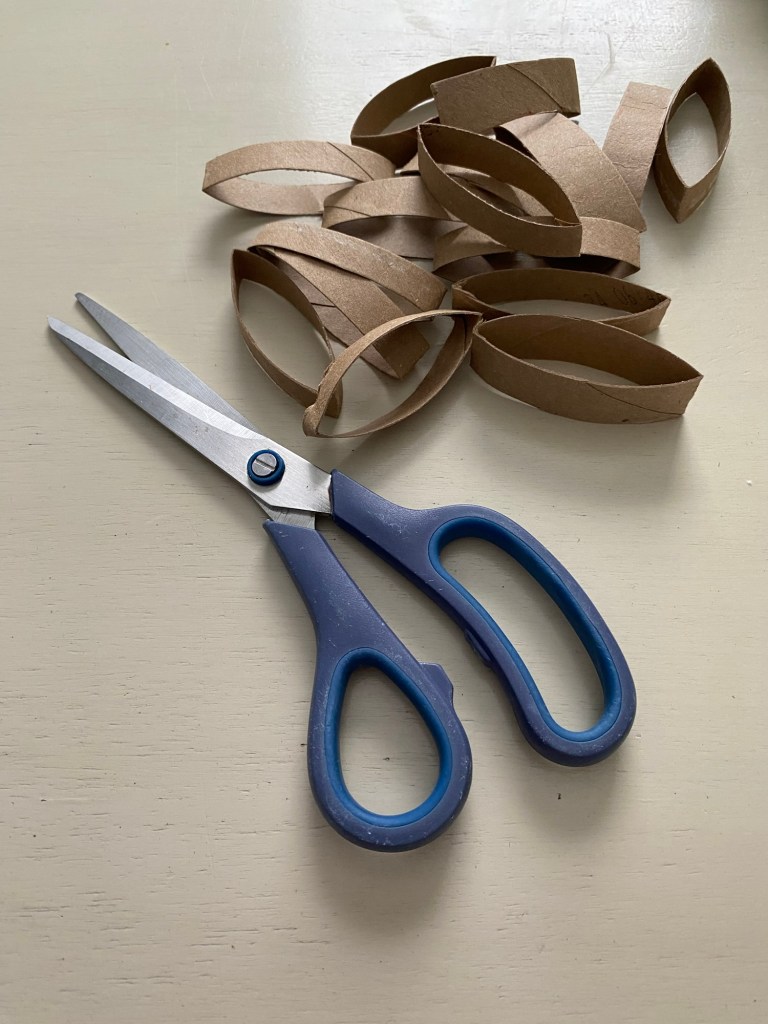
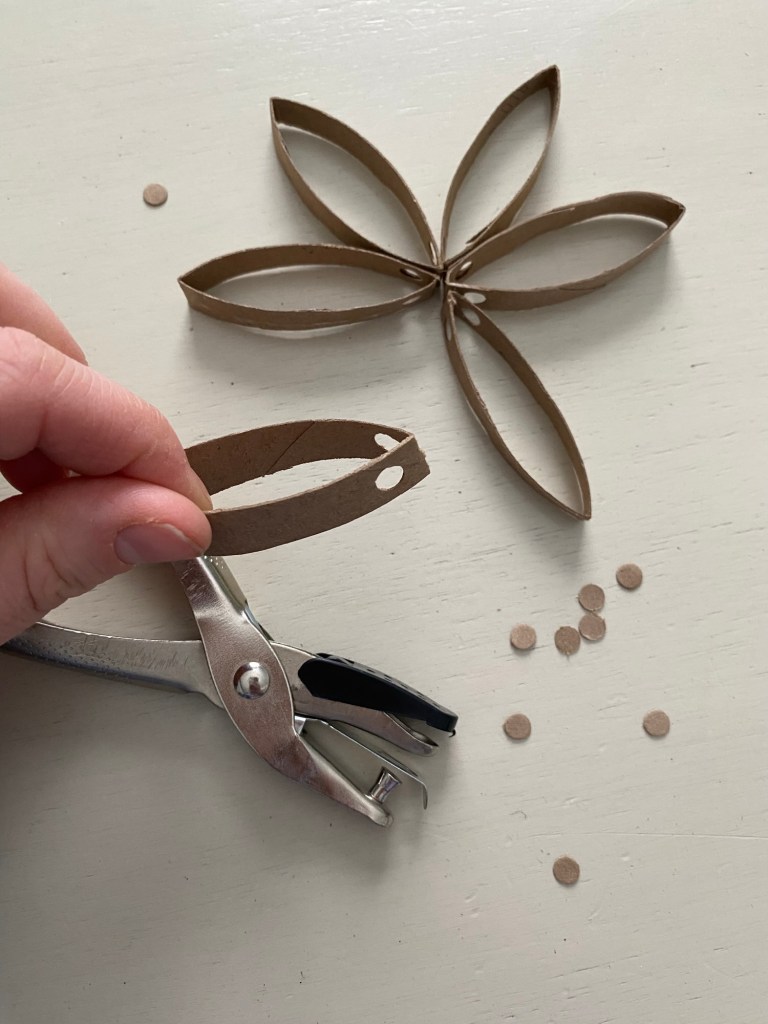
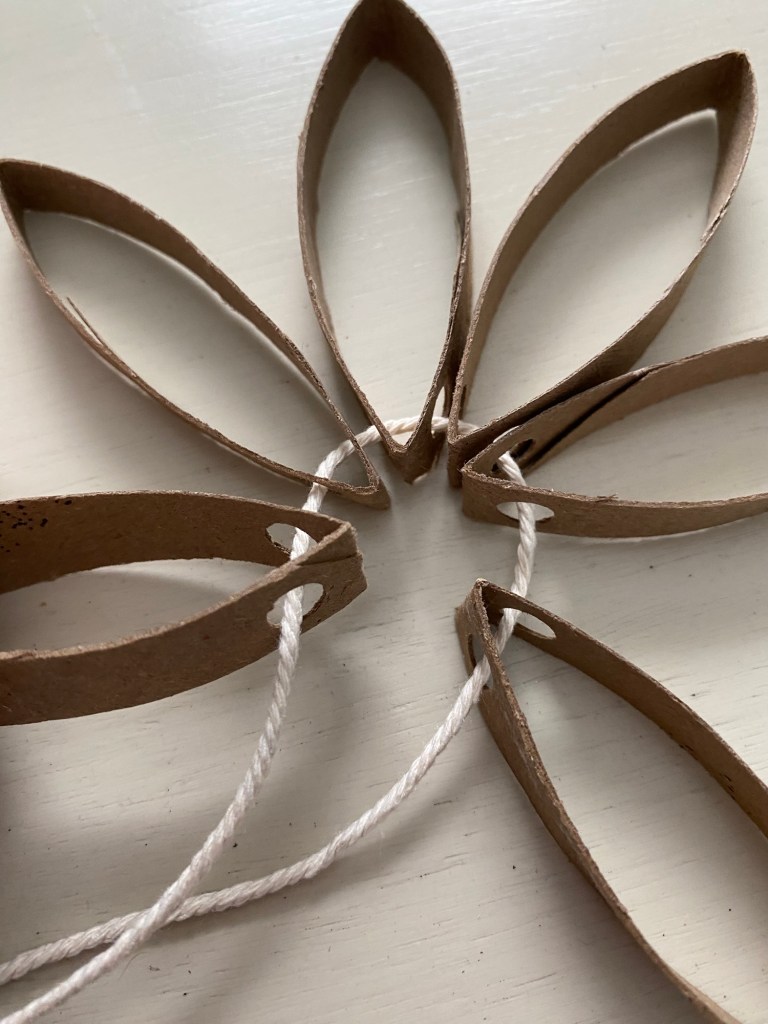
This easy and simple craft is what we came up with. All you need is string and toilet paper rolls. Everyone has these!
I like that it can be either completed and hung “as is”, or if desired, adding further embellishments or painting it! There are so many possibilities to have fun with this simple craft.
I hope you enjoy making this easy ornament for your Christmas tree or holiday garland!
For those who need a visual aid in making the Paper Roll Star, you might find this short video helpful!
I’m a Wife and Homeschooling Mom living in a remote town in Northern Ontario, Canada.I love making wholesome meals for my family from scratch, homeschooling our girls and learning more about natural living.
Subscribe to Northbird’s email list to get weekly posts on: tasty recipes, activity ideas for kids, natural living tips, and some genuine mom thoughts and encouragement!
Looking for an easy Christmas ornament craft to do this holiday season? Are you interested in it being Eco-Friendly and made from recycled materials? Check out this easy craft to decorate your home with!
This post contains affiliate links. As an Amazon associate, I earn from qualifying purchases. This means that I make a small commission at no extra cost to you. You can read my full disclosure HERE.
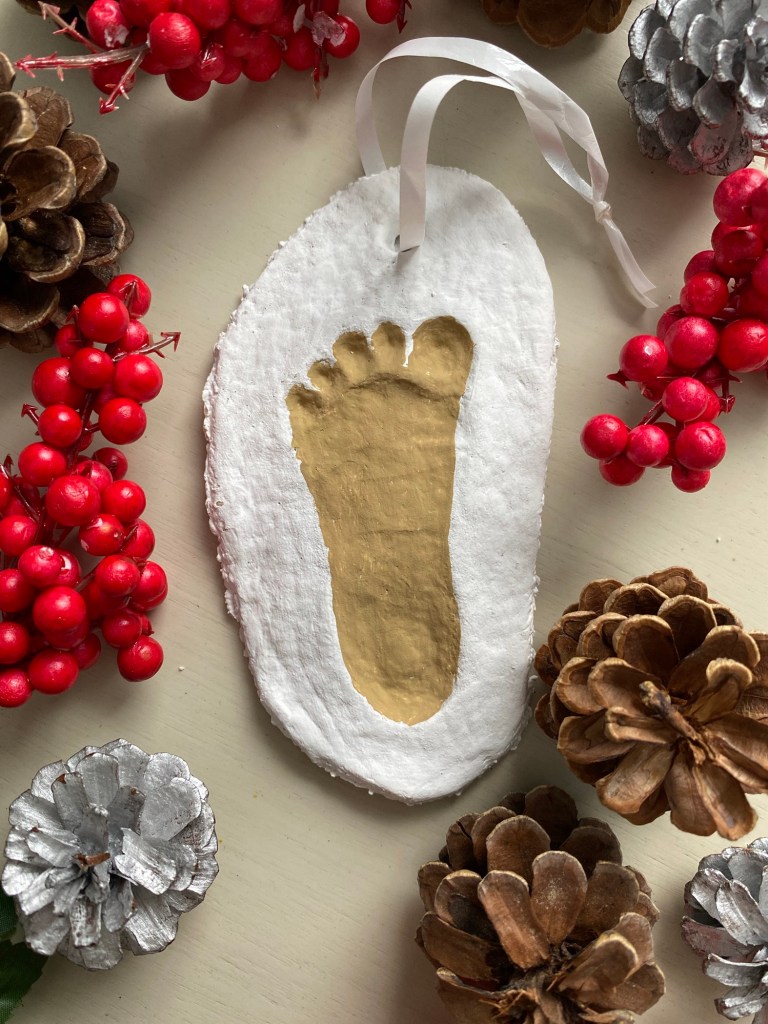
With each baby that we’ve had, we have this lovely tradition to make a salt dough imprint of their tiny feet or hands every Christmas and turn it into a special ornament for our Christmas garland.
I love having this precious memento to remind myself of our little girls when they were this tiny!
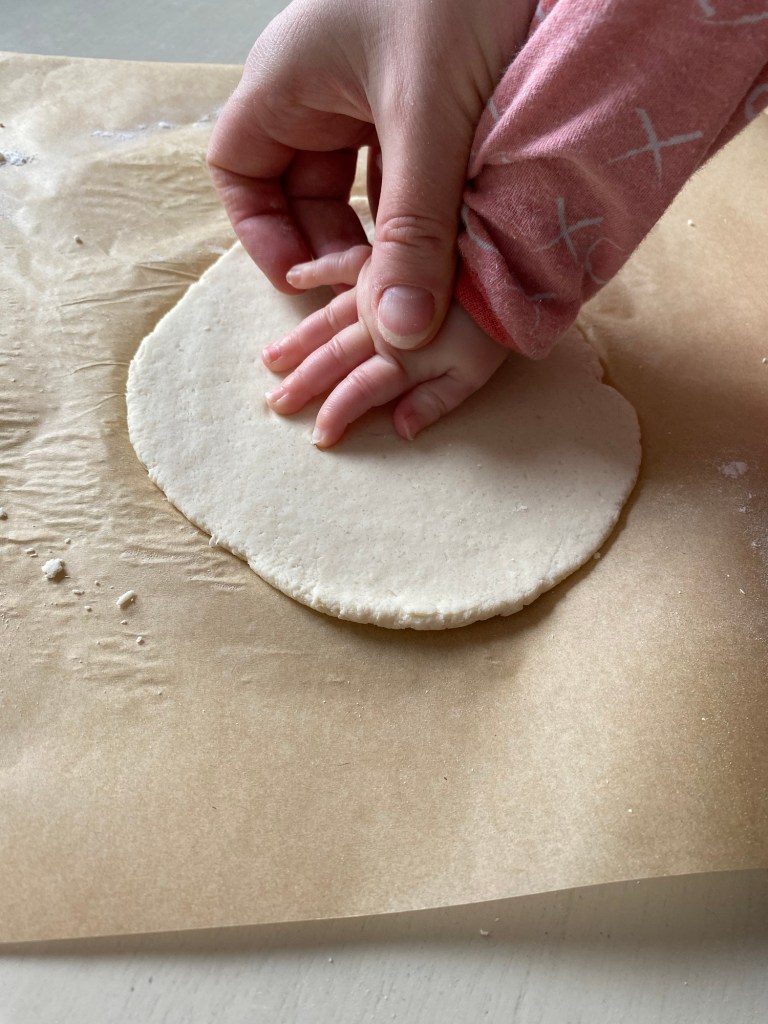
It’s not always easy to try to get wriggling toes or tiny squirming fingers to cooperate for this craft, so I definitely suggest having someone help hold your little one still while you gently push their feet or hands into the rolled out and ready dough!
These charming ornaments also make great gifts for grandparents, aunties, uncles (to my family members reading this: sorry for the spoiler this year!) and other special friends in your life.
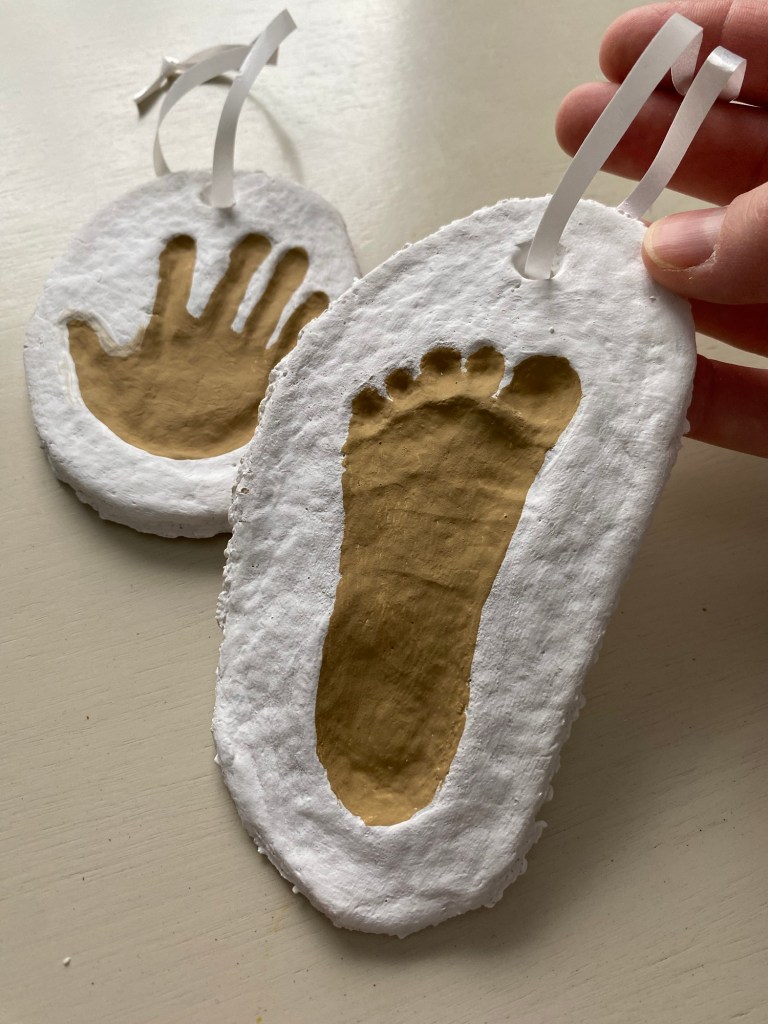
After baking them in the oven and cooling completely, use some acrylic paint to either paint the print so you can see it better, or paint the whole thing however you like!
After the paint has dried, a nice layer of mod podge will seal it and give it a nice shine to enjoy on your Christmas tree for many years to come.
I hope you enjoy making this simple and inexpensive yet precious keepsake of this time in your baby’s life!
If you are a visual learner like I am, this video might be helpful to see the whole process!
How to Make Salt Dough Baby Foot/Handprint Ornaments:
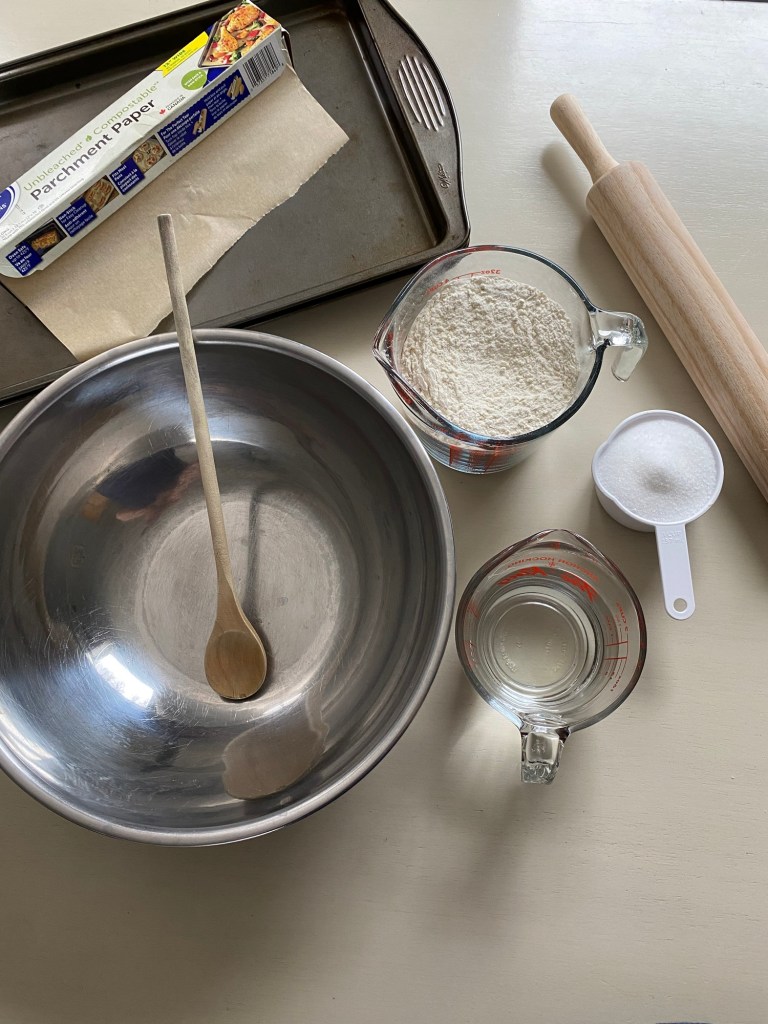
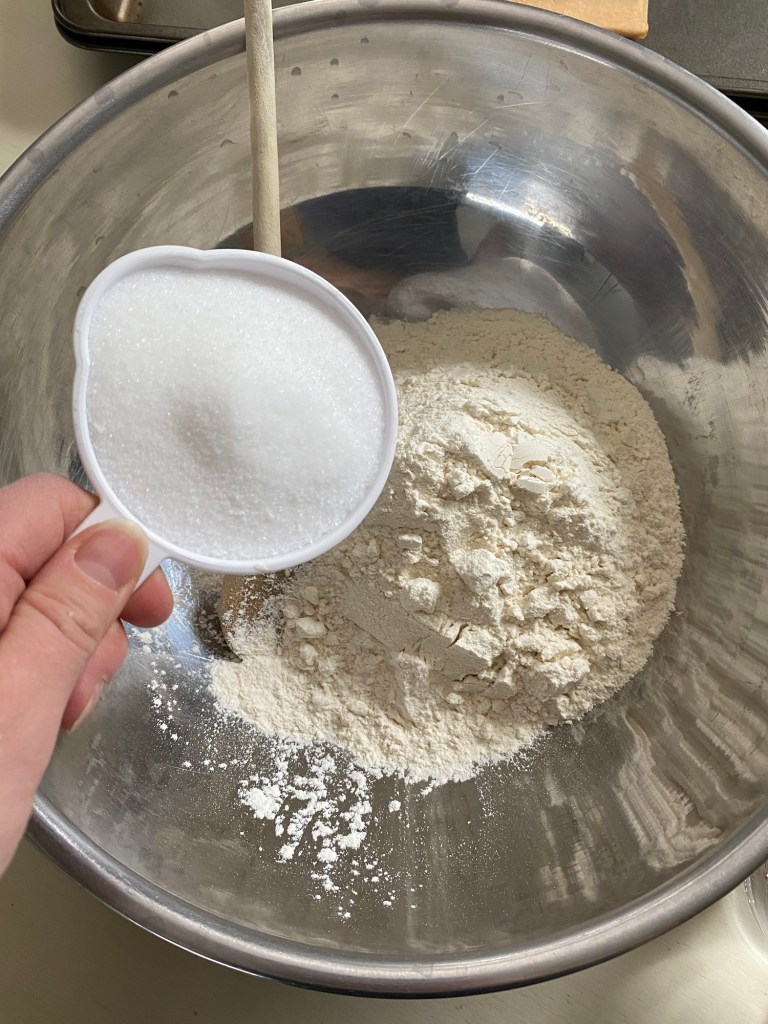
Mix flour and salt together in medium size bowl. (Add any additional sparkles or cinnamon if you want at this point, but keep in mind if you want to paint later on it may not matter too much!)
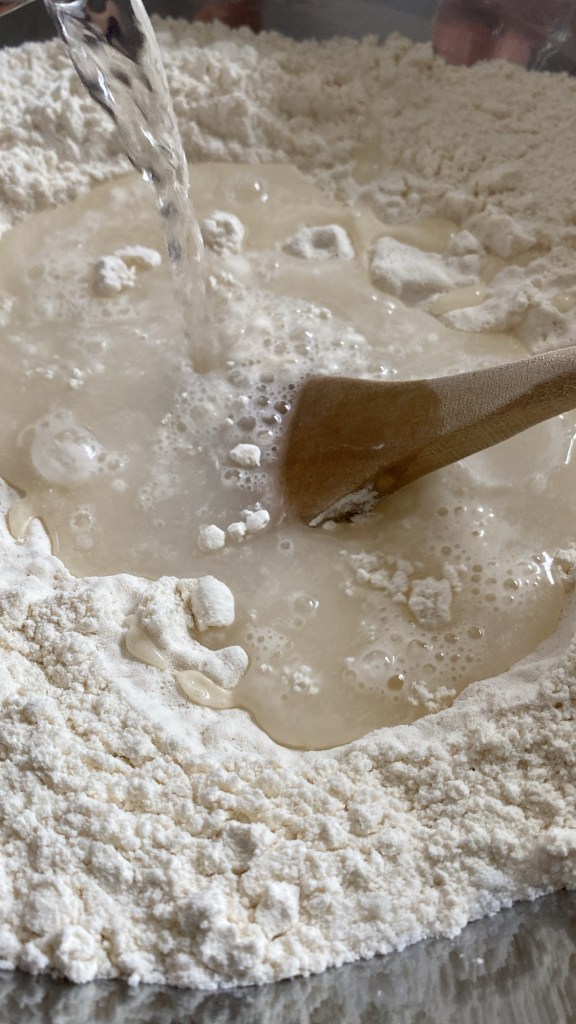
Add just enough water to make it into a soft dough.
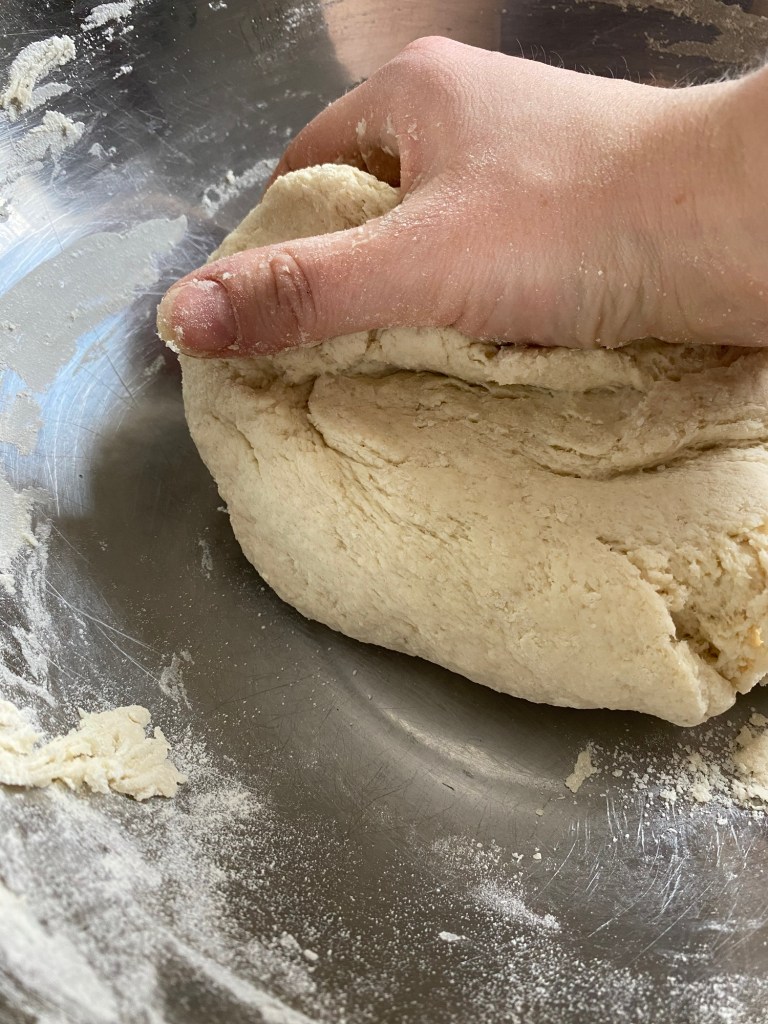
4. Knead for 2-3 minutes so dough is a smooth ball.
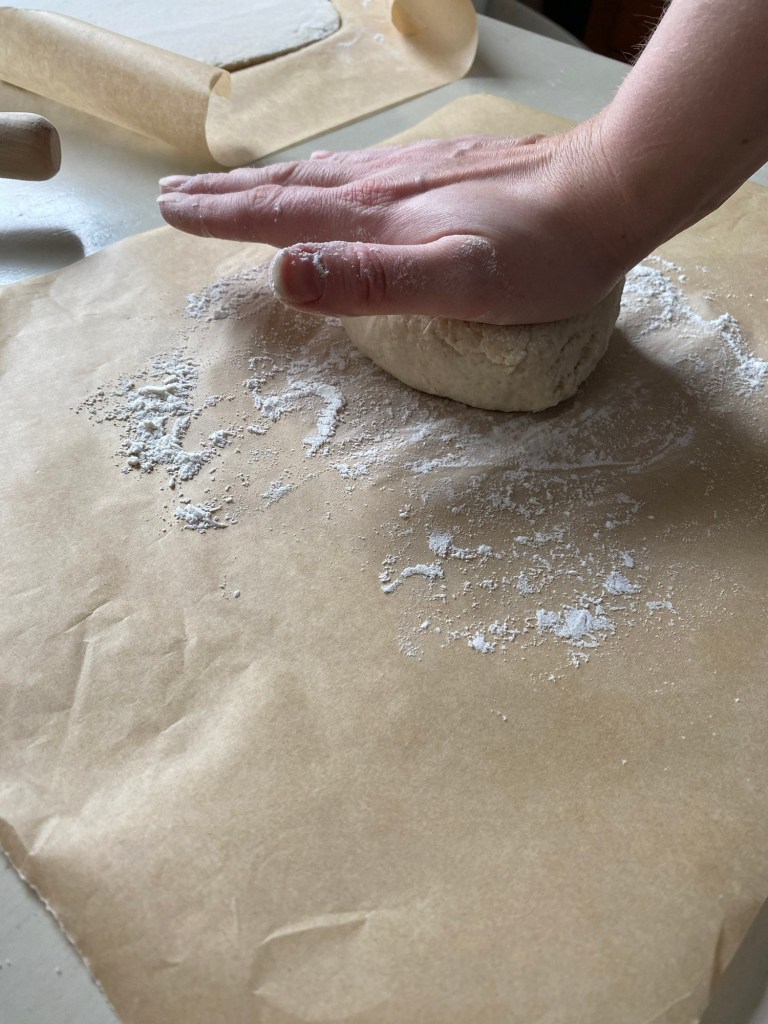
5. Divide into 2 balls and roll out to 1/4” thick (or about 1/2 centimeter). *You can try putting a flattened ball between two sheets of parchment paper with flour and rolling it this way, or just flour up a surface and roll out, adding flour as you go. (Try not to add too much flour, just enough so that it doesn’t stick to the parchment or pin!)
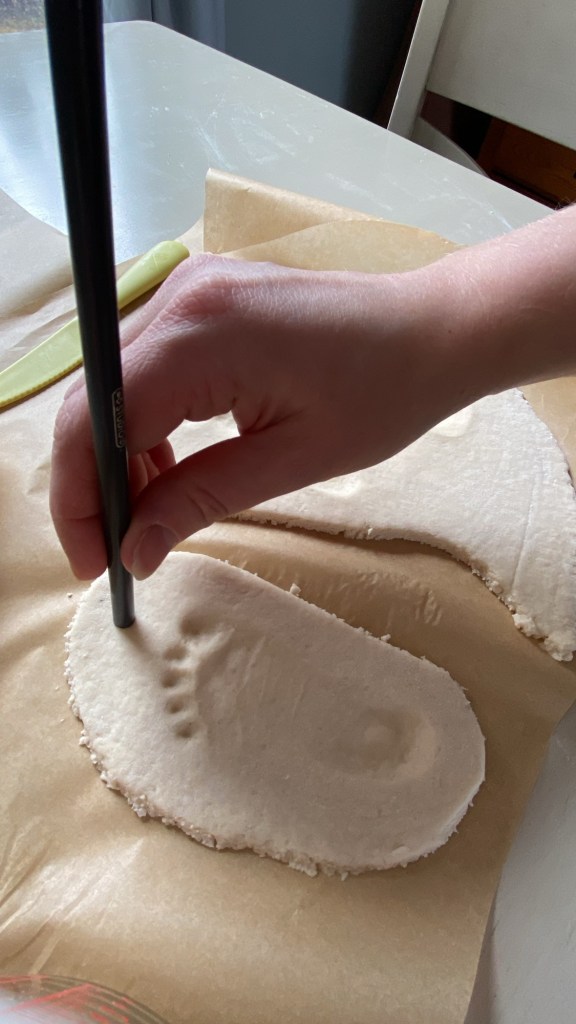
6. While baby is held overtop of dough area by one person, another can gently take the hand or foot and press firmly into the soft dough. Make sure to poke each finger and toe so that you get the full imprint! (If you have a really wriggly baby, feet are definitely much easier to do than hands!)
7. If the print is not very deep, it will be harder to see, especially after baking. Use your finger or gently use a utensil to deepen the baby’s print to make it more visible.
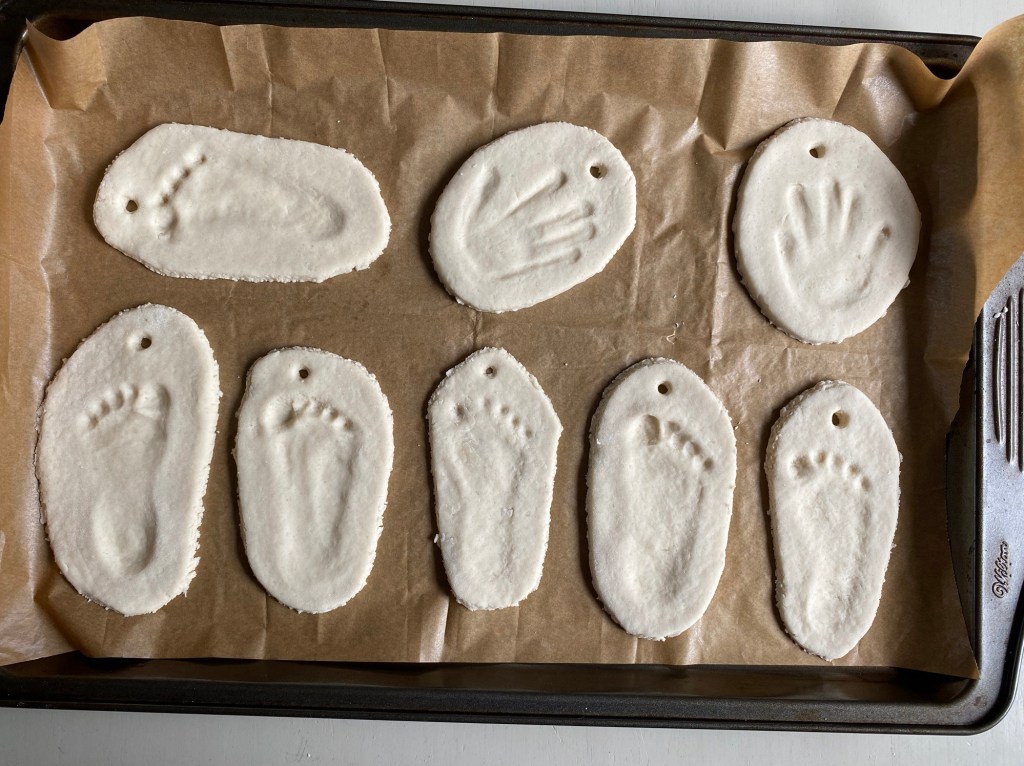
8. Use dull knife or large cookie cutter to cut out baby’s print. Gently place on a parchment covered baking sheet, spaced out evenly with other baby prints.
9. Poke a hole above the print for the ribbon, leaving at least 1/2 inch of dough before the edge.
10. Bake on middle rack for about 1.5-2 hours (90-120 minutes). The timing will largely depend on the thickness of the baby prints, so I recommend checking it after 1 hour, and every 20 minutes after that. When done it will be mostly hard yet slightly soft on top (not squish-able!) and slightly golden on bottom. Turn the oven off at this point and just let them continue to dry out in the oven for another hour (or longer if you want, just make sure not to forget about them for the next time you use the oven!)
11. Remove from oven and transfer to cooling racks.
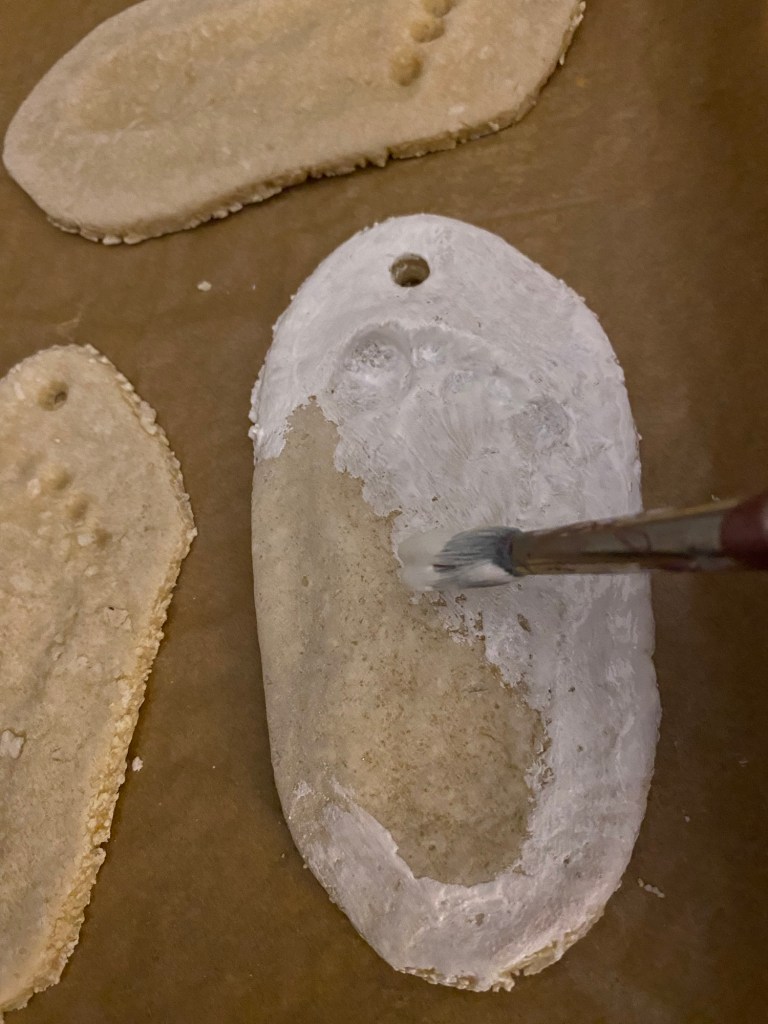
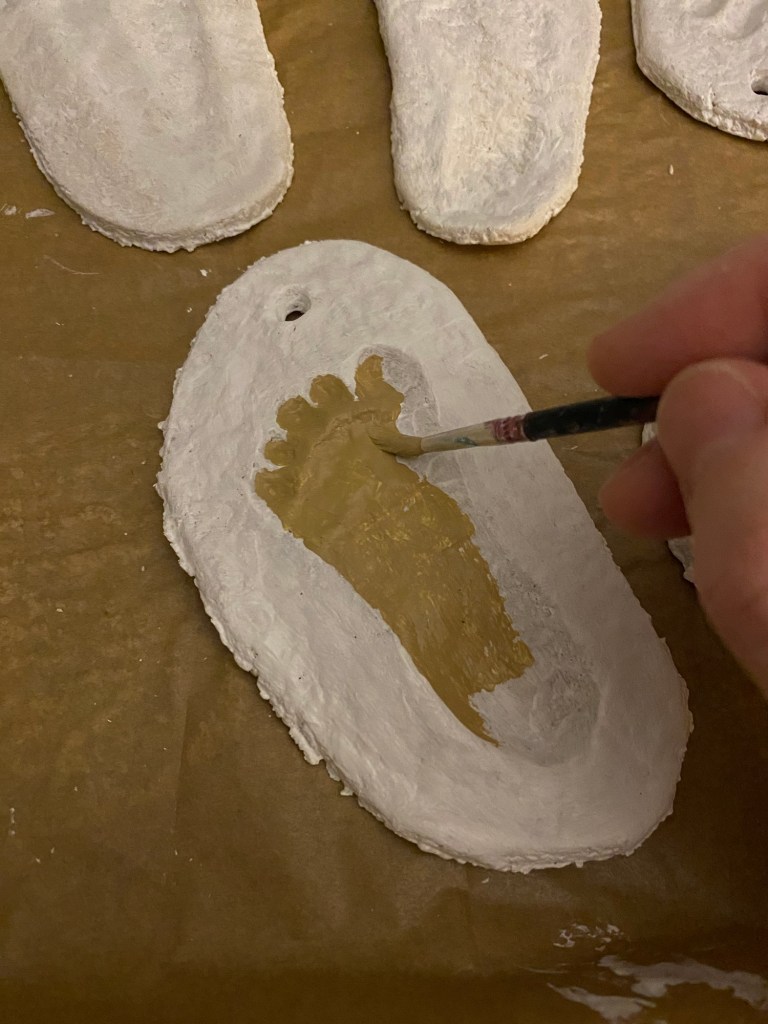
12. When fully cooled (or the next day!) you can use acrylic paint if desired to paint the baby’s imprint area so it can be seen better, and decorate however you like. I also painted the backs once the front side had dried.
13. Seal with mod podge or other craft sealer to help it stay dry and preserved.
14. Don’t forget to write your baby’s name and age with a permanent marker so you don’t forget this precious moment in your baby’s life.
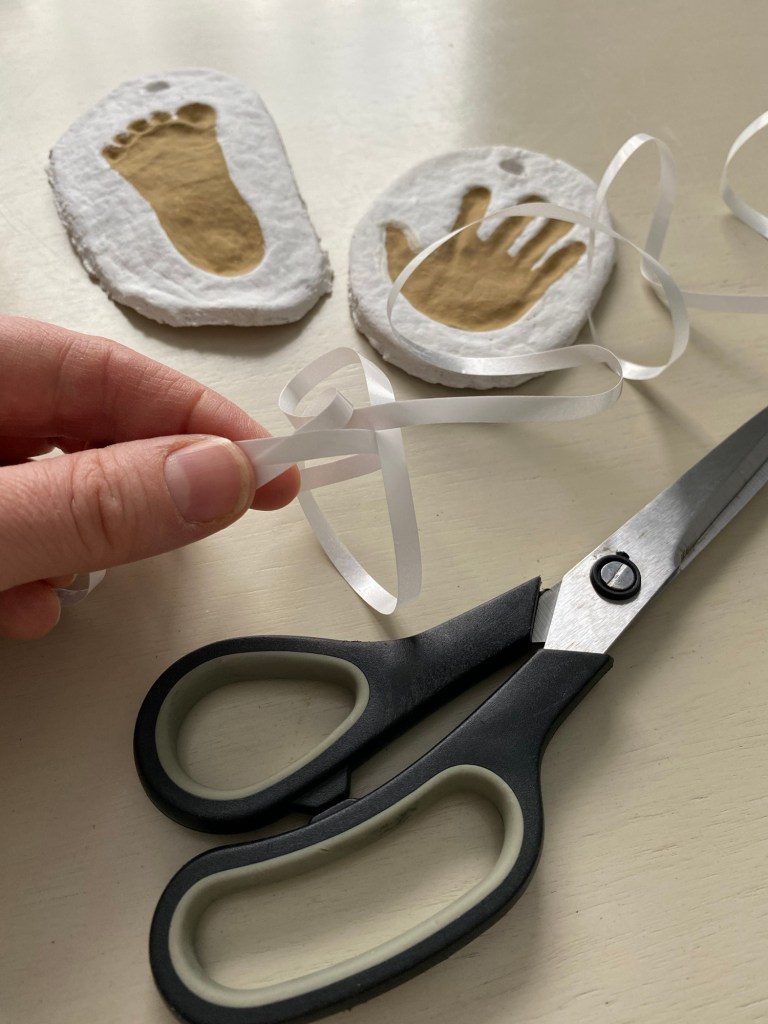
15. Tie with a ribbon and wrap up carefully when not in use. Keep in mind that it may still break if dropped (it is salt dough after all!).
Additional Notes:
1. This recipe makes enough for about 10 handprint or footprint infant ornaments.
2. I had some ornaments puff up while being baked several years ago, using other recipes. So after tweaking it and having many great results, I have learned that puffing up usually happens from these three avoidable things:
Having the oven too hot
The dough hasn’t been rolled out thin enough
The dough has mini air pockets in it
Made This Recipe?
I’d LOVE to see your results!! Feel free to post to your social media account and tag Northbird using one of these links:
I’m a Wife and Homeschooling Mom living in a remote town in Northern Ontario, Canada.I love making wholesome meals for my family from scratch, homeschooling our girls and learning more about natural living.
Subscribe to Northbird’s email list to get weekly posts on: tasty recipes, activity ideas for kids, natural living tips, and some genuine mom thoughts and encouragement!
Mix flour and salt together in medium size bowl. (Add any additional sparkles or cinnamon if you want at this point, but keep in mind if you want to paint later on it may not matter too much!)
Add just enough water to make it into a soft dough.
Knead for 2-3 minutes so dough is a smooth ball.
Divide into 2 balls and roll out to 1/4” thick (or about 1/2 centimeter). *You can try putting a flattened ball between two sheets of parchment paper with flour and rolling it this way, or just flour up a surface and roll out, adding flour as you go. (Try not to add too much flour, just enough so that it doesn’t stick to the parchment or pin!)
While baby is held overtop of dough area by one person, another can gently take the hand or foot and press firmly into the soft dough. Make sure to poke each finger and toe so that you get the full imprint! (If you have a really wriggly baby, feet are definitely much easier to do than hands!)
If the print is not very deep, it will be harder to see, especially after baking. Use your finger or gently use a utensil to deepen the baby’s print to make it more visible.
Use dull knife or large cookie cutter to cut out baby’s print. Gently place on a parchment covered baking sheet, spaced out evenly with other baby prints.
Poke a hole above the print for the ribbon, leaving at least 1/2 inch of dough before the edge.
Bake on middle rack for about 1.5-2 hours (90-120 minutes). The timing will largely depend on the thickness of the baby prints, so I recommend checking it after 1 hour, and every 20 minutes after that. When done it will be mostly hard yet slightly soft on top (not squish-able!) and slightly golden on bottom. Turn the oven off at this point and just let them continue to dry out in the oven for another hour (or longer if you want, just make sure not to forget about them for the next time you use the oven!)
Remove from oven and transfer to cooling racks.
When fully cooled (or the next day!) you can use acrylic paint if desired to paint the baby’s imprint area so it can be seen better, and decorate however you like. I also painted the backs once the front side had dried.
Seal with mod podge or other craft sealer to help it stay dry and preserved.
Don’t forget to write your baby’s name and age with a permanent marker so you don’t forget this precious moment in your baby’s life.
Tie with a ribbon and wrap up carefully when not in use. Keep in mind that it may still break if dropped (it is salt dough after all!).