
Find Northbird on social media:
This post contains affiliate links. As an Amazon associate, I earn from qualifying purchases. This means that I make a small commission at no extra cost to you. You can read my full disclosure HERE.
Return to Christmas Activities
Jump to Printable Craft Directions
It’s FINALLY December?!
Up here in Northern Ontario we’ve had snow for several weeks now and our local Moose River has finally begun to freeze over. But it’s honestly felt like this year had the longest November that I can remember, and December seemed to take forever to come!
Our friendly neighbourhood has now started hanging up Christmas decorations, and the local schools have begun hosting Christmas bazaars every weekend leading up to the holidays.
“For it is good to be children sometimes, and never better than at Christmas, when it’s mighty founder was a child Himself.” -Charles Dickens
The kids are getting so excited for Christmas (especially our oldest), not only with decorating our home and having lots of community parties, but also the chance to hop on the train south to visit our families.
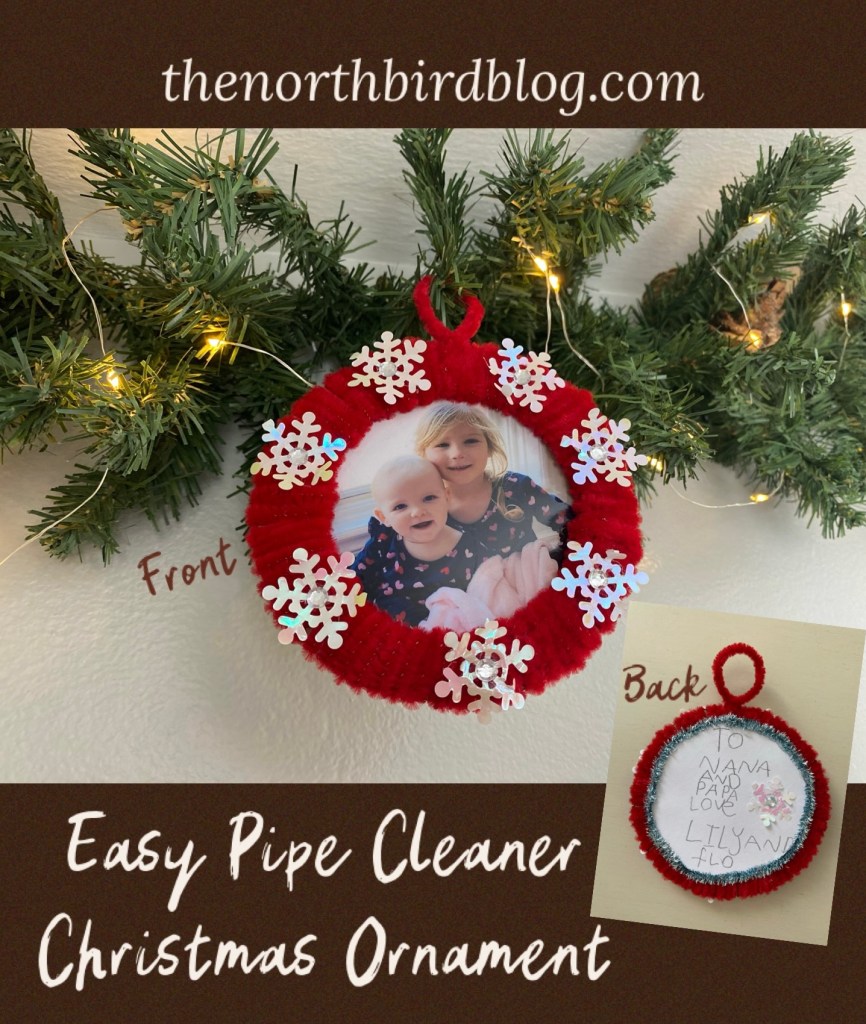
Every year I have tried to organize an ornament craft for our oldest to make and give to her Daddy, grandparents, and other relations and friends. This always gives her a sense of pride and accomplishment to see something that she has made and worked hard on to end up on our relation’s Christmas trees, and hung on garland throughout our family’s living room.

Usually I look for ideas on Pinterest or Google that are somewhat flat and could travel well by mail, as many of our relatives live far away from us and we are not able to see everyone in the short time we travel south at Christmas.

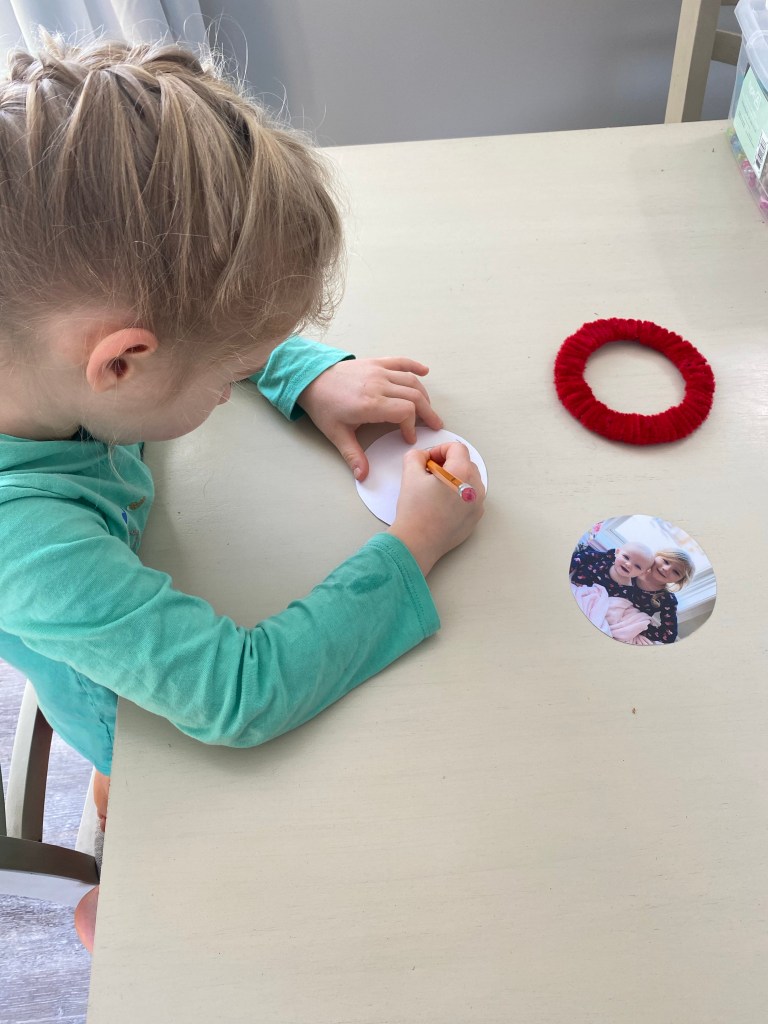
The other day I looked around the house at what we had to work with and ended up creating this easy and customizable picture ornament with my oldest daughter.
I hope this simple gift idea inspires you and your kids with fun and joy this season!
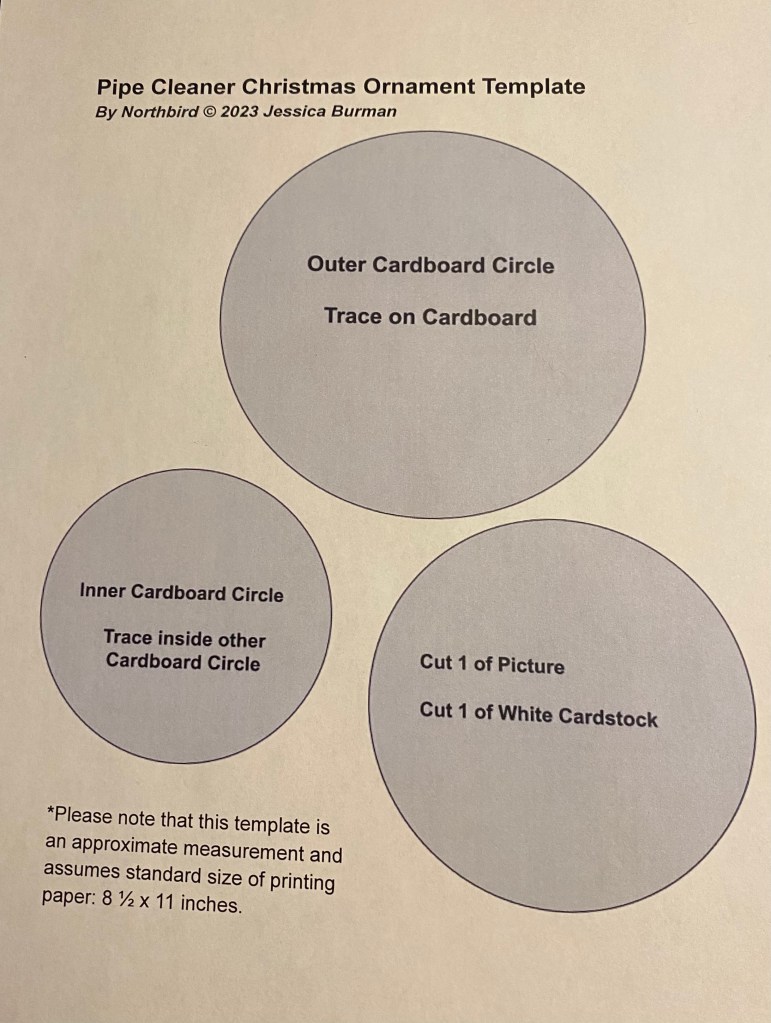
You can download the FREE pre-measured circle template HERE.


How to make this Easy Pipe Cleaner Christmas Ornament:
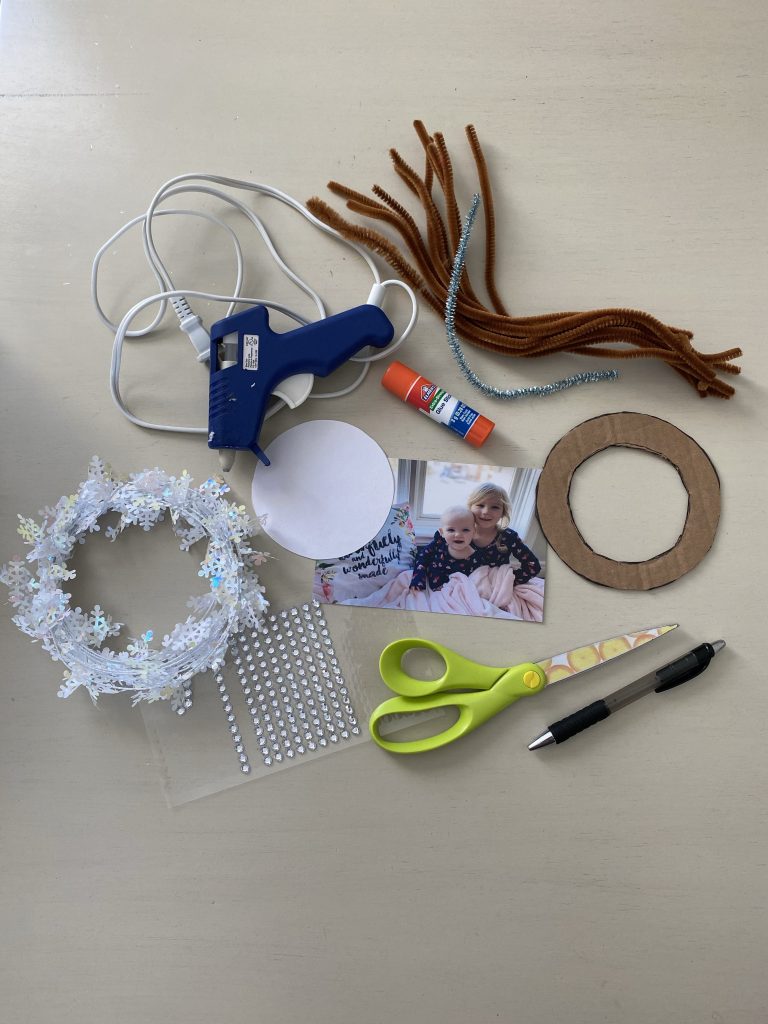
Supplies Needed:
- Hot glue gun
- Glue stick
- Pen or marker
- Scissors
- Pipe cleaners (10-15, depending on how long they are and how thick you wrap the cardboard)
- Cardboard
- Print the free template to trace the circles HERE
- Round plastic containers to trace, different sizes (If you aren’t able to print the template)
- Picture
- White card stock paper
- Items to decorate with (glue or stick on)
Directions:
1. Trace cardboard circles, using two different sizes of round cups or plastic containers. The outer circle is approximately 5 inches (12.5cm) in diameter, and the inner one is 3 inches (8cm) in diameter. Disregard this if you are able to print the template, and simply follow the template directions.
2. Cut out the centre of the cardboard circle.

3. Begin wrapping the pipe cleaners around the cardboard frame, tucking in the end pieces when you start a new pipe cleaner. Tuck the final piece in.

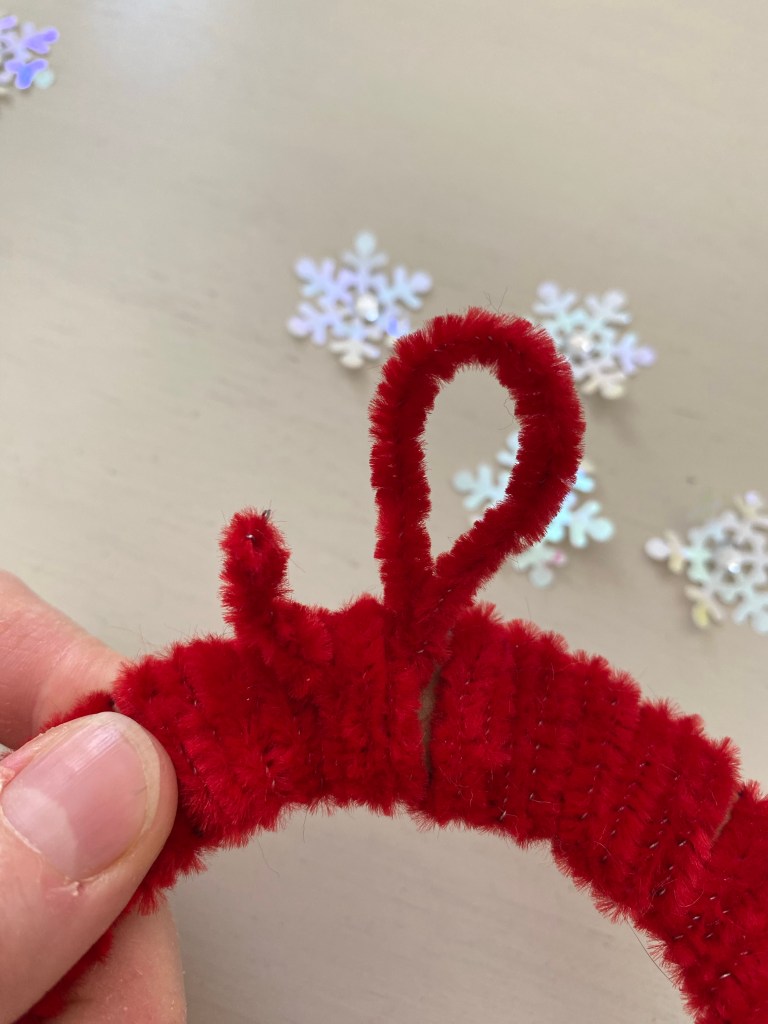
4. Make a loop out of a pipe cleaner and attach and tuck it through a few strands, twisting it so it doesn’t come undone.

5. Trace around another round plastic container and cut out circles of your chosen picture and a piece of white card-stock paper. I used a circle size that was middle in size comparison to the other two circles, approximately 3 1/2 inches (9 cm) in diameter. The free printable template includes this too.


6. Write a personal message if desired, or instead cut out another picture to insert, so that there is a picture to see on both sides of your ornament.
7. Use your glue stick to glue the backs of the two circles together.

8. Take your hot glue gun (I recommend that adults handle this part!), and put glue around the edge of the picture front, then place the pipe cleaner frame on top of the picture and hold in place firmly while the glue dries (its fast!)


9. Add any desired decorations to the front and back. For this, we hot glued jewelled snowflakes to both sides and also glued a sparkly pipe cleaner to the back ring to hide the paper edge.
10. Enjoy! I’d love to hear from you and see how yours turned out!

Download and print the Free Circle Templates HERE.
More Homeschooling Crafts & Activities to Check Out:


Hi, I’m Jessie!
I’m a Wife and Homeschooling Mom living in a remote town in Northern Ontario, Canada. I love making wholesome meals for my family from scratch, homeschooling our girls and learning more about natural living.
Read more about my story HERE.

Subscribe to Northbird’s email list to get weekly posts on: tasty recipes, activity ideas for kids, natural living tips, and some genuine mom thoughts and encouragement!
Recent posts from Northbird:


Pipe Cleaner Christmas Ornament
Here's an Easy Christmas Ornament Craft to do with your child this season!
Supplies Needed:
Directions:
- Trace cardboard circles, using two different sizes of round cups or plastic containers. The outer circle is approximately 5 inches (12.5cm) in diameter, and the inner one is 3 inches (8cm) in diameter. Disregard this if you are able to print the template, and simply follow the template directions.
- Cut out the centre of the cardboard circle.
- Begin wrapping the pipe cleaners around the cardboard frame, tucking in the end pieces when you start a new pipe cleaner. Tuck the final piece in.
- Make a loop out of a pipe cleaner and attach and tuck it through a few strands, twisting it so it doesn’t come undone.
- Trace around another round plastic container and cut out circles of your chosen picture and a piece of white card-stock paper. I used a circle size that was middle in size comparison to the other two circles, approximately 3 1/2 inches (9 cm) in diameter. The free printable template includes this too.
- Write a personal message if desired, or instead cut out another picture to insert, so that there is a picture to see on both sides of your ornament.
- Use your glue stick to glue the backs of the two circles together.
- Take your hot glue gun (I recommend that adults handle this part!), and put glue around the edge of the picture front, then place the pipe cleaner frame on top of the picture and hold in place firmly while the glue dries (its fast!)
- Add any desired decorations to the front and back. For this, we hot glued jewelled snowflakes to both sides and also glued a sparkly pipe cleaner to the back ring to hide the paper edge.
- Enjoy! I’d love to hear from you and see how yours turned out!

