Easy Asparagus Cheese Frittata

Find Northbird on social media:

This post contains affiliate links. As an Amazon associate, I earn from qualifying purchases. This means that I make a small commission at no extra cost to you. You can read my full disclosure HERE.

Jump to Recipe Card

Return to “Soups & Entrees”

Asparagus Cheese Frittata:

This recipe has been a favourite meal for many years now. My mother made the original version from a very well worn cookbook, and the recipe changed over the years to taste preference for the family.

When I left my parent’s home for college, I started making my own version of it. It tended to change based on what was available in the pantry, and did not always turn out entirely well. This version of the recipe is a particular favourite with our girls, and it makes for an easy breakfast or lunch the next day too!

I love the simplicity of this meal: Mix everything together, pour into baking pan, smother with cheese and bake!

How to make Asparagus Cheese Frittata:

Supplies needed:

Ingredients:

  • 10 eggs
  • 1/2 cup flour
  • 1 teaspoon baking powder
  • 3/4 teaspoon sea salt
  • 1/2 teaspoon ground black pepper
  • 1/2 cup olive oil
  • 2 cups cheese grated, plus more for top
  • 1 can (398ml/4oz) creamed corn
  • 1- 1 1/2 cups chopped asparagus (1 small bunch)
  • 1 cup chopped spring onions or scallions

Directions:

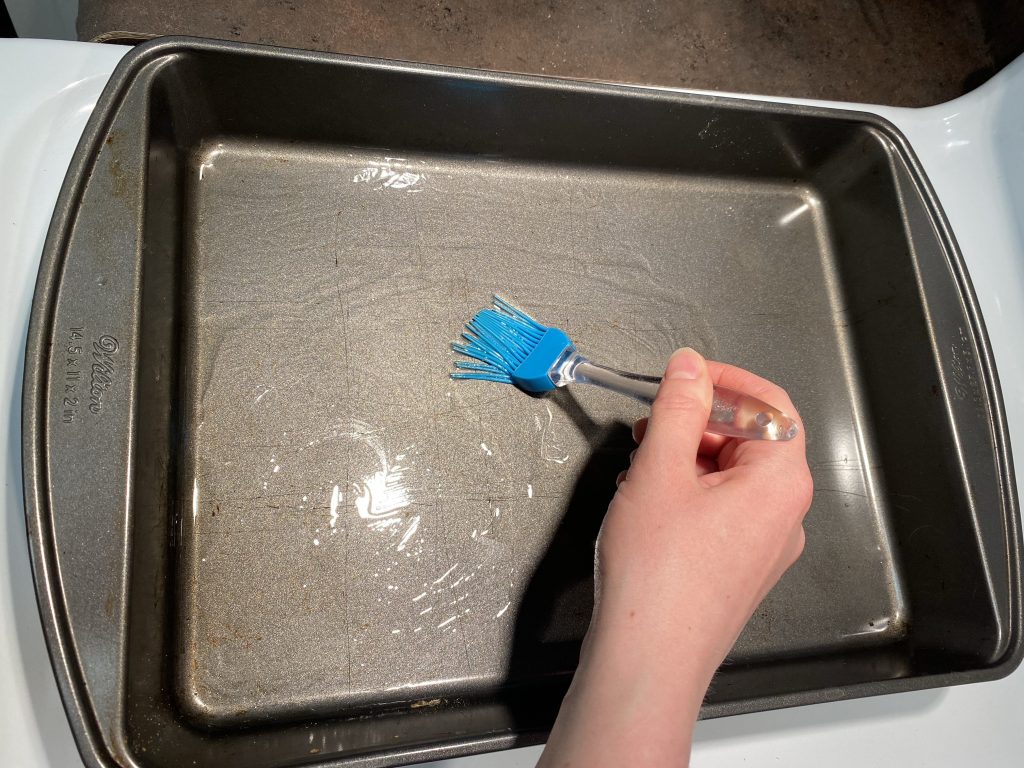
  1. Preheat oven to 350 degrees F, and grease 9”x13” baking pan.

2. Whisk eggs together in large bowl.

3. Add flour, baking powder, salt and pepper. Whisk together.

4. Add the remainder of ingredients, mix thoroughly, and pour into greased 9″x13″ pan.

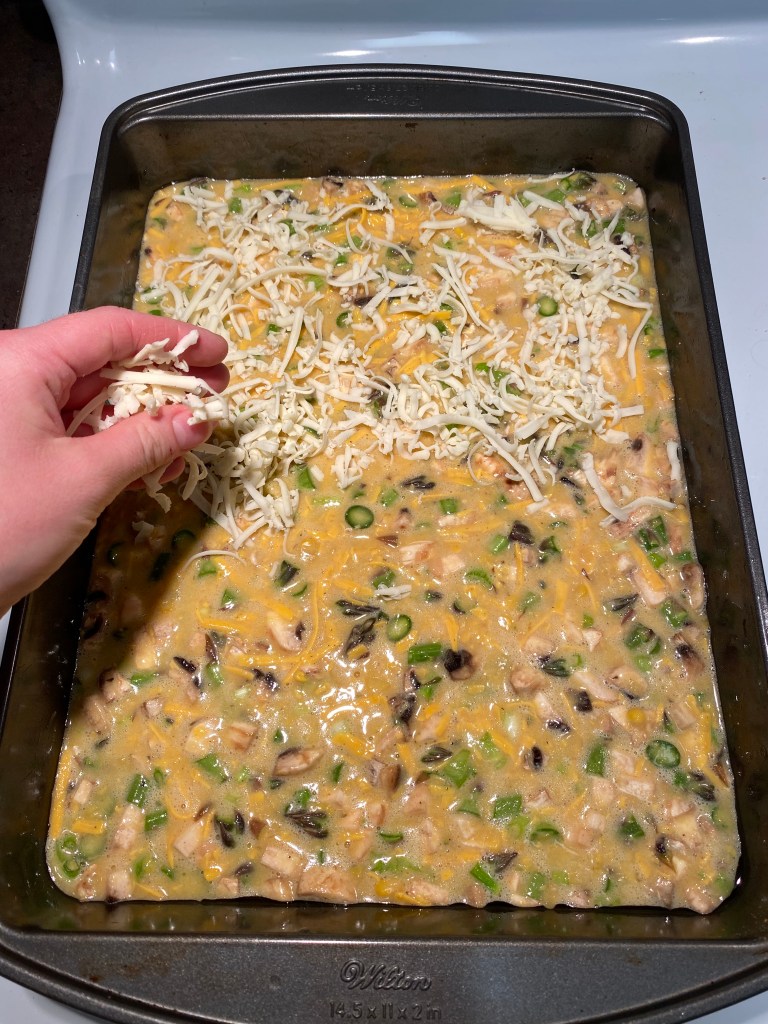
5. Cover top with extra grated cheese.

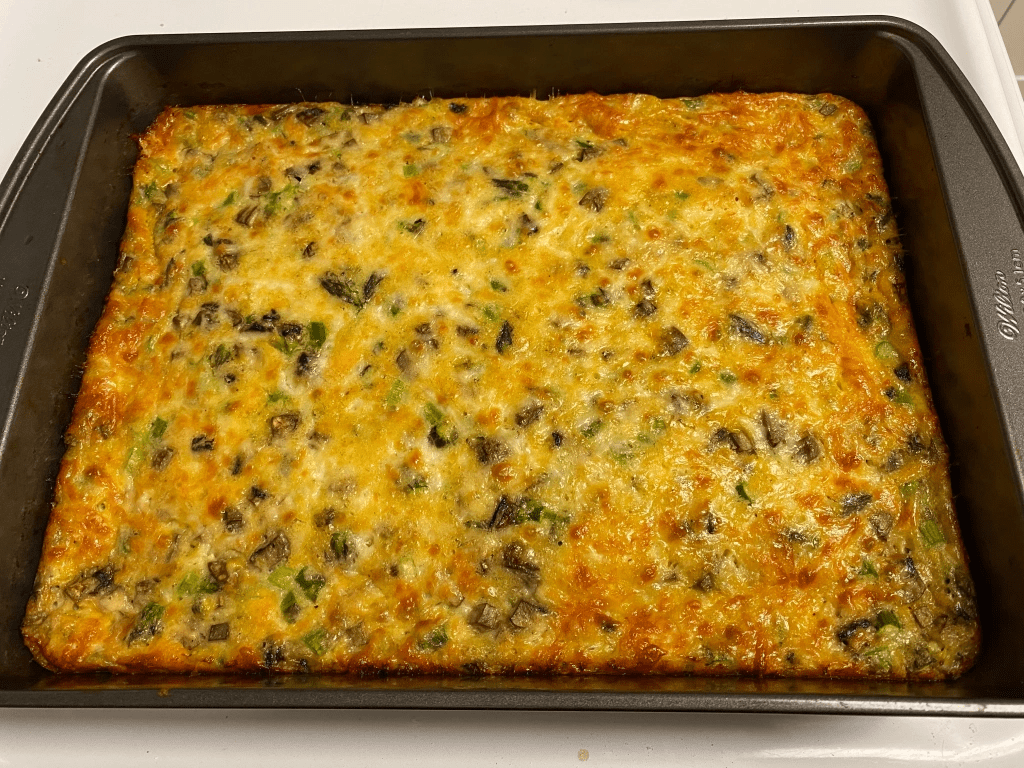
6. Bake for 30-45 minutes until Frittata is firm to a gentle jiggle and golden on top.

7. Let sit for 5 minutes before serving.

How to store it for later

It also freezes incredibly well in an airtight plastic container, aluminum foil freezer container (to reheat in oven easily). To reheat, place frozen frittata pieces on a cookie sheet and bake at 300 degrees F until heated through. Another favourite that we have done in the past is to roll some leftovers inside a tortilla wrap, wrap it in foil, and put in a freezer bag to freeze for a delicious on-the-go breakfast wrap! Simply pop in the microwave (foil off!) to reheat from frozen.

We have also made it with broccoli and zucchini (the original vegetable), but asparagus is our personal favourite. The last time I made this dish (when some of these pictures were taken), I also added some chopped mushrooms which were delicious.

If you are looking for a non-vegetarian option then you can always add chopped bacon to the mix and topping. Because everything is better with bacon, right?!

What is a Frittata?

A frittata is traditionally a Italian egg-based dish that typically has meat, vegetables and cheese in it. Unlike a omelette or scramble, the frittata is cooked in one piece without it being folded over or mixed while cooking.

It is also usually cooked slowly on the stove and/or entirely baked in the oven and then served after cooling a bit. That makes this a great option for a delicious brunch dish!

Making Frittata with a Cast Iron Skillet:

If you have a cast iron deep fry pan, you can make it with the traditional method by:

1. Preheat cast iron skillet on stove with some olive oil in pan.

2. Gently cook asparagus or any other vegetables (like broccoli, green beans, brussel sprouts or zucchini) in pan on medium heat until soft.

3. Pour the rest of the batter into pan and gently stir in. Add extra grated cheese to the top.

4. Let cook without mixing until the eggy edges turn lighter (about 1 minute).

5. Remove from stove top and put in preheated oven. Bake for 30-40 minutes until golden on top and has a slight jiggle.

Other Soups and Entrees to Check Out:

Hi, I’m Jessie!

I’m a Wife and Homeschooling Mom living in a remote town in Northern Ontario, Canada. I love making wholesome meals for my family from scratch, homeschooling our girls and learning more about natural living.

Read more about my story HERE.

Subscribe to Northbird’s email list to get weekly posts on: tasty recipes, activity ideas for kids, natural living tips, and some genuine mom thoughts and encouragement!

Easy Asparagus Cheese Frittata

  • Servings: 6
  • Difficulty: Easy
  • Print

A Quick and Easy Vegetarian Dinner Dish


Ingredients

  • 10 eggs
  • 1/2 cup flour
  • 1 teaspoon baking powder
  • 3/4 teaspoon sea salt
  • 1/2 teaspoon ground black pepper
  • 1/2 cup olive oil
  • 2 cups cheese grated, plus more for top
  • 1 can (398ml/4oz) creamed corn
  • 1- 1 1/2 cups chopped asparagus (1 small bunch)
  • 1 cup chopped spring onions or scallions

  • Directions

    1. Preheat oven to 350 degrees F, and hrease 9”x13” baking pan.
    2. Whisk eggs together.
    3. Add flour, baking powder, salt and pepper. Whisk together.
    4. Add the remainder of ingredients and mix thoroughly.
    5. Pour into greased baking pan.
    6. Cover top with extra grated cheese.
    7. Bake for 30-45 minutes until Frittata is firm and golden on top.
    8. Let sit for 5 minutes before serving.

    Nutrition


    Per Serving: 493 calories; 31.8 g fat; 14.6 g carbohydrates;
    21 g protein; 347 mg cholesterol; 792 mg sodium.

    Return to Top

    Homemade Almond Milk Recipe

    Find Northbird on social media:

    This post contains affiliate links. As an Amazon associate, I earn from qualifying purchases. This means that I make a small commission at no extra cost to you. You can read my full disclosure HERE.

    Jump to Recipe Card

    Return to “Breakfasts”

    Making Almond Milk From Scratch

    We have been making our own almond milk for several years now, and before that we always bought a carton from the store. One day I did the math and realized that not only was the homemade milk healthier and free from tons of preservatives but also cost way less too!

    Unless we are away from home or in the middle of packing for a move (which has happened a lot!), we always try to have 1-2 large jars of homemade almond milk on the go.

    When we first started making it, we bought a refurbished Blendtech blender (which has since then paid for itself!), and a couple of mesh nut milk bags.

    We usually buy our almonds from Costco and Yupik (Amazon) , as they seem to have the best price for almonds when we do our southern grocery pantry stock-up. We currently buy several large packages a year, and make almond milk 1-2 times a week.

    If purchasing a larger bulk amount of almonds, they can also be frozen to stay fresher, which we have done in the past when we have freezer space.

    How to Make Almond Milk

    Supplies Needed:

    Ingredients:

    • 1 cup raw almonds
    • Water for soaking
    • 4 cups water for blending
    • 3 pitted dates (optional)
    • 1 teaspoon vanilla (optional)
    • 1 tablespoon honey (optional)

    Directions:

    1. Soak 1 cup of almonds overnight at room temperature, or for at least 8 hours. Make sure the almonds are covered well with water to allow the almonds to expand. I like to use beesewax covers on top while they soak.

    (Sometimes at the end of the day I realize that I forgot to blend them up, so instead of using the noisy blender and potentially waking the kids, I rinse the almonds really well, change the water and put it in the fridge to blend up the next day).

    2. Rinse well after soaking, then add to the blender with 4 cups of water.

    3. If you want you can add a sweetener like honey (1 Tablespoon) or vanilla (1 teaspoon), or (my husband’s favourite) adding 3 pitted dates to the blender before pulsing.

    3. Blend well, until no visible chunks of almond pulp. Usually takes about a minute on our medium setting, but every blender is different.

    4. Pour into bowl, through nut milk bag. I usually give a little rinse of the blender and pour the rest through as well.

    5. Gently squeeze the nut milk bag with your hands until most of the liquid is out and you are left with the pulp. Set pulp aside (don’t throw out! Can be used in many more recipes!)

    7. Pour into glass jars, usually makes about 1500ml, so we use x2 1L glass mason jars. We use this pourable mason jar lid found on Amazon and love it!

    8. Serve and enjoy! Store in fridge for up to one week.

    Notes: You may notice that it separates after a day or so. This is normal and perfectly fine. Just give it a shake before enjoying it.

    Pros and Cons of Making Your Own Almond Milk:

    Pros:

    • You can adjust the sweetness level and flavour
    • Free from preservatives and additives
    • You can soak almonds in the evening and blend it up fresh the next morning
    • No more running to the store to get forgotten milk!

    Cons:

    • Timing: you’ll need to plan ahead
    • Cannot make it instantly without losing some of the nutrients from un-soaked almonds
    • A few more dishes to wash (haha)

    Why is it Important to Soak Your Almonds Before Eating or Making into Milk?

    I have seen a lot of recipes out there for almond milk, but many of them skip over the importance of soaking your almonds in water for several hours prior to blending them into milk.

    When soaked, they not only become easier to blend up into milk, but they also taste way better. Some compare it to a buttery-creamy taste!

    But most importantly, un-soaked almonds contain an enzyme inhibitor called phytic acid, which prevents the body from absorbing nutrients, and makes it harder for the body to digest. Beans and legumes are the same as nuts in this regard, they all need to be soaked and well rinsed to activate optimal absorption of goodness!

    When almonds are soaked for 8-12 hours, fully submerged in water, this phytic acid is released from the nut. You can see it as a cloudy muck that develops in the soaking bowl around the almonds, which is why it is important to rinse them well before blending into milk!

    Can I Still Eat Dry, Raw Almonds?

    Absolutely! I love eating raw almonds, and I’d rather eat them any day over a bag of chips as a snack!

    But after realizing that my body can’t properly absorb any nutrients from unsoaked almonds, I wanted to find another way to still enjoy dry, raw almonds. After all, they are one of those awesome trail mix staples!

    How to Dry and Store Soaked Almonds:

    1. Short Term: After soaking almonds for 8-12 hours, you can spread them out on a clean towel and let dry for 12-24 hours. Store in the fridge in an airtight container for up to 1 week.
    2. Long Term: Soak 1 cup raw almonds with 1/2 tablespoon sea salt, covered with water for 8-12 hours. If using the Oven: Spread on cookie sheet in single layer and dry at lowest temperature 12-24 hours until dry. If using a Dehydrator: Spread on dehydrator tray in single layer and dry at 150 for 12-24 hours until dry. Make sure they are completely dry to avoid risk of mold! Store in an airtight container for up to 1 year.

    What Can I do With the Leftover Almond Meal from Making Milk?

    The leftover almond meal is AMAZING. There are so many ways to use this delicious pulp. I am working on developing recipes into posts to link to this page with ideas, but in the meantime, here’s a list of my favourite ways to use up almond pulp (and some extra inspiration as well!):

    1. Put the pulp in a plastic container in the freezer until you are ready to use it up. When you have time, thaw to use almond meal in:
      • Energy Balls
      • Granola
      • Oatmeal & Breakfast Splodge
      • Overnight Oats
    2. Put the pulp on a baking sheet and dry out in the oven (200 degrees F for 1-2 hours), then blend up into flour and store at room temperature. Shelf stable for several months. Use as almond flour in:
      • Cookies & Squares
      • Waffles & Pancakes
      • Cakes & Pies
      • Pastries & Breads
      • Muffins & Biscuits
      • Crackers
      • Breadcrumbs (before blending to flour) ………..The list goes on!
    Almond meal, after drying in the oven.

    After the blender, it’s Homemade Almond flour!

    Check out these other Breakfast Recipes from the Northbird Kitchen!

    Hi, I’m Jessie!

    I’m a Wife and Homeschooling Mom living in a remote town in Northern Ontario, Canada. I love making wholesome meals for my family from scratch, homeschooling our girls and learning more about natural living.

    Read more about my story HERE.

    Subscribe to Northbird’s email list to get weekly posts on: tasty recipes, activity ideas for kids, natural living tips, and some genuine mom thoughts and encouragement!

    How to Make Almond Milk

    • Servings: 6 cups
    • Difficulty: Easy
    • Print

    Easy and Delicious: How to Make Your Own Almond Milk!


    Please Note: You may notice that it separates after a day or so. This is normal and perfectly fine. Just give it a shake before enjoying it.


    Ingredients

  • 1 cup raw almonds
  • Water for soaking
  • 4 cups water for blending
  • 3 pitted dates (optional)
  • 1 teaspoon vanilla (optional)
  • 1 tablespoon honey (optional)

  • Directions

    1. Soak 1 cup of Almond milk overnight for 8-12 hours. Make sure the almonds are covered well with water to allow the almonds to expand.
    2. Rinse well after soaking, then add to the blender with 4 cups of water.
    3. If you want you can add a sweeteners to the blender before pulsing. (See suggestions)
    4. Blend well, until no visible chunks of almond pulp. Usually takes about a minute on our medium setting, but every blender is different.
    5. Pour into bowl, through nut milk bag.
    6. Gently squeeze the nut milk bag with your hands until most of the liquid is out and you are left with the pulp. Set pulp aside and use in other recipes. See above for ideas.
    7. Pour into glass jars, usually makes about 1500ml or approximately 6 cups.
    8. Store in fridge for up to one week

    Nutrition


    Per 1 cup Serving: 32 calories; 3 g fat; 1 g carbohydrates;
    2 g protein; 0 mg cholesterol; 0 mg sodium.

    Return to Top

    Baby Breakfast: Yogurt and 3 Seed Breakfast Bowl

    Find Northbird on social media:

    This post contains affiliate links. As an Amazon associate, I earn from qualifying purchases. This means that I make a small commission at no extra cost to you. You can read my full disclosure HERE.

    Jump to Recipe Card

    Return to “Breakfast”

    This delicious breakfast dish has long been in use within our family, and originated from my parents who faithfully have it nearly every morning. It has many variations, based on what is available for the added toppings, but this particular version is our family favourite. It has been affectionately dubbed the title “splodge”.

    I am very thankful that our beautiful oldest daughter has always enjoyed eating pretty much everything on the menu except onions and spicy foods.

    We also have a very loved and very picky one year old daughter when it comes to food. I have learned that she likes eating anything with a smooth texture, or big cut up soft chunks, but nothing in-between! Pebbly textures, such as soaked whole chia seeds are a definite dislike!

    So that’s one reason why we blend chia up with flax and sunflower seeds in this breakfast blend, so that she still gets the delicious goodness but in a creamy, smooth texture when mixed with applesauce and homemade yogurt.

    How to Make Yogurt and 3 Seed Breakfast Bowl:

    Supplied Needed:

    Ingredients:

    • 1/2 cup Yogurt (Plain, unflavoured)
    • 1/4 cup of 3 Seed Breakfast Blend (Flaxseeds, Sunflower seeds and Chia seeds. *See Instructions below)
    • 1/4 cup of Applesauce (Unsweetened)
    • Toppings (Berries, chopped banana, other fresh fruit)

    Directions:

    1. Mix yogurt, 3 seed breakfast blend and applesauce together in serving bowl and let sit for 10 minutes.
    2. Add desired toppings to dish and serve!

    Additional Notes: Any kind of yogurt can be used, but plain greek or balkan style are lovely as they have less sugar than the flavoured ones and contain those lovely live bacterial cultures that help keep digestion happy.

    (EDIT: Since this post was written, I learned how to make yogurt in the crockpot! We now use homemade yogurt when we make this recipe for breakfast. You can read about it in the crockpot yogurt recipe post HERE.)

    How to Make the 3 Seed Breakfast Blend:

    Supplied Needed:

    Ingredients:

    Directions:

    1. Measure equal batches of seed into blender and pulse until grainy.

    2. Add to Jar and give it a good shake!

    3. Store in fridge for up to one month.

    A little more about the Seeds…

    Organic Golden Flaxseed:

    These are high in fibre and omega-3 fatty acids! They have also been shown to help lower blood pressure and blood sugar, contain protein, improve digestion (hence the fibre) and reduces bloating. Some doctors also claim it to help with weight loss.

    Important to note: Nutrition experts recommend the importance of grinding up flaxseed instead of eating it whole. Ground flaxseed is easier to digest and for your body to absorb the nutrients. Avoid buying it pre-ground, as it is best ground fresh and stored in the fridge. At room temperature it will lose some of its nutritional properties, which is why our Naturopath discouraged us from buying the pre ground sold at bulk barn!

    We buy organic flax seeds in bulk from a health food store in the south and then put in freezer bags and freeze until we need them. Big $ saver this way and ensures we always have some on hand for various recipes.

    Raw, Hulled Organic Sunflower Seeds:

    These are notably high in vitamin E and selenium, which act as a powerful antioxidant and supports your immune system and thyroid function. They also contain protein, magnesium, and linoleic fatty acids.

    We have also been able to buy these in bulk, and store them the same way as the flaxseeds. It is important to buy them raw and unsalted!

    Organic Chia Seeds:

    Chia seeds have had their waves of popularity over the past few years, but the science and nutritional values still speak for themselves. Chia seeds are amazing for lowering blood pressure, blood sugar and cholesterol, and improving overall heart health. They are high in fibre, which aids in digestion and reduces bloating.

    It is important to soak whole chia seeds for at least twenty minutes before eating them so that they become more digestible. This is true of most edible seeds! If we are eating them whole, we like to soak them in almond milk (see our recipe for homemade almond milk), but some people soak them in water as well.

    When they are soaked, the hard seed shell releases a gelatinous-like film around the seed, making it look like frog eggs or custard!

    We prefer to blend them up with Flax and Sunflower seeds in order to get optimal nutritional absorption when soaked in almond milk or yogurt, which this recipe suggests. When blending them, it is not necessary to soak for that long, roughly 10 minutes is all that is needed to thicken up the splodge.

    For our demographic area, the best price we have found is at Costco for Organic Chia Seeds, but you can also buy them from Amazon at a comparable price.

    Check out these other Breakfast Recipes from the Northbird Kitchen!

    Hi, I’m Jessie!

    I’m a Wife and Homeschooling Mom living in a remote town in Northern Ontario, Canada. I love making wholesome meals for my family from scratch, homeschooling our girls and learning more about natural living.

    Read more about my story HERE.

    Subscribe to Northbird’s email list to get weekly posts on: tasty recipes, activity ideas for kids, natural living tips, and some genuine mom thoughts and encouragement!

    Yogurt and 3 Seed Blend

    • Servings: 1
    • Difficulty: Easy
    • Print

    A Delicious and Baby-friendly Breakfast for Busy Mornings.


    This recipe is for 1 small bowl for baby or small child. You can double it for adult portion if desired.

    Ingredients

    • 1/2 cup Yogurt
    • 1/4 cup of 3 Seed Blend (See instructions above)
    • 1/4 cup of Applesauce
    • Berries or other fresh fruit

    Directions

    1. Mix Yogurt, Seed Blend and Applesauce in serving bowl.
    2. Let sit for about 10 minutes for seed blend to activate.
    3. Garnish with berries or other fresh fruit.

    Nutrition


    Per 1 cup Serving: 305 calories; 35 g fat; 29 g carbohydrates;
    15 g protein; 20 mg cholesterol; 73 mg sodium.

    Return to Top