
Find Northbird on social media:
This post contains affiliate links. As an Amazon associate, I earn from qualifying purchases. This means that I make a small commission at no extra cost to you. You can read my full disclosure HERE.

What is the Big Deal About Sourdough?
I was honestly asking myself this a year ago, and never really looked into it because we had so many transitions in our life: A new baby, moving OUT of the north, buying a house, moving BACK to the north…you get the idea.
We were way too busy for me to start a new hobby and spend the time to learn something new. And “sourdough” was a complicated process, right? Or so I thought!
We were out for dinner at another family’s house and my friend P had some fresh sourdough bread. She encouraged me to try it and gave some starter with instructions and a website to check out.
I was apprehensive and unsure if I was up for the challenge, but wanted to give it a try. After researching and building up my tiny starter for a few days, I made my first loaf. I was amazed at HOW EASY it really was!
After that, I decided that we would no longer buy bread, but would make it ourselves as much as possible. And the result: I learned to make and create a few different sourdough recipes, my tummy was happier because it could digest the fermented bread better and it largely cut down on our grocery bill. Not to mention the pride I felt in serving my family fresh baking made from scratch!

What is Sourdough Bread?
Sourdough bread is a natural leavening bread, which means that it rises without the use of commercial yeast. It is made using a fermented mixture of flour and water, called the starter, and mixed with more water, flour, and usually salt. The bread naturally rises as the dough ferments during resting stages. There are hundreds of variations of sourdough bread with different flavourings, texture and shapes.
Is Sourdough Good for You?
Yes! I have a sensitive tummy when it comes to bread products, and although I’m sure those struggling with celiac would still find sourdough bread hard to digest, I personally have no digestive problems with sourdough, compared to the traditional yeasted store-bought breads.

1. Sourdough bread is easier to digest than other breads. The fermenting that takes place while making sourdough breads produces amino acids, which in turn produces enzymes that help to break down proteins and lower the overall gluten levels in the bread (making it easier to digest).
2. Whole grain sourdough breads have a lower glycemic index than other types of bread, specifically white flour breads that have been processed and are packed full of preservatives. This means that sourdough breads have less of a glycemic spike, and more of a gradual release on the glycemic scale, making it a healthier option for those struggling with balancing blood sugar levels.
3. Sourdough bread contains higher levels of protein, fibre and nutrients than most breads.
- Sourdough bread still contains many of the natural nutrients that are processed out of the majority of other kinds of breads.
- It contains lower levels of phytate, which helps your body to absorb the nutrients easier than other breads.
- Whole grain sourdough is considered a high-fiber food, which feeds the good bacteria in your gut and digestive system.
- Common vitamins and minerals found in sourdough bread: Calcium, Iron, Manganese, B1-B6, B12, Potassium, Magnesium, Folate, Niacin, Zinc, Thiamin, Riboflavin, Selenium, Phosphorus, and Vitamin E.
What is a Sourdough Starter?
A sourdough starter is basically a fermented mixture of flour and water. Every day it is “fed” flour and water, and within several hours it becomes bubbly and the amount doubles in size. This is now called “active starter”. The “active” timing depends on your kitchen’s temperature and humidity, and also the feeding ratio of flour and water.
HOW & WHAT do I feed a Sourdough Starter?
The current starter I use every day is mostly made from all purpose flour. I have used bread flour, spelt flour and whole wheat flour to feed it in the past, but now I find it is easiest to use basic all purpose flour for feeding it with the ratio I have developed, (and can also better predict the bubbling up timing!) I am sure there is more science behind using different flours and ratio of starter/new flour/new water, so when I have learned and researched more then I will share this with you.
When I first started “sourdoughing”, I used a glass jar to store my starter, but have since started using a glass rectangle dish with clamp on lid. I was inspired by my friend R’s sourdough dish when I looked after it for a week, and loved how easy it was to measure amounts and stir.
I got this particular glass container from Ikea, and wrote on the side a “1 Cup” marking line with permanent marker that I use as a baseline to determine how much to feed it.
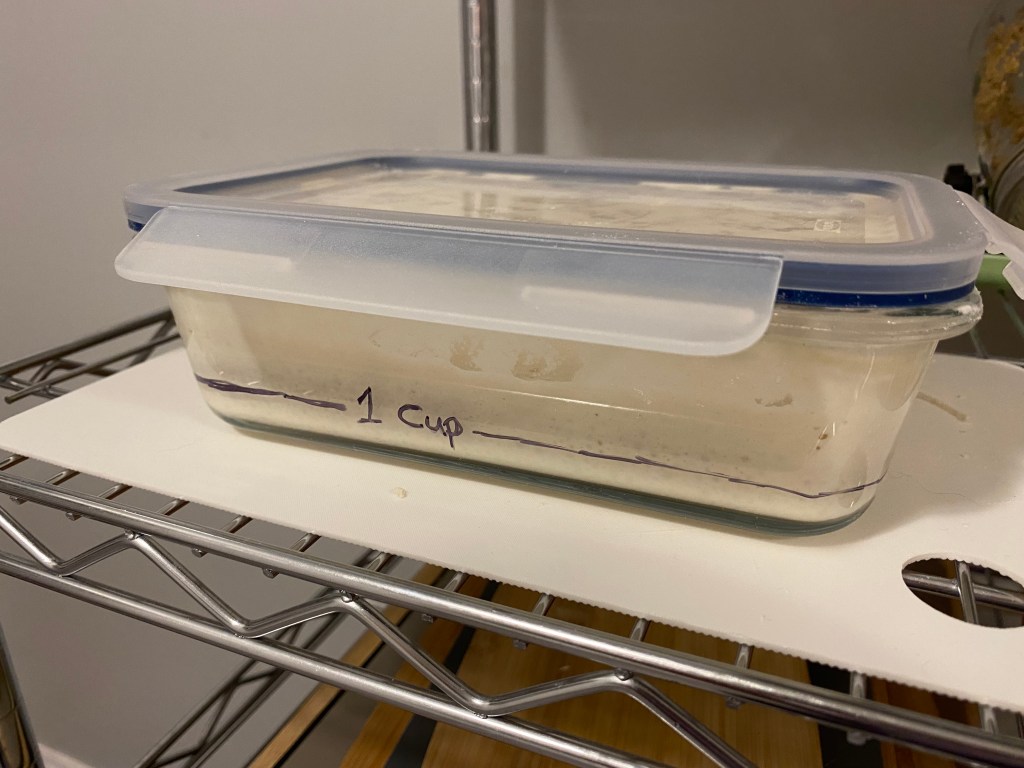
On the days that I plan on feeding it (because it’s not every day!) I will usually discard (spoon out/skim off the top) until I reach the 1 cup measuring line.
With 1 cup of starter in there, I will then add about 2/3 cup of all purpose flour and 1/3 cup of lukewarm/room temperature water. I have read that it’s best to use well water or distilled water instead of “town water” for feeding your starter, but have also had great results with unfiltered town water. Typically we use filtered water for feeding and recipes.
General feeding rule of thumb that I use: 1:1 ratio of {1 PART current starter : 1 PART added flour+added water}
After a good stir, the starter rests in a warm area of the kitchen on the counter (not in a cupboard!) and within 4-8 hours is bubbly, more than doubled in size, and ready. A great test is to take a cup of water and put a tiny spot of starter in it to see if it floats. If it floats, then it is ready!
As mentioned above, the timing of active starter readiness will be determined by the warmth and humidity of your kitchen. I have also found the active timing to change with the seasons.
Here in Northern Ontario we get temperatures nearing -50 degrees Celsius in the winter months, and our old kitchen has the furnace contained on one side of it. This means that when the other rooms of the house get chillier, the air vents in the kitchen will tend to come on more frequently and blast hot air into an already warm kitchen (especially if I am already cooking or baking that day!). On those days, the sourdough starter doesn’t take too long to bubble up for me.
I don’t have time to feed it and bake with it every day. What should I do?
I don’t make bread or other sourdough stuff everyday, so as soon as I’ve measured out the active starter I need for a recipe, I’ll put my starter container in the fridge with the lid clamps on. This will slow down the fermenting process and let it go a little dormant in the fridge until I’m ready to feed it and make something else again in a few days.
When in the fridge, the typical rule is to feed it once a week. To maintain a consistent amount of starter while in the fridge, then you will need to discard/spoon out some of the inactive starter until you reach your base amount. (for example, I always try to keep a minimum of 1 cup of starter when it is taking a break in the fridge.
How does the timing work?
There are so many ways of doing it, and honestly everyone does it a little differently! The routine that has worked for me is as follows for most of my sourdough recipes:
- Feed the starter in the morning…(somewhere between getting the kids breakfast and sitting down to coffee!)
- Sometime after lunch or mid afternoon I’ll check on it and if its ready then I’ll mix up the dough. (And put the rest of my starter in the fridge to go dormant for a few days)
- Depending on the recipe, it may need a few extra stretches (like for bread) that I’ll do while making dinner.
- Bulk fermenting overnight. Usually this is easier to do overnight and the timing can be very forgiving for generally most sourdough recipes.
- Next morning, depending on the recipe there may need to be more stretches (bread), or rolling out, shaping, letting rise for a few hours, putting in fridge, etc. Most timing is quite forgiving and I try to plan the baking part of the recipe according to what that day holds.
I accidently used too much starter in a recipe and am only left with a few tablespoons. How do I build it back up?
I have definitely done this a few times, for example doubling a recipe then forgetting that I actually need 1 CUP of starter instead of 1/2 CUP. Ooops.
To build your starter back up when it has settled back down from the active stage, you can simply measure the amount you currently have, then add an equal amount of flour and water. For example, If you have 3 tablespoons of starter, you can add 2 tablespoons of flour and 1 tablespoon of water.
Oops, I missed the active timing and it has started to bubble down again! Can I still use it?
Sometimes my timing gets off if we have a busy morning, or (as mentioned above) it bubbles up faster than I anticipated or had planned, and has already started to shrink down again. It still looks bubbly but doesn’t float. When this happens (and yes, has happened many times!), I still use the starter, but just add another 1-2 tablespoons of starter to the regular recipe.
What can I do with the Sourdough Discard?
The idea of “discarding” your starter is there for a reason: if you never discard or remove a portion of your starter from the jar, but keep feeding it and never take any out for baking in recipes, then if you are following the 1:1 feeding ratio it will quickly multiply and you will have to keep feeding it higher quantities of flour/water each day!
As a result of this multiplying “problem” there are now oodles of “sourdough discard” recipes and ideas to be found on the internet, to incorporate the inactive starter into a recipe instead of throwing it in the trash.
How can I get a Sourdough Starter?
There are dehydrated sourdough starters that you can purchase online, or you can make your own from scratch (it takes about 10 days, I am still developing a post post to follow soon with instructions), or if possible, see if a friend can give you a portion of theirs.
Sourdough starters that have been fed and cultured for years are pure gold to beginners!

How to Make Sourdough Bread
This recipe’s timing has been written to bake the loaf off on the 2nd day late morning. Adjust the start time to bake off in the evening.
Supplies Needed:
- Measuring cups
- Teaspoon
- Stirring spoons
- Mixing bowls
- Beeswax food cover or plastic wrap
- Sharp knife or baking lame for scouring
- Banneton (bread proofing basket) or large bowl
- Parchment paper
- Dutch oven or roasting pan with lid
Ingredients:
- 1/2 cup active sourdough starter
- 1 + 3/4 cups lukewarm water
- 4 cups all purpose flour
- 2 teaspoons sea salt, finely ground
Directions (to bake off late morning 2nd day):
Day One:
- Feed your starter in the morning
- You can read above HERE for more suggestions on feeding your starter.
- If your kitchen is more humid and warmer, than your starter may take less time to activate. You could feed your starter in the early afternoon instead to keep with this recipe’s timing.

2. Mix your Dough in the Evening
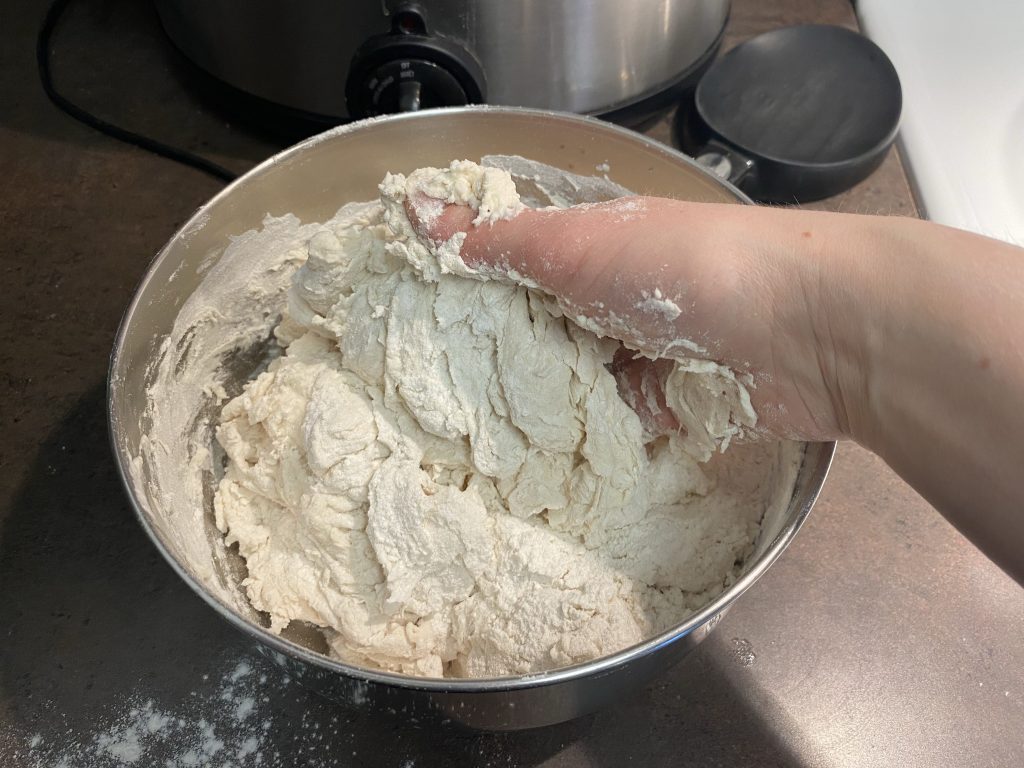
- Mix your active starter with the water and set aside. Mix the flour and salt together in larger bowl, then add the wet ingredients and stir together until it forms a sticky ball.
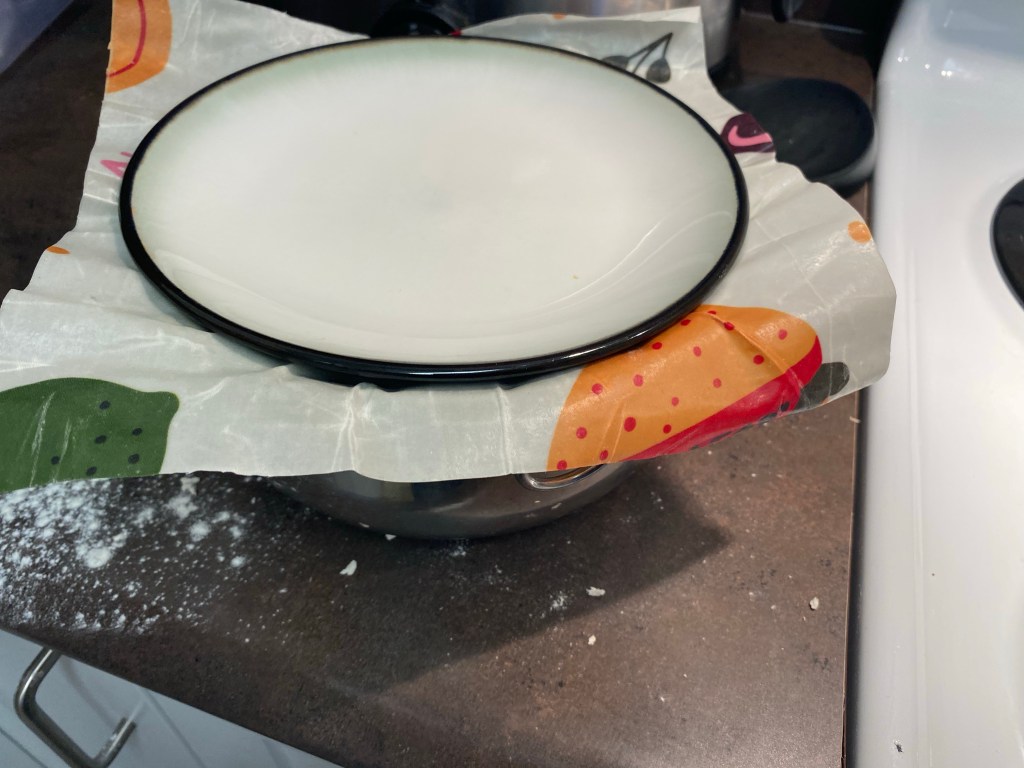
- I find it easier to finish mixing it with my hands. If it is dry, resist the urge to add any water! Cover with beeswax cover/plastic wrap/tea towel and rest for 30 minutes.

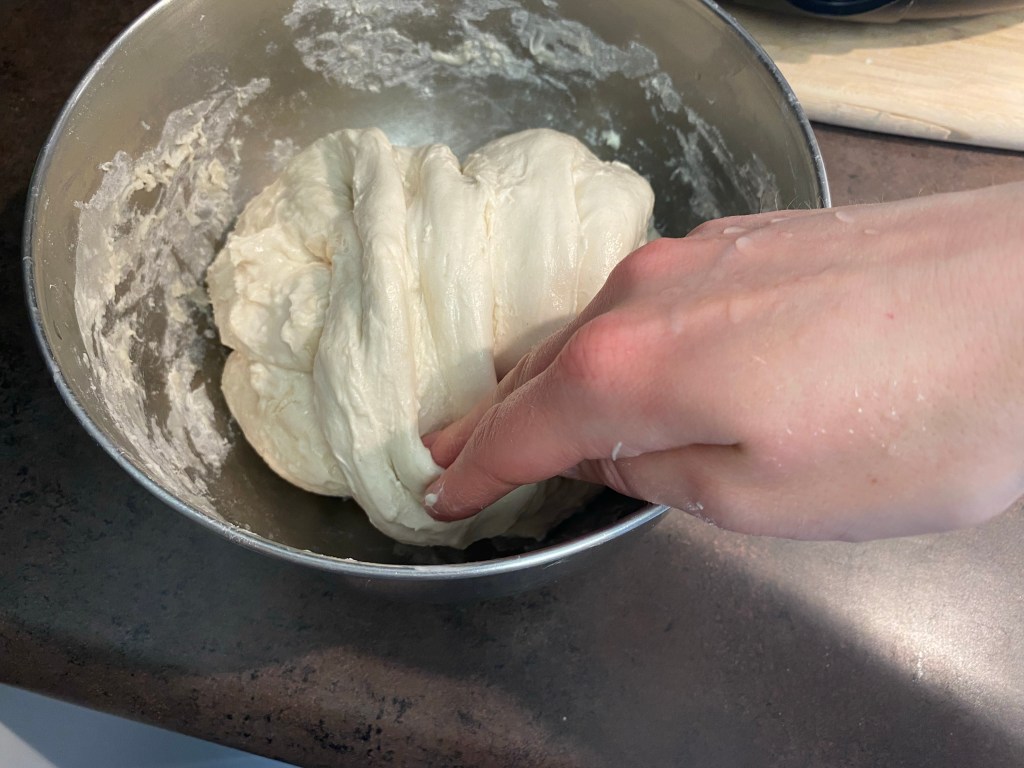
3. Stretch & Fold: 1st Way
- Wet one hand and gently loosen dough from edges of bowl. Take a handful of dough from the top of the bowl and pull towards you *See picture. Turn bowl 1/4 turn and repeat for a total of 4 stretch & folds to complete circle.
- Cover and rest 20 minutes
- Repeat stretch & fold full circle
- Cover and rest 20 minutes
- Repeat stretch & fold full circle
- Cover and rest overnight 10-12 hours.

Day Two:
4. Lift & Fold: 2nd Way
- Wet both hands and loosen dough from edges of bowl. Using both hands, pick up dough from middle and let it droop over the sides of your hands. *See picture. Gently lower into bowl and let it fold on top of itself. Turn bowl 1/4 turn and repeat for total of 4 to complete full circle.
- Note: If it is stiff at first, you can pick it up and gently stretch a little with your wet hands to encourage the gluten. *See picture.
- Cover and rest 20 minutes
- Repeat lift & fold full circle
- Cover and rest 20 minutes


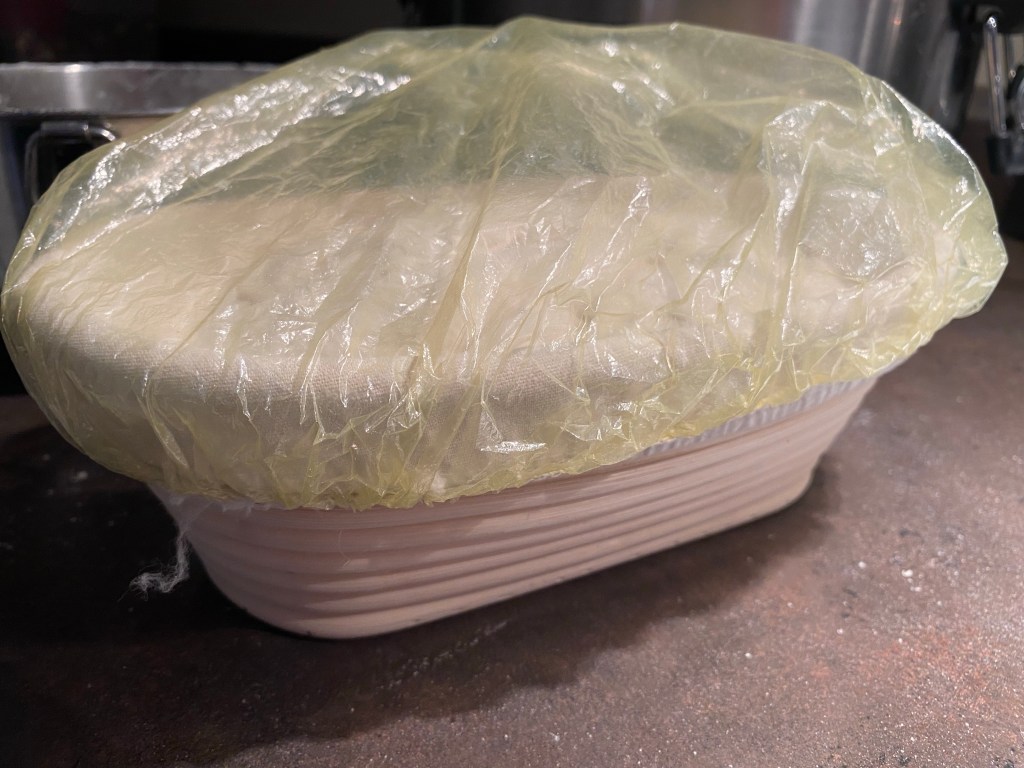
5. Transfer to Fridge
- Put on floured surface and form into soft ball with floured hands. Put into banneton basket with smoothest side down and cover OR into a clean bowl lined with parchment paper, smoothest side up.
- Cover and place in fridge for 1-24 hours. *This step is great, because you can keep the bread dough in there until you are ready to use it. It will continue cold fermenting and “proofing” during this time.
- Note: If in fridge for longer than 1 hour, start preheating 1 hour from when you plan to bake.

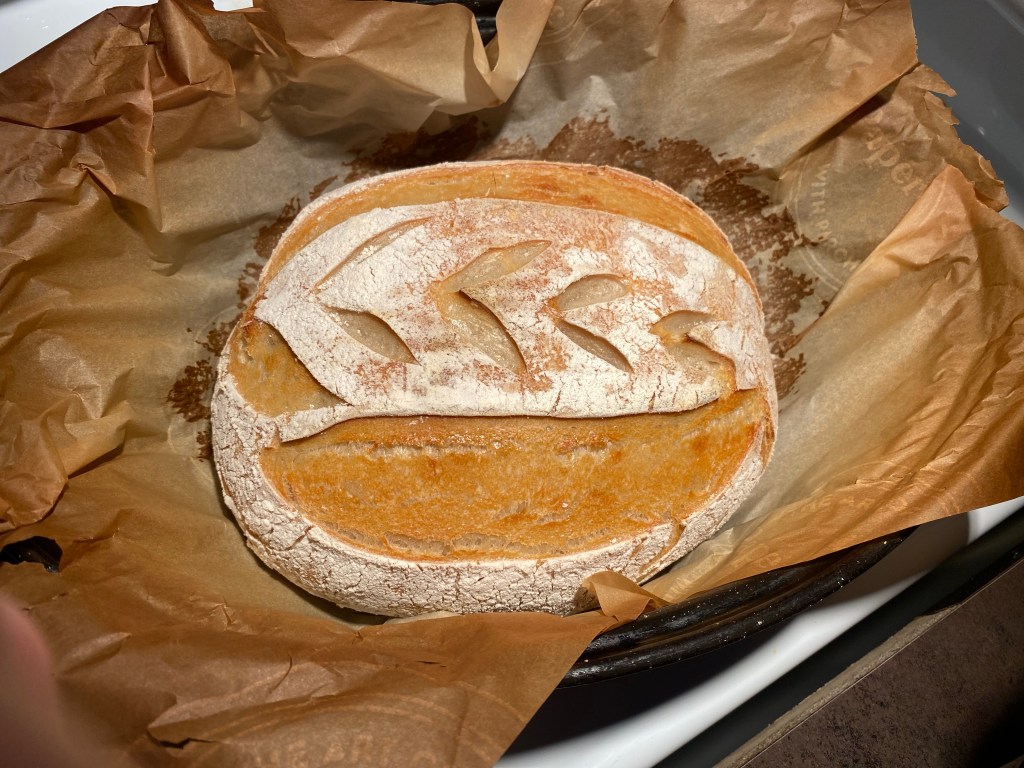
6. Bake
- Put your dutch oven or roasting pan in oven with lid on and preheat oven to 450 degrees.
- Approximately 1 hour from the time you turned the oven on, take dough out of the fridge.
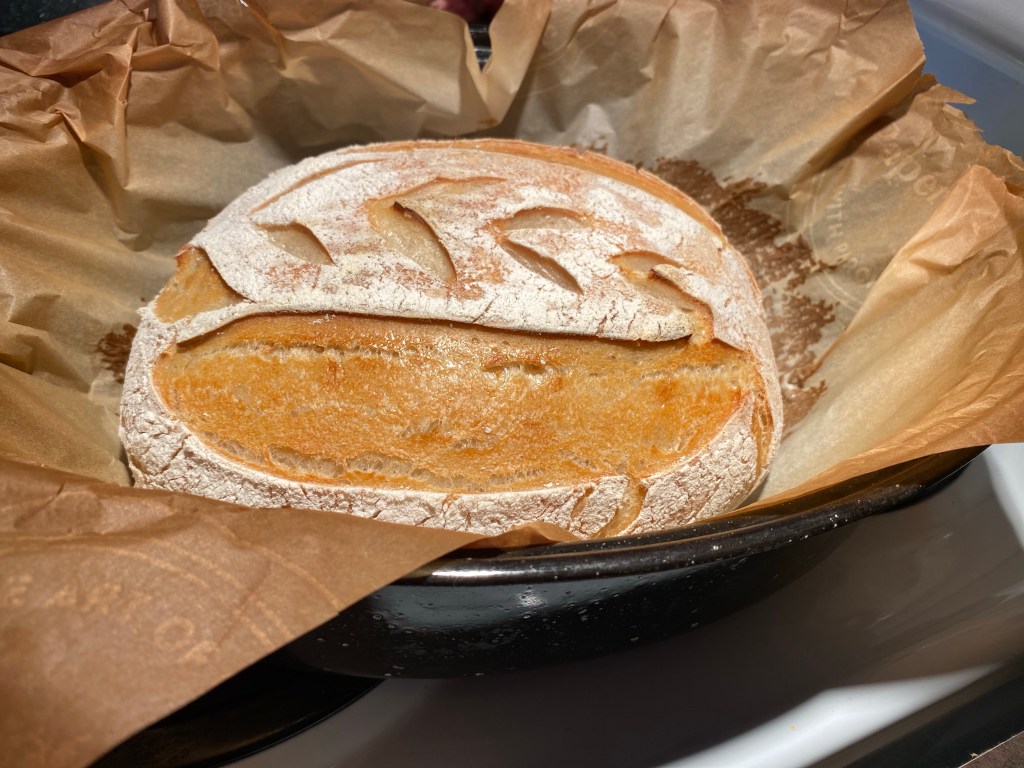
- If using a banneton, transfer to parchment lined baking sheet. (I like to place a big piece of parchment on top of banneton, place cookie sheet upside down on top of parchment, then flip it right side up and gently pull banneton off, revealing the smooth side of the dough).
- If desired, lightly dust the top of the bread with flour.
- Proceed to score the top with sharp knife, razor blade or baking “lame”.
- If using a bowl already lined with parchment, continue to score.
- Take dutch oven or roaster out of oven, take lid off, and transfer dough by lifting up the parchment corners. Put lid back on and bake for 20 minutes.
- After 20 minutes, take lid off and continue to bake for another 15-20 minutes or until golden and crusty.

7. Cool
- Cool on wire rack, and let air harden the crust a little as desired. Store in airtight container or ziplock bag at room temperature to maintain freshness.
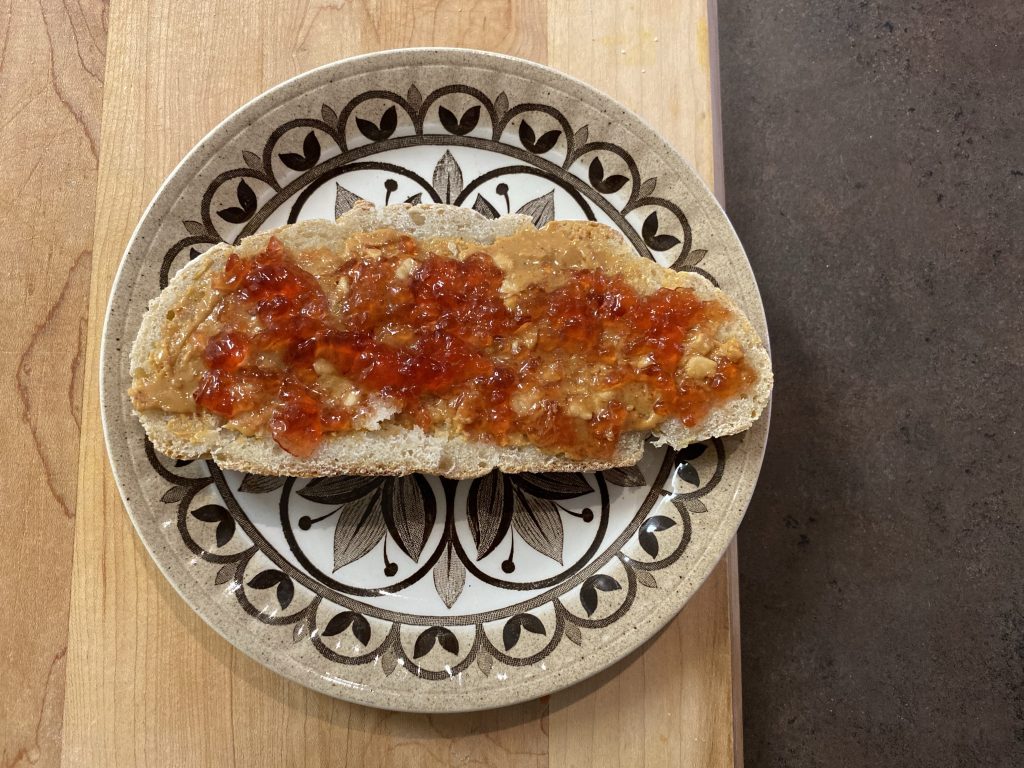
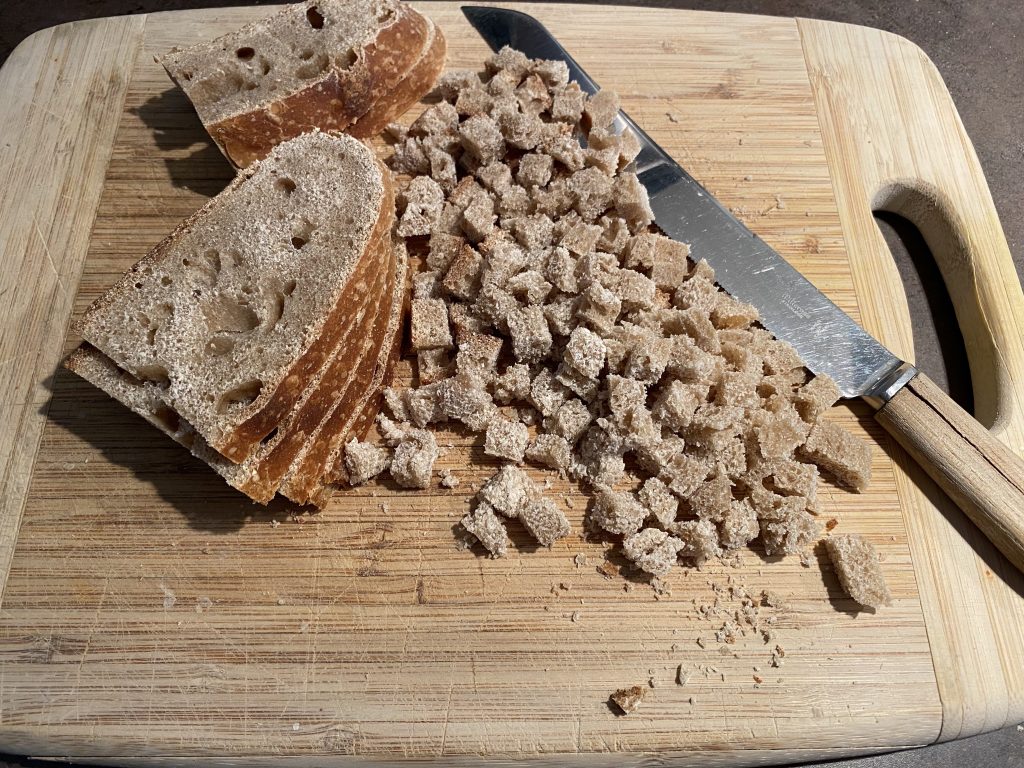
These are some of my favourite ways to eat Sourdough Bread:


Other Tasty Sourdough Recipes to Check Out!


Hi, I’m Jessie!
I’m a Wife and Homeschooling Mom living in a remote town in Northern Ontario, Canada. I love making wholesome meals for my family from scratch, homeschooling our girls and learning more about natural living.
Read more about my story HERE.

Subscribe to Northbird’s email list to get weekly posts on: tasty recipes, activity ideas for kids, natural living tips, and some genuine mom thoughts and encouragement!
Recent posts from Northbird:


Easy Sourdough Bread
Easy and Simplified Beginner Sourdough Bread
Supplies Needed:
Ingredients:
Directions: Day One
1. Feed Your Starter In the Morning
2. Mix your Dough in the Evening
- Mix your active starter with the water and set aside. Mix the flour and salt together in larger bowl, then add the wet ingredients and stir together until it forms a sticky ball. I find it easier to finish mixing it with my hands. If it is dry, resist the urge to add any water!
- Cover with beeswax cover/plastic wrap/tea towel and rest for 30 minutes.
3. Stretch & Fold: 1st Way
- Wet one hand and gently loosen dough from edges of bowl. Take a handful of dough from the top of the bowl and pull towards you *See picture. Turn bowl 1/4 turn and repeat for a total of 4 stretch & folds to complete circle.
- Cover and rest 20 minutes.
- Repeat stretch and fold full circle.
- Cover and rest 20 minutes.
- Repeat stretch and fold full circle.
- Cover and rest overnight 10-12 hours.
Directions: Day Two
4. Lift & Fold: 2nd Way
- Wet both hands and loosen dough from edges of bowl. Using both hands, pick up dough from middle and let it droop over the sides of your hands. *See picture. Gently lower into bowl and let it fold on top of itself. Turn bowl 1/4 turn and repeat for total of 4 to complete full circle.
- Note: If it is stiff at first, you can pick it up and gently stretch a little with your wet hands to encourage the gluten. *See picture.
- Cover and rest 20 minutes
- Repeat 2nd way of stretch & fold full circle
- Cover and rest 20 minutes
5. Transfer to Fridge
- Put on floured surface and form into soft ball with floured hands. Put into banneton basket with smoothest side down and cover OR into a clean bowl lined with parchment paper, smoothest side up.
- Cover and place in fridge for 1-24 hours.
- Note: If in fridge for longer than 1 hour, start preheating 1 hour from when you plan to bake.
6. Bake
- Put your dutch oven or roasting pan in oven with lid on and preheat oven to 450 degrees.
- Approximately 1 hour from the time you turned the oven on, take dough out of the fridge.
- If using a banneton, transfer to parchment lined baking sheet. (I like to place big piece of parchment on top of banneton, place cookie sheet upside down on top of parchment, then flip it rightside up and gently pull banneton off, revealing the smooth side of the dough).
- If desired, lightly dust the top of the bread with flour.
- Proceed to score the top with sharp knife, razor blade or baking “lame”.
- If using a bowl already lined with parchment, continue to score.
- Take dutch oven or roaster out of oven, take lid off, and transfer dough by lifting up the parchment corners. Put lid back on and bake for 20 minutes.
- After 20 minutes, take lid off and continue to bake for another 15-20 minutes or until golden and crusty.
7. Cool
- Cool on wire rack, and let air harden the crust a little as desired. Store in airtight container or ziplock bag at room temperature to maintain freshness.
Nutrition
Per 2 slices: 190 calories; 0.5 g fat; 40 g carbohydrates;
5.4 g protein; 465 mg sodium.

